
Who should use this guide?
This guide is intended for Yarken Administrators responsible for onboarding users, configuring tenant access, and managing identity and access settings within Yarken.
Typical users of this guide include:
-
IT Finance Administrators
-
Platform Administrators
-
Microsoft Entra ID (Azure AD) Administrators
This guide covers administrative tasks such as:
-
Initial tenant onboarding
-
User and role management
-
Domain-based access control
-
Microsoft Entra ID integration
-
Tenant-level security and access configuration
Non-admin users do not require this guide for day-to-day use of Yarken.
Overview
Yarken offers a streamlined solution for user management and secure access control that empowers administrators to manage user access efficiently, whether directly within the application or through seamless integration with Microsoft Entra ID (Azure AD).
By leveraging OpenID Connect (OIDC) for authentication and integrating Microsoft Entra ID Single Sign-On (SSO), Yarken ensures that your organization benefits from secure, reliable, and easy-to-manage user authentication, keeping your data safe while simplifying access for users.
This guide walks administrators through:
-
Setting up the initial Yarken administrator
-
Configuring tenant-level access settings
-
Managing users directly in Yarken
-
Enabling Microsoft Entra ID integration
-
Assigning users and roles through Azure AD
-
Understanding user roles and permissions
Before you begin
Before starting the onboarding process, ensure the following prerequisites are available:
-
An active Azure subscription
-
A Microsoft Entra ID (Azure AD) tenant
-
A user with one of the following Azure roles:
-
Global Administrator
-
Application Administrator
-
These permissions are required to approve consent requests and configure enterprise application access.
Initial Yarken administrator setup
The onboarding process starts with the first administrator from your organization.
To provision your Yarken environment, the Yarken onboarding or support team requires:
-
The administrator’s full name
-
The administrator’s email address
Once received, Yarken provisions the tenant environment and sends a Microsoft consent invitation link to the designated administrator.
Step 1 — Review and approve the consent request
The tenant administrator receives a Microsoft consent request by email.
The administrator should:
-
Open the invitation link
-
Review the requested permissions
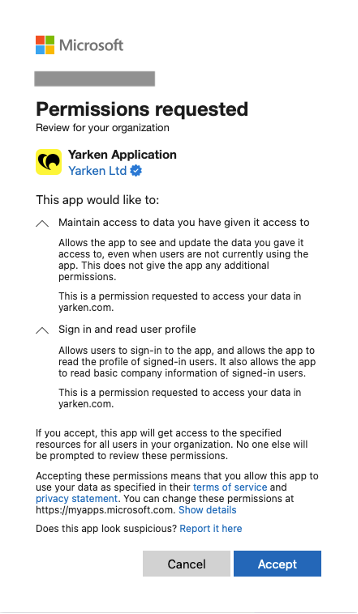
-
Approve the consent request
-
Complete Microsoft authentication
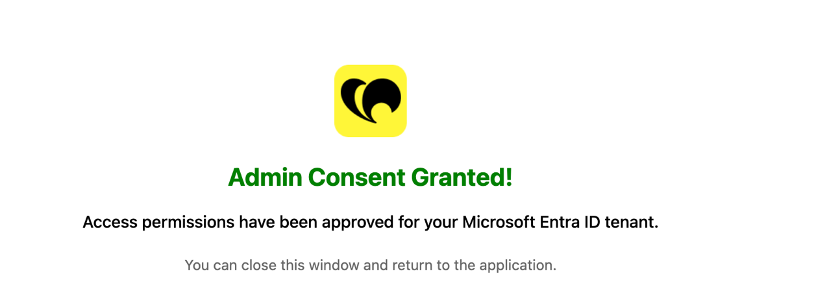
Once access is granted, the administrator is redirected automatically to the Yarken application.
Step 2 — Access tenant settings
After signing in, the administrator can review tenant-level configuration settings.
Navigate to Admin → Settings → Tenants
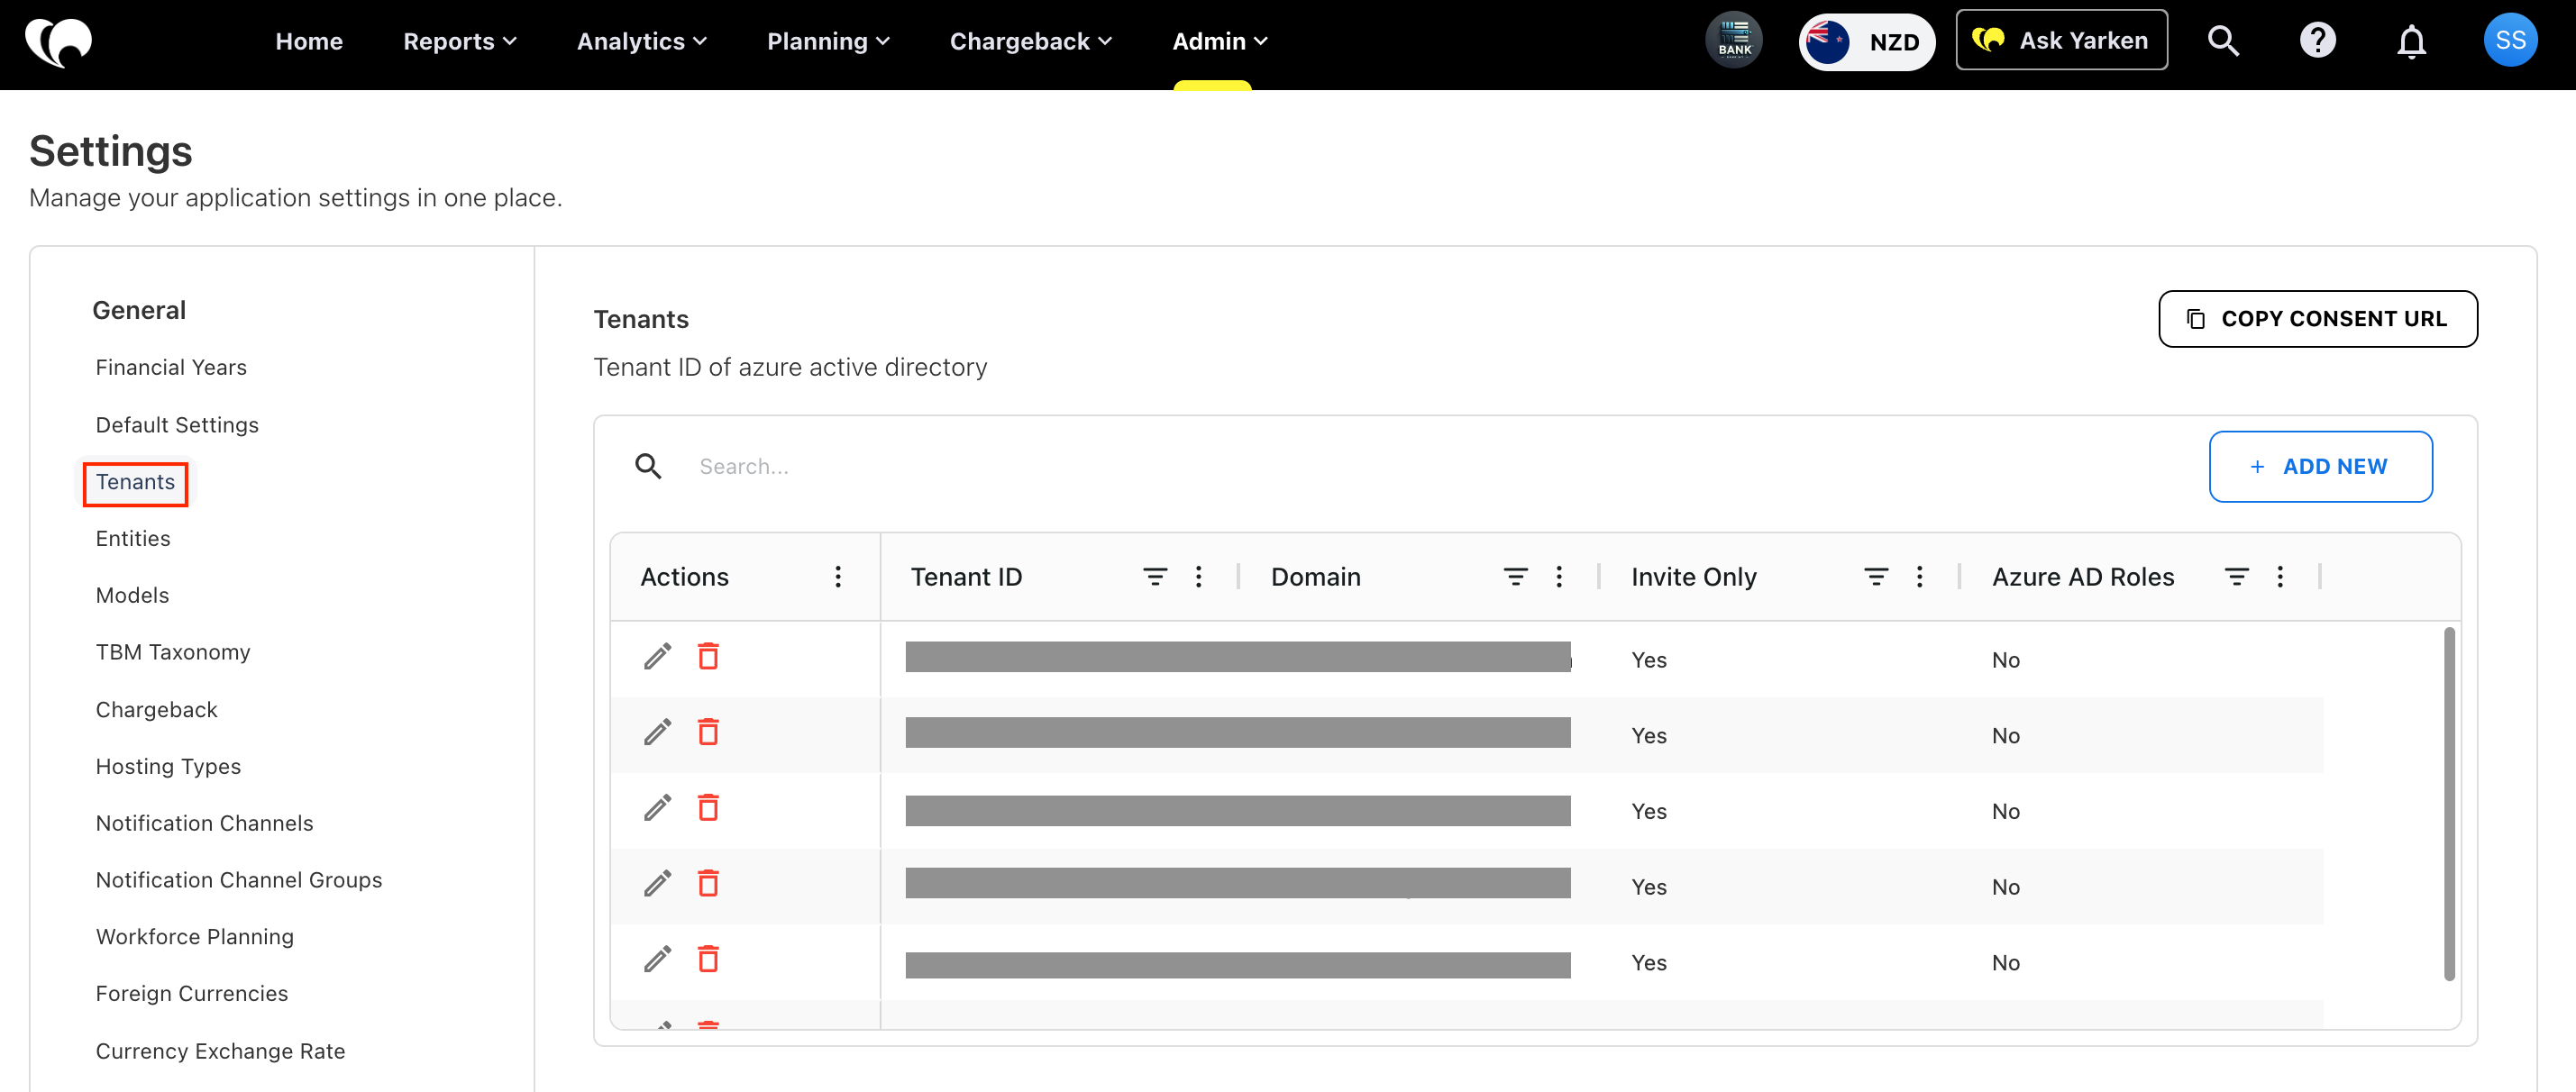
The Tenants section allows administrators to manage:
-
Organization domain access
-
Invite-only onboarding
-
Azure AD integration
-
Tenant configuration settings
This becomes the control center for access governance within your organization.
Choose your onboarding path
Yarken supports two onboarding models:
|
Onboarding model |
Description |
Required tenant settings |
|---|---|---|
|
Administrators manually create and manage users inside Yarken |
||
|
Administrators assign users and roles centrally through Azure AD |
Administrators can also control whether users within the organization domain can access Yarken automatically or only through invitation.
Related content