
Use this page to understand how Data Sources are used, configured, and governed in AI Studio.
Overview
Data Sources define the governed datasets available to AI Studio.
A Data Source connects specialists and AI workflows to approved Yarken data. It controls what data can be queried, which columns are available, and whether user-level authorization is applied.
The Data Sources page describes this area as the place where warehouse tables and query tools are available to the agent.
User flow
Users do not directly select Data Sources when asking questions.
Data Sources are used behind the scenes when Ask Yarken, a Specialist, Playbook, or Automation needs data to answer a question or run a workflow.
|
User action |
What happens |
|---|---|
|
User asks a question in Ask Yarken |
The orchestrator determines whether data is required. |
|
A Specialist is selected |
The Specialist can use only its assigned Data Sources. |
|
Data is queried |
User authorization is applied where enabled. |
|
Results are returned |
The Specialist or workflow uses the data to generate the response. |
How Data Sources work
Where to find Data Sources
To open Data Sources:
-
Go to Admin.
-
Select AI Studio.
-
Under Configure, select Data Sources.
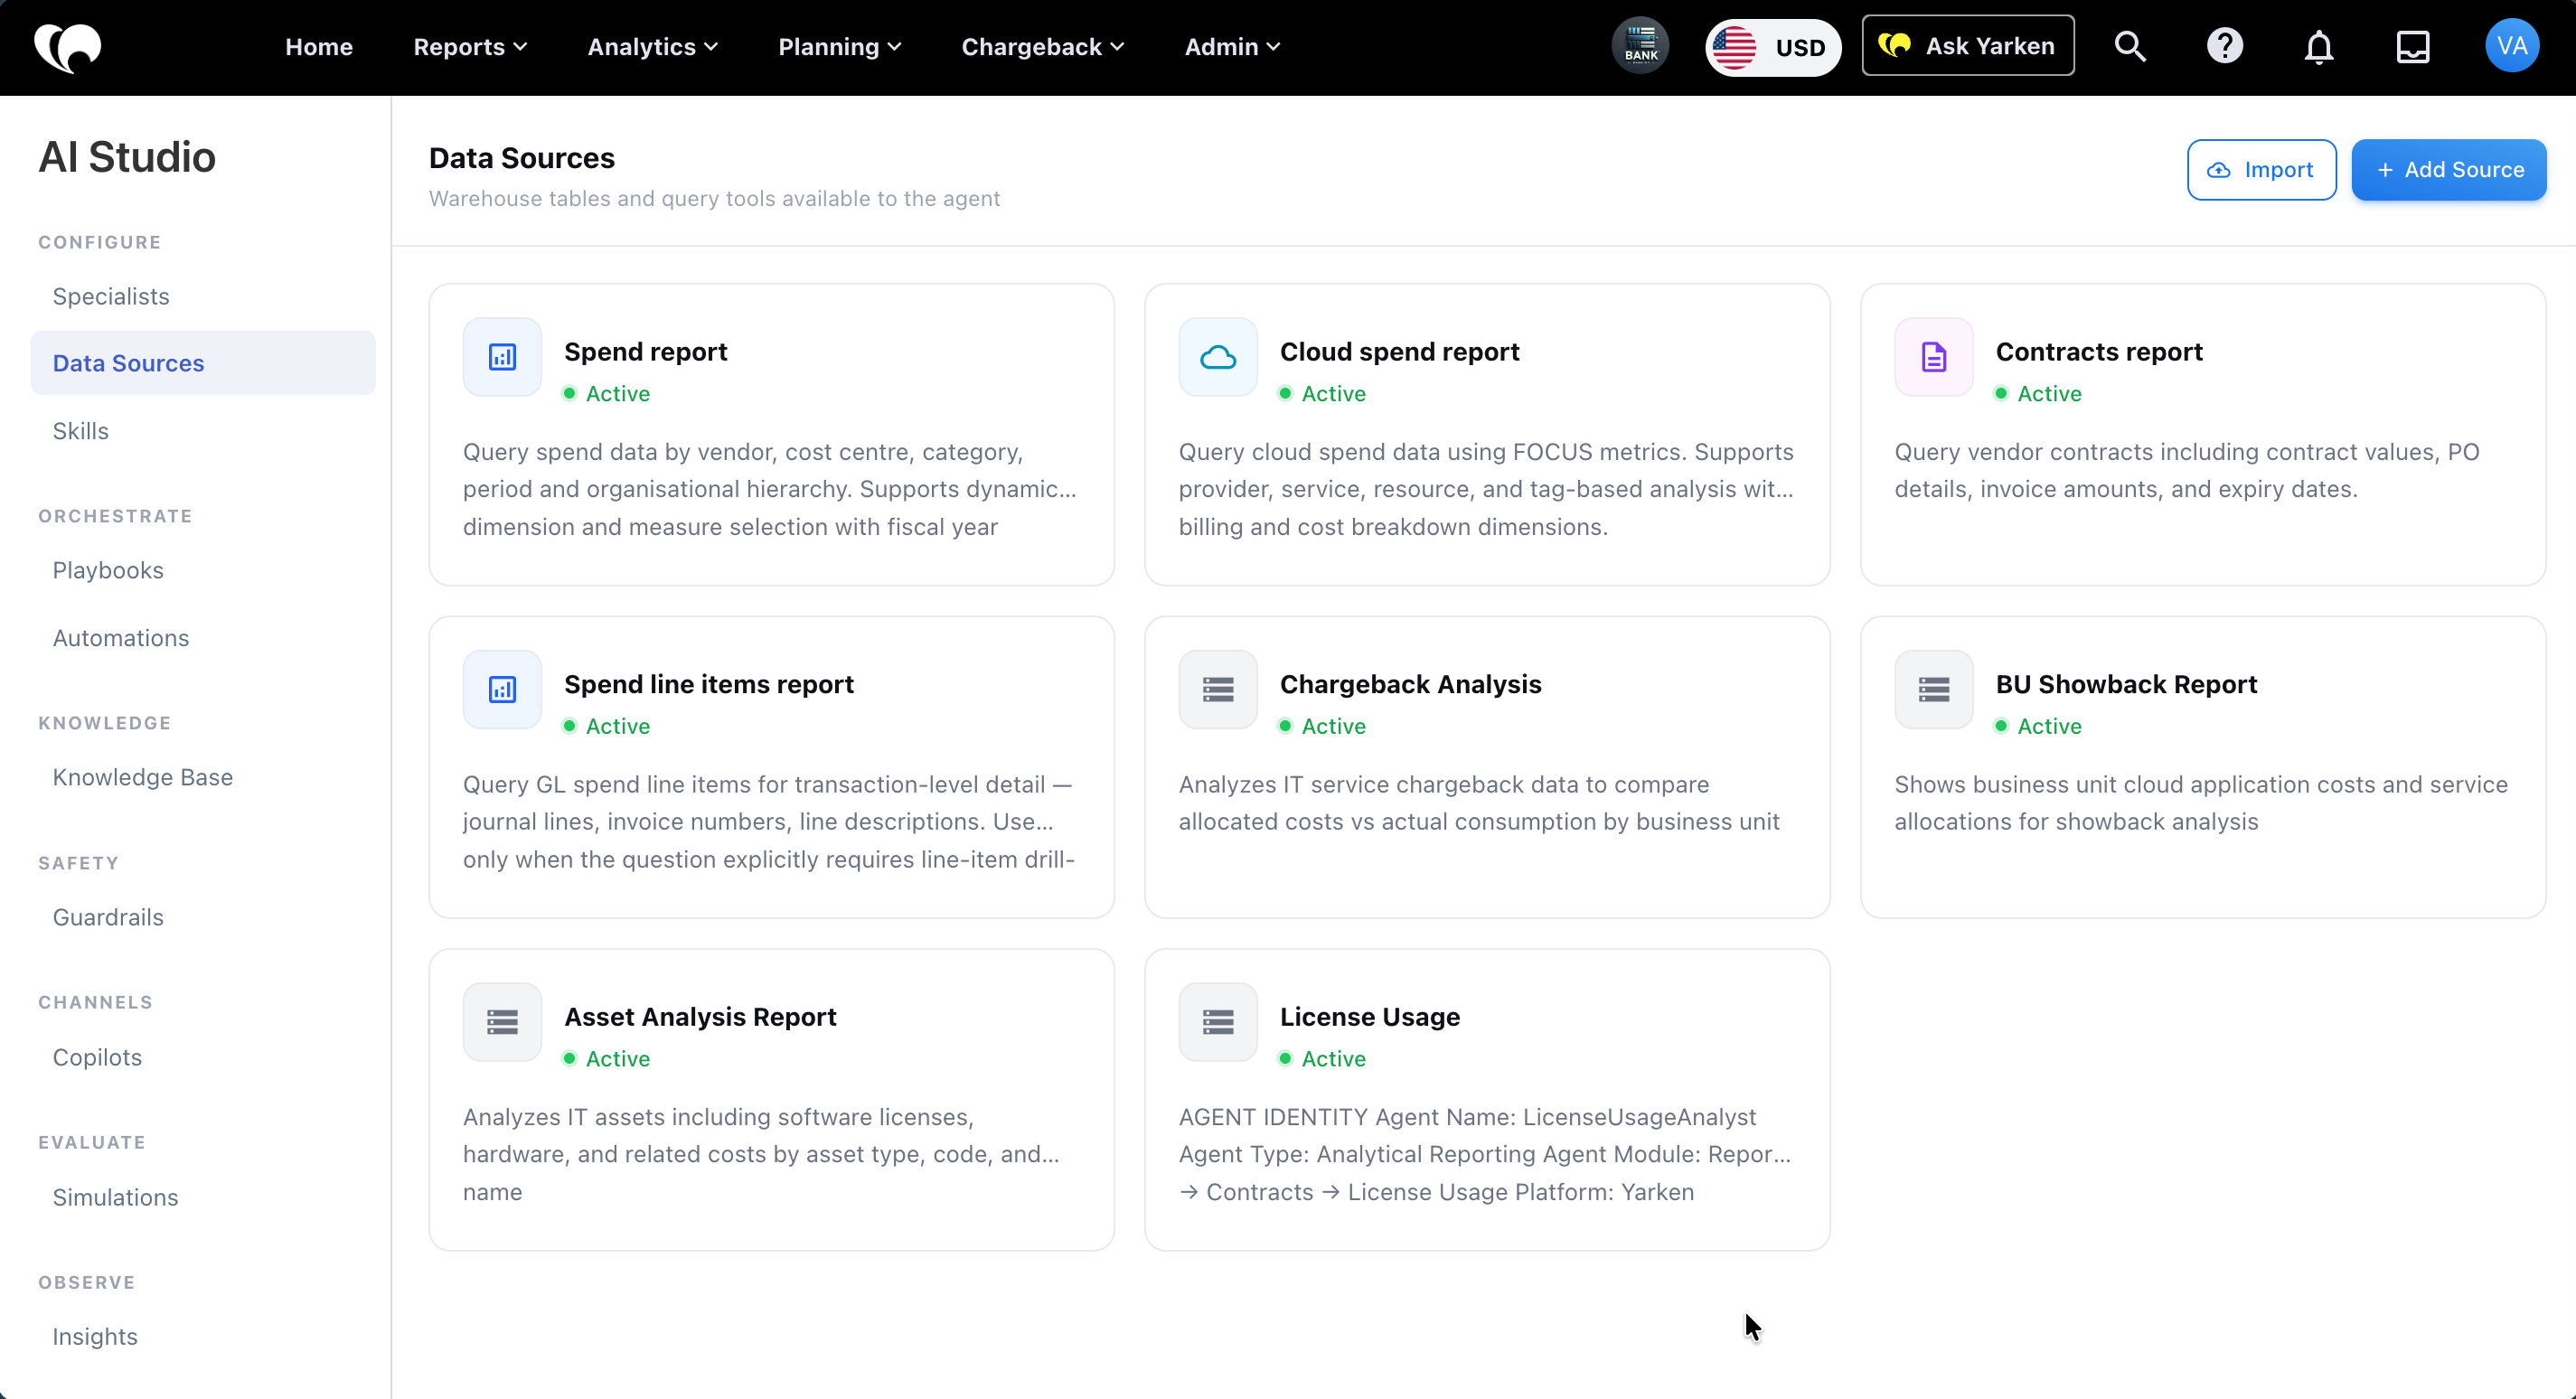
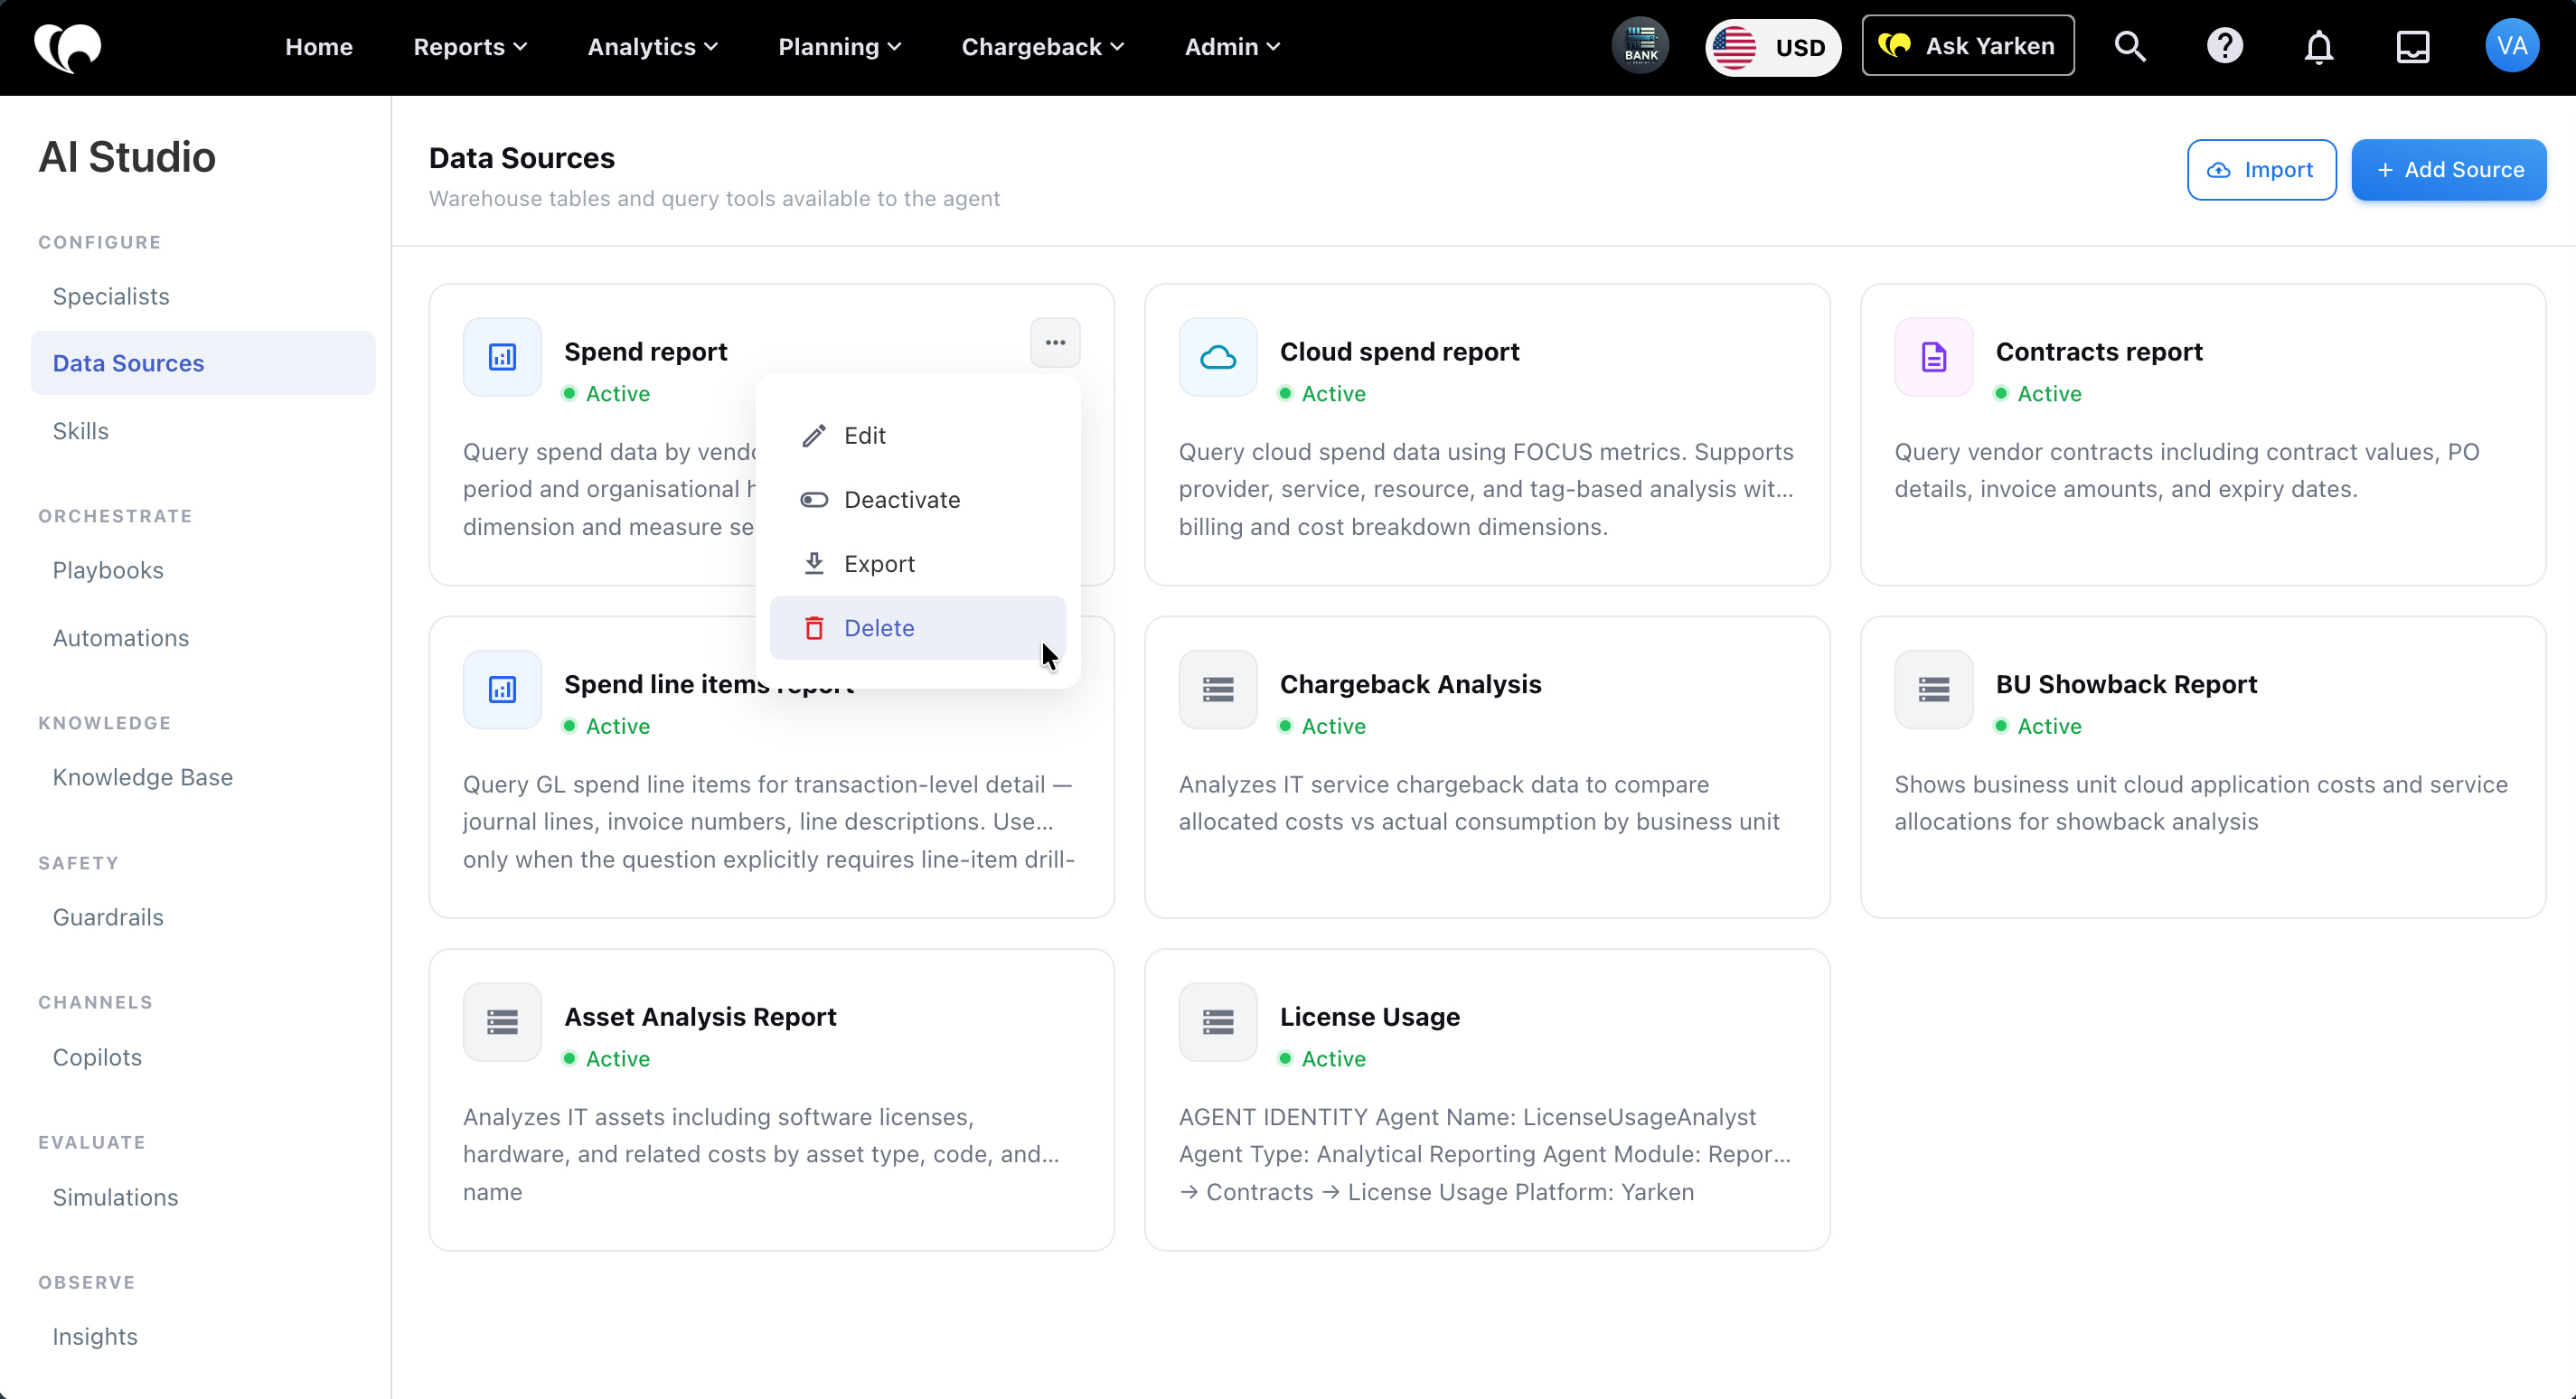
The page displays data source cards in the main panel.
Default data sources
For new users, built-in data sources are loaded by default.
The current default data sources include:
|
Data source |
Status |
Purpose |
|---|---|---|
|
Spend report |
Active |
Query spend data by vendor, cost centre, category, period, and organizational hierarchy. Supports dynamic dimension and measure selection with fiscal year awareness. |
|
Cloud spend report |
Active |
Query cloud spend data using FOCUS metrics. Supports provider, service, resource, tag-based, billing, and cost breakdown dimensions. |
|
Contracts report |
Active |
Query vendor contracts, including contract values, PO details, invoice amounts, and expiry dates. |
|
Spend line items report |
Active |
Query GL spend line items for transaction-level detail, including journal lines, invoice numbers, line descriptions, and similar details. Use only when transaction detail is required. |
|
Chargeback Analysis |
Active |
Analyze IT service chargeback data to compare allocated costs against actual consumption by business unit. |
|
BU Showback Report |
Active |
Shows business unit cloud application costs and service allocations for showback analysis. |
|
Asset Analysis Report |
Active |
Analyze IT assets, including software licenses, hardware, and related costs by asset type, code, and name. |
|
License Usage |
Active |
Analyze software license usage and related license details. |
The default list may change before release.
What each data source card shows
Each data source card shows:
|
Field |
Description |
|---|---|
|
Data source name |
User-facing name of the data source. |
|
Status |
Whether the data source is active. |
|
Description |
Summary of what the source is used for. |
|
Actions menu |
Options such as Edit, Deactivate, and Delete where available. |
How Data Sources appear in instructions
When a Data Source is assigned to a specialist or used in an AI workflow, it can be referenced in instructions using @.
For example:
Use @Spend_report when the user asks for aggregate spend by vendor, cost centre, category, period, or organisational hierarchy.

Use @Spend_line_items report only when the user explicitly asks for transaction-level or line-item detail.

Use @Contracts_report when the user asks about contract values, PO details, invoice amounts, or expiry dates.
The @ mention picker may show Data Sources alongside system Tools. These are separate groups.
A Data Source controls what data can be queried.
A Tool controls what action the agent can perform.
Admin configuration flow
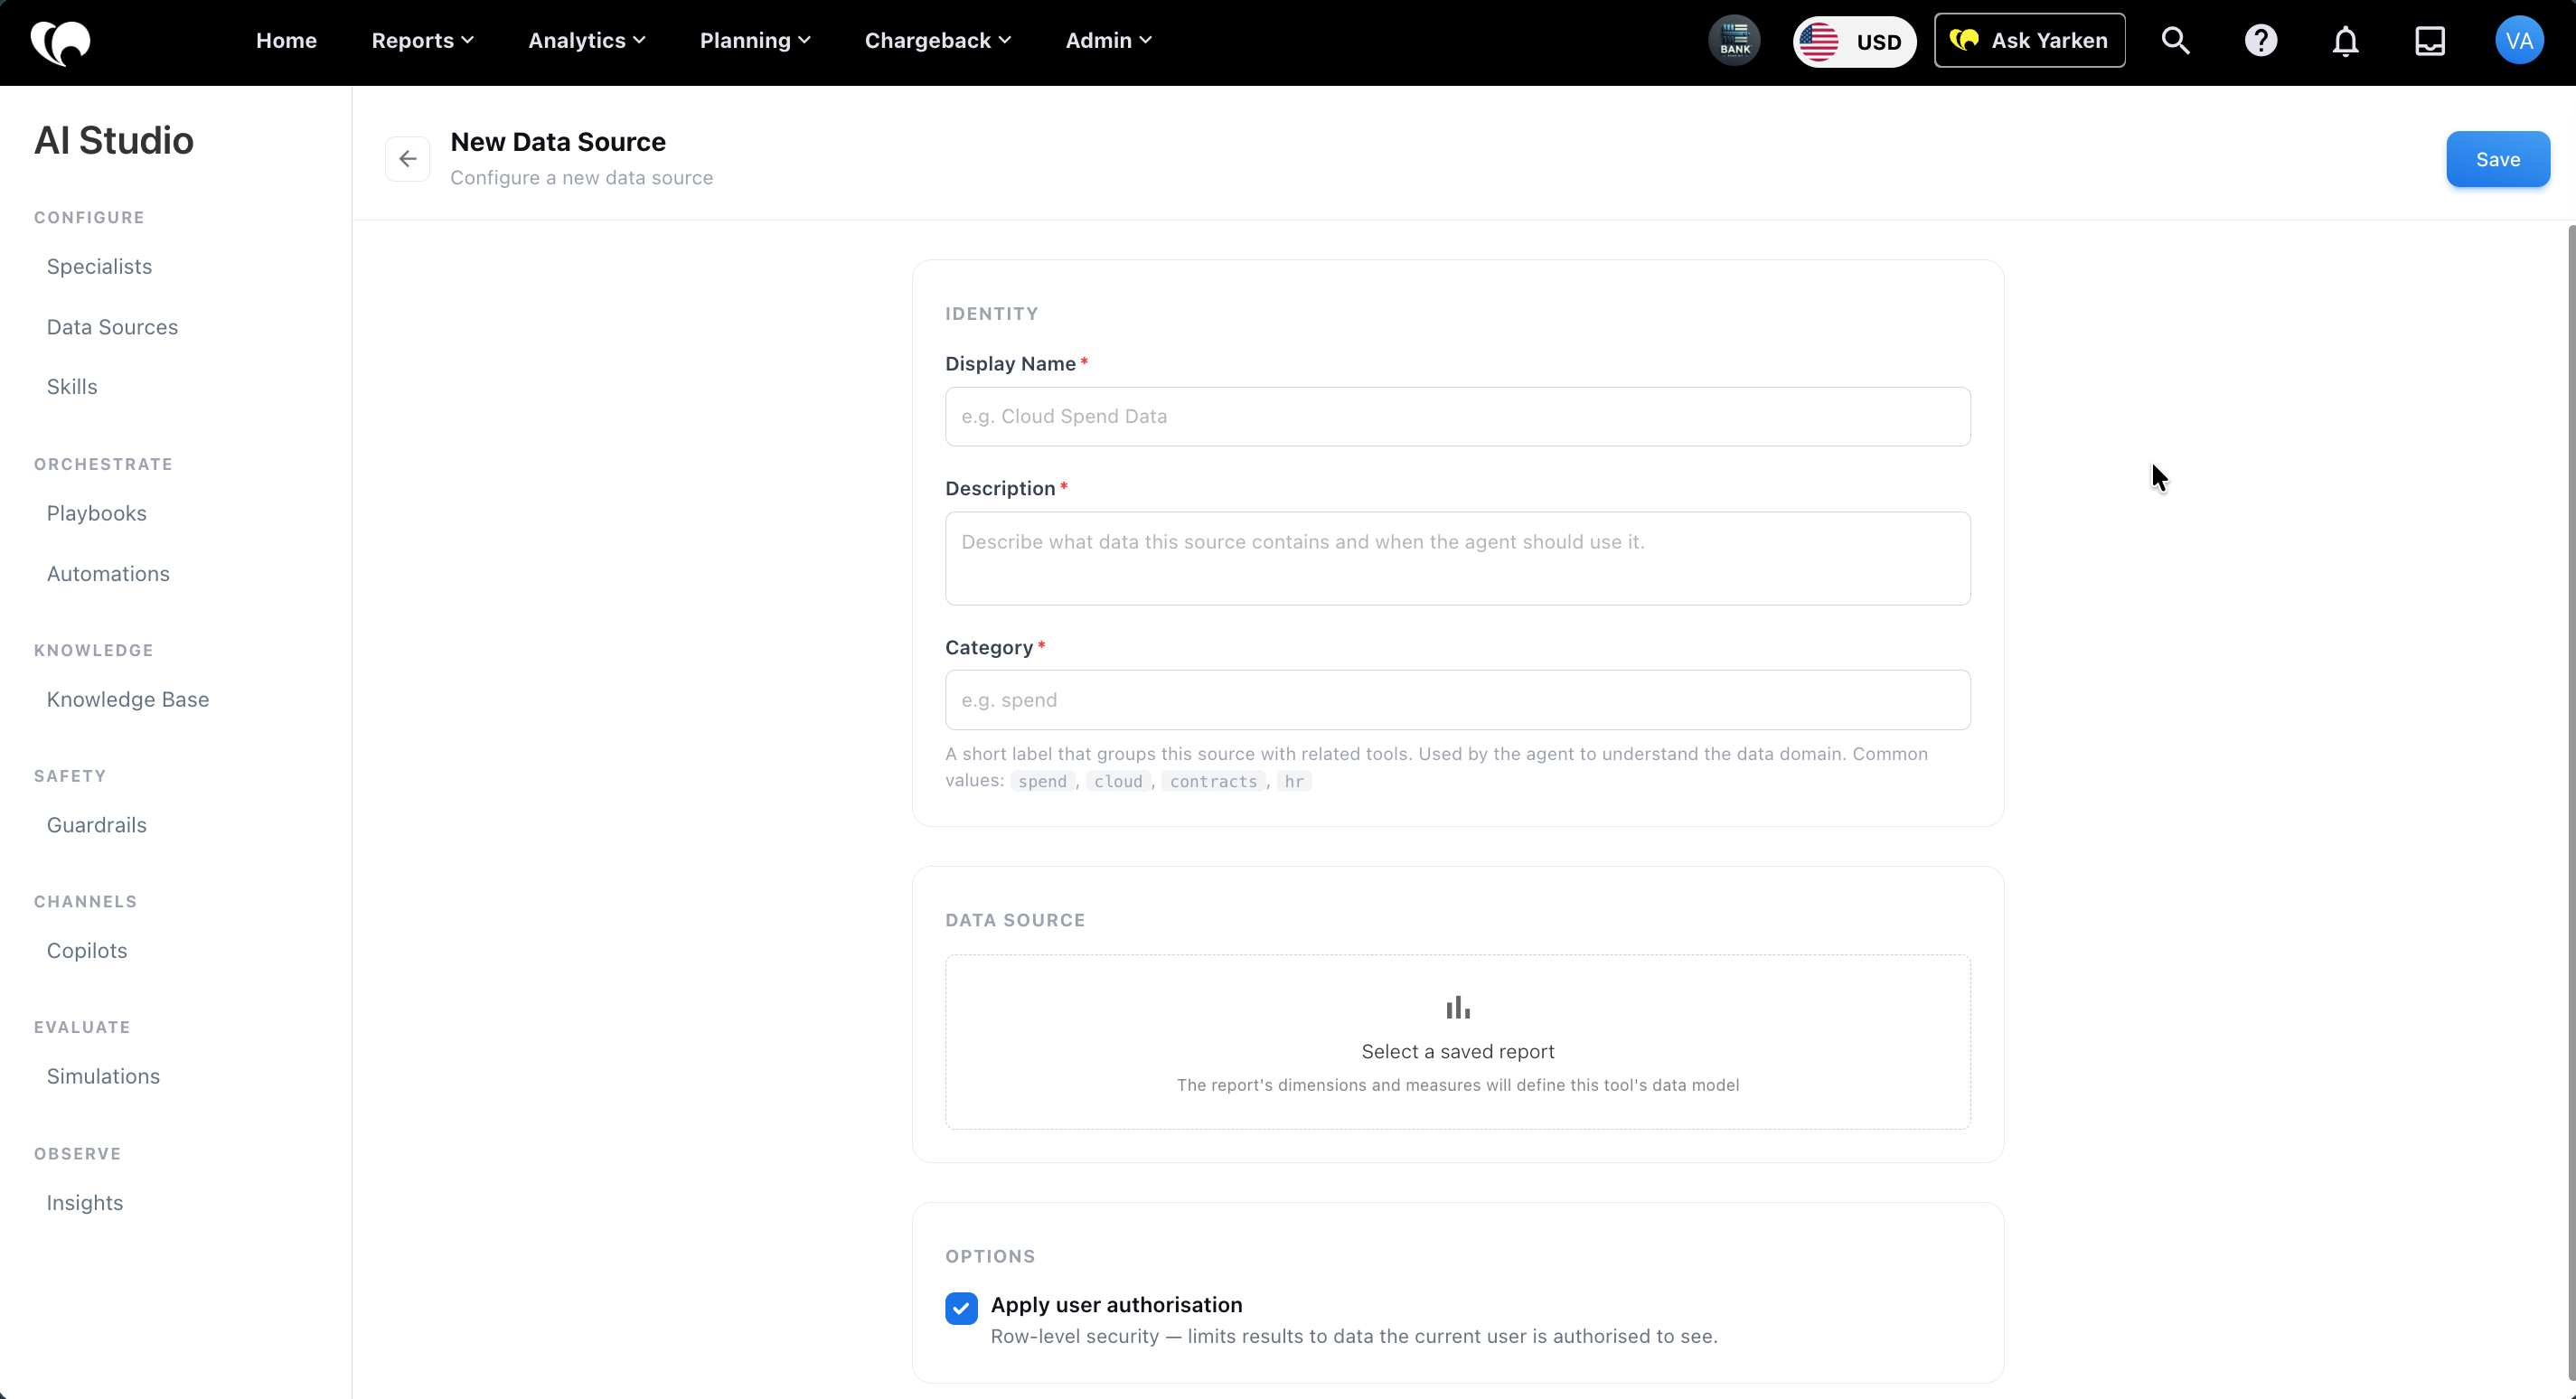
Add a data source
To add a data source:
-
Go to Admin > AI Studio > Data Sources.
-
Select + Add Source.
-
Enter the identity details.
-
Configure the data source columns and options.
-
Confirm authorization behavior.
-
Select Save.
Detailed setup steps should be confirmed after the Add Source workflow is reviewed.
Import a data source
Use Import to upload a data source configuration from a local file.
To import a data source:
-
Go to Admin > AI Studio > Data Sources.
-
Select Import.
-
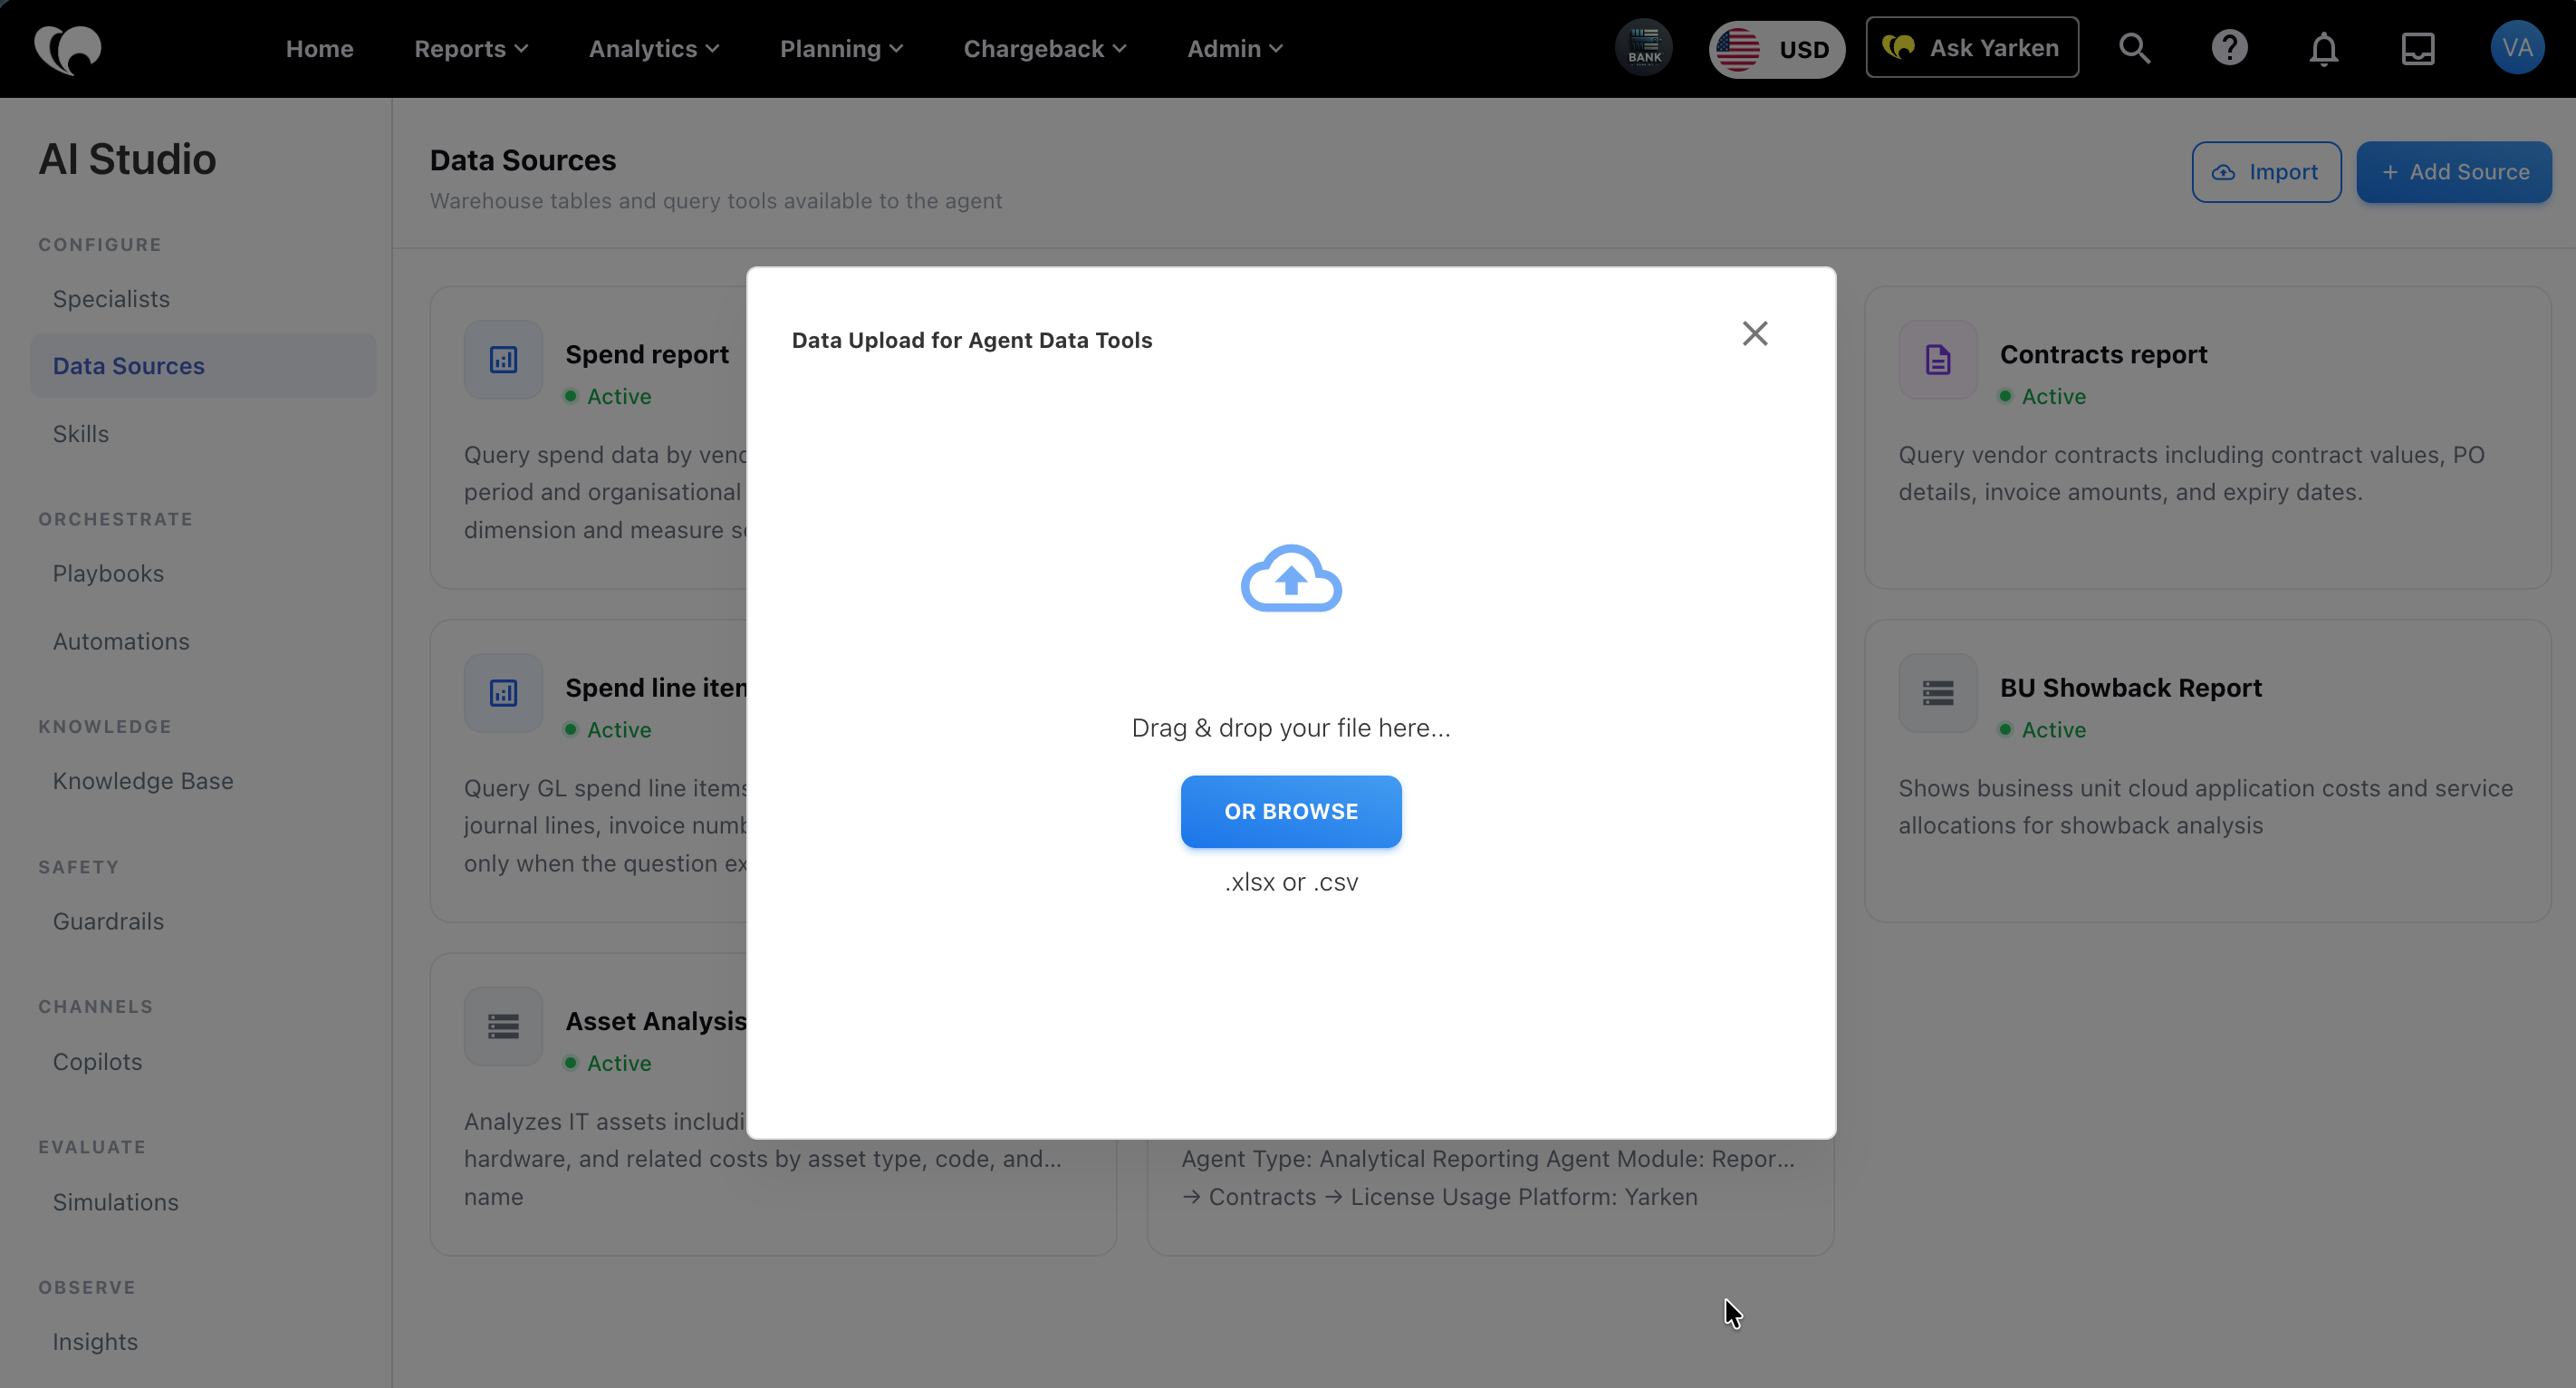
Drag and drop the file into the upload window, or select Browse.
-
Upload the file.
Supported file types:
-
.xlsx -
.csv
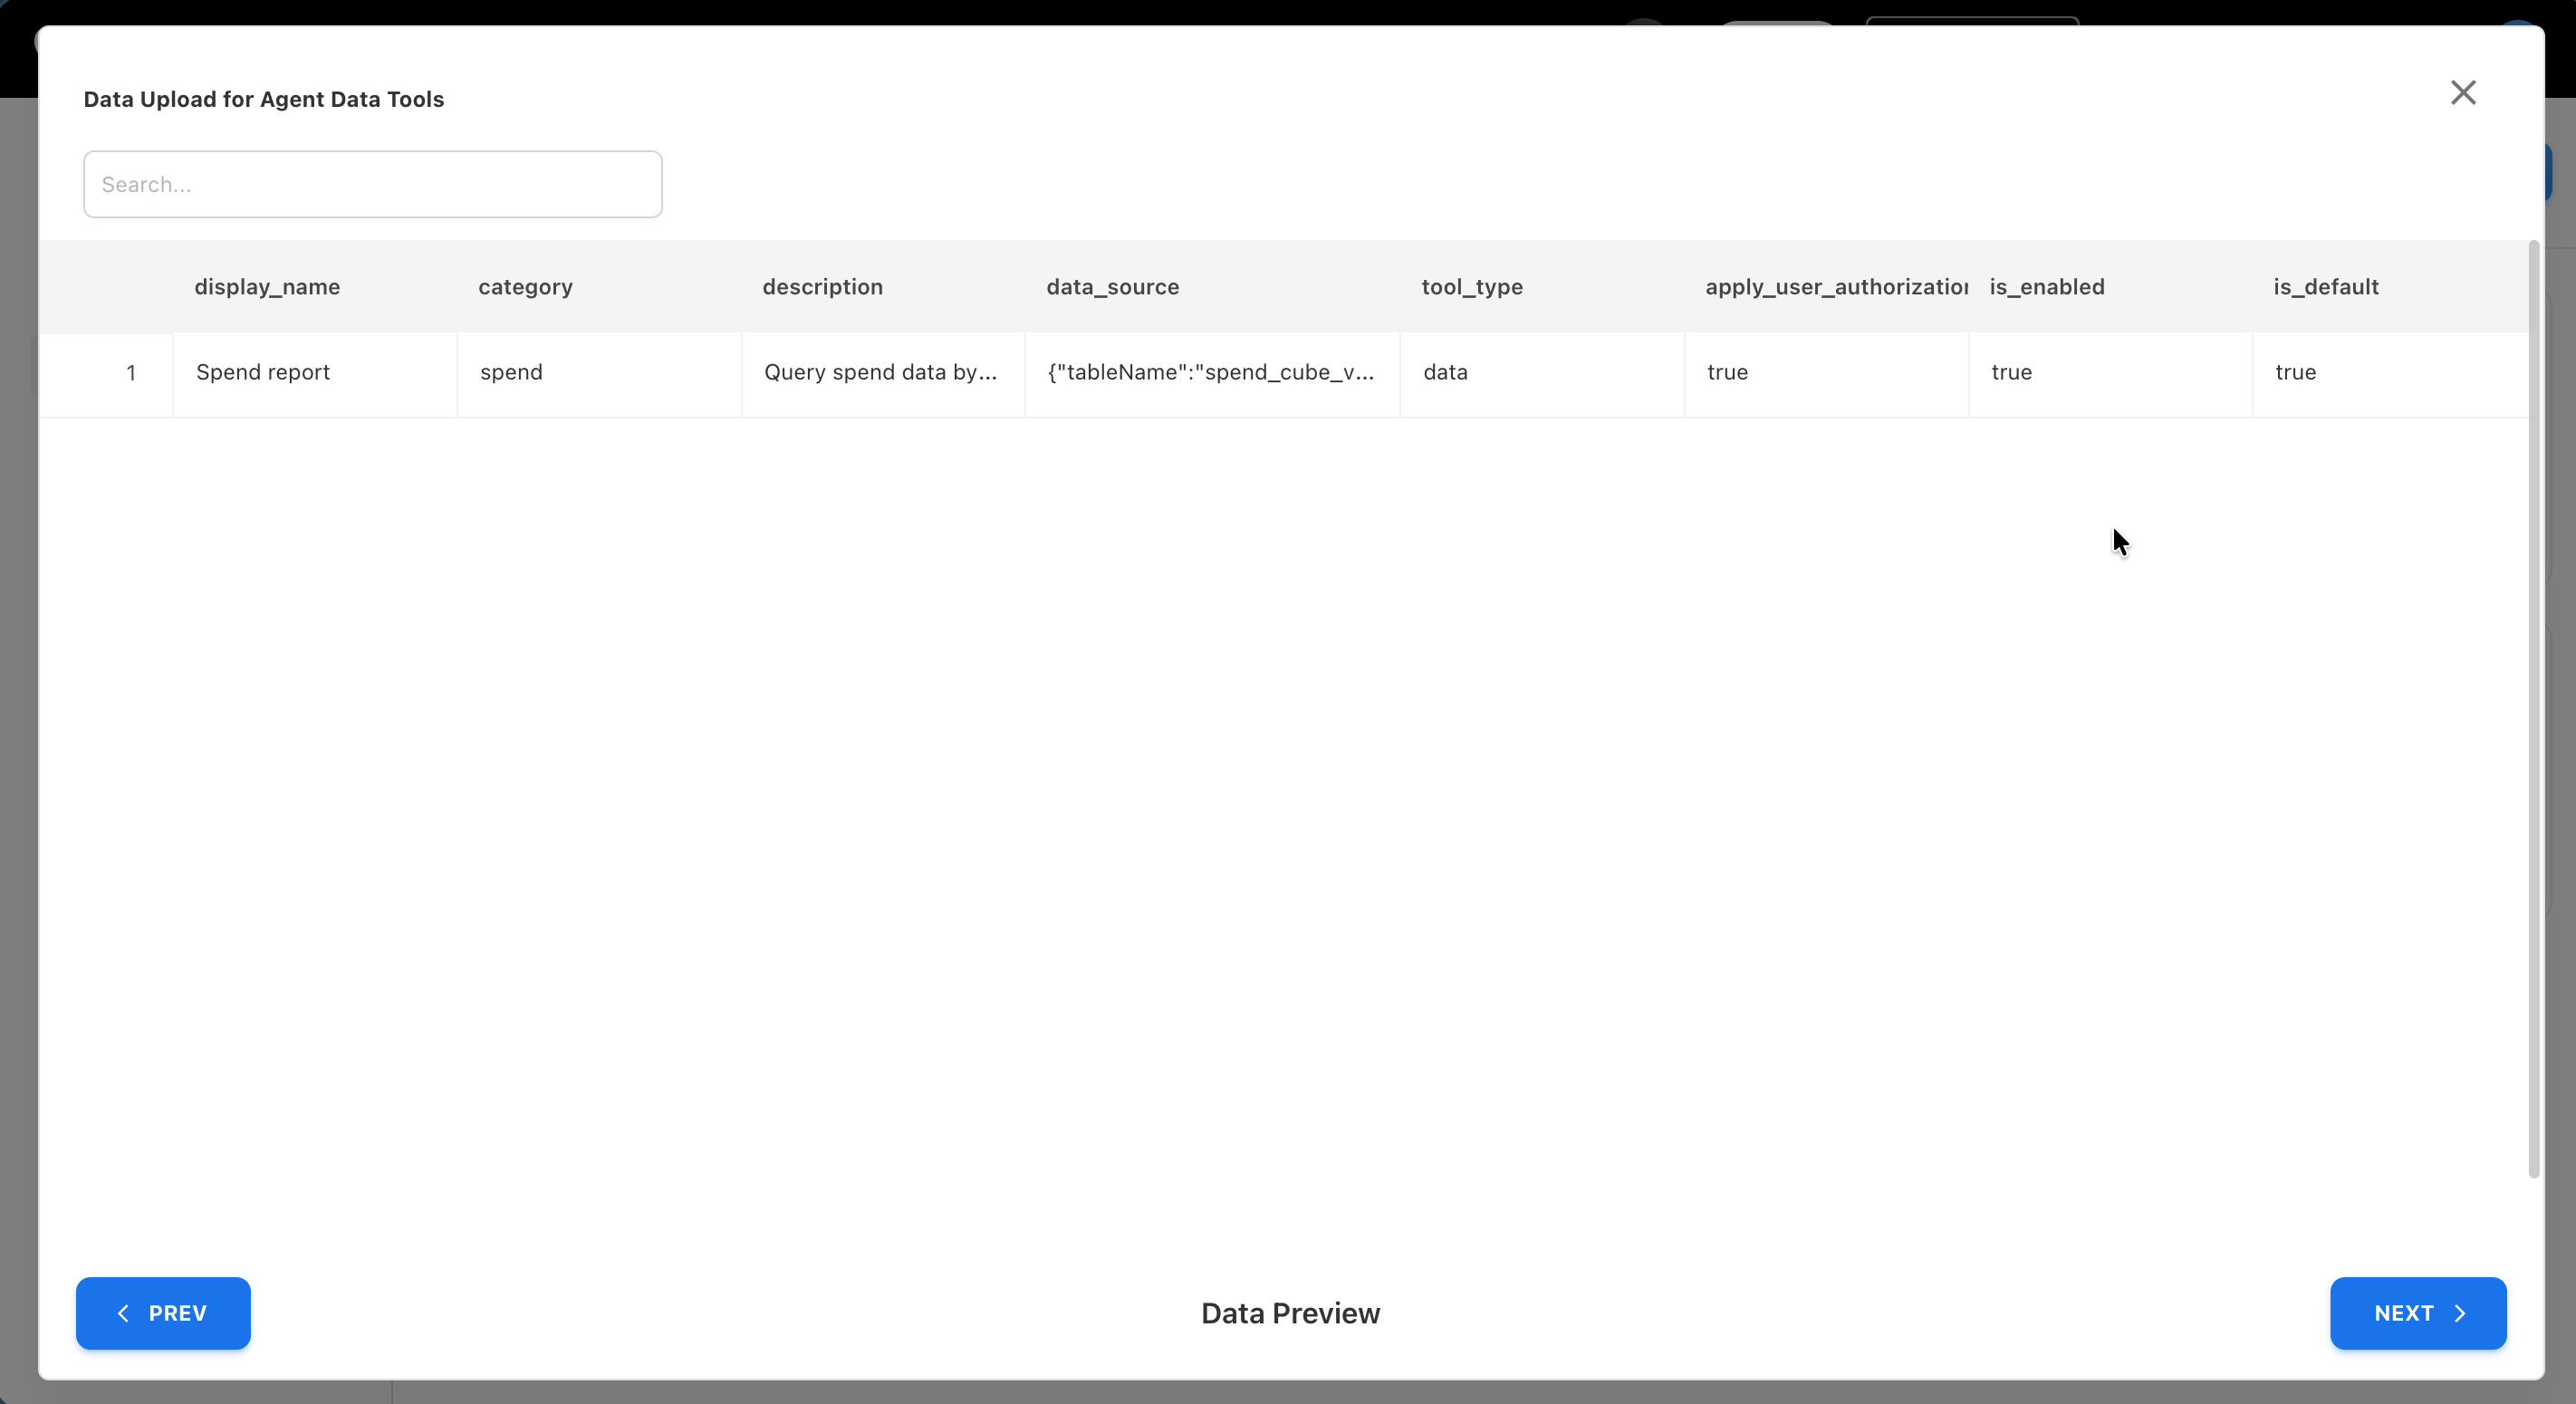
After the file is uploaded, Yarken shows a data preview. Review the imported fields before continuing.
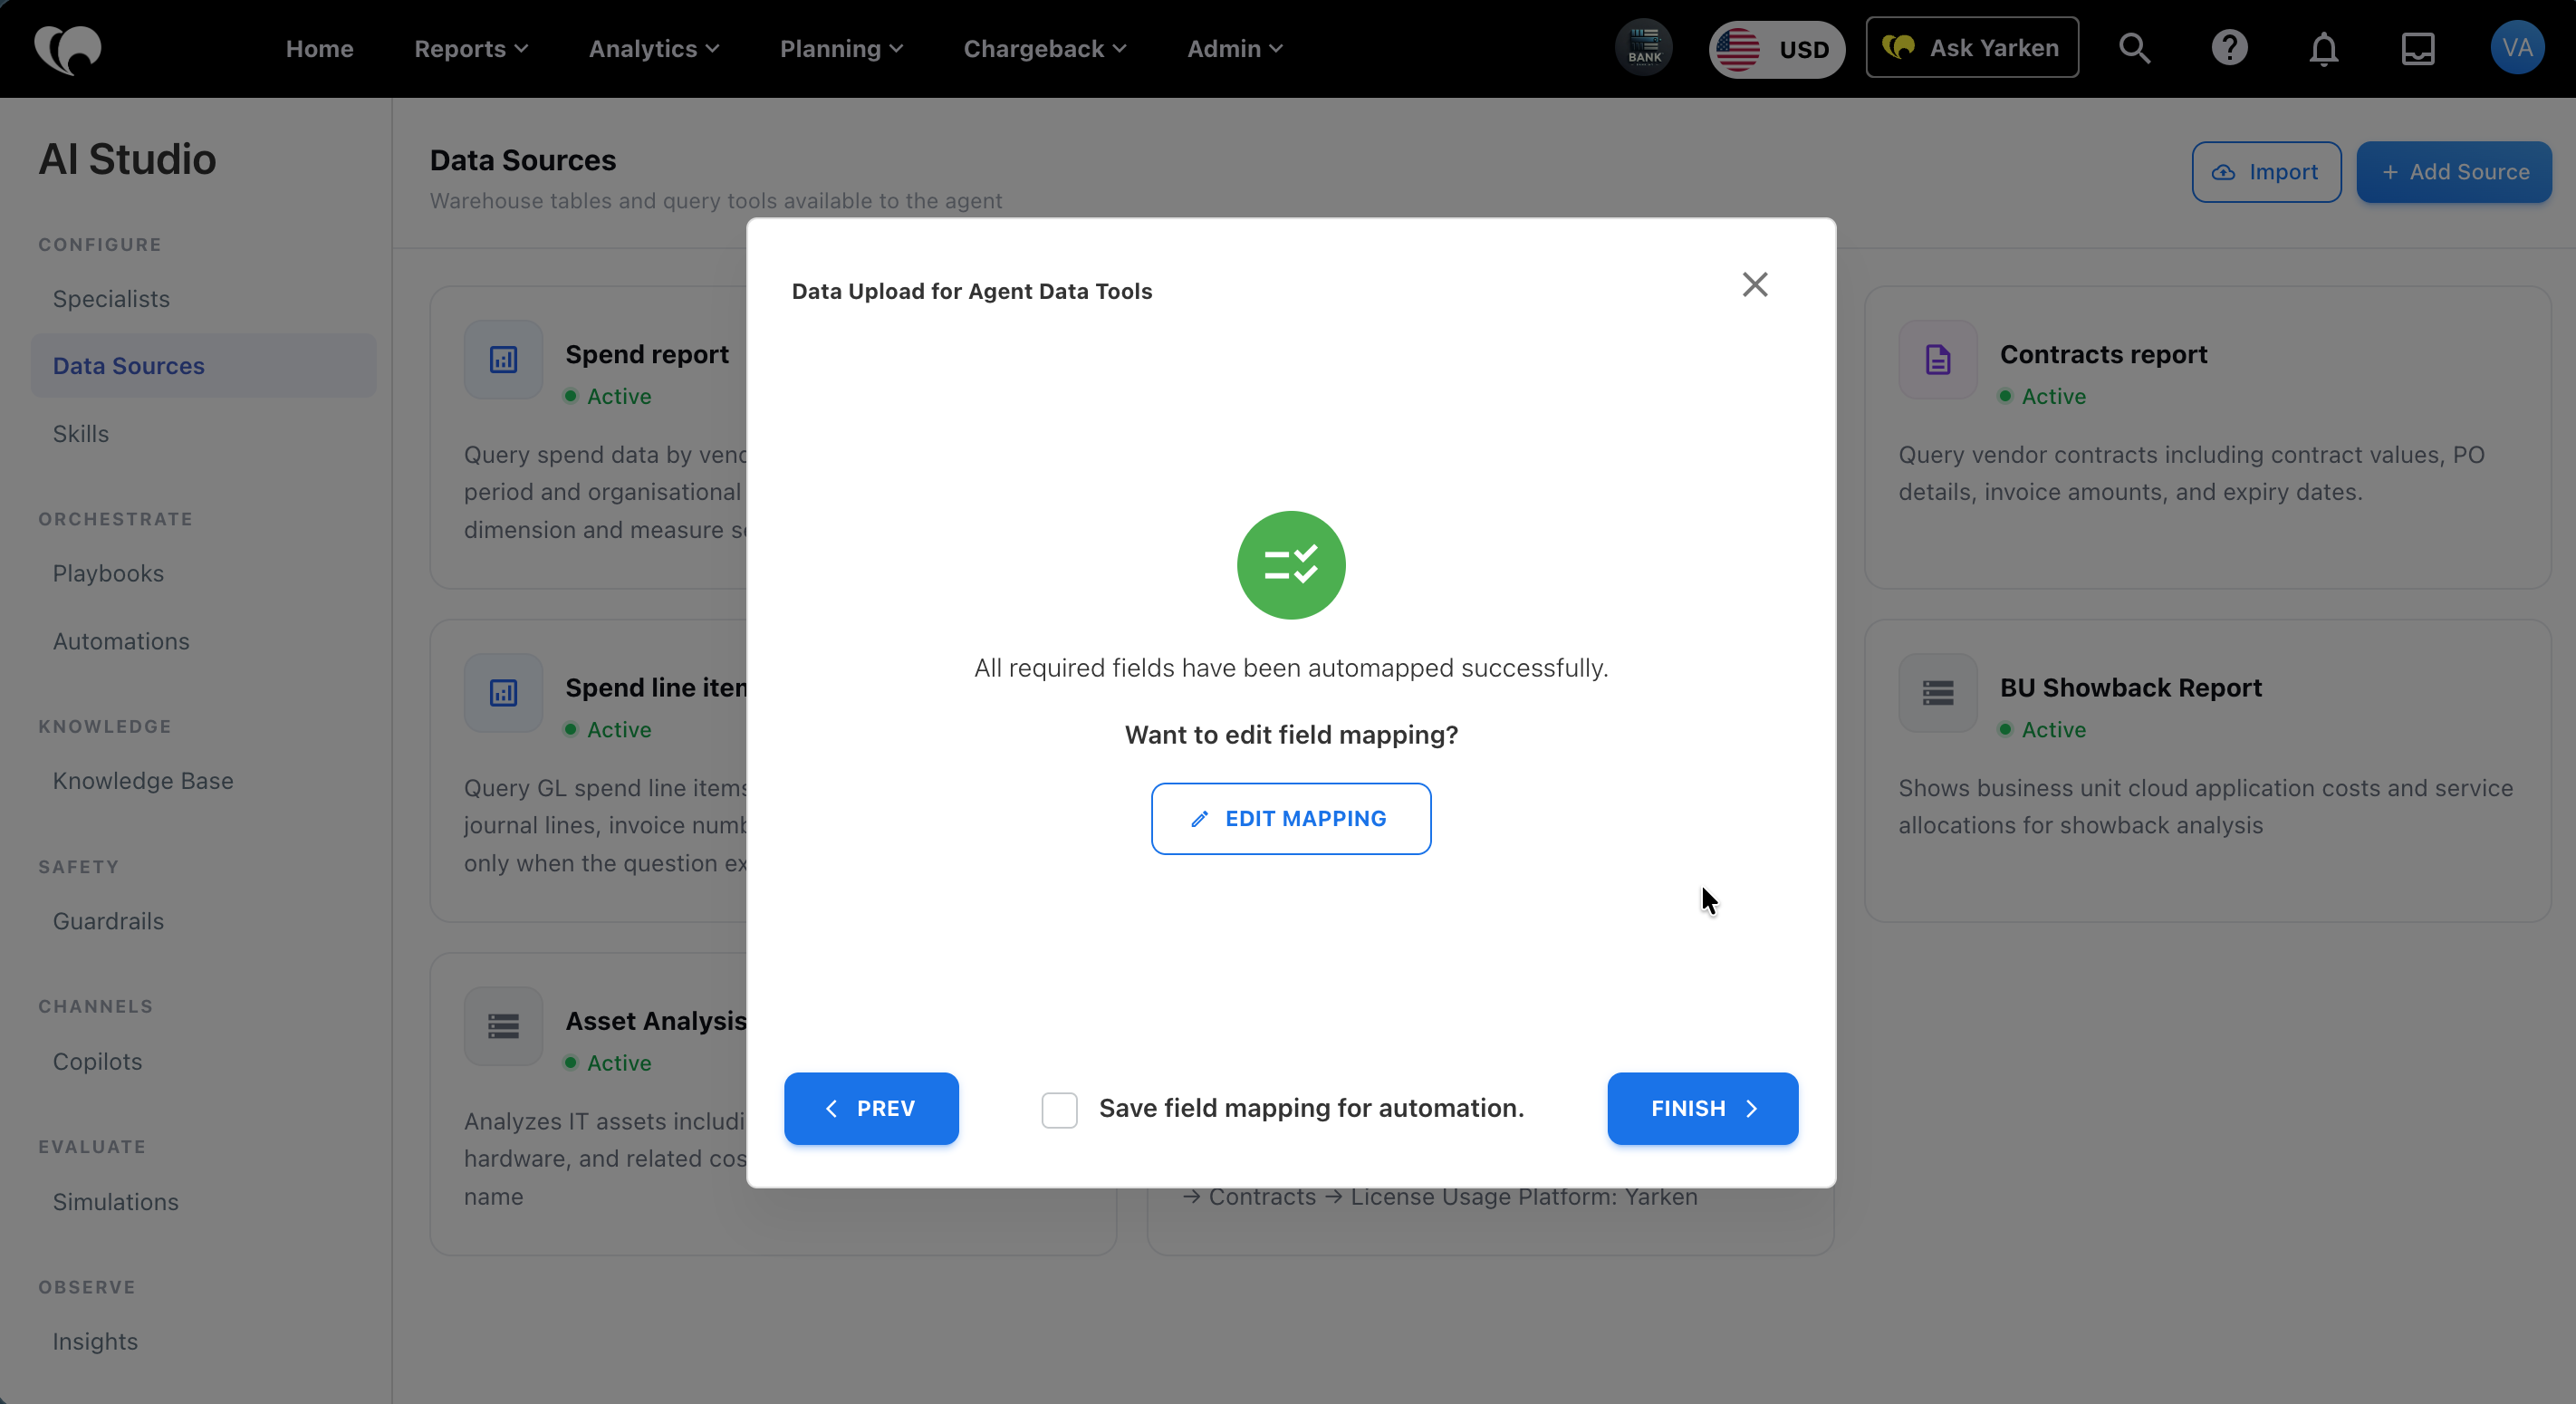
If required fields are detected successfully, Yarken automatically maps them.
You can then:
-
Select Finish to complete the import.
-
Select Edit Mapping to review or adjust field mapping.
-
Select Save field mapping for automation if the same mapping should be reused later.
Export a data source
Use Export to download a data source configuration as a CSV file.
To export a data source:
-
Go to Admin > AI Studio > Data Sources.
-
Open the action menu on the data source card.
-
Select Export.
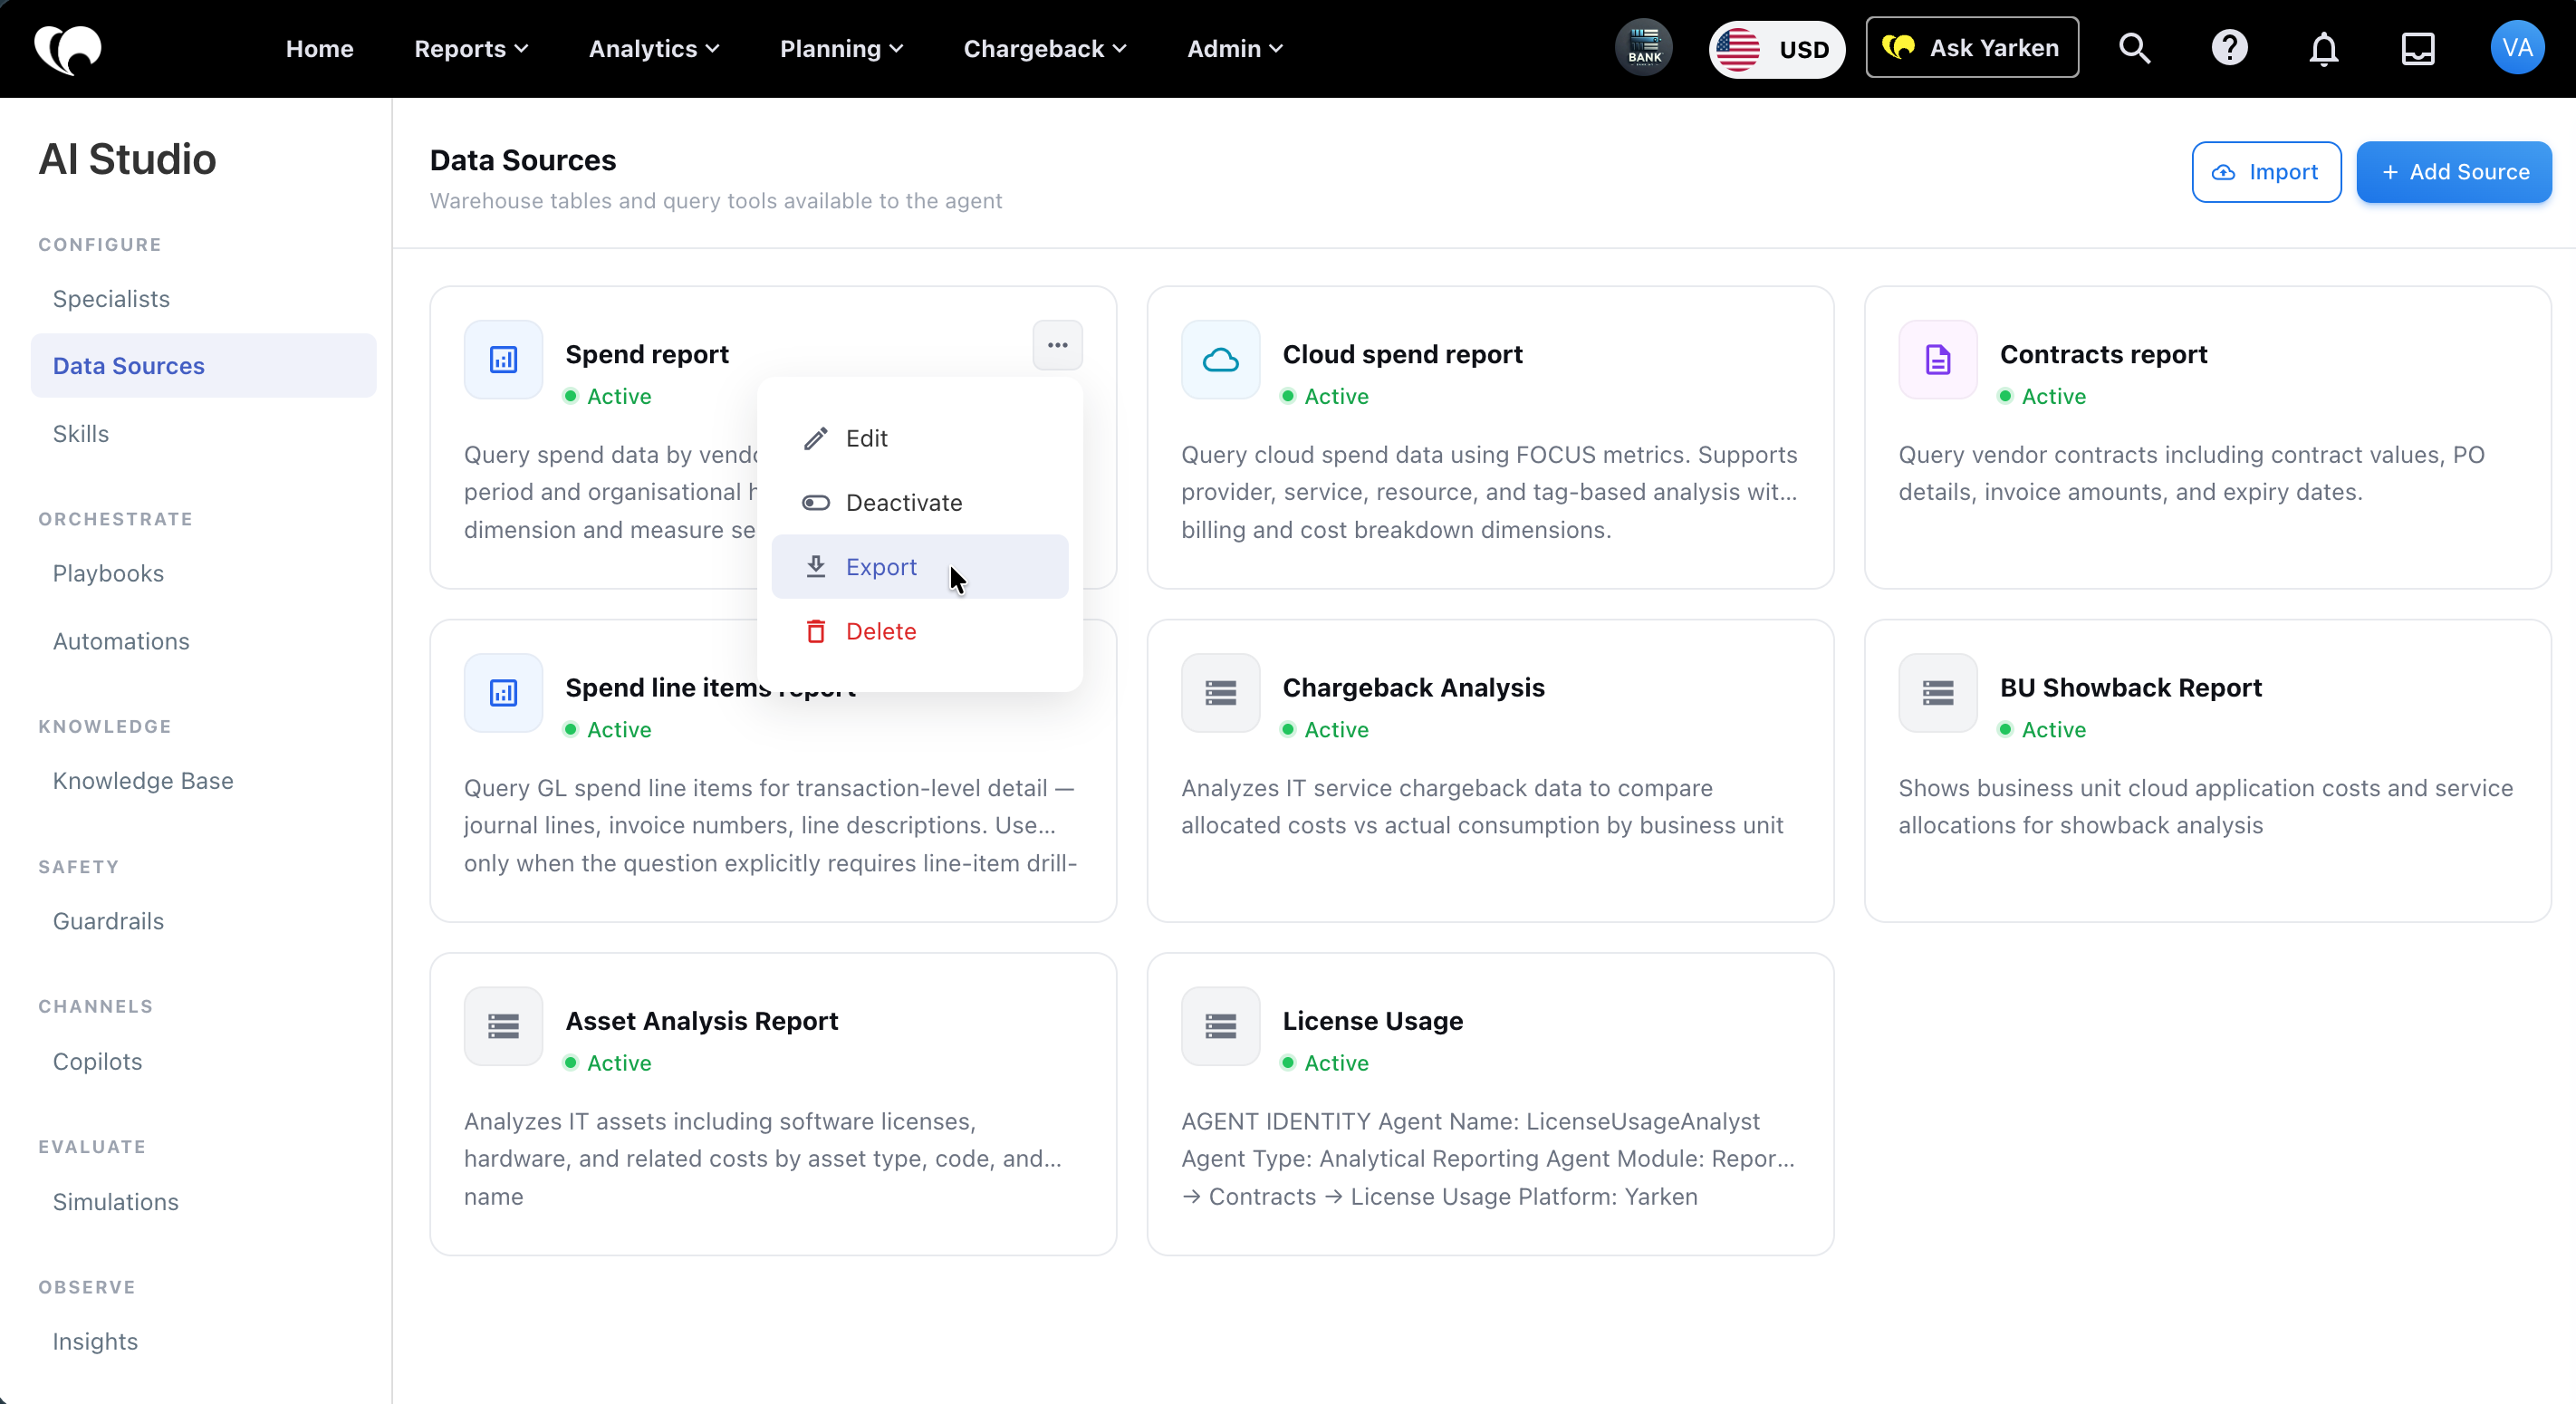
The export starts immediately. Yarken downloads the data source information as a .csv file.
When to use import and export
Use import and export when you need to:
-
Move a data source configuration between environments.
-
Create a data source from an approved configuration file.
-
Review data source metadata outside Yarken.
-
Validate field names, categories, descriptions, authorization settings, and default status.
-
Keep a record of data source setup before making changes.
View or edit a data source
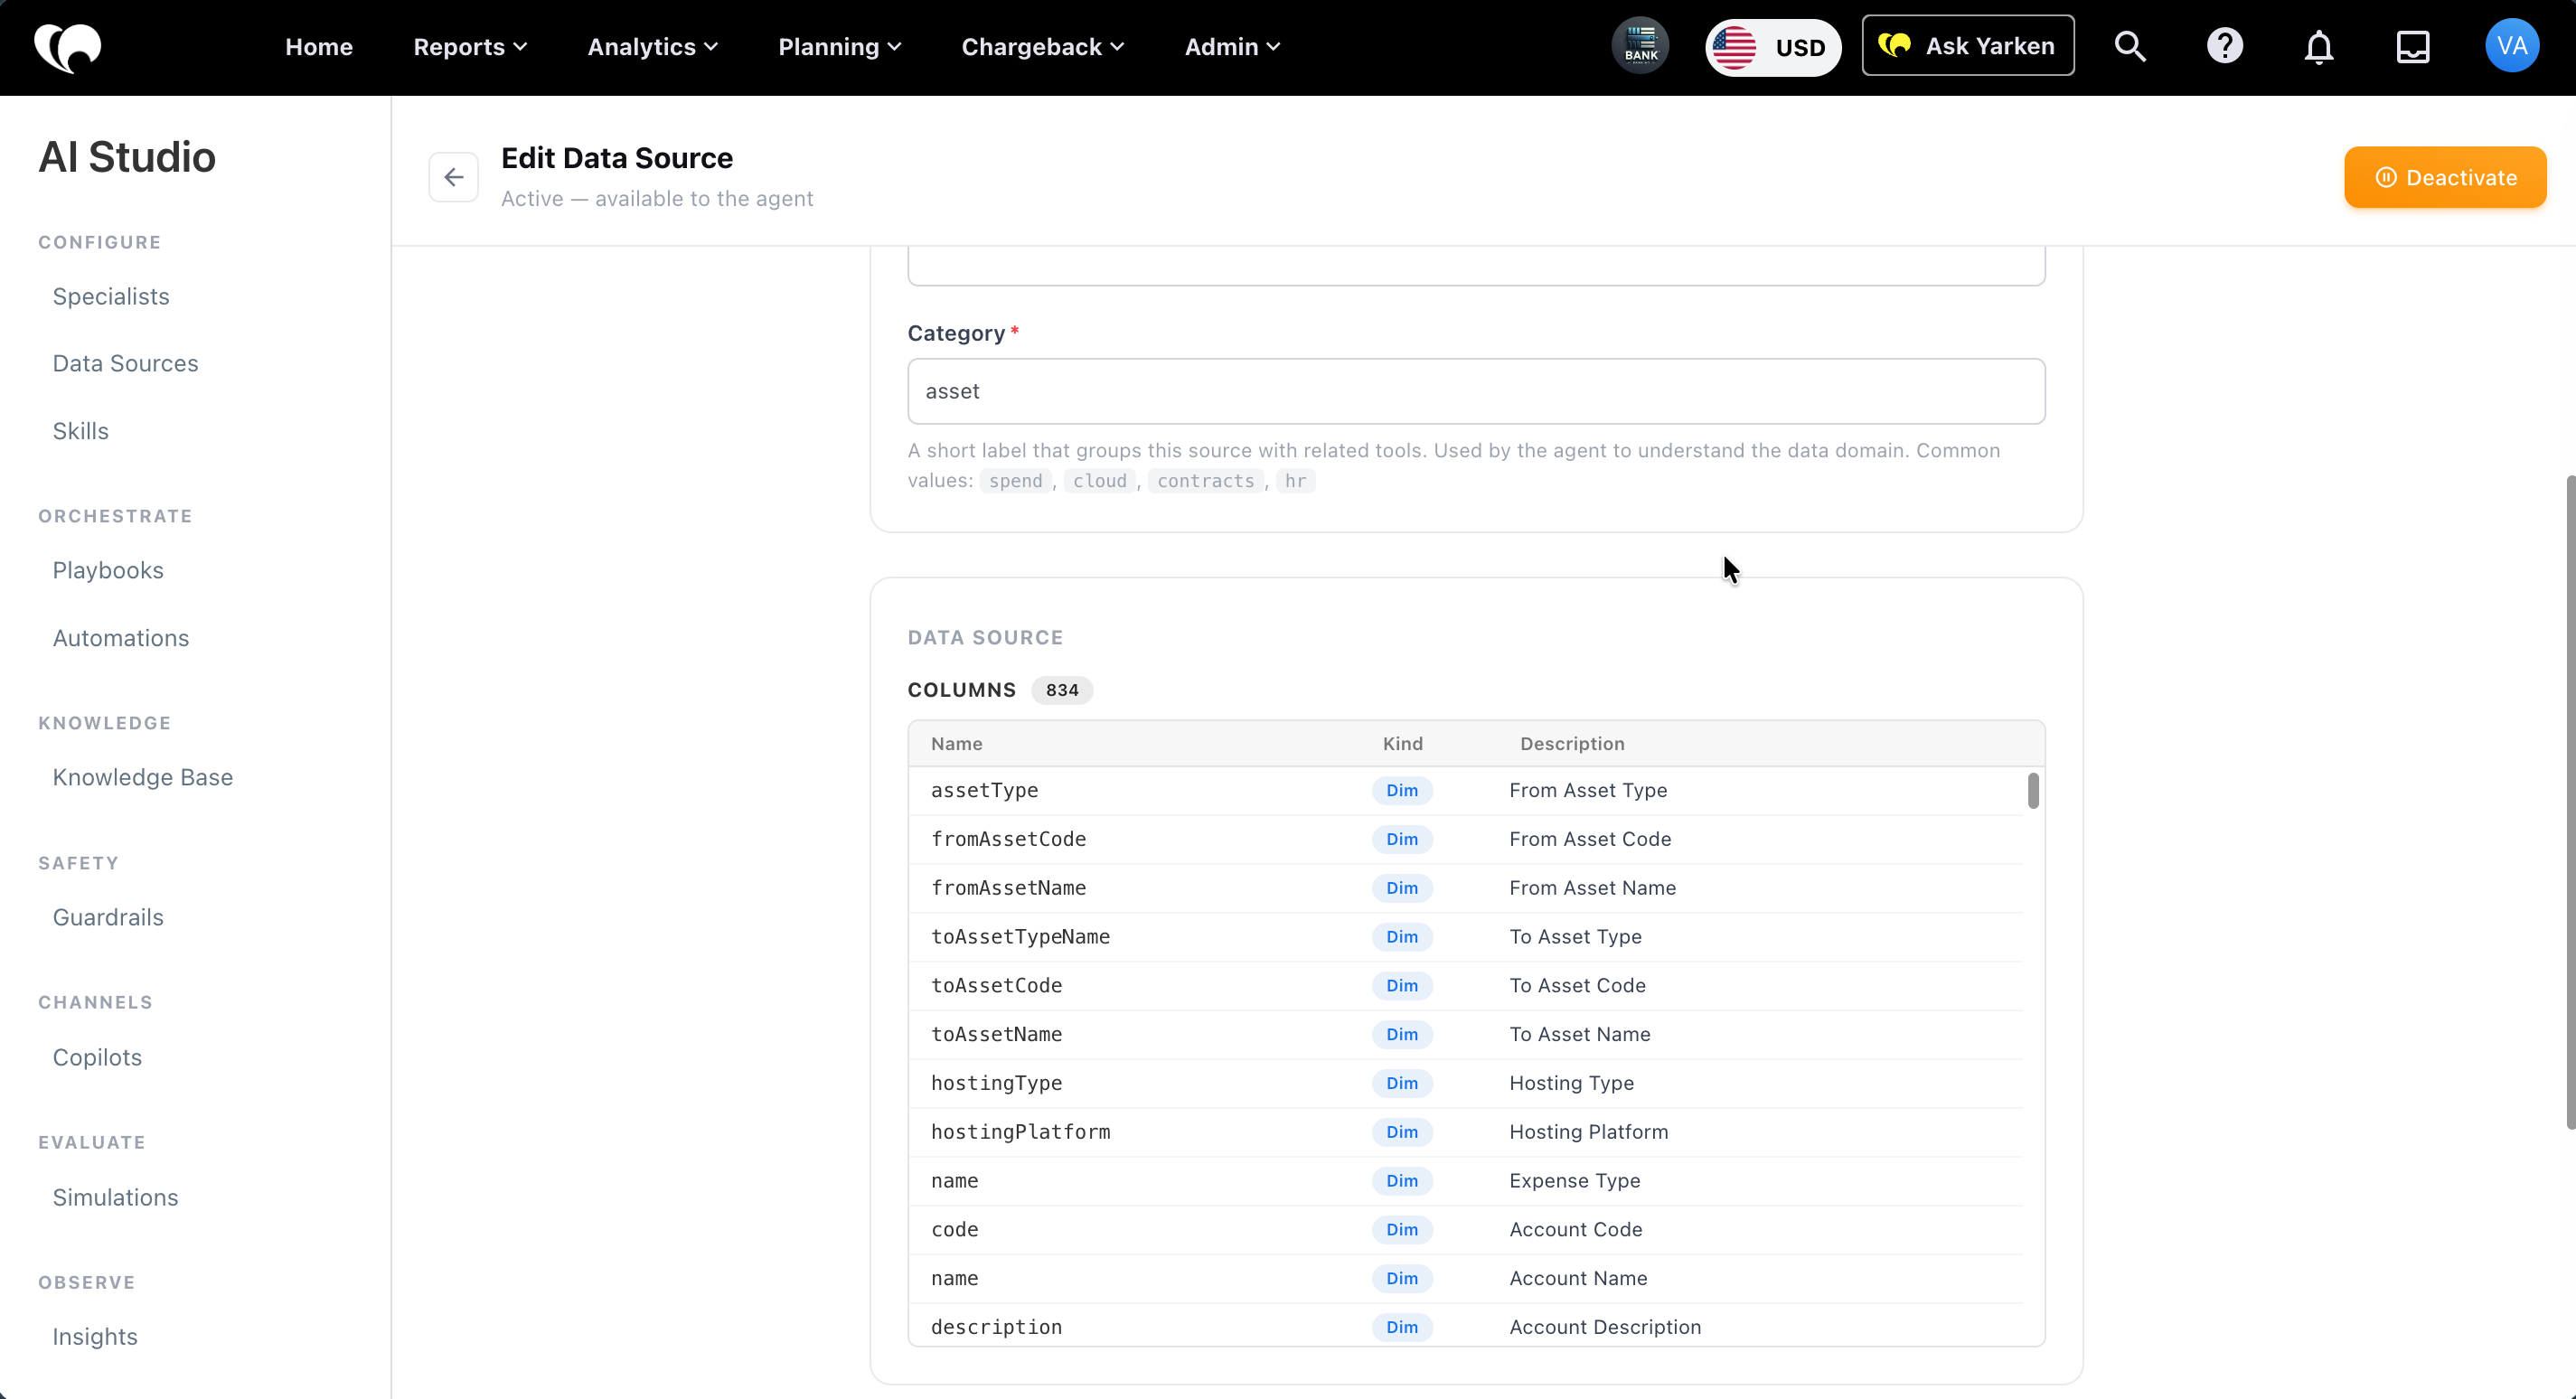
To view or edit a data source:
-
Go to Admin > AI Studio > Data Sources.
-
Open the data source card.
-
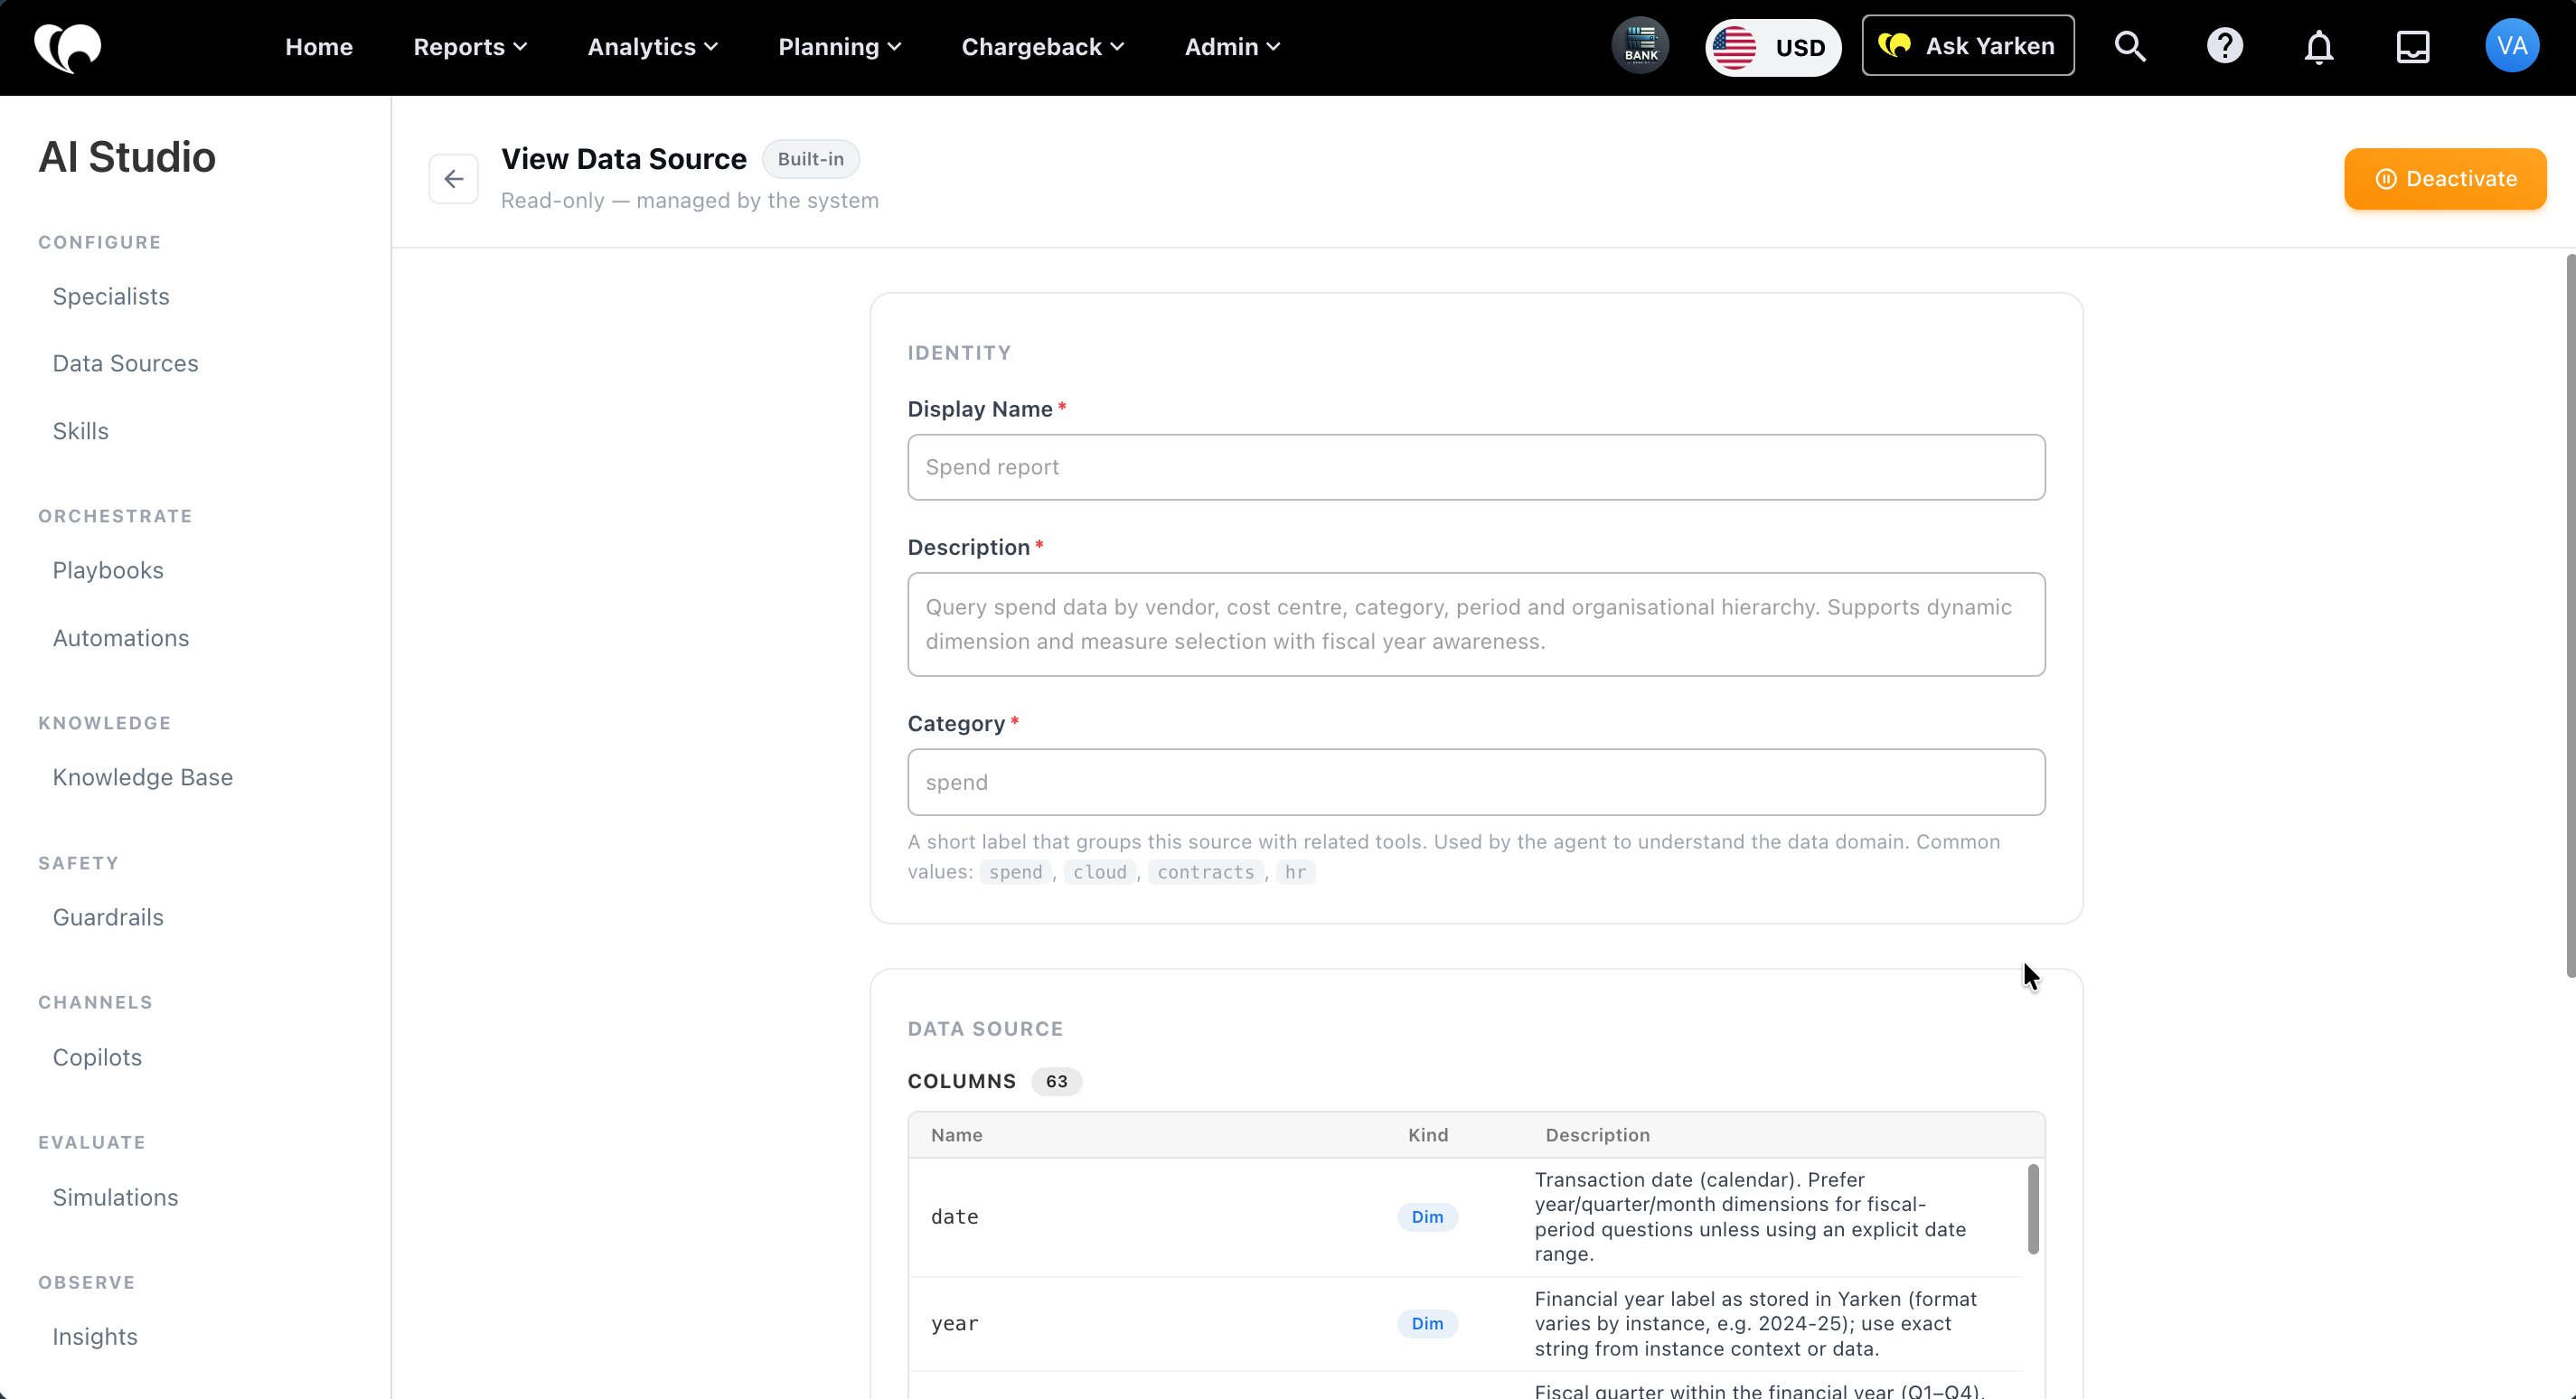
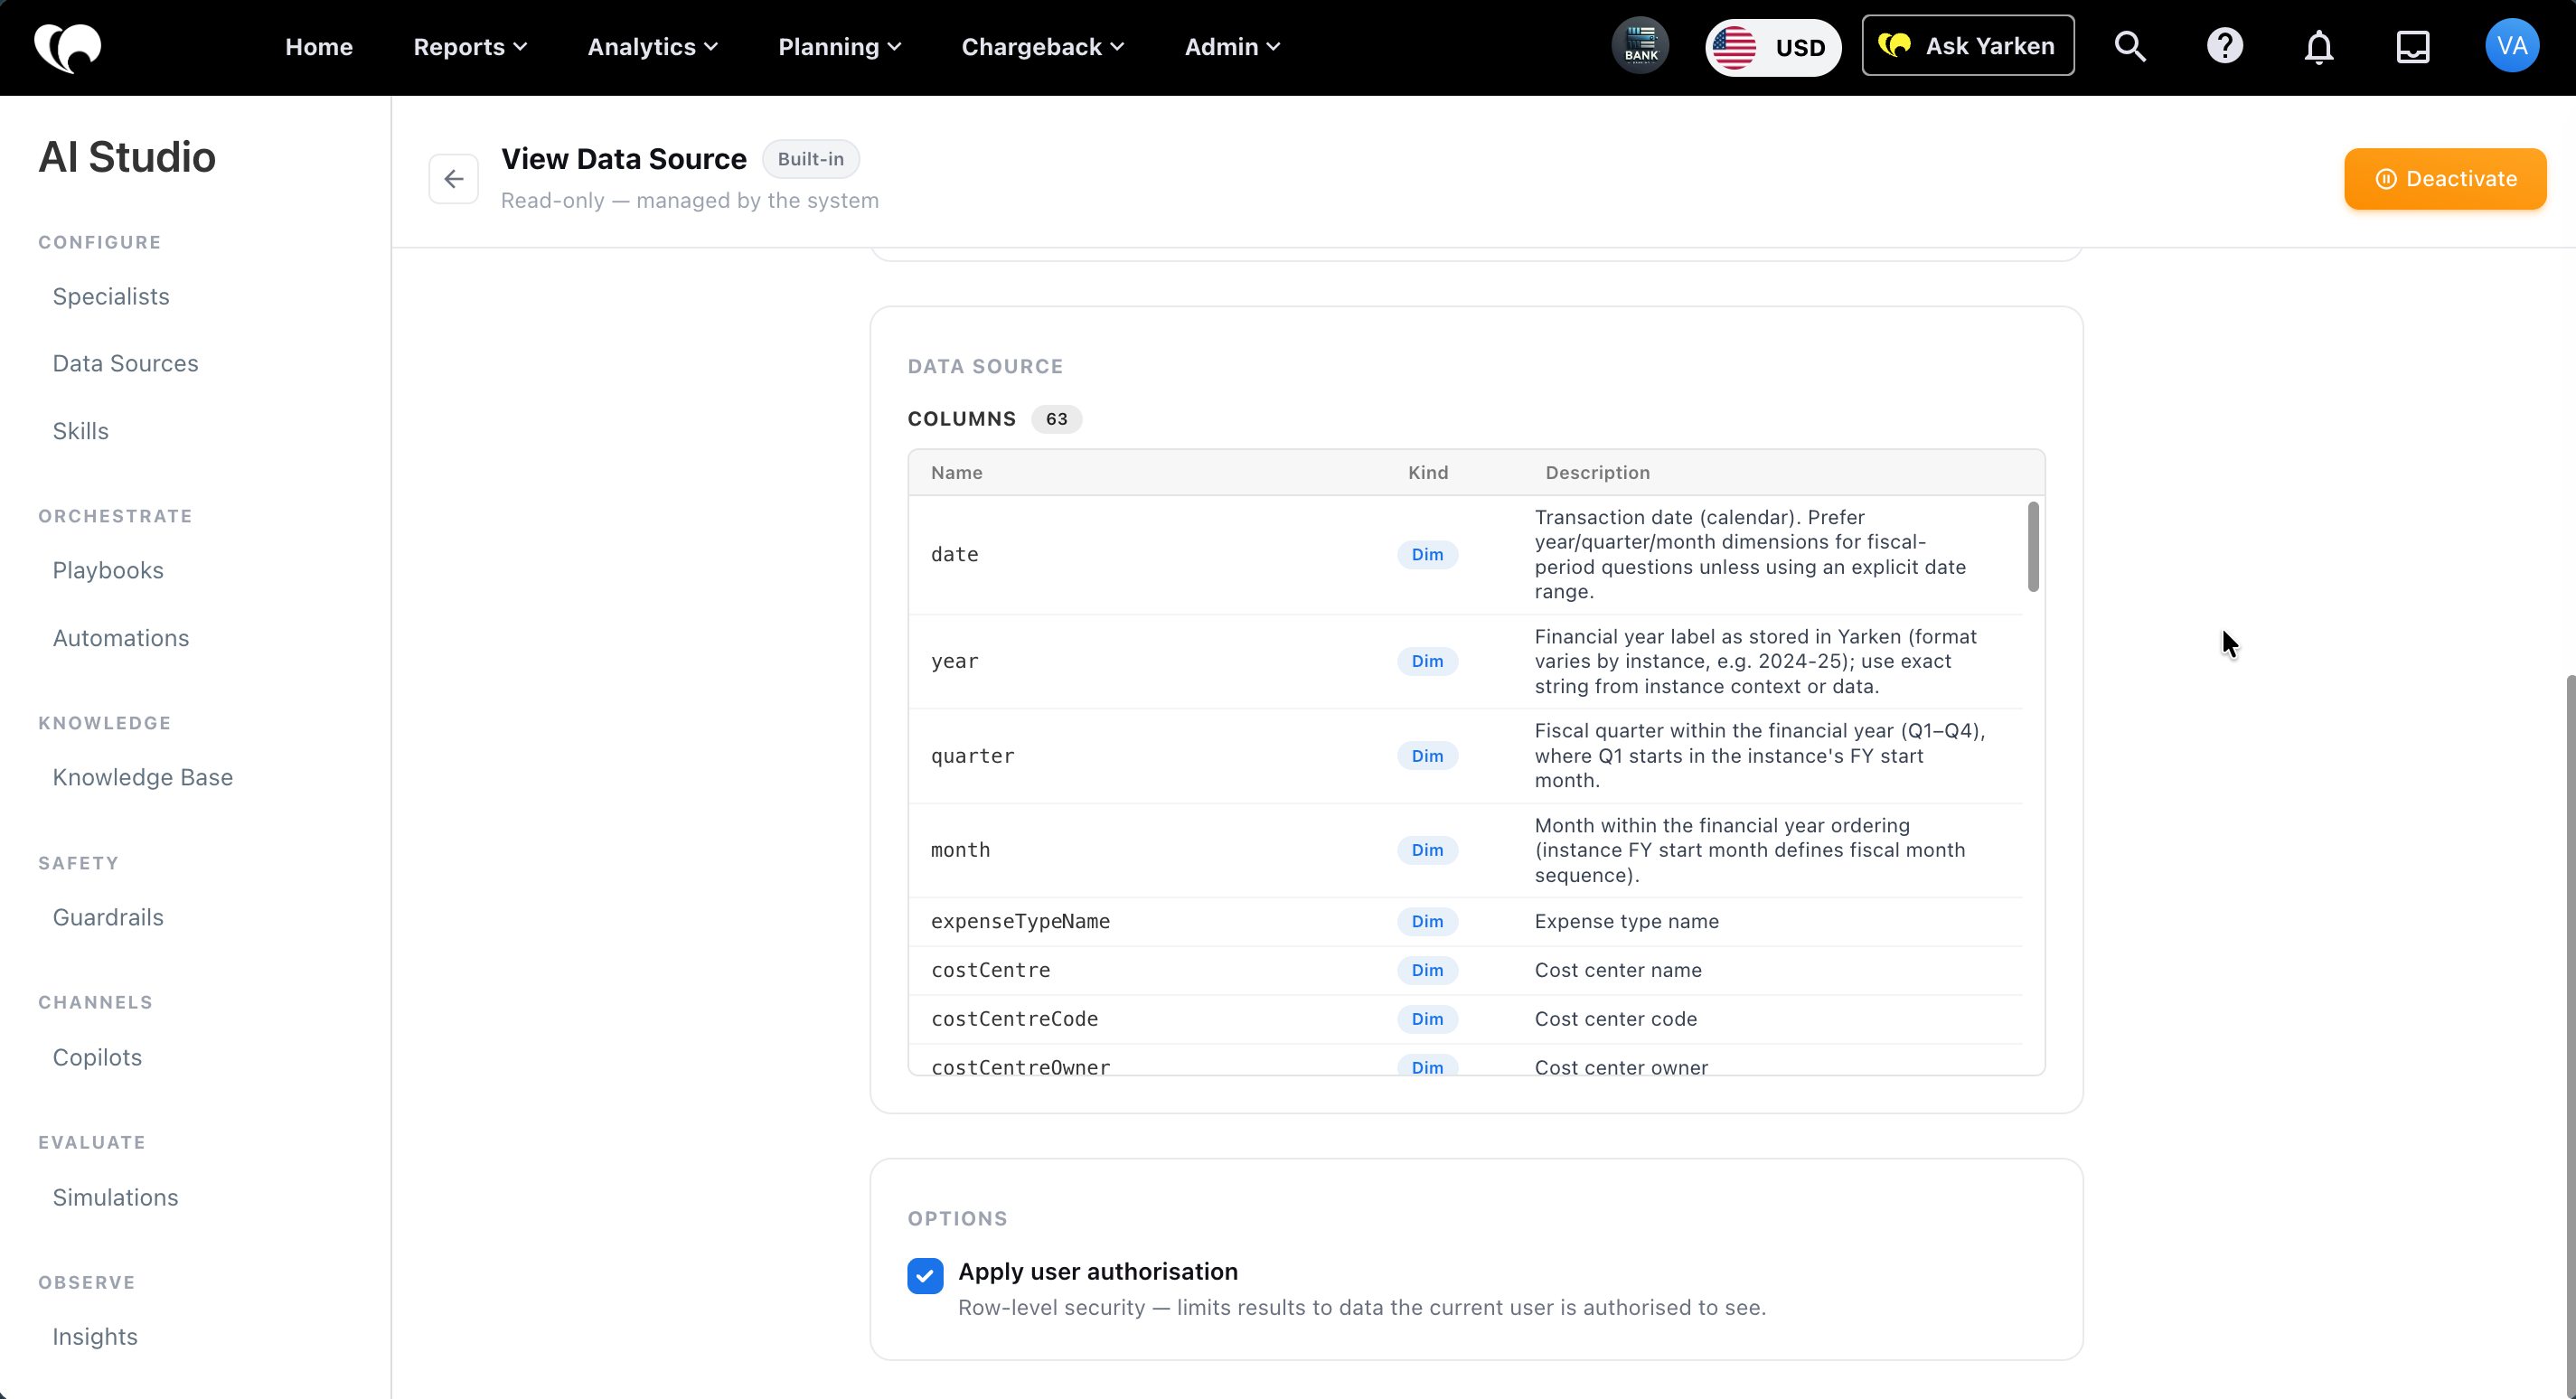
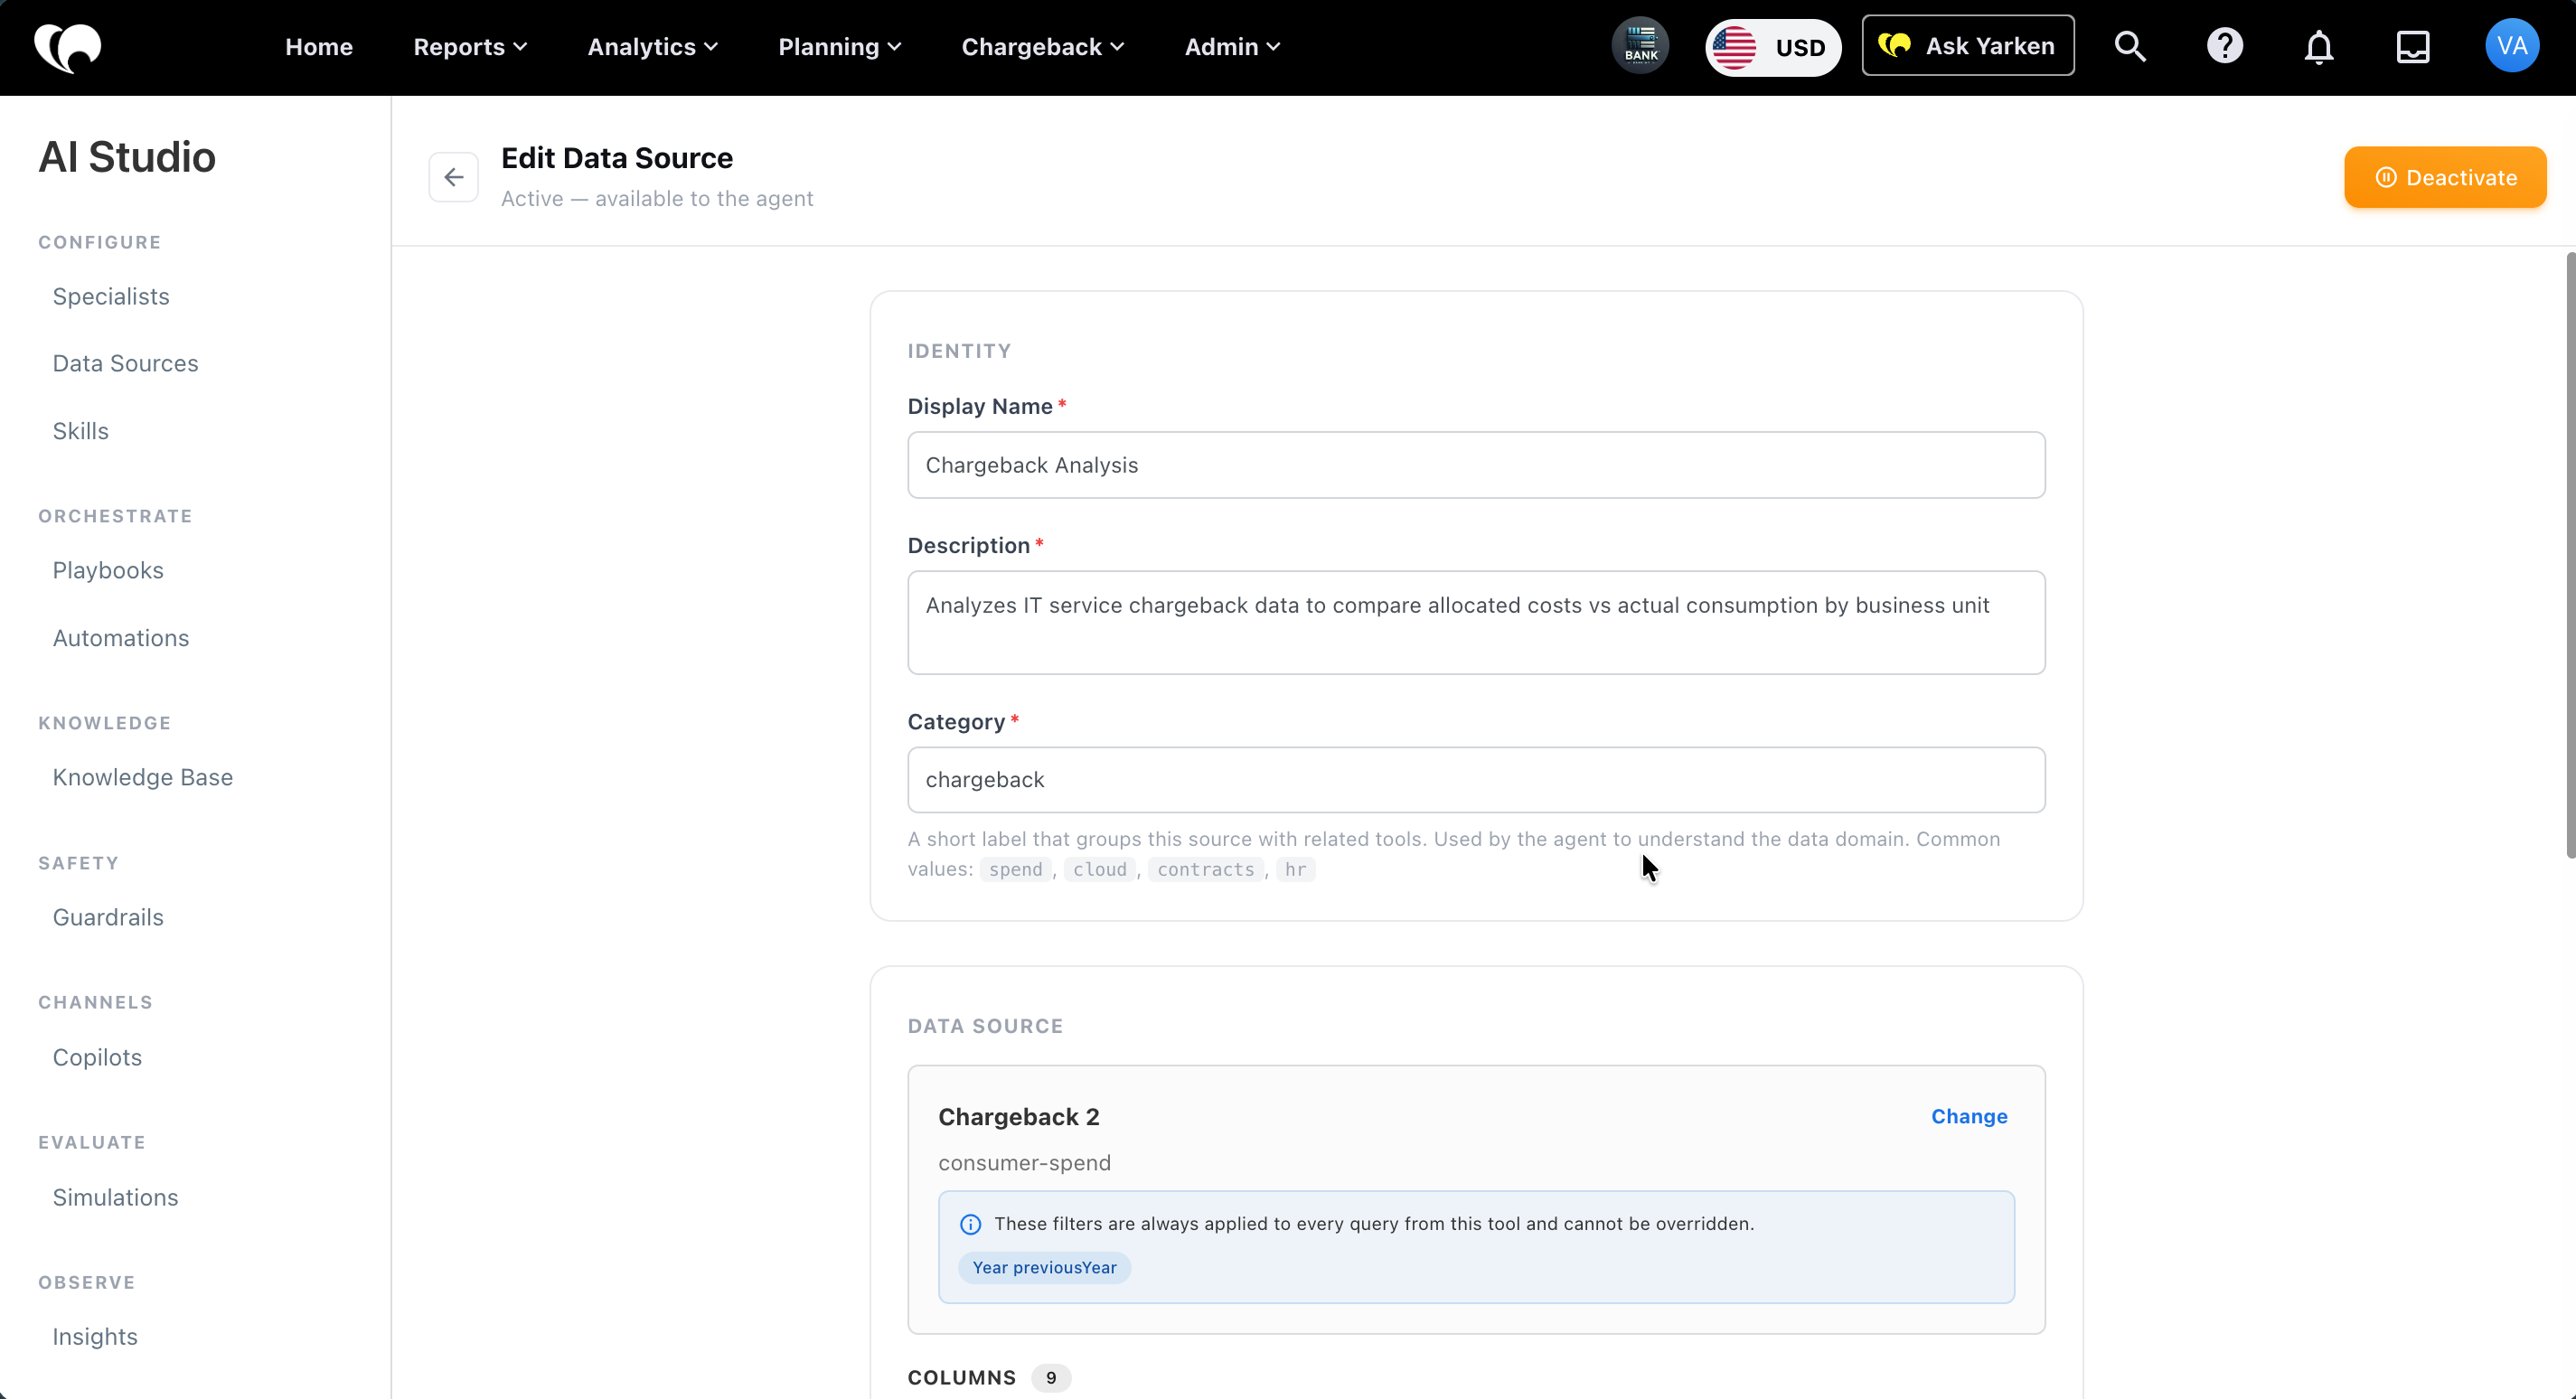
Review the identity, data source columns, and options.
-
Update editable fields if required.
-
Select Save.
Some data sources are built in and managed by the system. These may appear as read-only.
Data source identity
The Identity section defines how the data source appears and how the agent understands its domain.
|
Field |
Required |
Description |
|---|---|---|
|
Display Name |
Yes |
The user-facing name. Example: Spend report. |
|
Description |
Yes |
Explains what the data source provides and when it should be used. |
|
Category |
Yes |
A short label that groups the source with related tools. Common values shown include spend, cloud, contracts, and hr. |
Use a clear category so agents can understand the data domain.
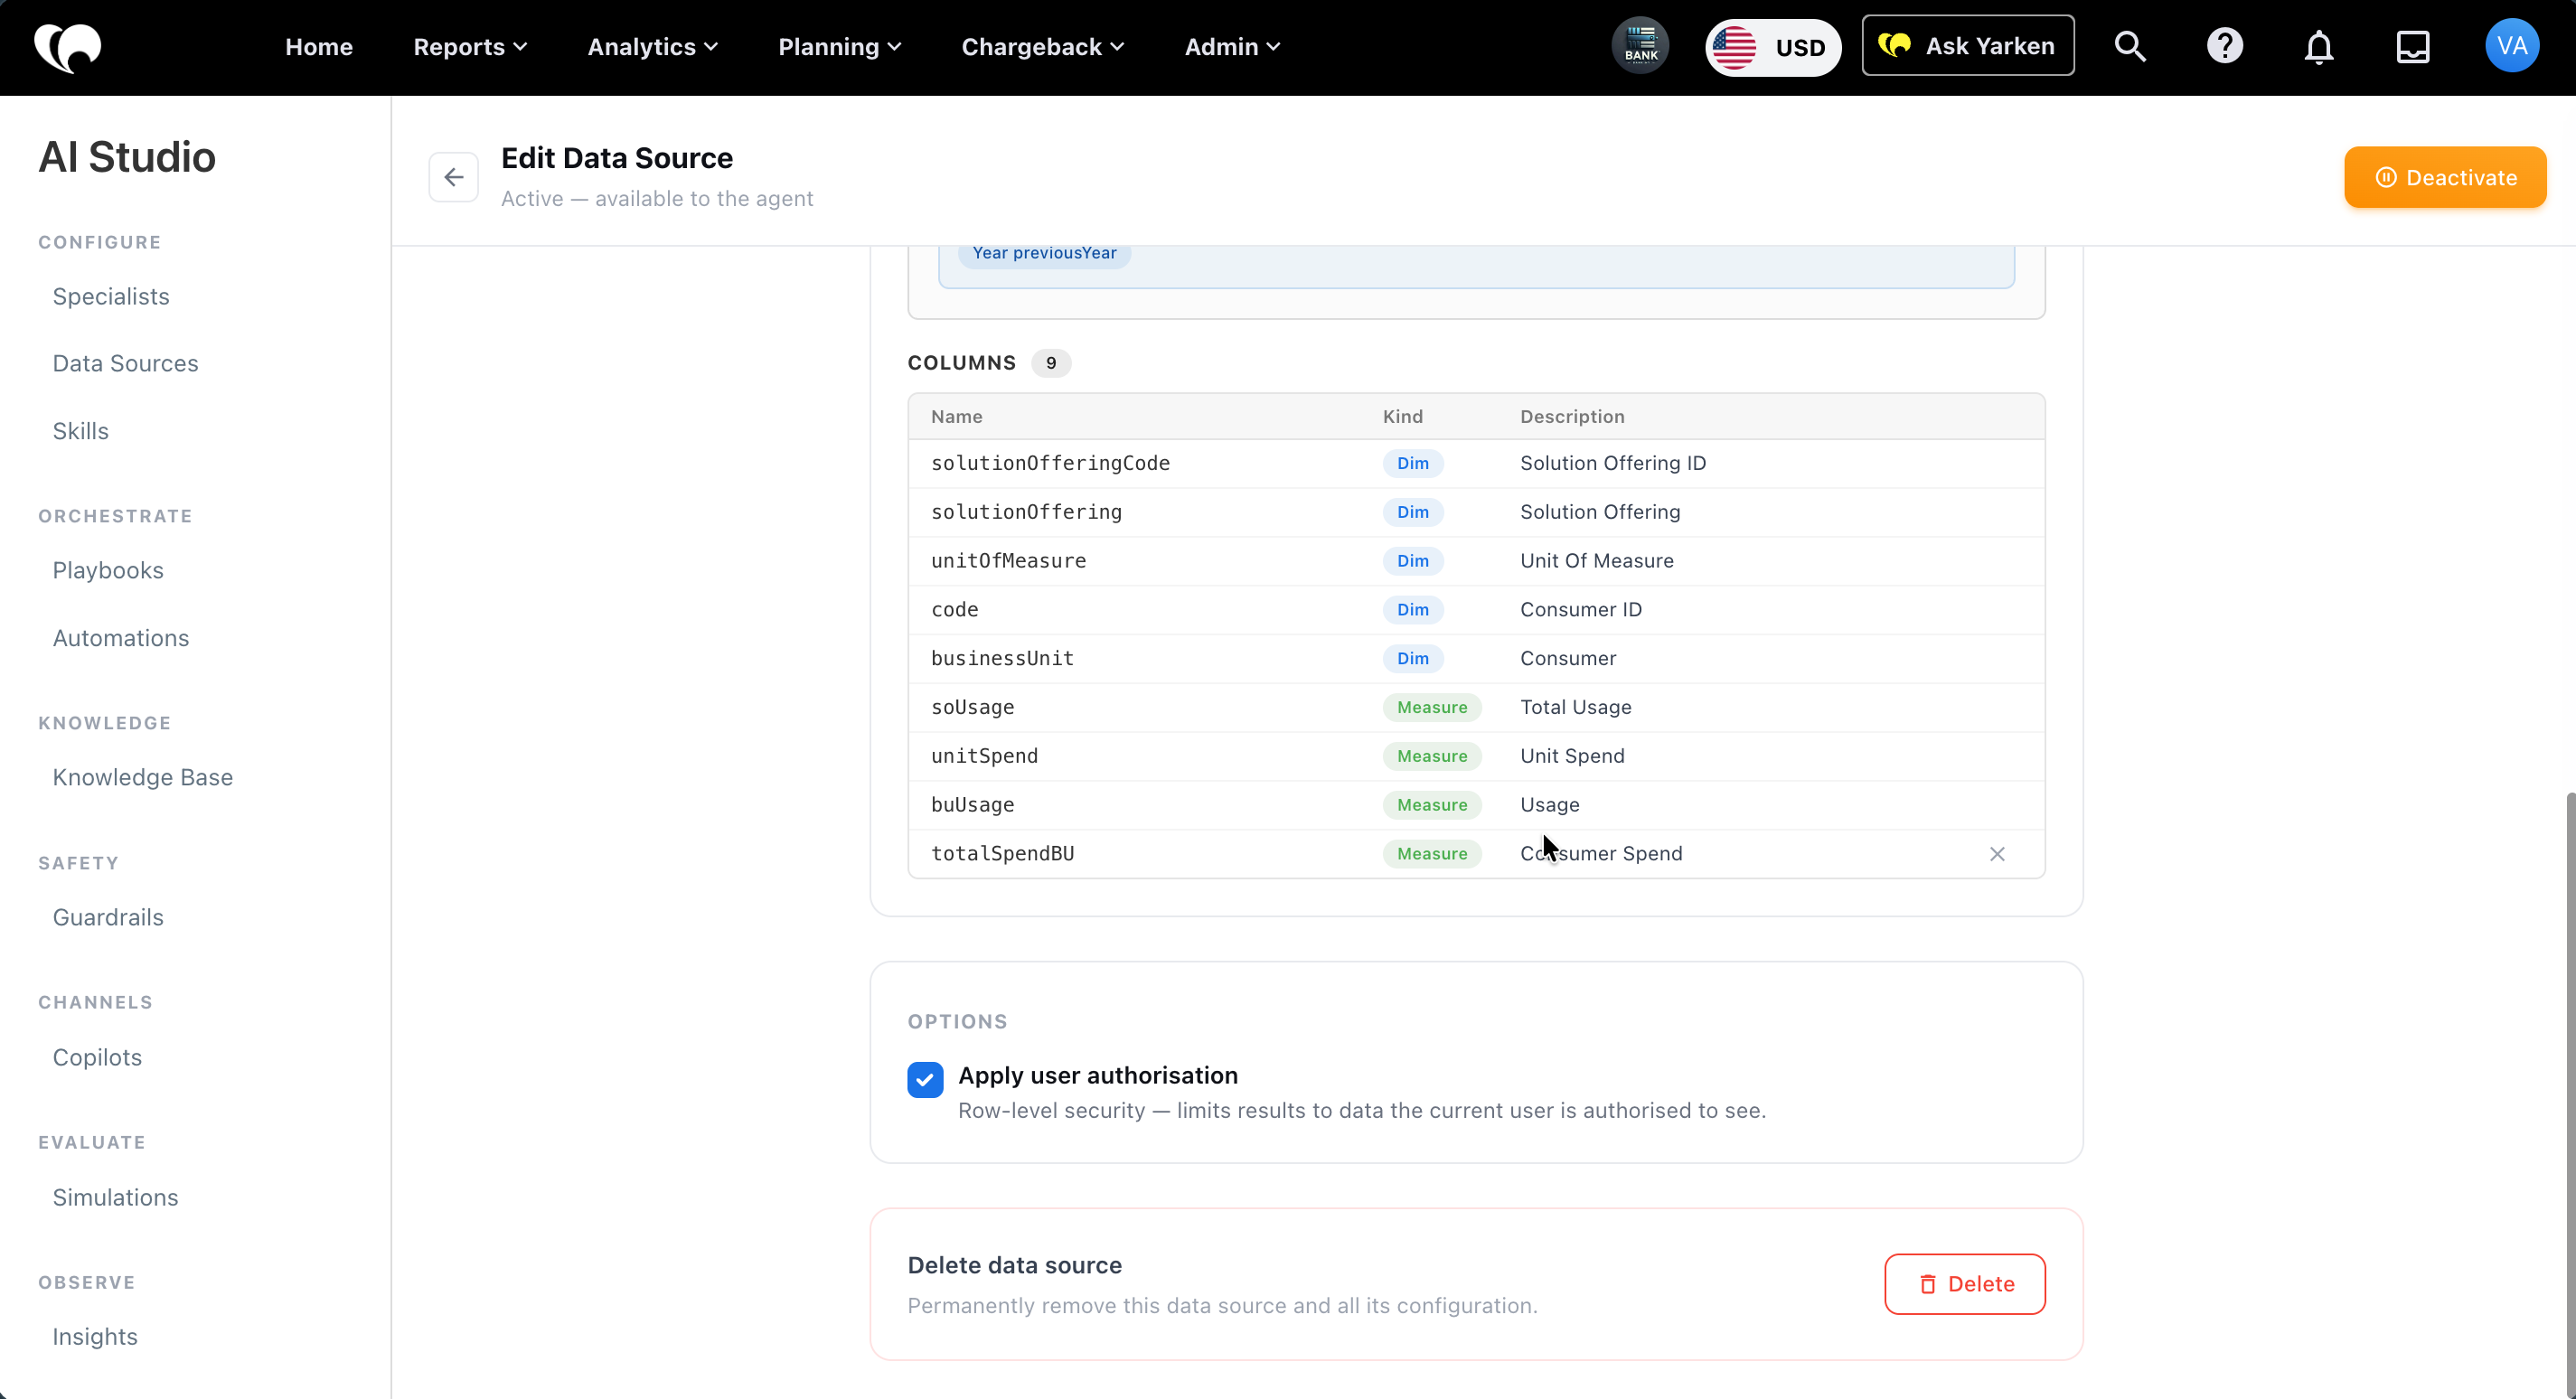
Data source columns
The Data Source section lists the columns available to the agent.
Each column includes:
|
Field |
Description |
|---|---|
|
Name |
Internal column or field name. |
|
Kind |
Whether the field is a dimension or measure. |
|
Description |
Business meaning of the field. |
Examples shown in the screenshots include:
|
Column |
Kind |
Description |
|---|---|---|
|
date |
Dimension |
Transaction date. Prefer year, quarter, or month dimensions for fiscal-period questions unless using an explicit date range. |
|
year |
Dimension |
Financial year label stored in Yarken. |
|
quarter |
Dimension |
Fiscal quarter within the financial year. |
|
month |
Dimension |
Month within the financial year. |
|
costCentre |
Dimension |
Cost center name. |
|
costCentreCode |
Dimension |
Cost center code. |
|
account |
Dimension |
Account name. |
|
accountCode |
Dimension |
Account code. |
|
entity |
Dimension |
Entity name. |
|
entityCode |
Dimension |
Entity code. |
|
spend |
Measure |
Total spend amount. |
|
budget |
Measure |
Total budget amount. |
|
forecast |
Measure |
Total forecast amount. |
The number of available columns depends on the data source. Examples shown include 63 columns for Spend report and 834 columns for Asset Analysis Report.
Row-level authorization
The Apply user authorisation option controls whether results are limited to data the current user is authorized to see.
When enabled, row-level security limits results to authorized data.
Keep this enabled unless the data source is specifically intended to expose organization-wide aggregates to all permitted users.
Activate or deactivate a data source
Active data sources are available to the agent.
To deactivate a data source:
-
Go to Admin > AI Studio > Data Sources.
-
Open the action menu on the data source card.
-
Select Deactivate.
Use deactivation when the data source should remain configured but should not be used.
Delete a data source
To delete a data source:
-
Open the data source.
-
Scroll to Delete data source.
-
Select Delete.
Deleting a data source permanently removes the data source and its configuration.
Do not delete built-in or shared data sources unless you are certain they are not used by any specialist, skill, playbook, or automation.
Configuration guidance
Before making a data source available, confirm that:
-
The source is approved for AI use.
-
The description clearly explains when to use it.
-
The category is accurate.
-
Column names and descriptions are clear.
-
Dimension and measure types are correct.
-
Authorization behavior is appropriate.
-
Assigned specialists actually need the source.