
Configure Workforce Planning
Admins must complete the configuration before users can create workforce plans.
Step 1: Create workforce roles
Go to:
Admin > Settings > Workforce Planning > Roles
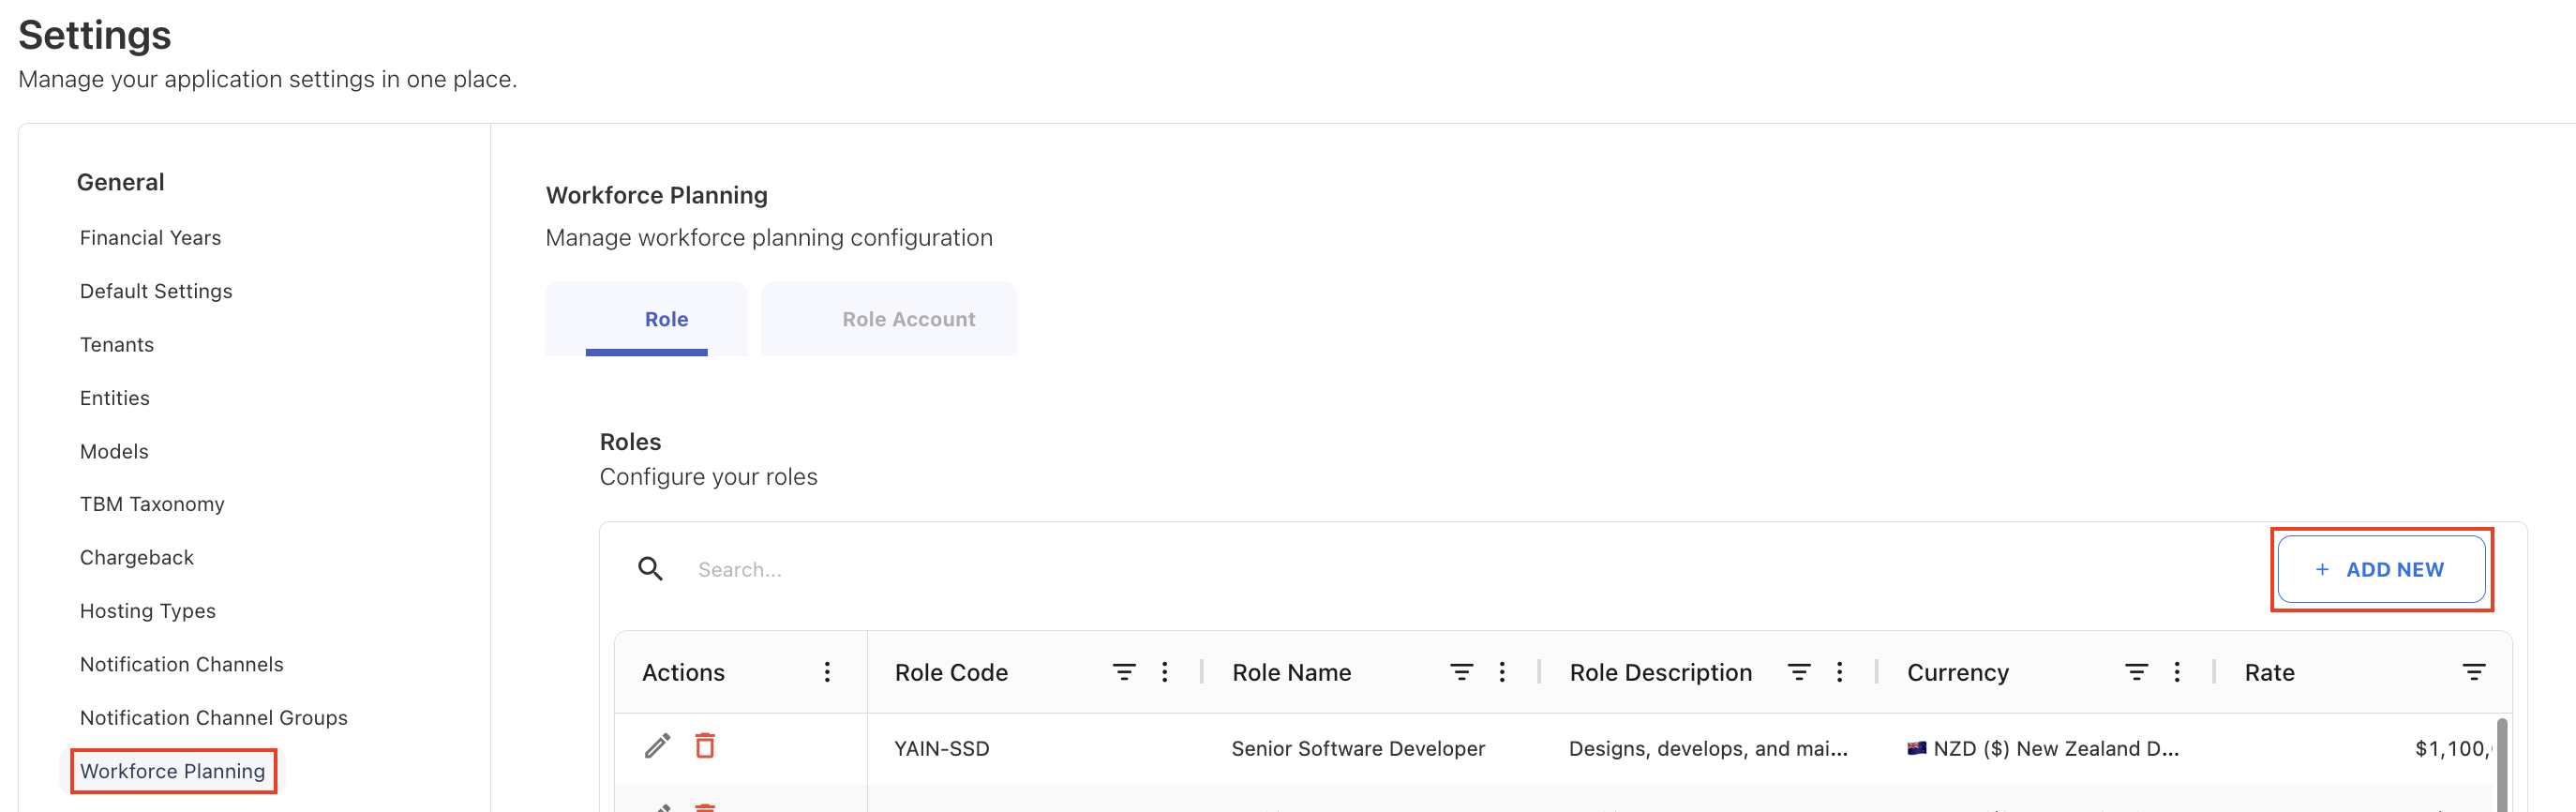
Click + Add New and enter:
-
Role Code
-
Role Name
-
Role Description, if needed
-
Rate
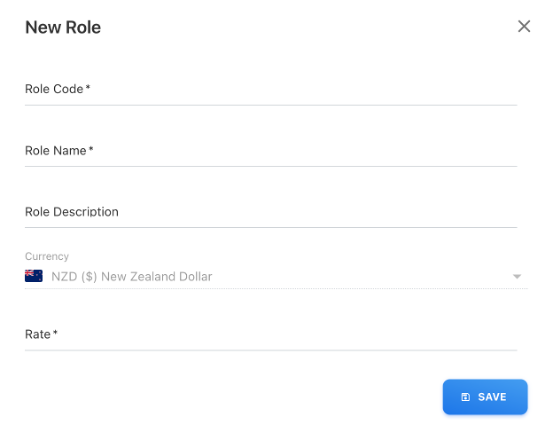
The Rate is the annual Base Compensation used for workforce cost calculation.
Now, once all valid details are entered, click SAVE.
Step 2: Map roles to accounts
Before you map roles to accounts, ensure that Accounts are configured in the Master Data
Go to:
Admin > Settings > Workforce Planning > Role Account
Click + Add New, select the role, and configure the account distribution.
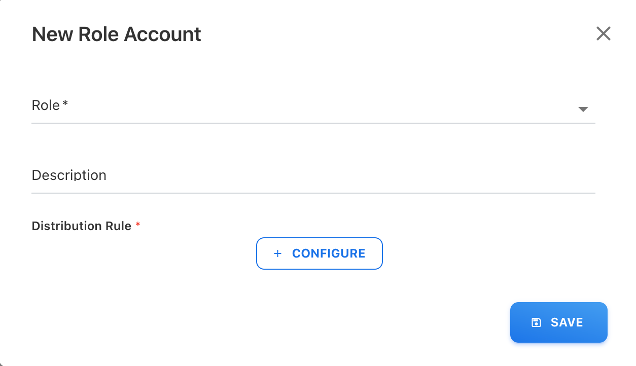
You can assign one or more accounts and enter the percentage for each account.
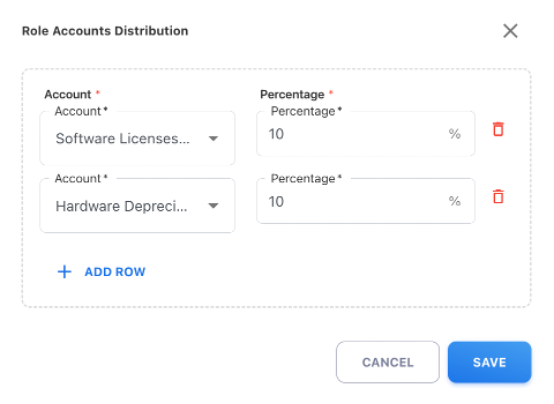
Click SAVE, after entering all details.
-
Total distribution can be greater than 100% (if required by financial modeling)
-
Each account receives cost based on its defined percentage