Create Chargeback
Chargeback refers to the practice of allocating the costs of IT services, resources, or assets to the business units or departments that use them.
Prerequisites:
To create the Chargeback, you should have:
-
Spend to be distributed upto the Business Units for the Month.
-
Default Chargeback Report should be selected in the Settings.
Creating Chargeback:
Steps for creating Chargeback’s in YäRKEN.
Step 1: Creating chargeback Report using Analytics.
There will be an chargeback report which has been selected by default in the settings. To create an report with specific filters for a chargeback follow the steps below.
Chargeback Reports can be created in the TBM Business Units sub menu option which is available under the Analytics menu.

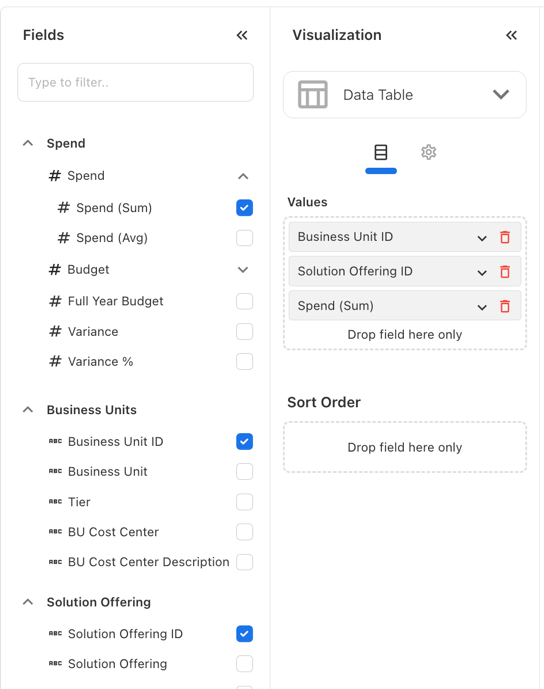
On TBM Business Units analytics create an report with specific filter reqirements for the chargeback.
Madatory Fields required in the report:
-
Business Units >> Business Unit ID.
-
Solution Offerings >> Solution Offering ID
-
Spend >> Spend >> Spend(Sum).
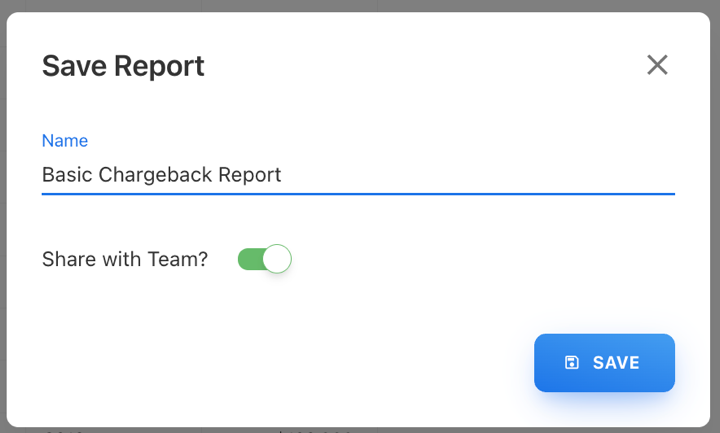
After creating the report to save the report click on the SAVE button on the top.

On the popup provide a name to the report and click SAVE button.
|
Analytics >> TBM Business Units |
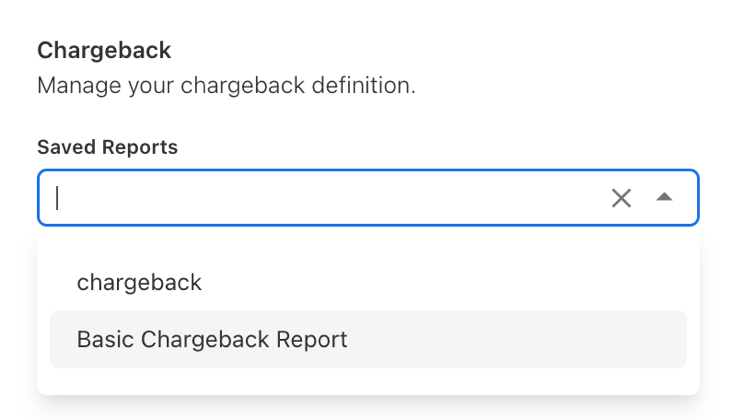
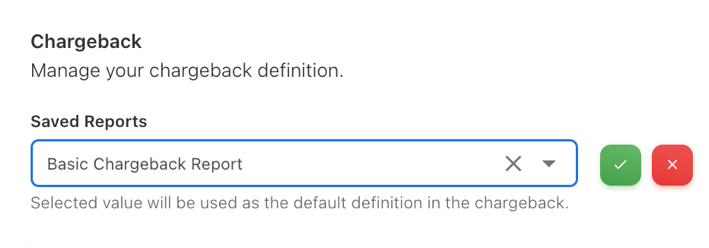
Step 2: Select the default chargeback report in Settings.
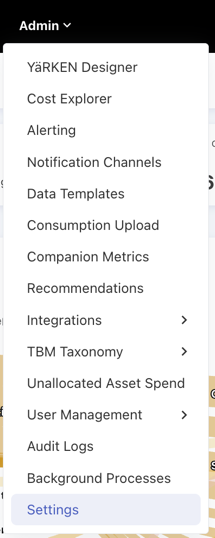
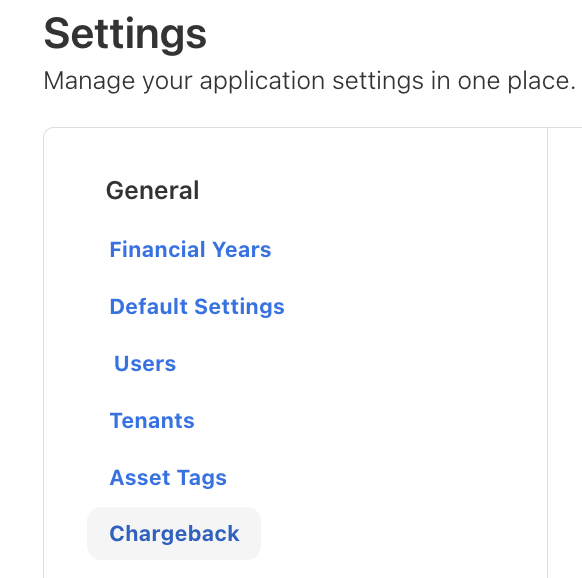
Chargeback settings can be accessed via the Settings sub menu options under the Admin menu.
In the Chargeback setting click the Saved Reports dropdown and select the chargeback report and click on the Tick Button.
|
Admin >> Settings >> Chargeback
|
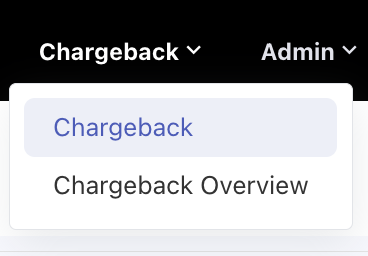
Step 3: Create Chargeback
Chargeback can be accessed via the Chargeback sub menu option under the Chargeback menu.
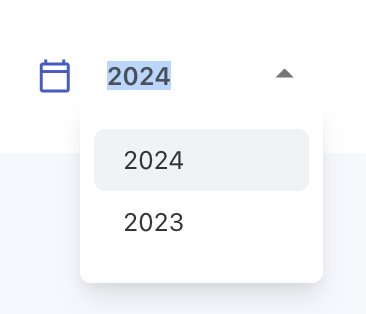
Select the Year from the year dropdown.
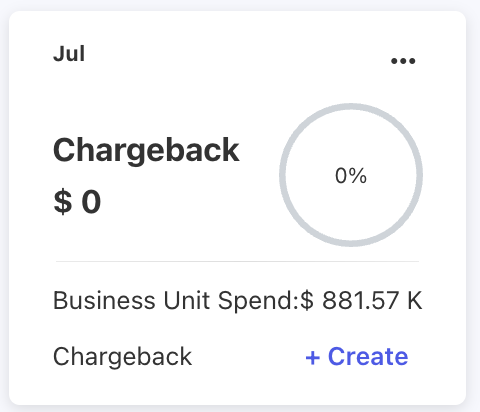
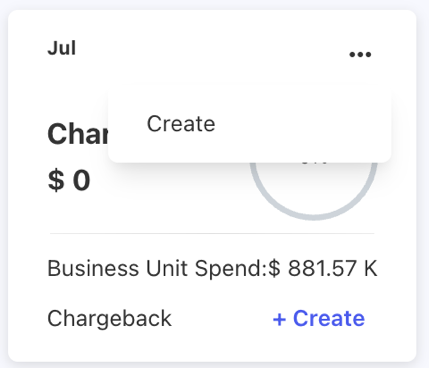
On the month card in which chargeback to be created, Click Either the +Create Button at the bottom left or Click the ellipsis (…) icon and click Create.
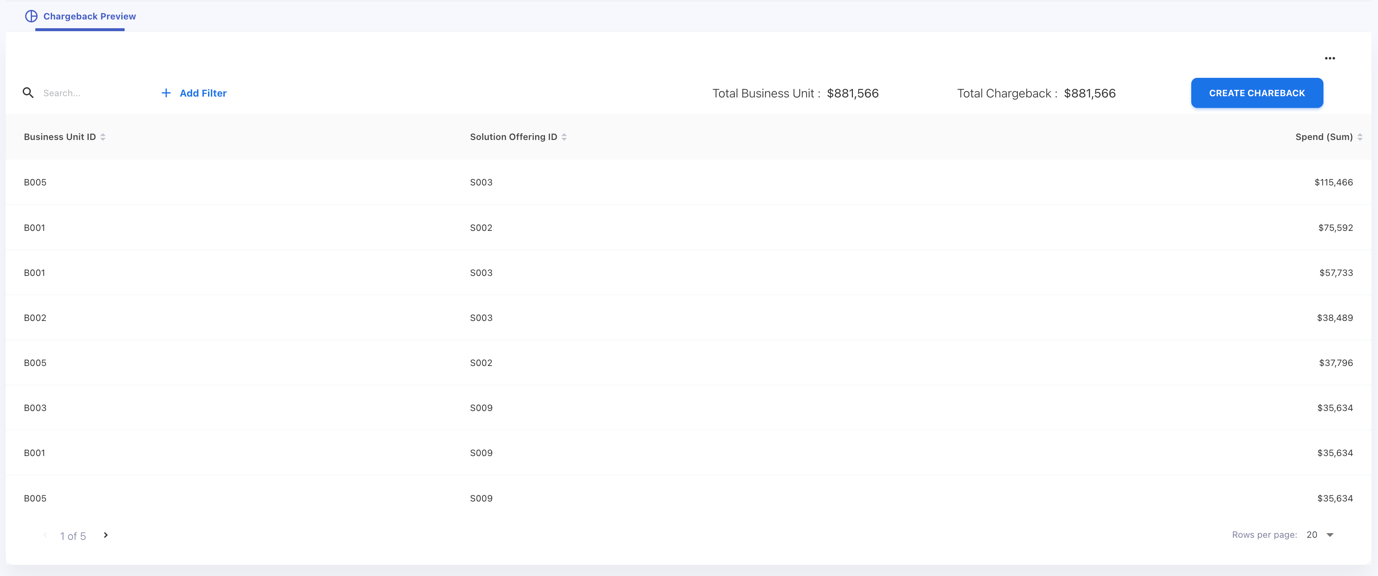
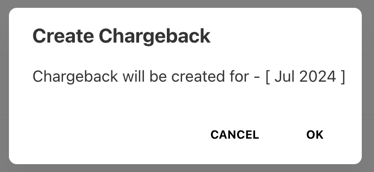
Review the data in the Chargeback Preview page and Click CREATE CHARGEBACK Button.
Click OK in the Popup Dialog.
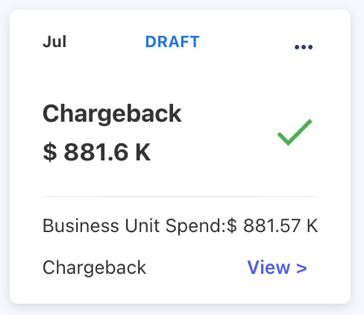
Once chargeback is created for a month in a year then that month will be locked completely.
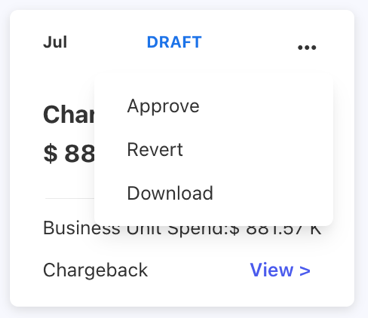
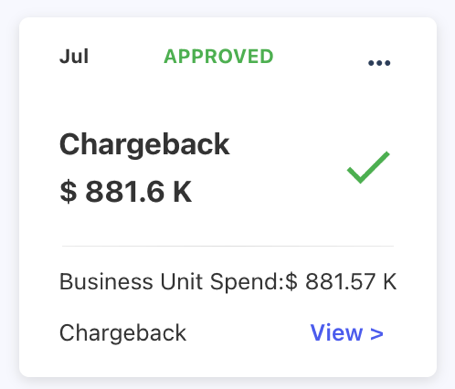
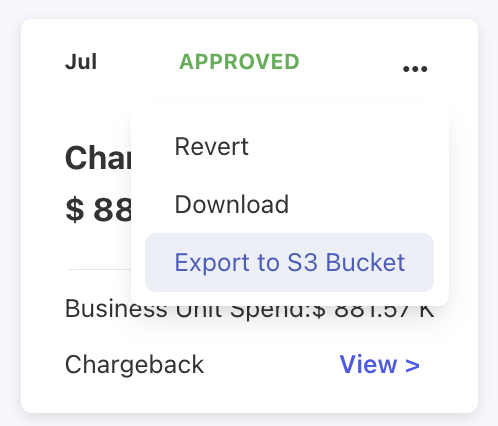
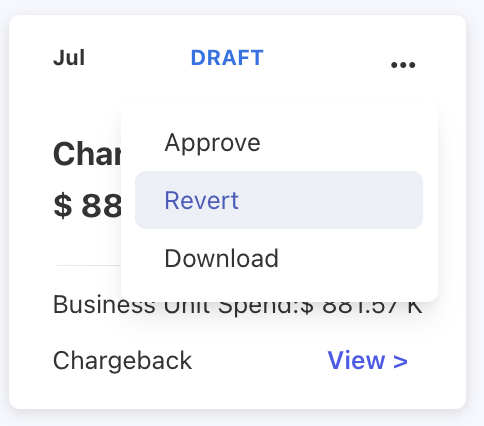
After the Chargeback is created, It will be in DRAFT status that can be Approved, Reverted or Downloaded under the ellipse (…) menu on month cards where the chargeback is created.
Chargeback can be Approved on view screen as well. Click on the View > Button and Click APPROVE CHARGEBACK button to approve a Chargeback.
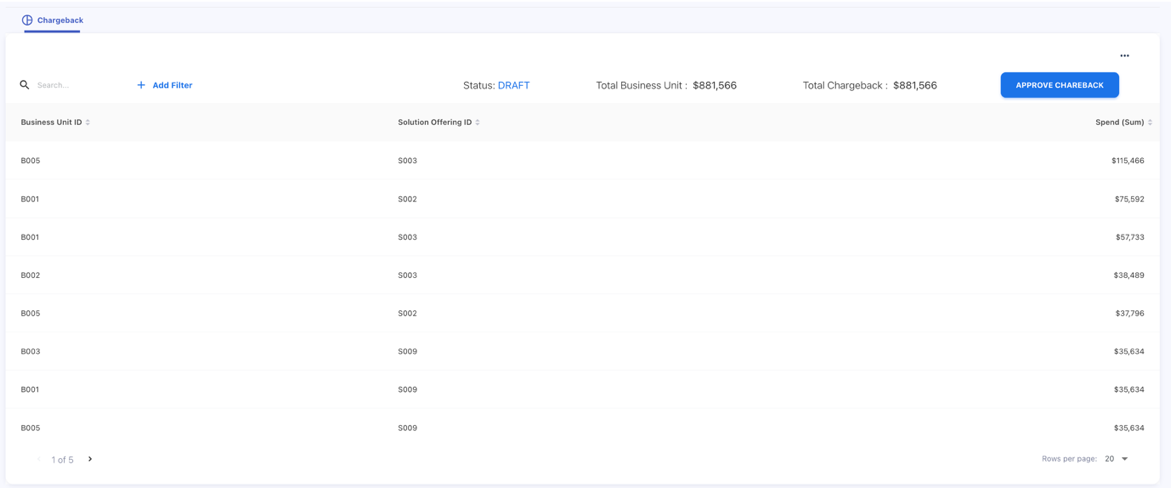
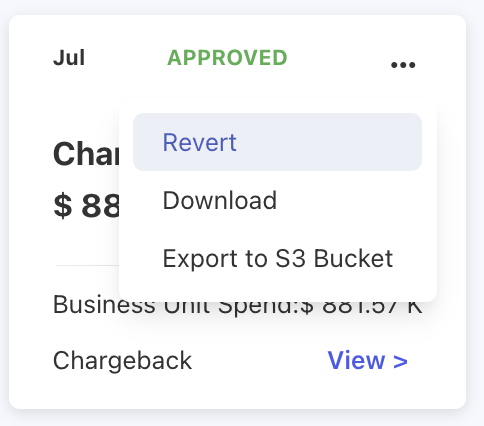
Once the Chargeback has been APPROVED, then the status of the chargeback will be moved to APPROVED and the chargeback can be Exported to S3 Bucket.
To Export the Chargeback into S3 Bucket. Click the ellipsis (…) icon and click Export to S3 Bucket.
On the Dropdown select the S3 Bucket to export the Chargeback and Click SAVE.
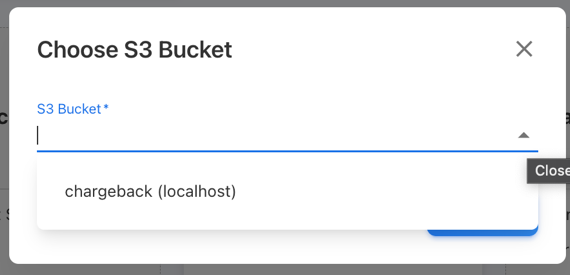
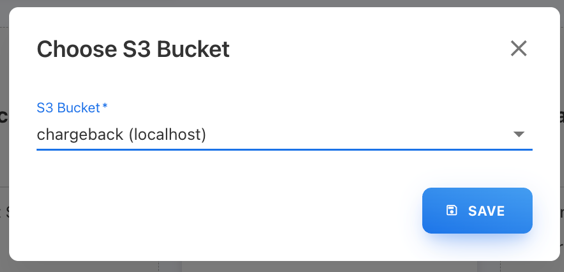
Then, an Alert message will be displayed with the status of the export.
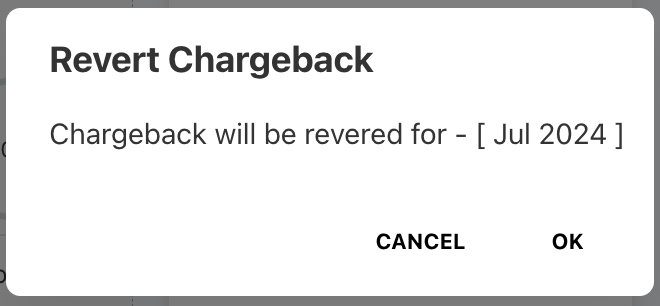
Created Chargeback can be Reverted either in DRAFT or APPROVED status. The Revert option can be found under the ellipse (…) menu on month cards where the chargeback is created. The revert function will revert the status and Delete the Chargeback created for that month.
Click OK in the Popup Dialog to revert the chargeback.