
Budget Process Owners can create a budget using multiple strategies, such as importing a budget file or creating a budget line by line. This allows you to define planned expenses and allocate costs efficiently.
Budget Process Owners can create budgets and forecasts from Planning > Budgets and Forecast.
A budget or forecast can be created by:
-
Adding items manually
-
Importing a CSV file
-
Loading values from Cost Transparency
-
Creating an empty plan for Budget Contributors to complete
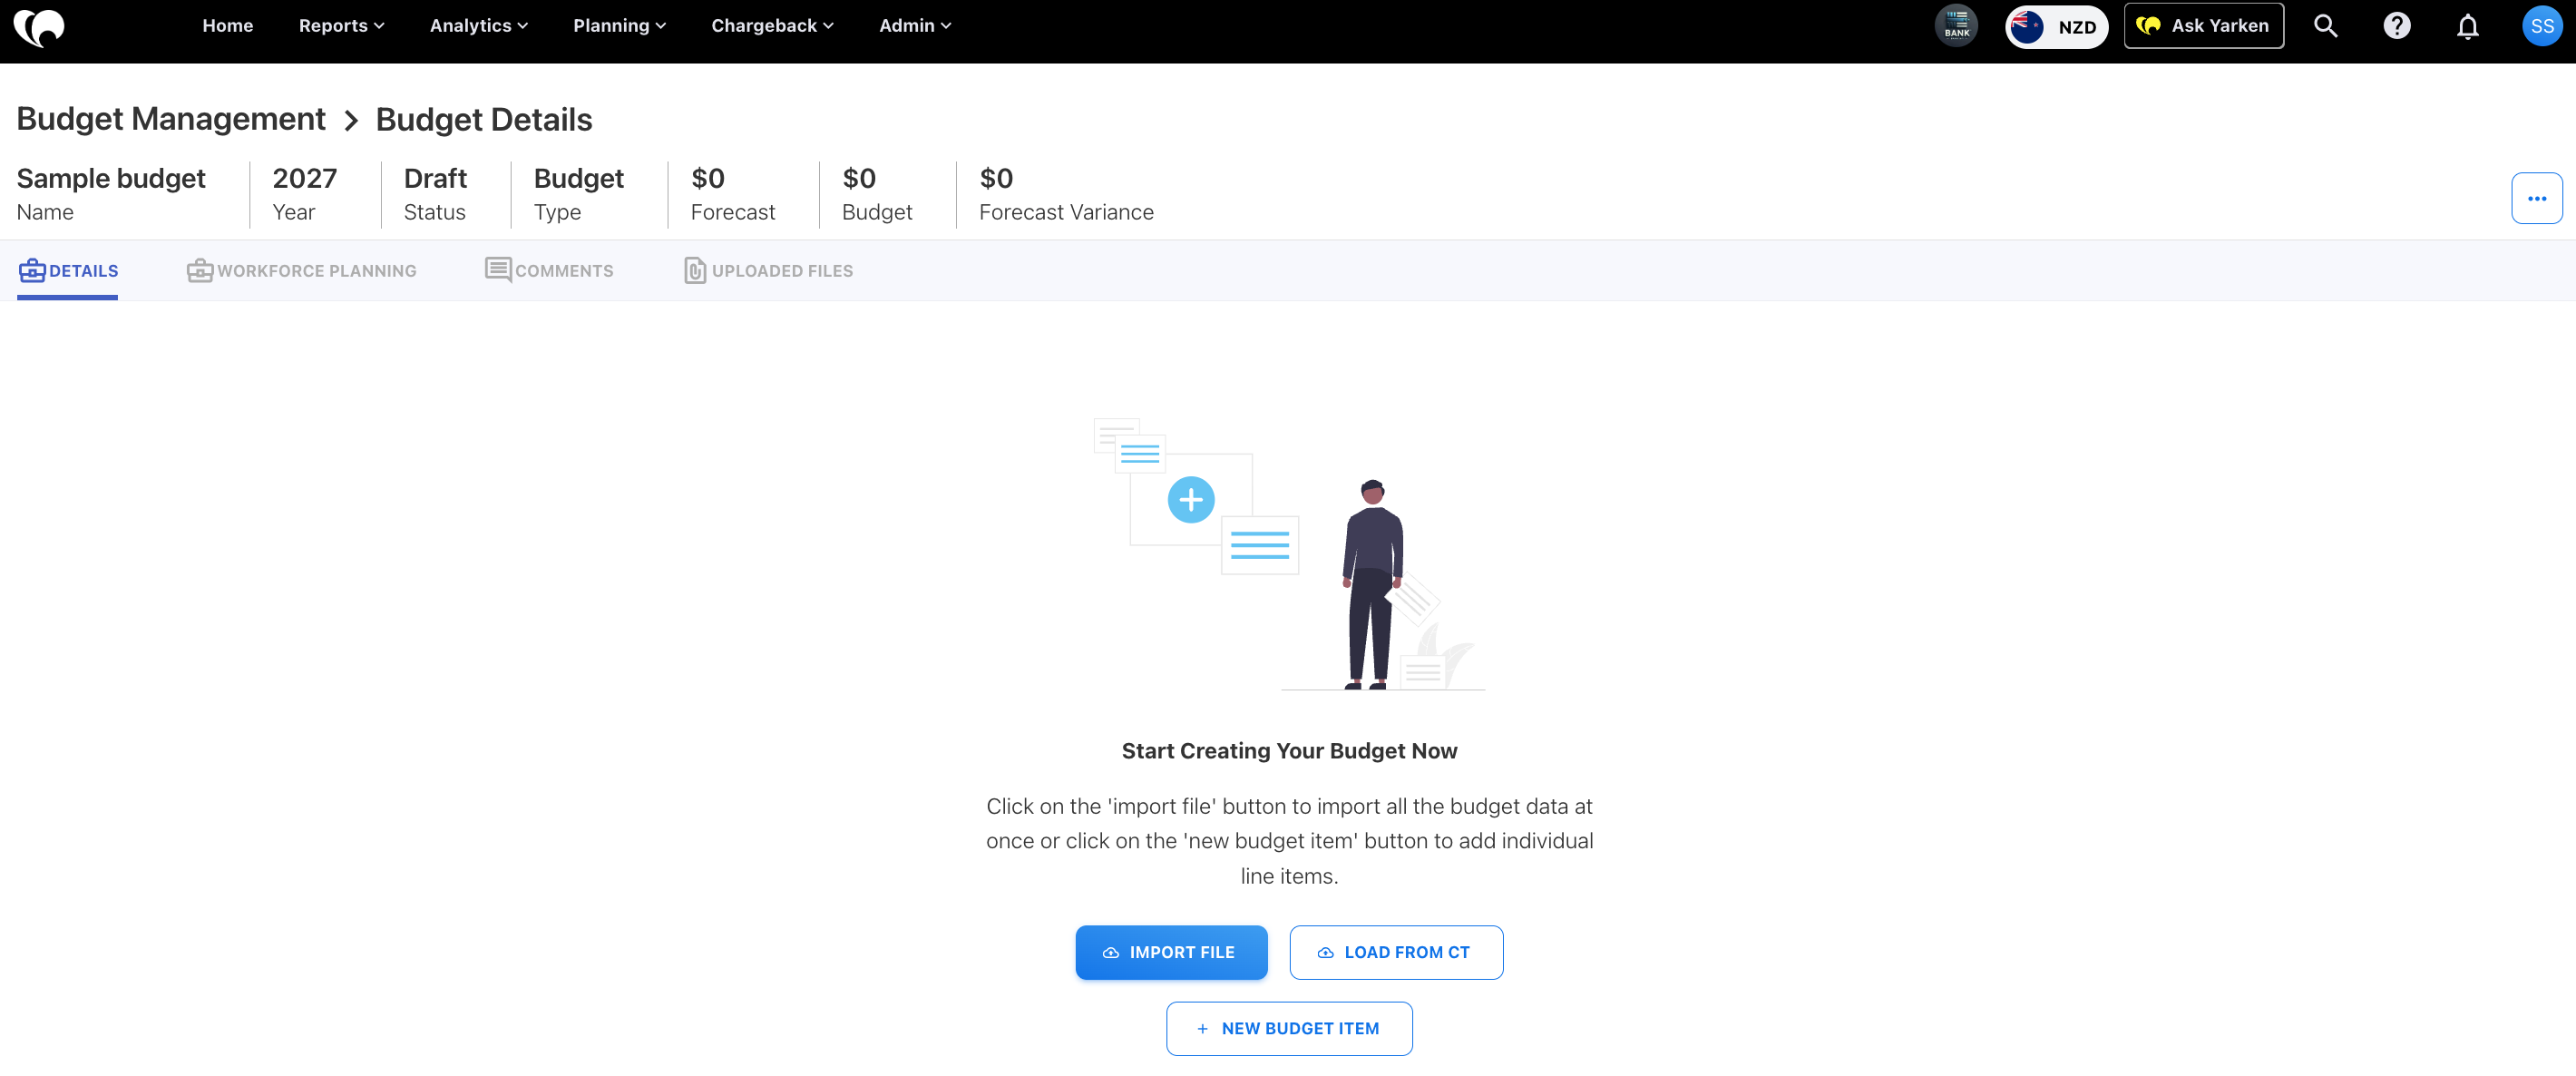
Create a budget
Use a budget to define planned spend for a fiscal year.
Before you begin
Make sure the required financial year is already configured in settings. The application only displays years that are defined as financial years.
If you need to plan in a foreign currency, make sure the Currency field is enabled in Settings > Form Configuration and that planning exchange rates are configured for all required months before creating the budget. For more information, refer Form Configuration.
Procedure
-
Go to Planning > Budgets and Forecast.
-
Select + New Budget / Forecast.
-
Enter the budget name.
-
Select the budget year.
-
Select Budget as the type.
-
Optional: enable CPI or LPI and enter the percentage.
-
Select Save.
The Budget Details page opens. From here, you can add items manually, import a file, load values from Cost Transparency, or create an empty budget for contributors.
Create a forecast
Use a forecast to estimate expected spend for a fiscal year or remaining period.
Note: If forecast values must be entered in a foreign currency, enable the Currency field from Settings > Form Configuration and configure planning exchange rates for all required months before creating the forecast. For more information, refer Form Configuration.
Procedure
-
Go to Planning > Budgets and Forecast.
-
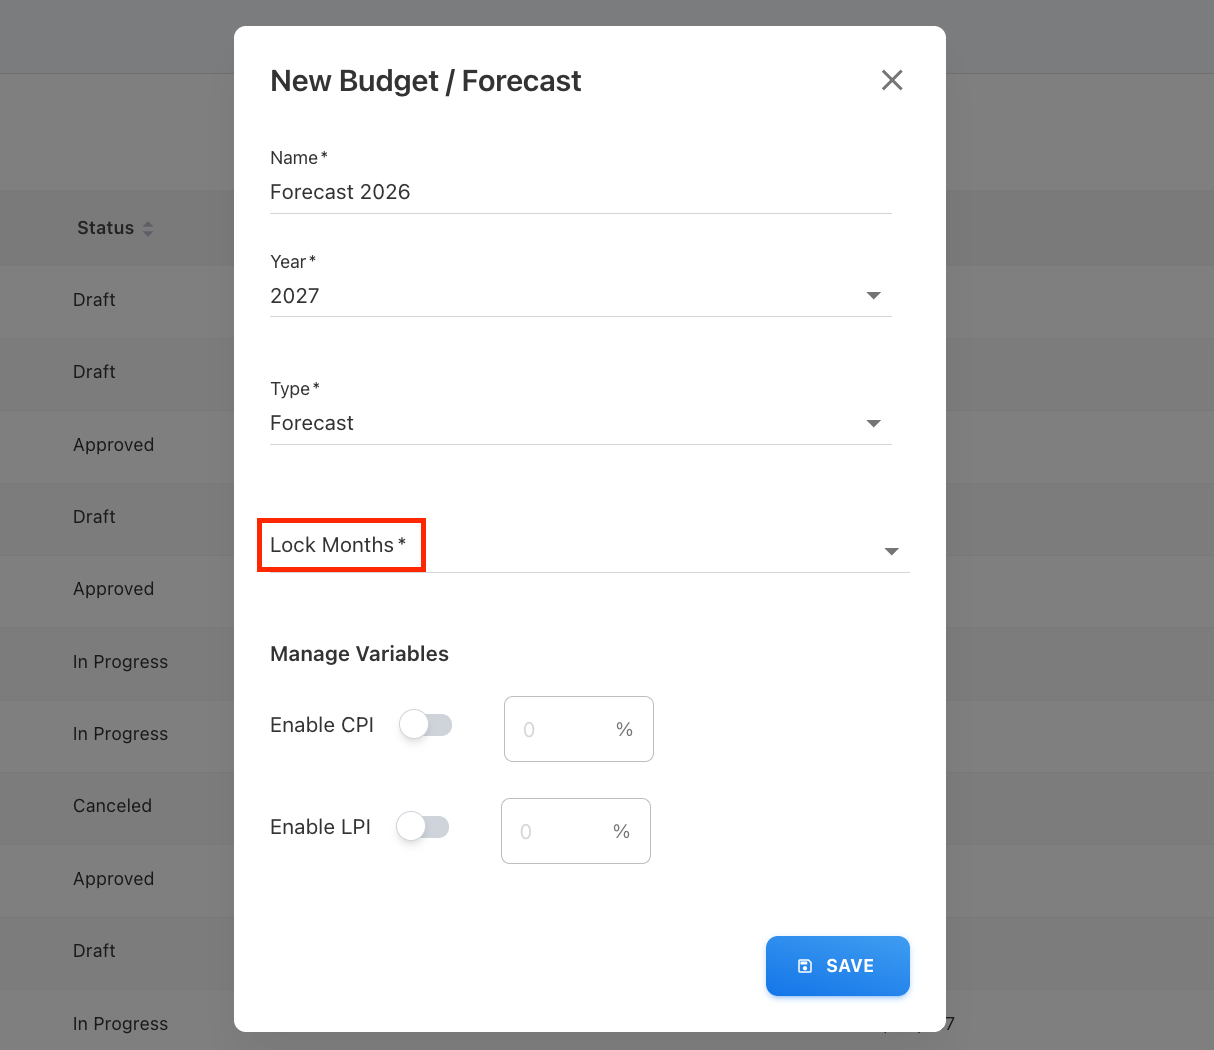
Select + New Budget / Forecast.
-
Enter the forecast name.
-
Select the forecast year.
-
Select Forecast as the type.
-
Select the Lock Month.
-
Optional: enable CPI or LPI and enter the percentage.
-
Select Save.
The Forecast Details page opens. From here, you can add forecast items manually, import a file, load values from Cost Transparency, or create an empty forecast for contributors.
What is Lock months
When creating a forecast, you can select a lock month. The selected lock month restricts forecast entries from the beginning of the financial year through the selected month.
For example, if the financial year starts in January and you select May as the lock month, entries from January through May are locked.
Add items manually
Use manual entry when you want to create individual budget or forecast line items.
Required fields
Each budget or forecast item must include:
-
Expense type
-
Cost center
-
Account
-
Entity
Optional fields
You can also include:
-
Vendor
-
SKU
-
Cost Pool, Sub Cost Pool, Tower, and Sub Tower
-
Assumption
-
Monthly budget values
Additional fields, such as Currency, may appear depending on your organization’s Form Configuration settings.
Procedure
-
Open the Budget Details or Forecast Details page.
-
Select + New Budget Item or + New Forecast Item.
-
Enter the required item details.
-
Add optional vendor, assumption, or month-wise expenditure details if needed.
-
Select Save.
The item is added to the details page. Use Show Detailed View to view the monthly breakdown.
Import items from a file
Use file import to add multiple budget or forecast items at once.
The Budget Planning template is available from Admin > Data Dictionary.
Before you begin
Prepare a CSV file with the required fields:
-
Expense type
-
Cost center
-
Account
-
Entity
You can also include optional fields such as:
-
Vendor
-
SKU
-
Cost Pool, Sub Cost Pool, Tower, and Sub Tower
-
Assumption
-
Monthly budget values
Procedure
-
Open the Budget Details or Forecast Details page.
-
Select + Import File.
-
Browse for the file or drag and drop it into the upload area.
-
Preview the uploaded data.
-
Select Next.
-
Map the required fields.
-
Select Finish.
After the file is imported, you can edit, delete, or add items as needed.
Load from Cost Transparency
Use Load from CT to generate budget or forecast values from existing Cost Transparency data, primarily from the budget or forecast model.
Load a budget from CT
When loading a budget:
-
The application first pulls January to December values from the previous year’s budget available in the budget model.
Load a forecast from CT
When loading a forecast:
-
The application fills locked months with actual spend of selected year from CT.
-
The application then pulls remaining months from the current year’s forecast in CT, or from the budget if no forecast baseline exists.
What happens after data is loaded from CT
After budget or forecast data is loaded from Cost Transparency, the application populates the monthly values on the Budget Details or Forecast Details page.
The application then uses those monthly values to automatically calculate the following columns:
|
Column |
Description |
|---|---|
|
Latest Budget or Latest Forecast |
The total value calculated from the monthly budget or forecast values. |
|
Latest vs Baseline |
The difference between the latest value and the baseline value. |
|
Latest vs Previous |
The difference between the latest value and the previous forecast or previous planning value. |
These calculated columns are read-only and are updated by the application when budget or forecast data is added, imported, loaded from CT, or edited.
For more information, see Understand budget and forecast calculated columns.
Related content