
Yarken uses Okta group membership to determine the roles and permissions assigned to a user during authentication.
Before creating the OIDC application, create Okta groups for the Yarken roles your organization plans to use, then assign users to the appropriate groups.
Available Yarken roles
The following roles are supported:
-
Admin
-
Cost Model Manager
-
Power User
-
Viewer
-
Dashboard Only
-
No Role
-
Budget Process Owner
-
Budget Contributor
-
Chargeback Approver
-
Cloud Engineer
-
Cloud Cost Owner
For detailed permissions, see Yarken roles and access reference.
Plan your Okta groups
Create a separate Okta group for each Yarken role your organization uses.
The source guide recommends the following naming convention:
|
Yarken role |
Suggested Okta group |
|---|---|
|
Admin |
Yarken Admin |
|
Power User |
Yarken Power User |
|
Viewer |
Yarken Viewer |
|
Dashboard Only |
Yarken Dashboard Only |
|
Budget Process Owner |
Yarken Budget Process Owner |
|
Budget Contributor |
Yarken Budget Contributor |
|
Chargeback Approver |
Yarken Chargeback Approver |
Best practice: Use a consistent naming convention for all Yarken groups. Consistent names make administration easier and help you identify role assignments at a glance.
Note: The table shows example Okta group names for selected Yarken roles. If you create groups for other Yarken roles, use the same naming approach and ensure the group names match the Groups claim filter configured for the integration.
Create an Okta group
-
Sign in to the Okta Admin Console using an administrator account.
-
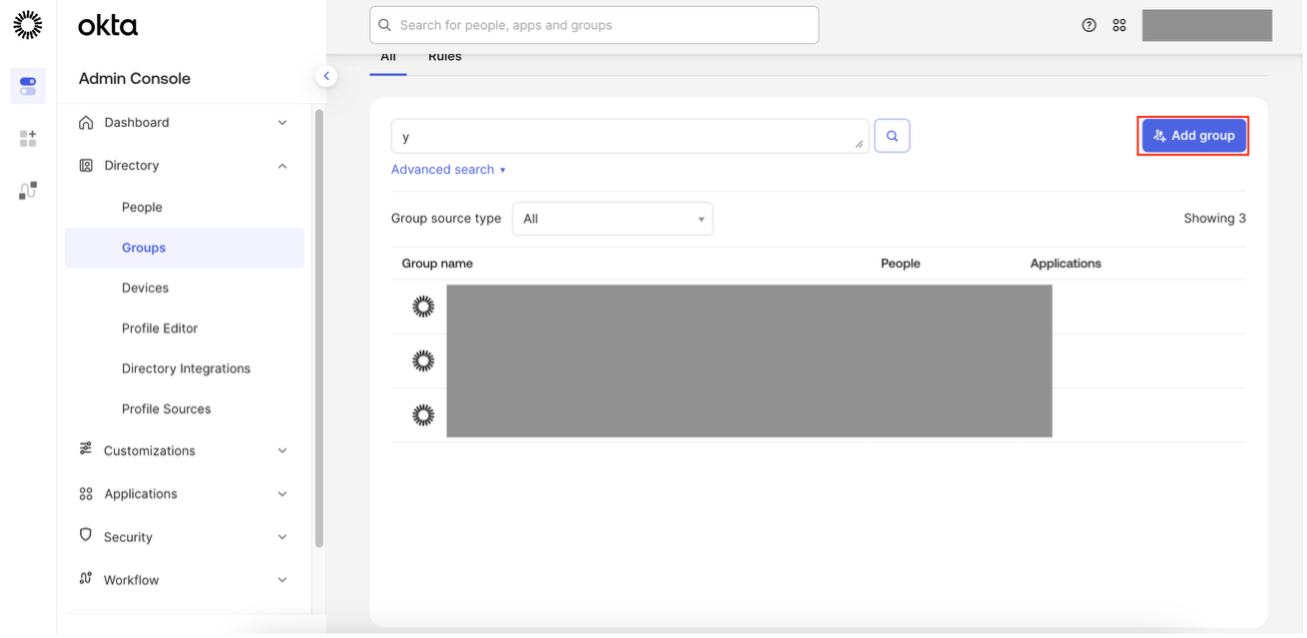
Go to Directory > Groups.
-
Select Add group.
-
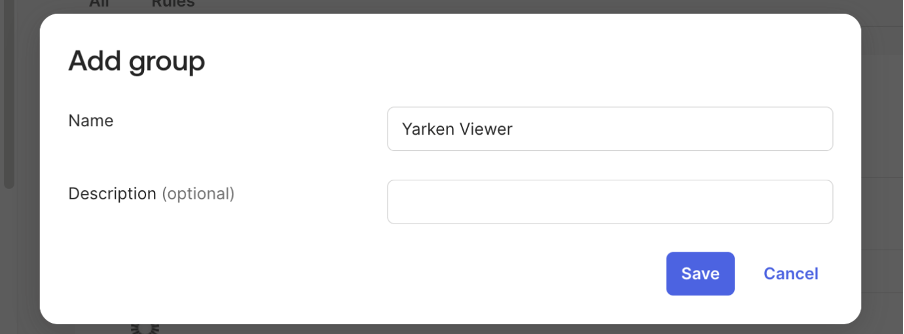
Enter a Name for the group.
-
Optional: Enter a Description that explains the purpose of the group.
-
Select Save.
The group is now available for user assignments.
Repeat these steps for each Yarken role group your organization requires.
Assign users to a group
After creating the groups, assign users based on the access they require in Yarken.
-
In the Okta Admin Console, open the group.
-
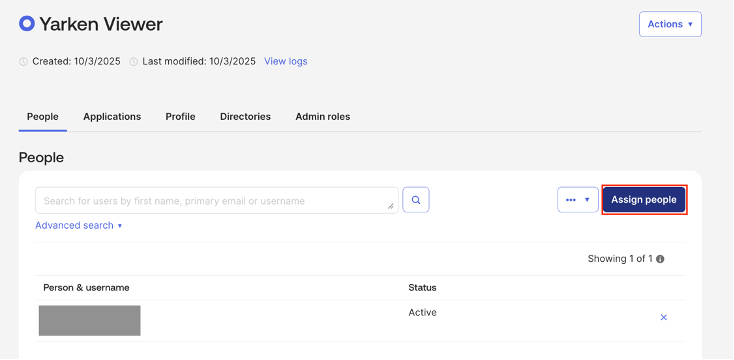
Select the People tab.
-
Select Assign people.
-
Search for a user by name or email address.
-
Select one or more users.
-
Select Save.
The selected users are added to the group.
Note: A user can belong to multiple Okta groups. If a user requires multiple responsibilities in Yarken, assign the user to multiple role groups. Yarken combines the assigned roles during authentication.
Best practices
-
Create one Okta group for each Yarken application role you use.
-
Follow a consistent group naming convention.
-
Assign users through groups instead of directly to the application.
-
Plan role assignments before enabling SSO organization-wide.
Next step
Create and configure the Yarken OIDC application in Okta
Related content