
Create an OpenID Connect application in Okta to authenticate users to Yarken. You'll configure the Yarken redirect URIs, assign the appropriate groups, and create a Groups claim so Yarken can determine each user's role-based access.
Before you begin
Make sure that:
-
You've created the required Yarken role groups in Okta.
-
You've assigned users to the appropriate groups.
-
You have the Sign-in Redirect URI provided by Yarken.
-
You have the Sign-out Redirect URI provided by Yarken.
-
Your Okta account can create applications and configure authorization server claims.
Create the OIDC application
-
In the Okta Admin Console, go to Applications > Applications.
-
Select Create App Integration.
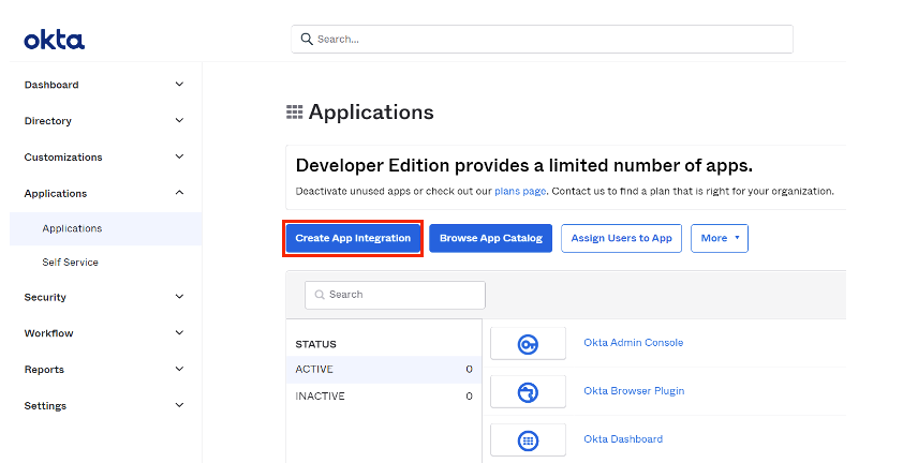
The Create a new app integration window opens.
-
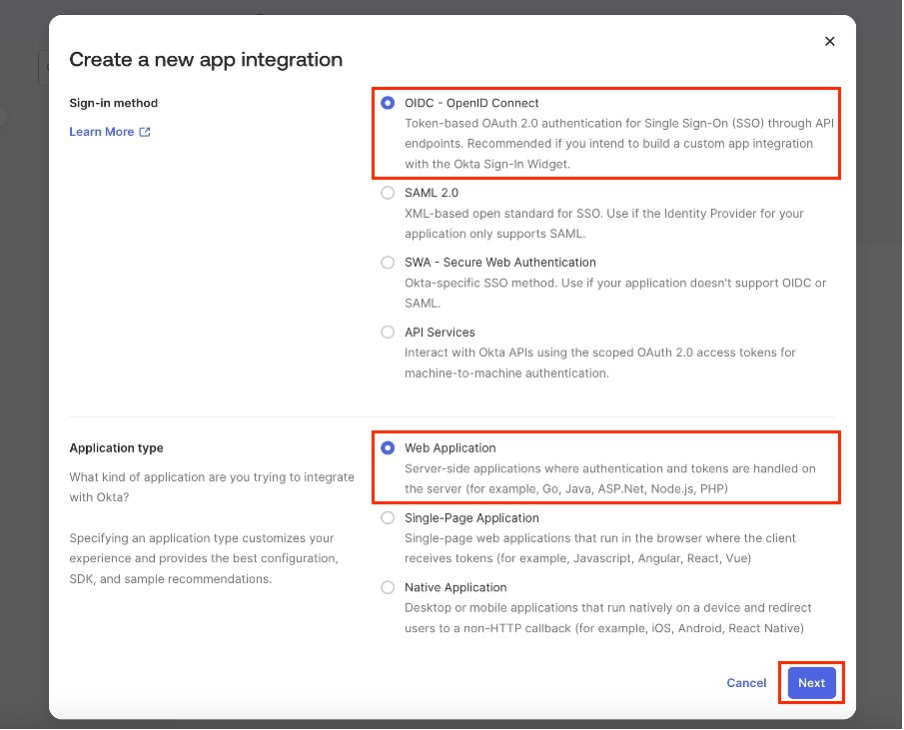
For the sign-in method, select OIDC – OpenID Connect.
-
For Application type, select Web Application.
-
Select Next.
The application configuration page opens.
Configure the application
-
Enter an App integration name, for example,
Yarken Test App. -
In Sign-in redirect URIs, select + Add URI, then enter the Sign-in Redirect URI provided by Yarken.
Example:
https://<your-subdomain>.yarken.com/auth/login/oidc/callback -
In Sign-out redirect URIs, select + Add URI, then enter the Sign-out Redirect URI provided by Yarken.
Example:
https://<your-subdomain>.yarken.com/auth/logout
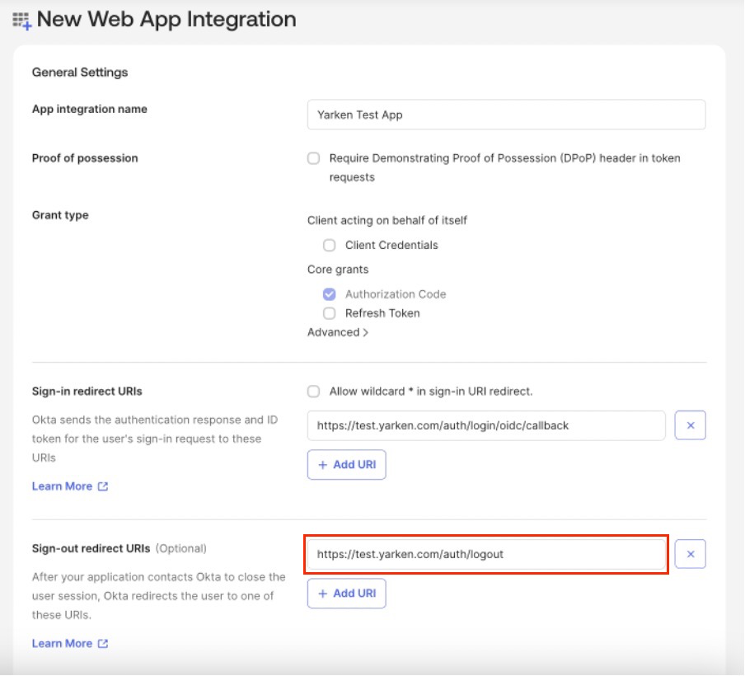
Important: The URLs above are examples. Use the redirect URIs provided by the Yarken implementation team for your environment.
-
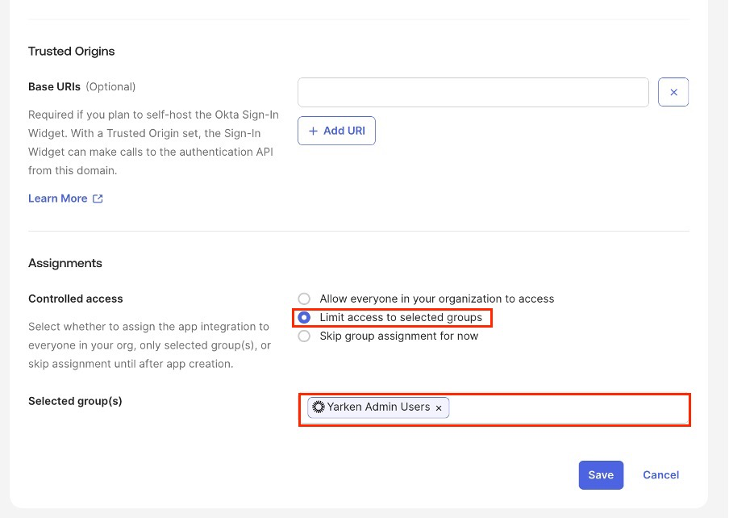
In Assignments, select Limit access to selected groups.
-
Assign the appropriate Yarken role group or groups to the application.
-
Select Save.
Okta creates the OIDC application and opens its General page. You can edit the assigned groups later if required.
Create the Groups claim
To enable role-based access in Yarken, configure Okta to include the user's group membership information in the ID token. Yarken uses this information to map authenticated users to the appropriate Yarken roles.
Yarken supports Groups claims configured using either a custom authorization server or the org authorization server. The configuration steps differ depending on the authorization server used in your Okta environment.
Use the applicable procedure described in this section.
Configure the Groups claim using a custom authorization server
To create the claim,
-
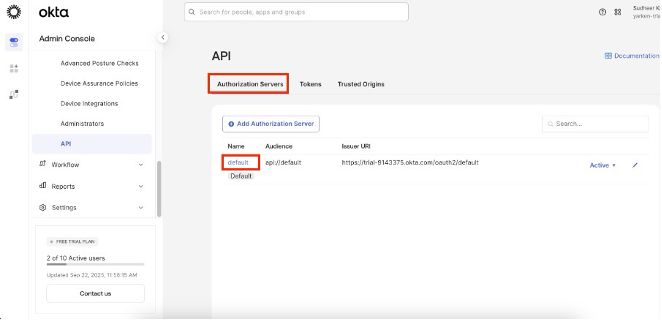
In the Okta Admin Console, go to Security > API.
-
Select the Authorization Servers tab.
-
Select the default custom server.
-
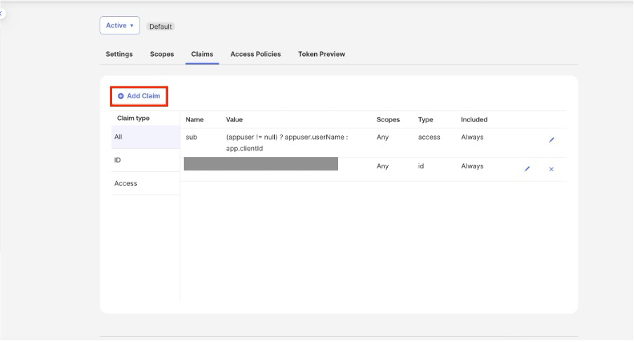
Open the Claims tab.
-
Select Add Claim.
-
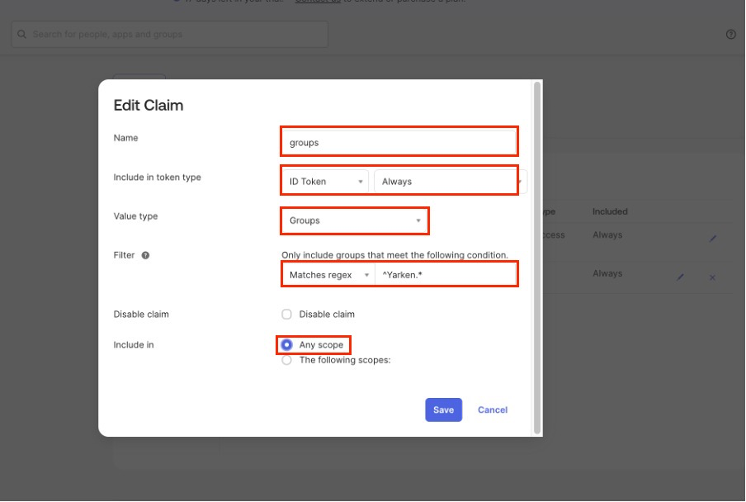
Configure the claim as follows:
|
Setting |
Value |
|---|---|
|
Name |
Enter a claim name, for example, |
|
Include in token type |
Select ID Token and Always |
|
Value type |
Groups |
|
Filter |
Select Matches regex and enter |
|
Disable claim |
Leave unselected |
|
Include in |
Any scope |
-
Select Save.
Important: Enter the regular expression exactly as ^Yarken.*. It uses a caret (^), period (.), and asterisk (*).
Configure the Groups claim using org authorization server
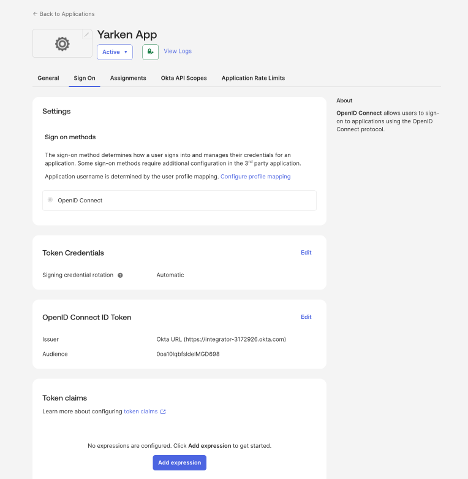
If your Okta environment uses the org authorization server, configure the Groups claim directly in the Yarken OIDC application. The Groups claim includes the user's Yarken-related Okta groups in the ID token, which Yarken uses to determine the user's application roles.
To configure the Groups claim,
-
In the Okta Admin Console, navigate to Applications > Applications.
-
Select the OIDC application that you created for Yarken.
-
Select the Sign On tab.
-
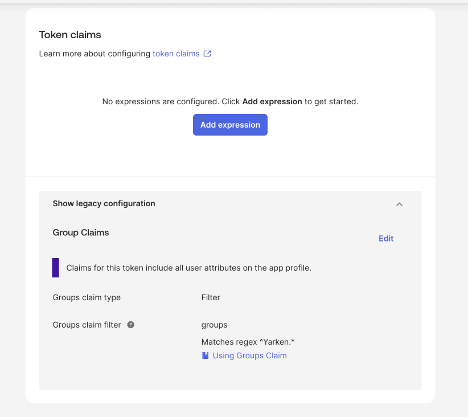
Scroll to the Token claims section.
-
Click Add expression.
-
Expand Show legacy configuration.
-
Under Group Claims, click Edit.
-
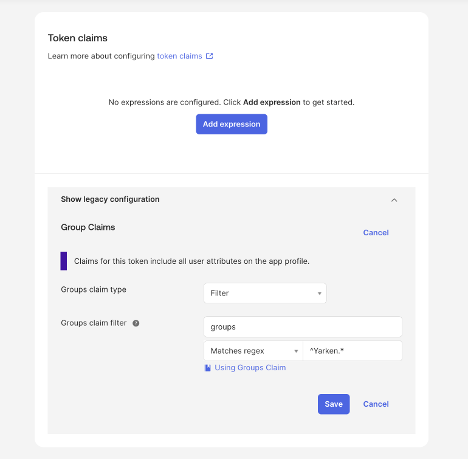
Configure the Groups claim as follows:
-
-
Groups claim type: Select Filter.
-
Groups claim filter: Enter groups.
-
Filter condition: Select Matches regex.
-
Filter Value: Enter ^Yarken.*
-
-
Click Save.
The Groups claim is configured to include groups whose names begin with Yarken in the ID token.
Note: Ensure that the Okta groups used for Yarken follow the Yarken naming convention. For example, Yarken Admin, Yarken Power User, and Yarken Viewer match the ^Yarken.* filter.
Next step
Share Okta application details with Yarken
Related content