
Use this article if you are an Admin responsible for setting up Workforce Planning before users create workforce plans.
Configuration overview
Workforce Planning configuration controls how headcount turns into financial budget or forecast values.
There are two required configuration steps:
-
Create workforce roles and rates.
-
Map roles to financial accounts.
Roles define what is being planned. Account mappings define where calculated costs should be posted.
You can configure Roles and Role Accounts in two ways:
-
Add records manually using + ADD NEW
-
Import records in bulk using the UPLOAD option
You can also download existing Roles and Role Account data for review, backup, or bulk updates.
Step 1: Configure Roles
Roles represent standard workforce types used for planning. Each role must have a rate. The rate is treated as annual base compensation and is used to calculate monthly cost.
Prerequisite
You need Admin access to create or manage workforce roles.
Navigation
Go to:
Admin → Settings → Workforce Planning → Roles
Option 1: Add Roles manually
-
Open Admin.
-
Select Settings.
-
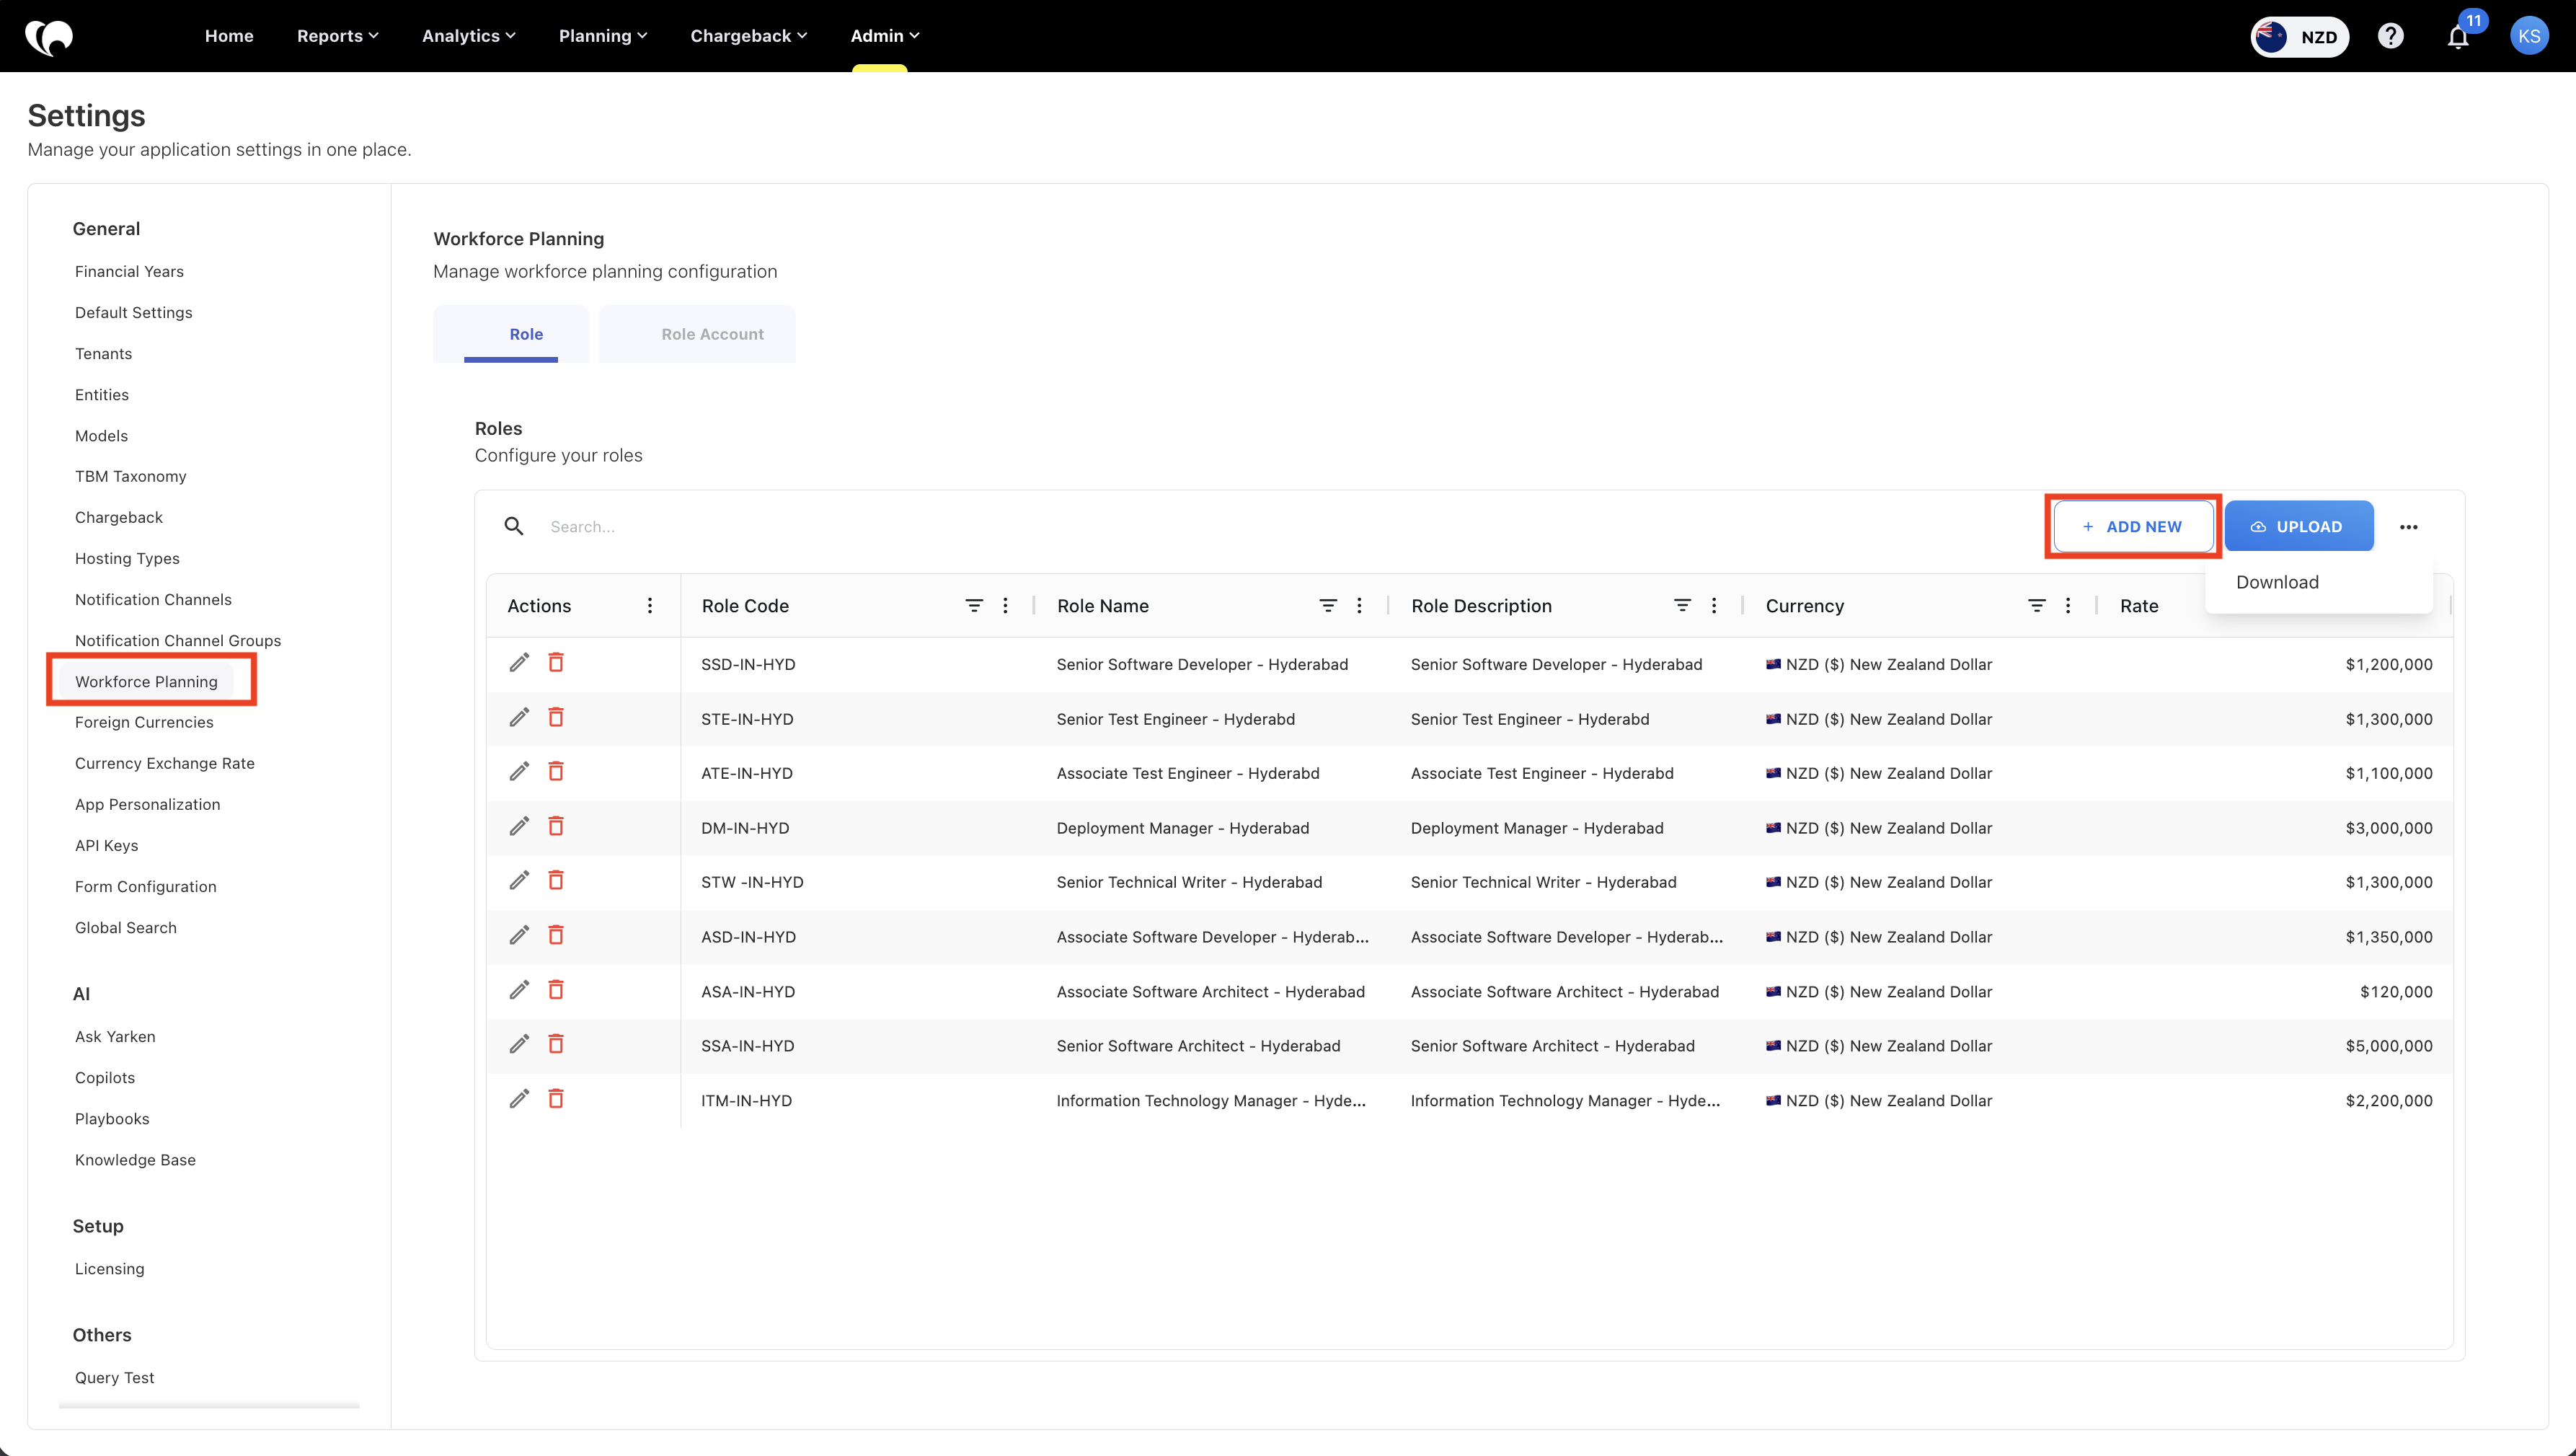
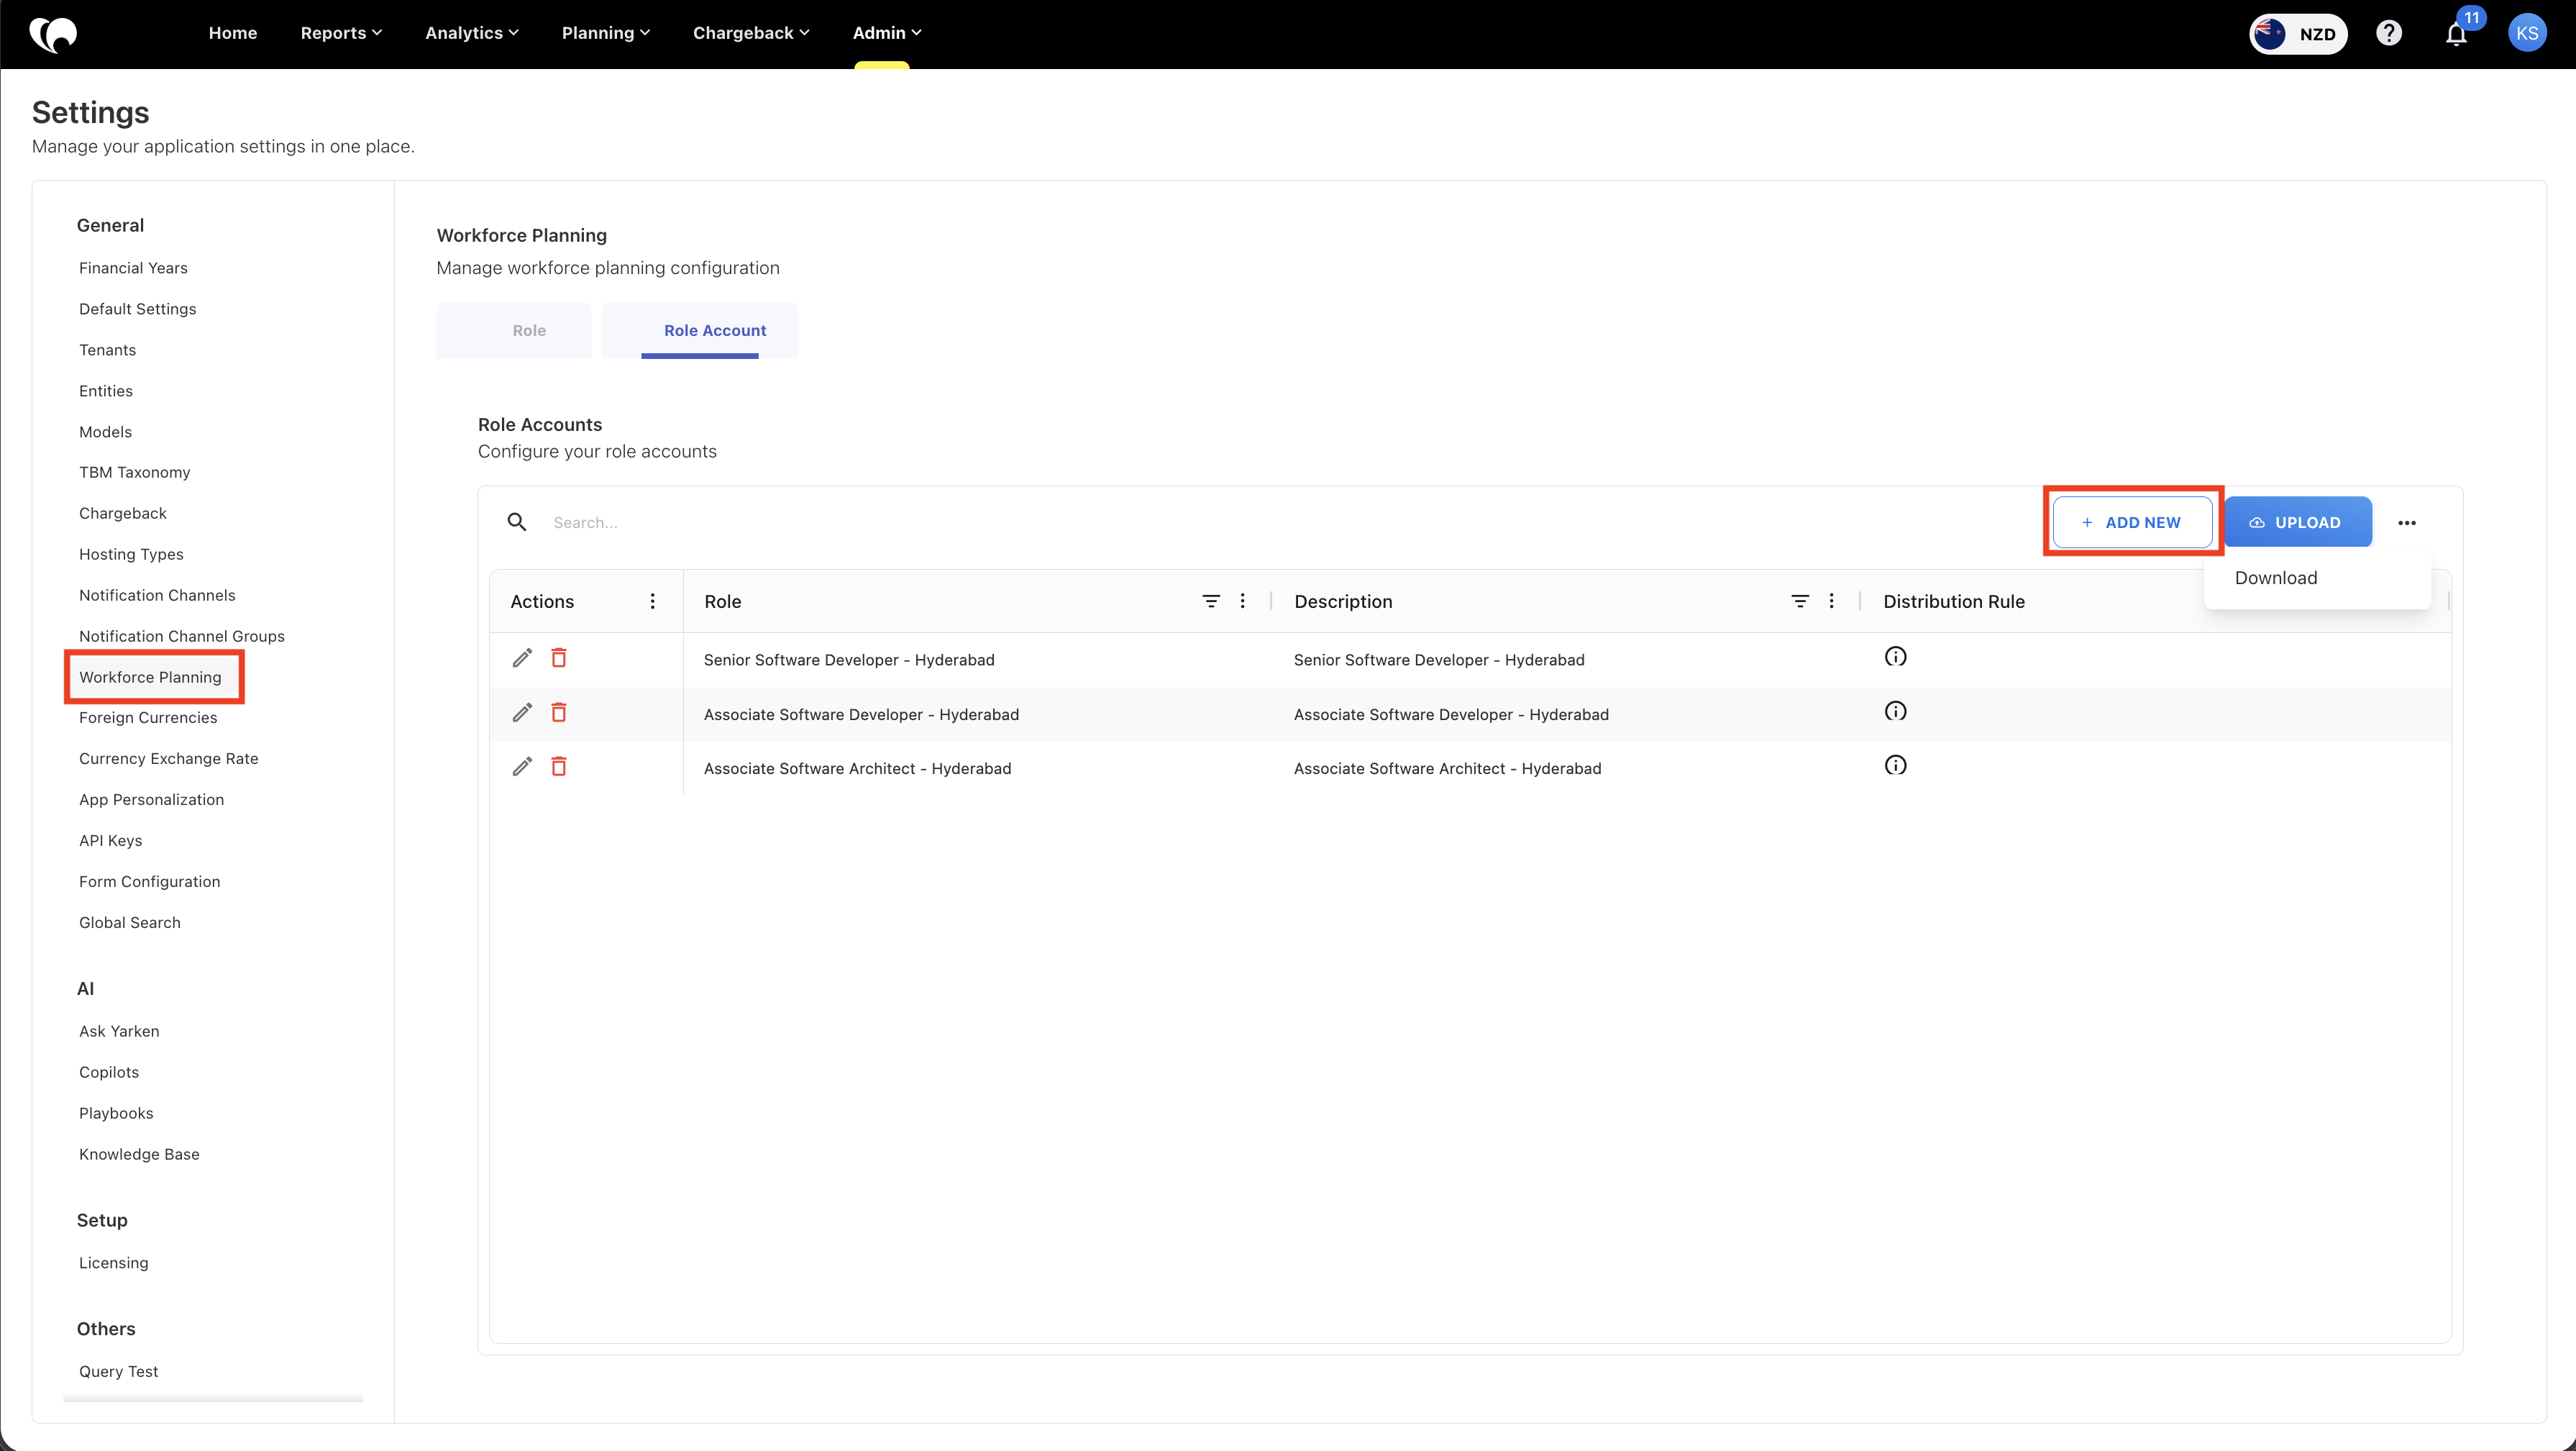
From the left pane, select Workforce Planning.
-
Open the Roles tab.
-
Click + ADD NEW.
-
Enter the role details.
-
Click SAVE.
Field guidance
|
Field |
Description |
Guidance |
|---|---|---|
|
Role Code |
Unique identifier for the role |
Use a stable code that is easy to recognize, such as SE-SR or VENDOR-DEV |
|
Role Name |
Display name for planners |
Use a clear business name, such as Senior Software Developer |
|
Role Description |
Optional role description |
Add context when similar roles exist |
|
Rate |
Annual cost in base currency |
Enter the annual amount used for planning calculations |
|
Currency |
Currency used for the role rate |
Select the applicable currency for planning |
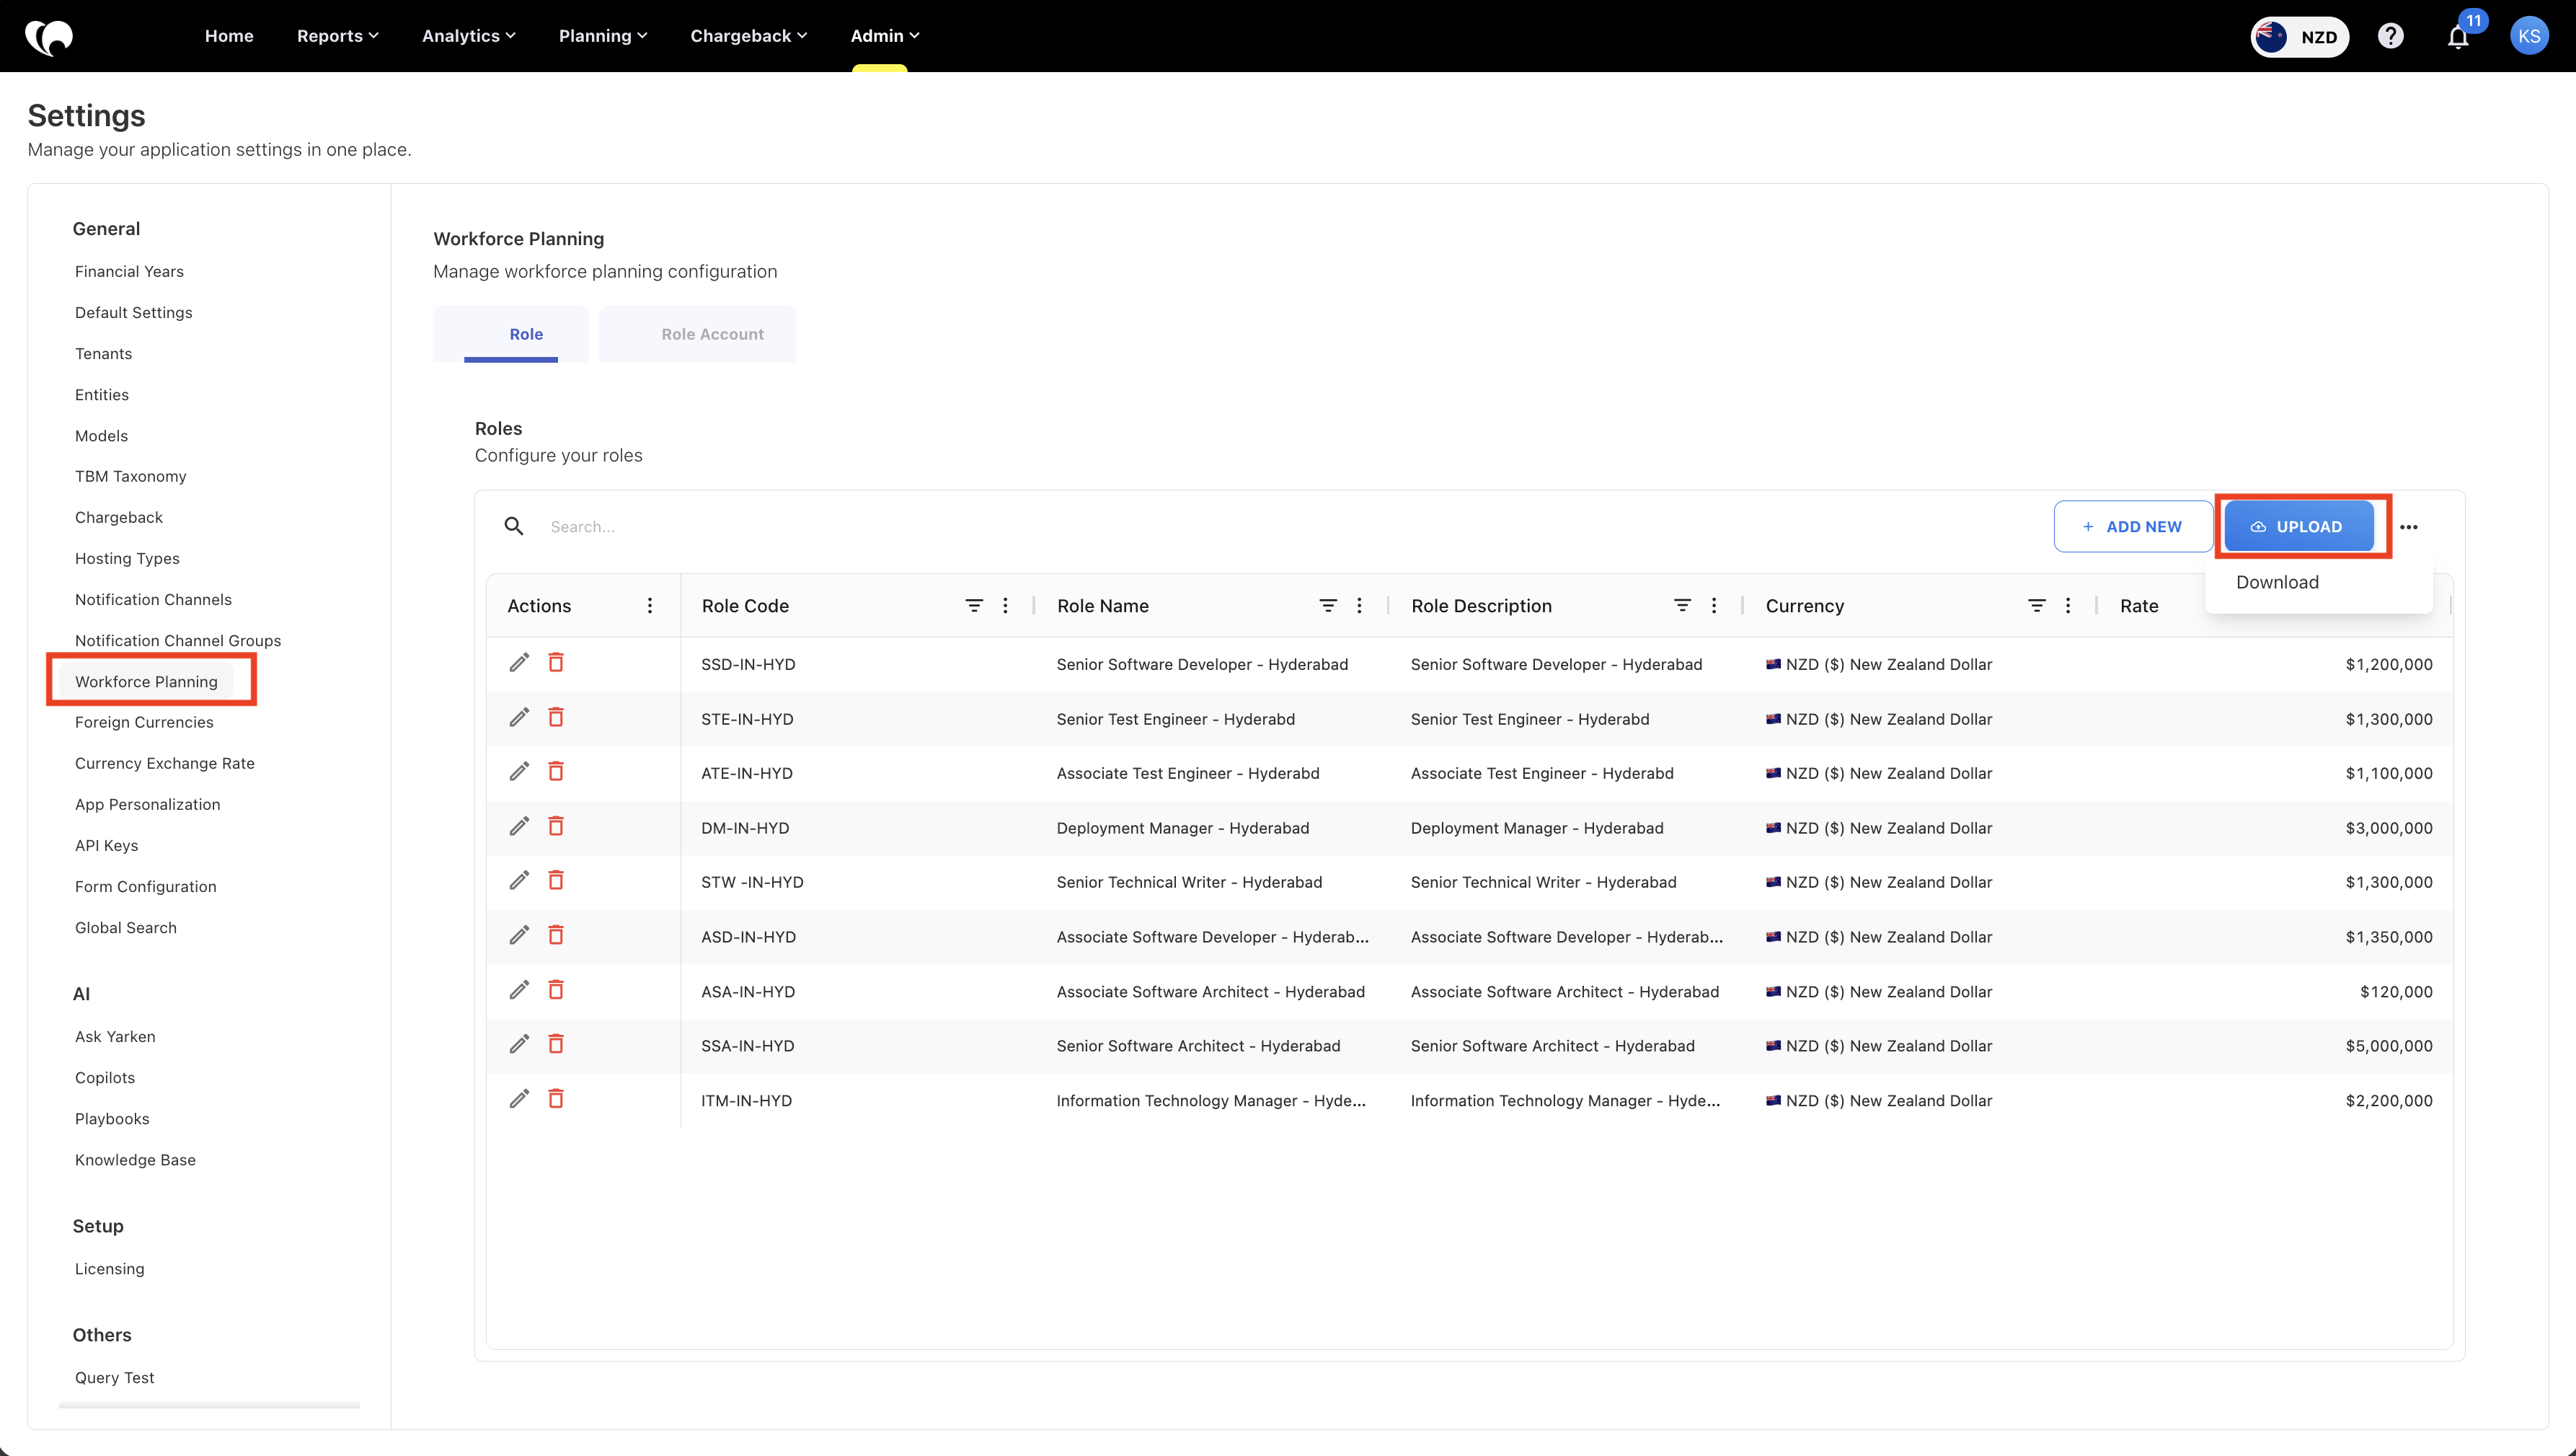
Option 2: Upload Roles using CSV
You can upload a CSV file to create or update multiple workforce roles in bulk.
-
Open the Roles tab.
-
Click UPLOAD.
-
Select or drag and drop the CSV file.
-
Review the uploaded data preview.
-
Click NEXT.
-
Validate field mapping.
-
Click FINISH.
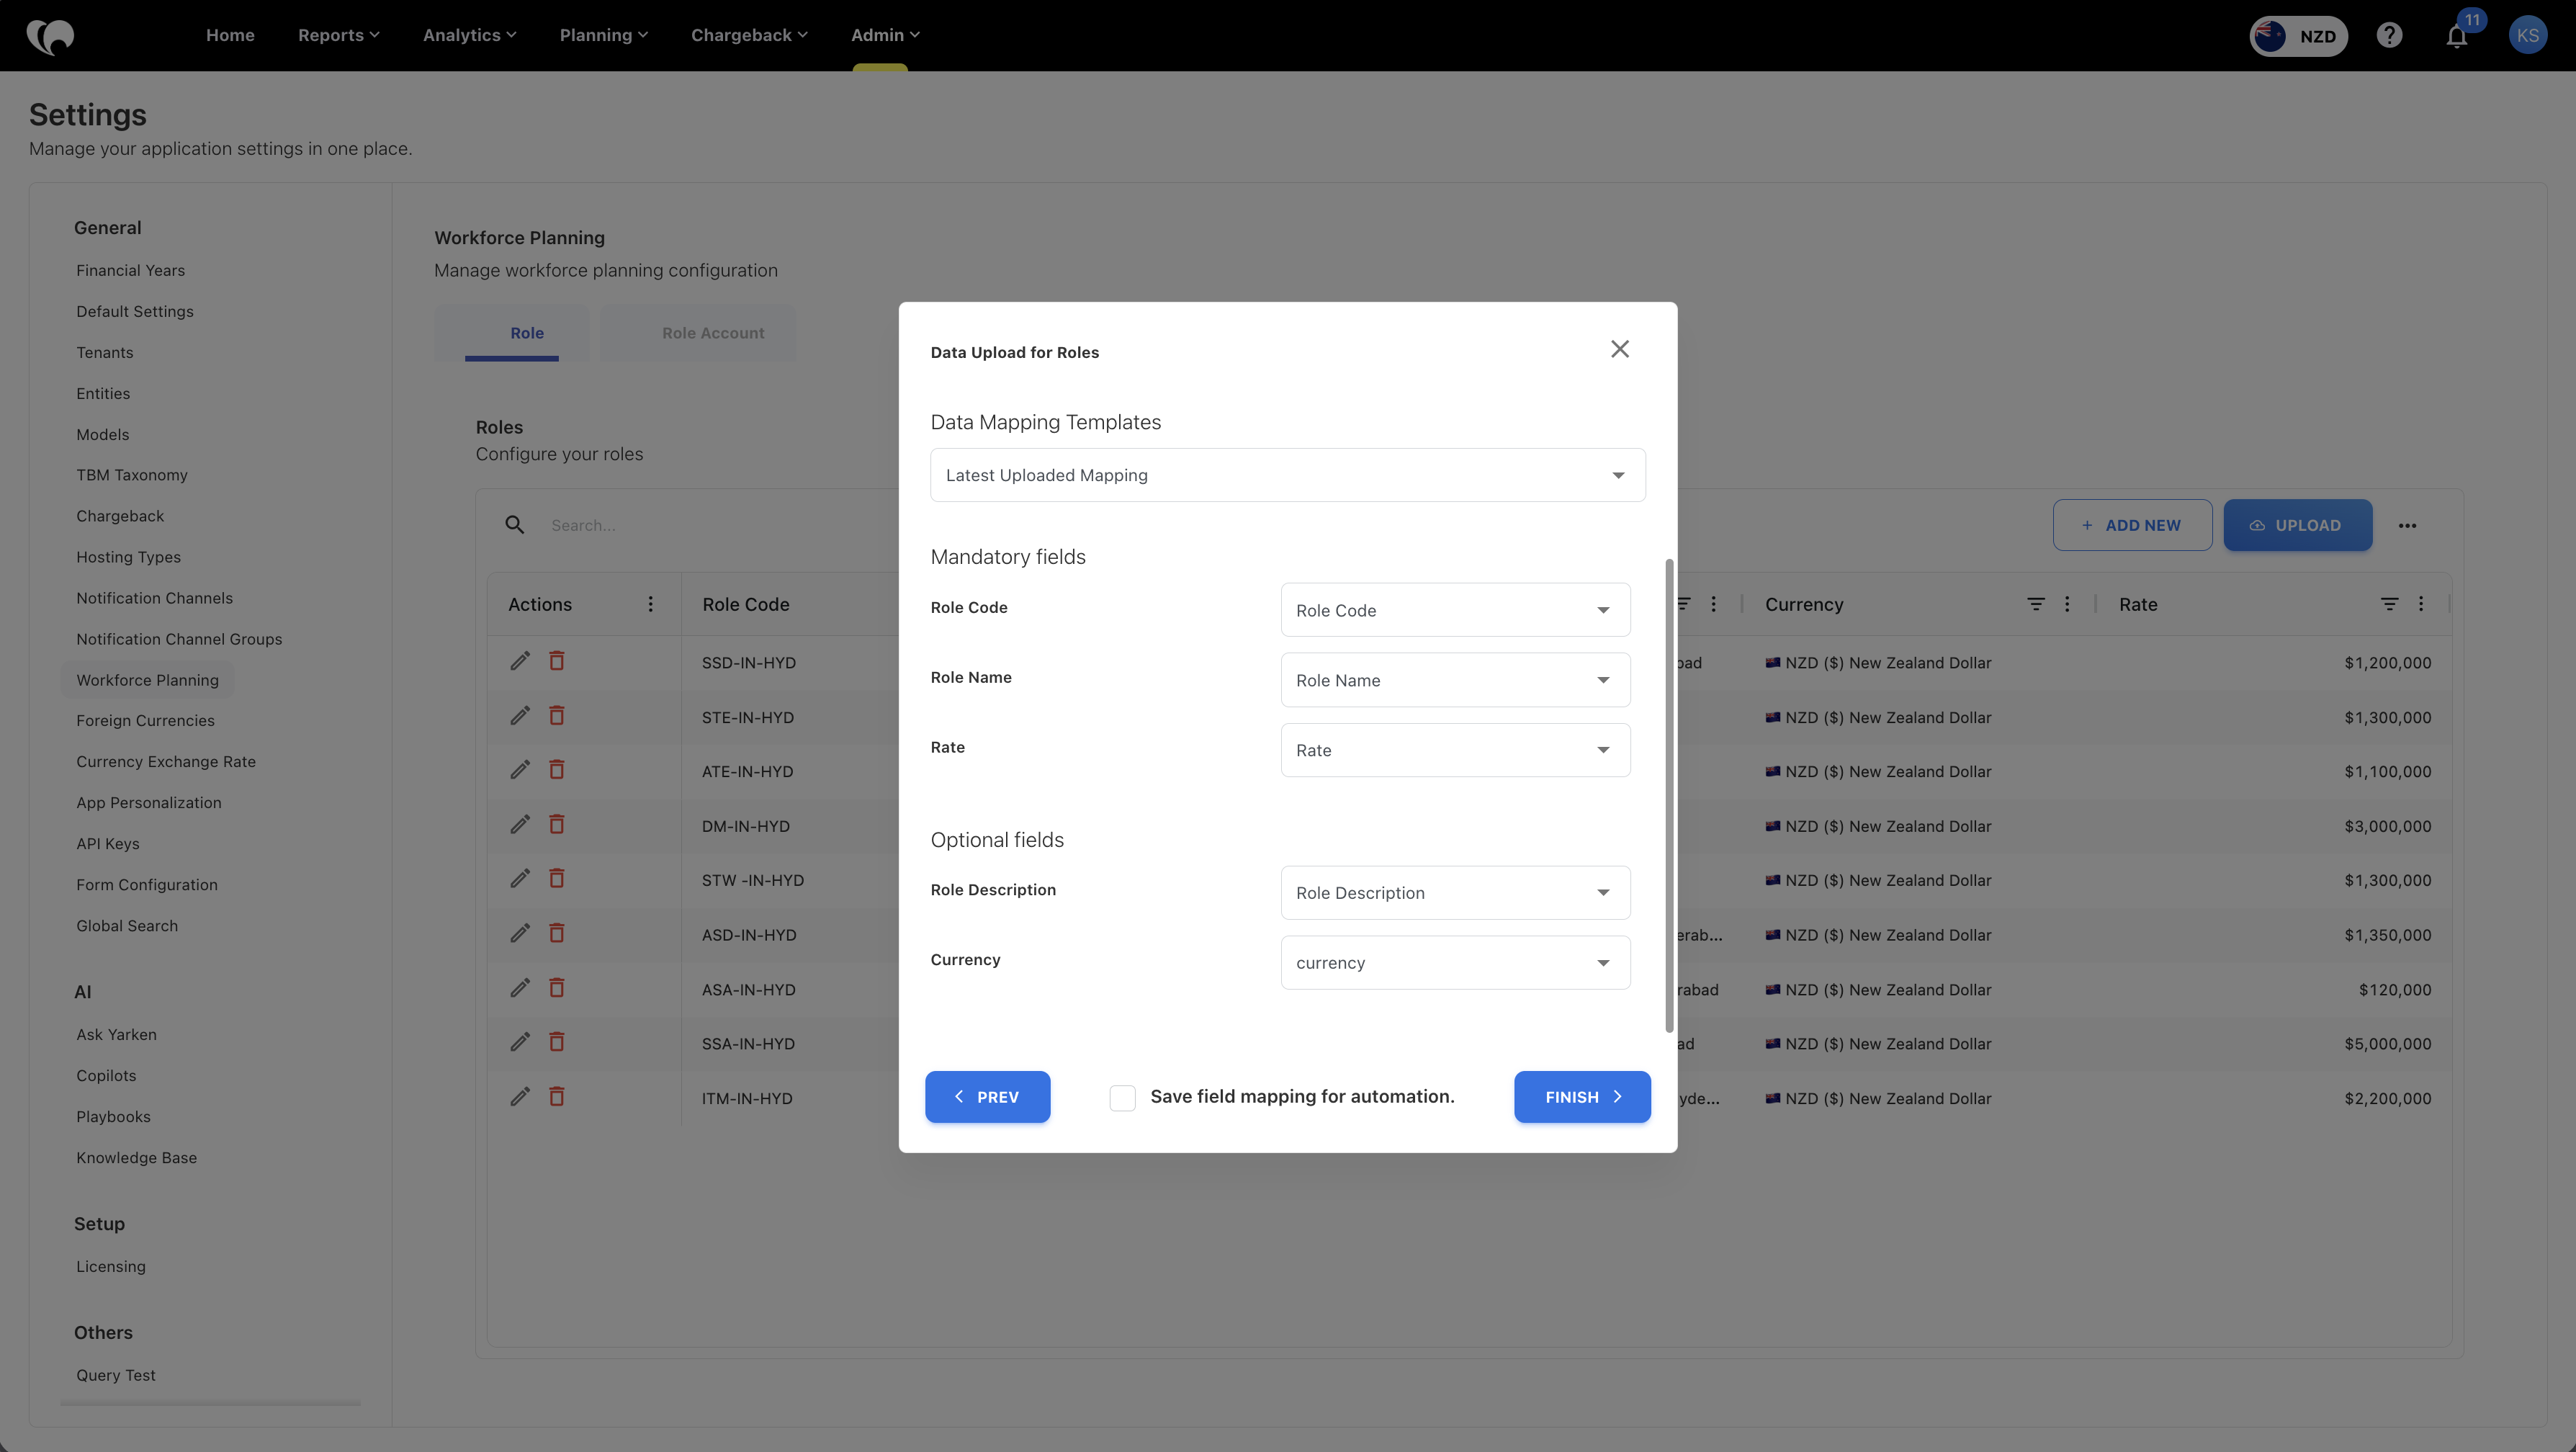
Required fields
-
Role Code
-
Role Name
-
Rate
Optional fields
-
Role Description
-
Currency
Upload notes
-
Use a valid CSV file format.
-
Ensure Role Codes are unique.
-
Verify rate values before completing the upload.
-
Existing records may be updated if matching Role Codes are detected.
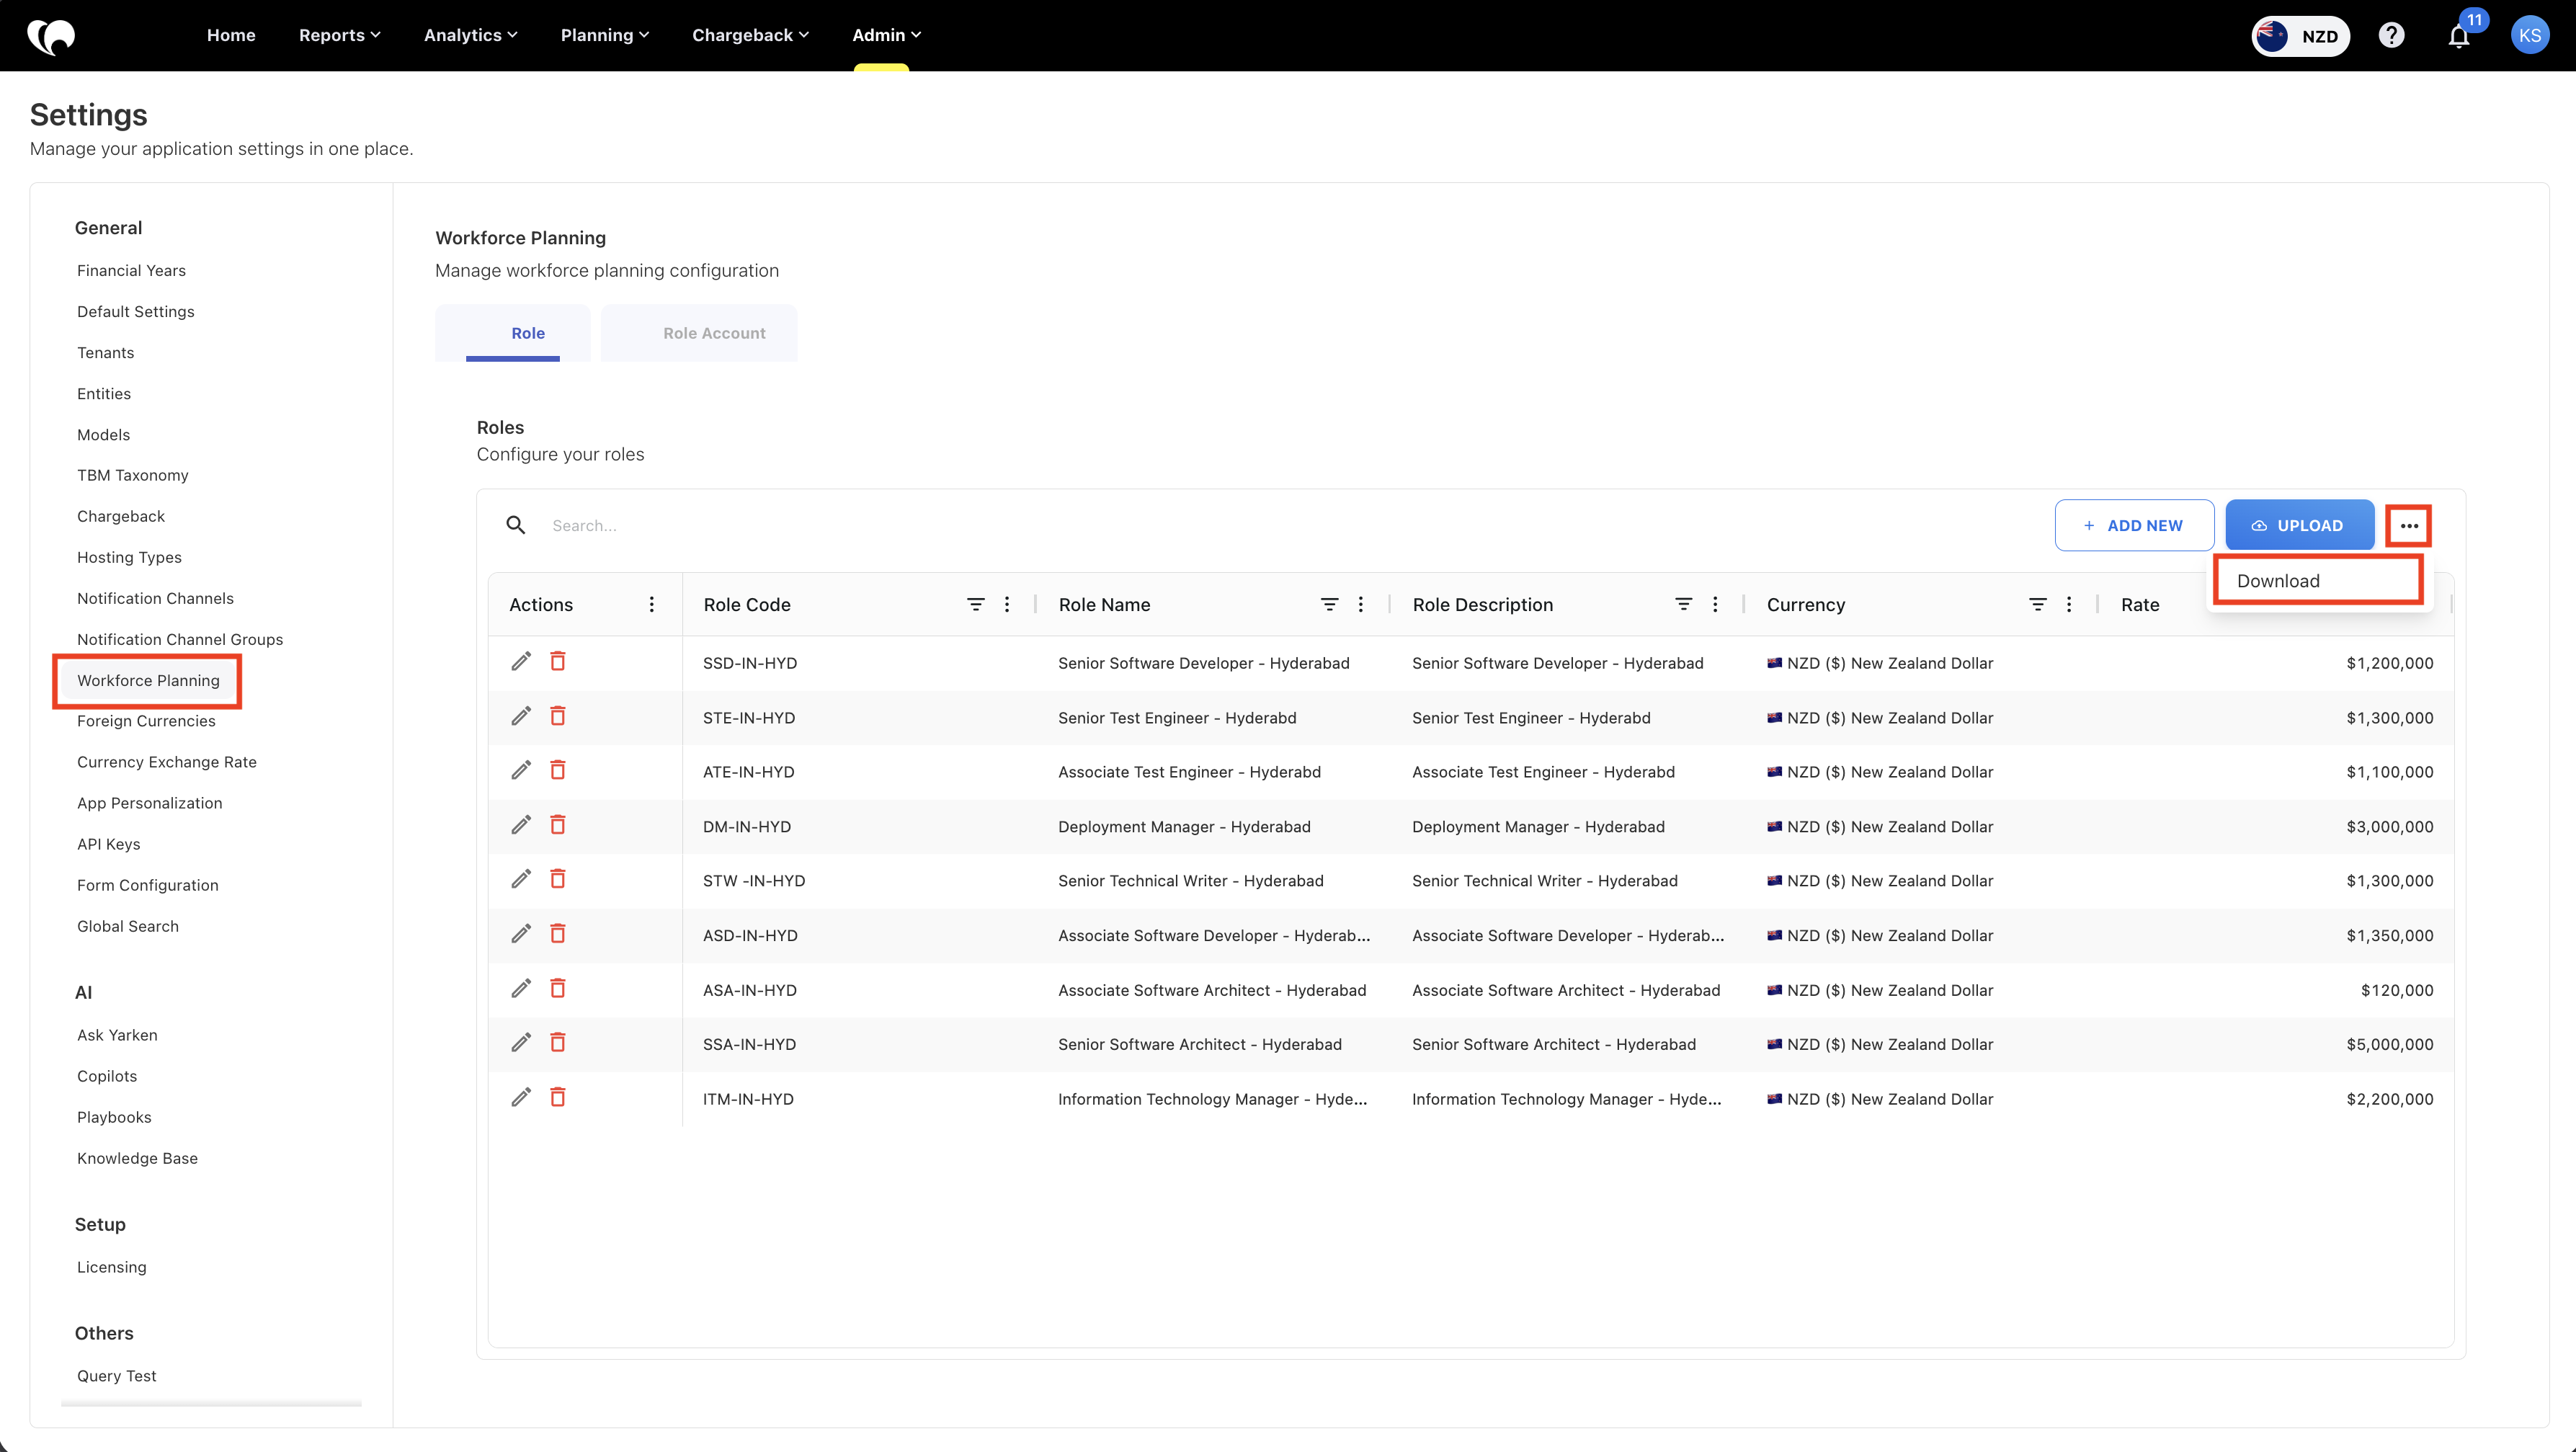
Download Role data
You can export existing role data for reporting, backup, or bulk editing.
-
Open the Roles tab.
-
Click the menu beside UPLOAD.
-
Select Download.
-
The system downloads the role data as a CSV file.
Role setup best practices
-
Use clear role names. Avoid names that only a small group understands.
-
Create separate roles when cost assumptions differ. For example, a Senior Software Developer in one region may have a different rate than a Senior Software Developer in another region.
-
Avoid creating too many roles for minor variations. Too many roles can make planning harder for contributors.
-
Use the description field to explain when a role should be used.
-
Review rates before every major planning cycle to ensure assumptions remain current.
Step 2: Configure Role Accounts
After creating roles, map each role to the financial accounts that should receive the generated budget or forecast values.
Prerequisite
Accounts must already be configured in Master Data.
Navigation
Go to:
Admin → Settings → Workforce Planning → Role Account
Option 1: Add Role Accounts manually
-
Open the Role Account tab.
-
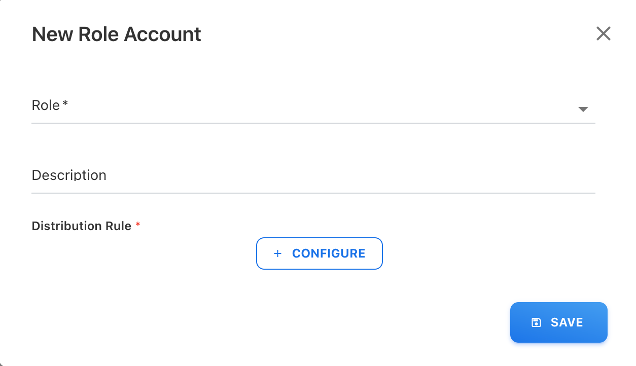
Click + ADD NEW.
-
Select the workforce role.
-
Add an optional description.
-
Click + CONFIGURE to add a distribution rule.
-
Select one or more financial accounts.
-
Enter the distribution percentage for each account.
-
Click SAVE for the distribution rule.
-
Click SAVE for the role account mapping.
Field guidance
|
Field |
Description |
Guidance |
|---|---|---|
|
Role |
Workforce role being mapped |
Select the role whose costs should be distributed |
|
Description |
Optional explanation |
Use this to explain the purpose of the mapping |
|
Account |
Financial account receiving cost |
Select configured Master Data account |
|
Distribution (Percentage) |
Percentage of total cost allocated to the account |
Use finance-approved allocation logic |
Option 2: Upload Role Accounts using CSV
You can upload a CSV file to create or update role account mappings in bulk.
-
Open the Role Account tab.
-
Click UPLOAD.
-
Select or drag and drop the CSV file.
-
Review the uploaded data preview.
-
Click NEXT.
-
Validate field mapping.
-
Click FINISH.

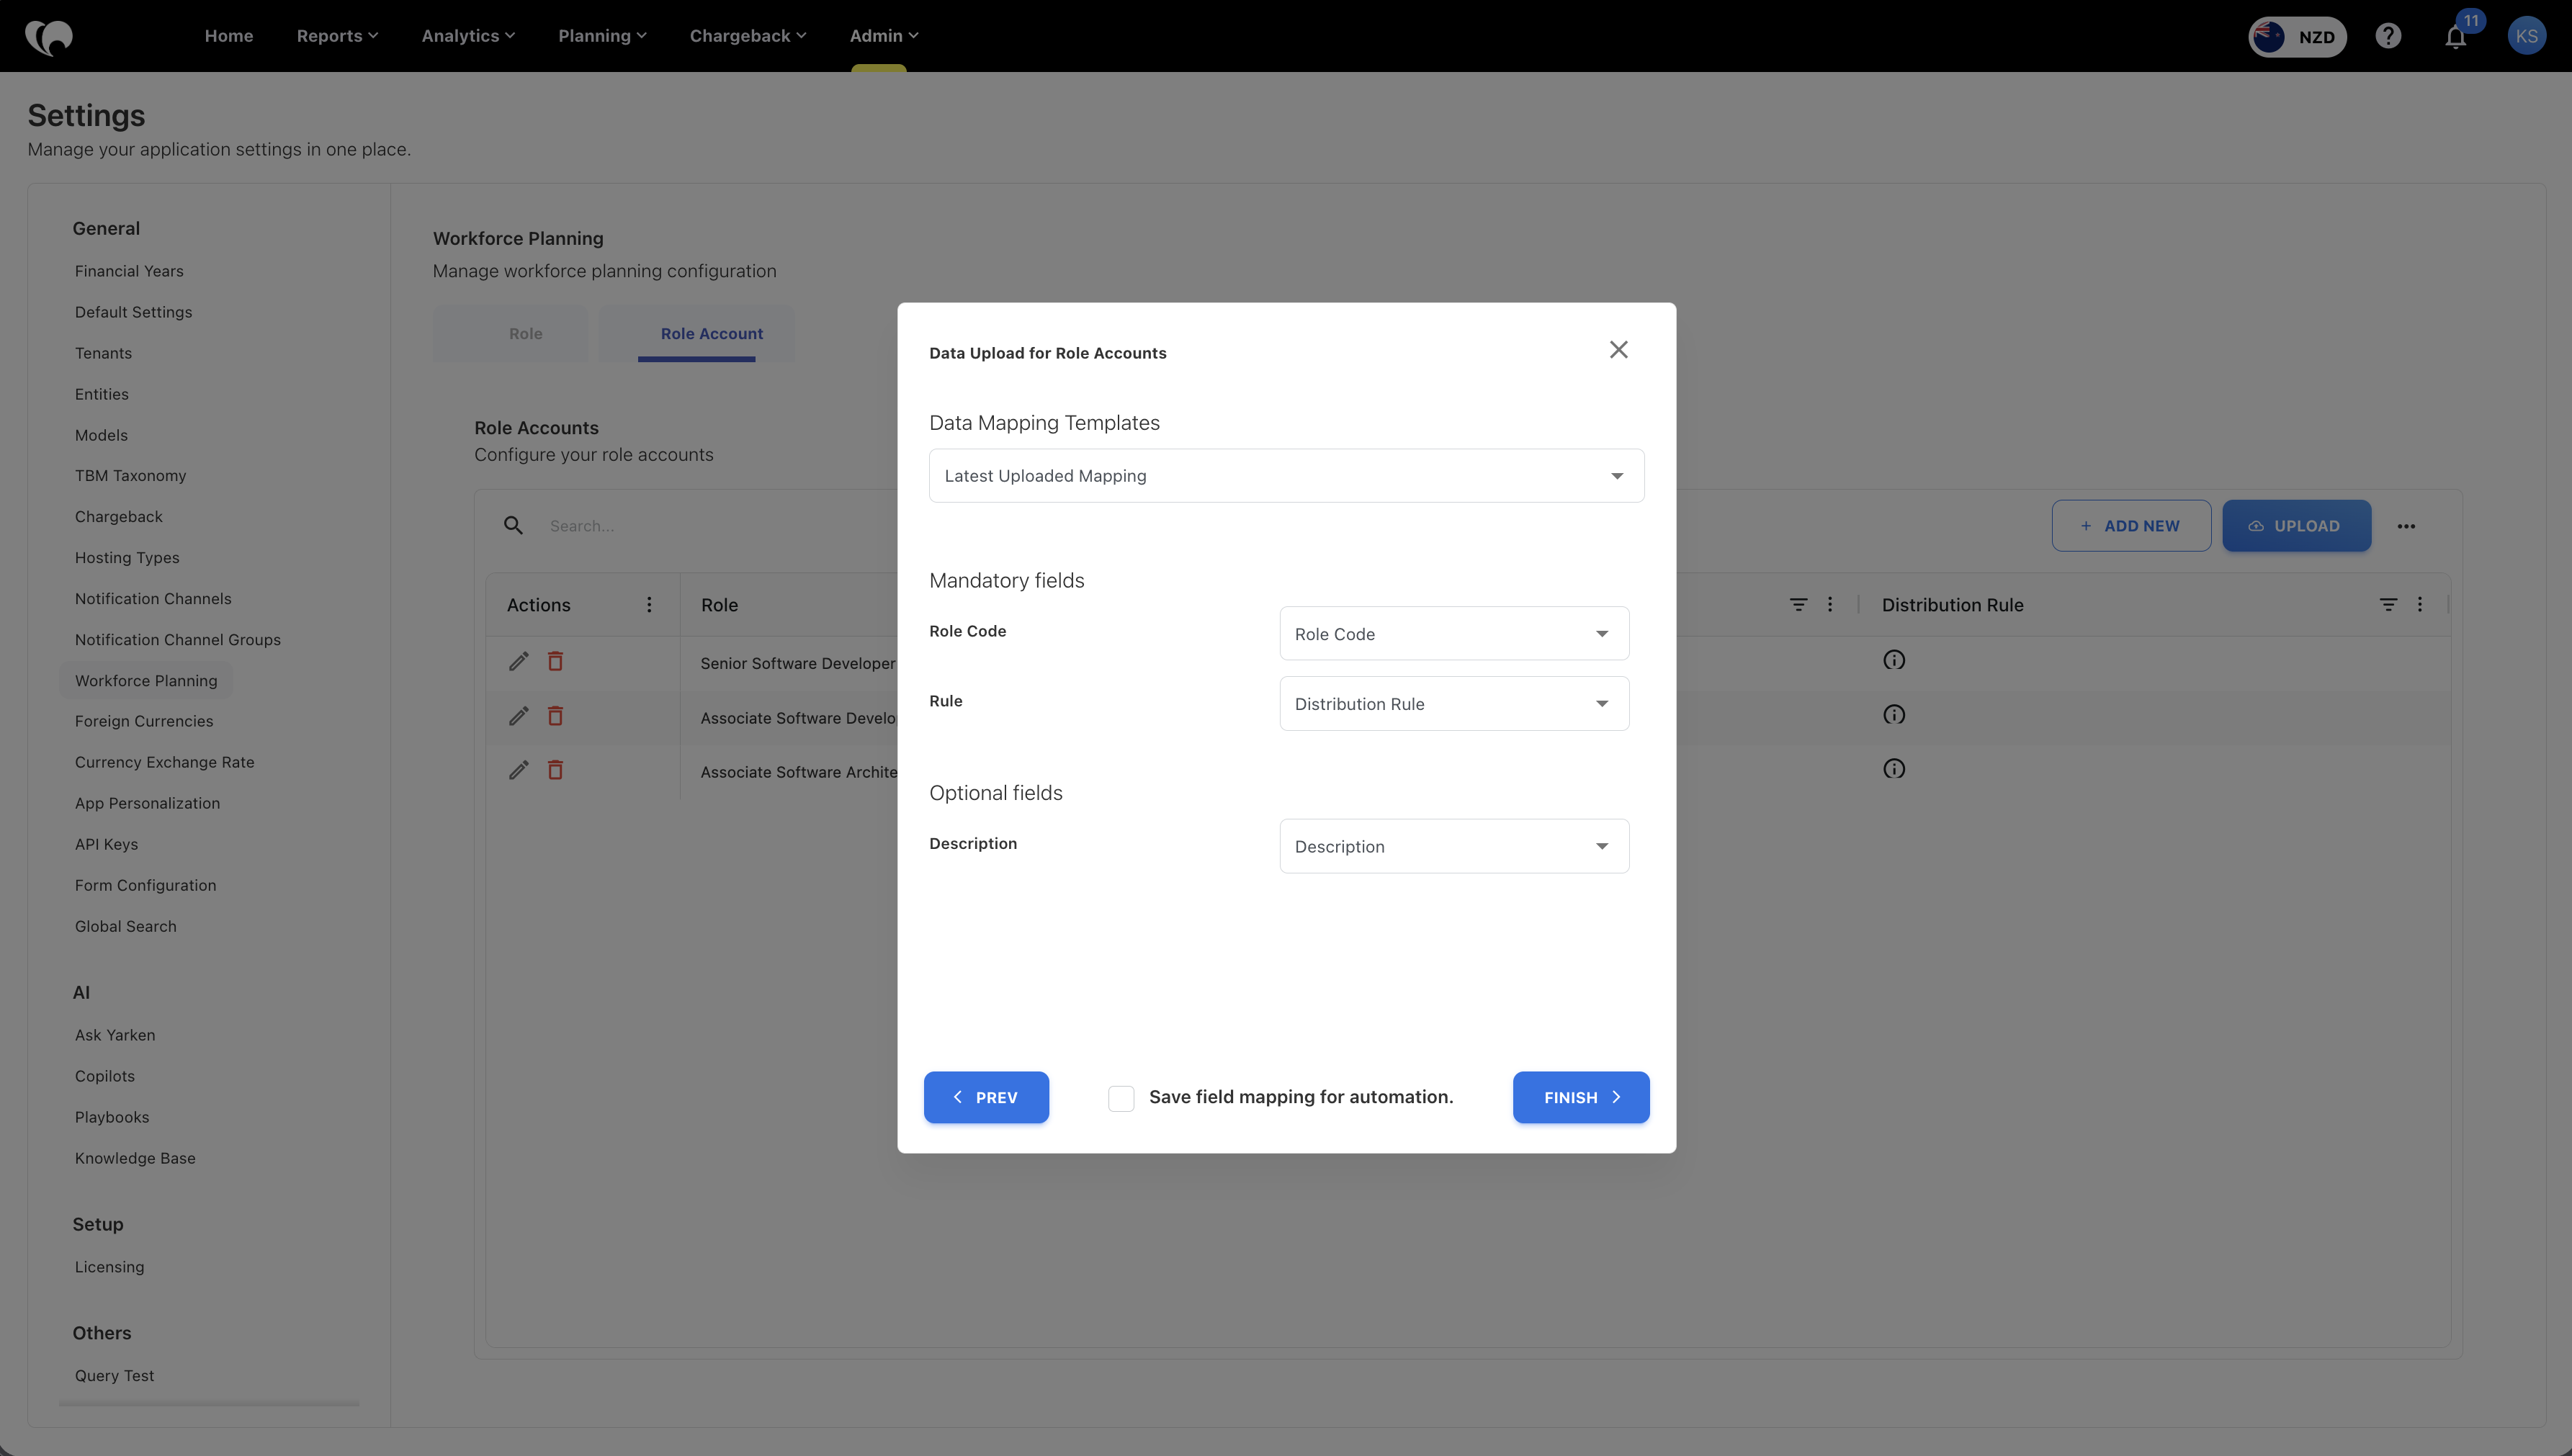
Required fields
-
Role Code
-
Rule
Optional fields
-
Description
Upload notes
-
Ensure Role Codes already exist before uploading Role Account mappings.
-
Verify account distribution logic before completing the upload.
-
Review field mapping carefully to avoid incorrect account allocations.
Download Role Account data
You can export existing role account mappings for reporting, backup, or bulk updates.
-
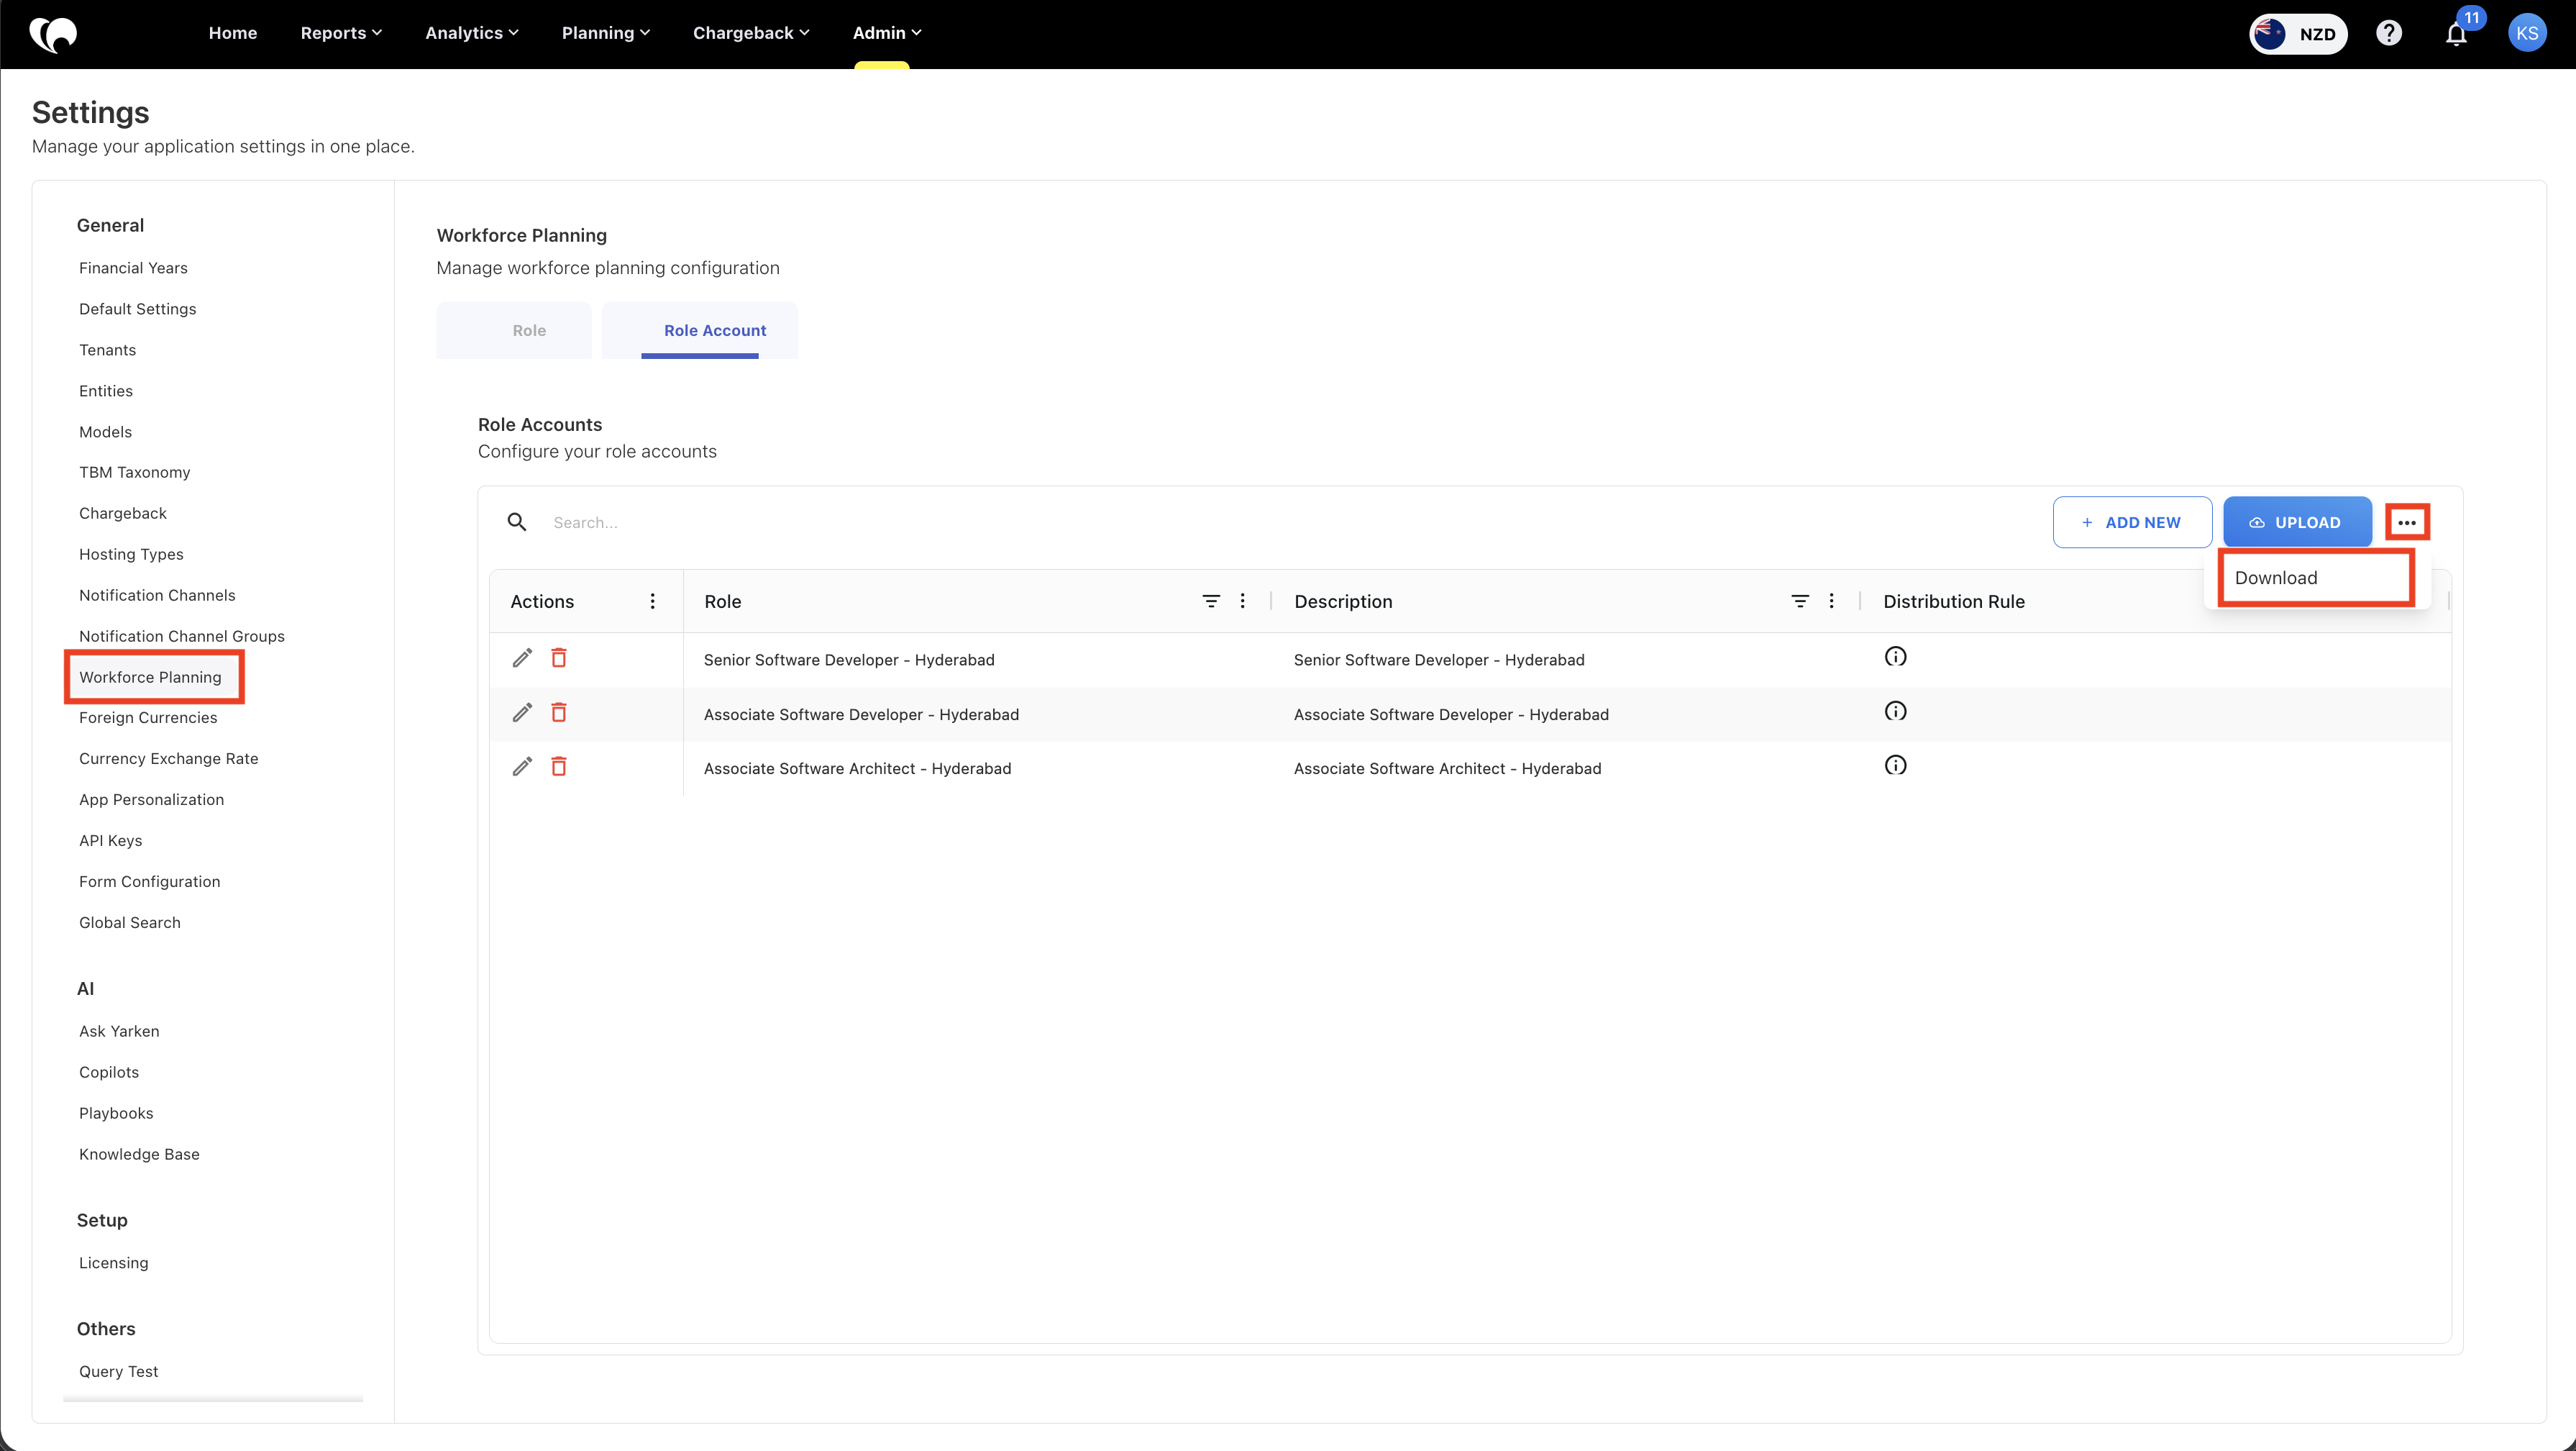
Open the Role Account tab.
-
Click the menu beside UPLOAD.
-
Select Download.
-
The system downloads the role account data as a CSV file.
Account mapping example
A Senior Software Developer role has an annual rate of 1,200,000. The organization wants 10% of calculated workforce cost posted to Software Licenses.
|
Role |
Account |
Distribution |
|---|---|---|
|
Senior Software Developer |
Software Licenses |
10% |
If total workforce cost is 300,000, Yarken generates 30,000 for Software Licenses.
Can distribution exceed 100%?
Yes, total distribution can be greater than 100% if required by the organization’s financial modeling approach.
This allows organizations to model additional burden, related cost, or allocation logic where the sum of mapped accounts intentionally exceeds the base workforce cost.
Use this only when the finance model requires it. Otherwise, keep mapping logic simple and easy to audit.
Validation checklist for Admins
- Required roles are created.
- Each role has a valid annual rate.
- Role names are clear and searchable.
- Required accounts exist in Master Data.
- Each planning role has account mapping.
- Distribution percentages are intentional.
- Cost centers and entities are available.
- Employee and vendor records are available if needed.
- Budget Process Owners and Contributors have correct access.
Common setup issues
The role does not appear during planning
Check whether the role was saved correctly and whether the user has access to the planning area where the role is used.
Base compensation is missing
Check whether the role has a rate. The rate drives base compensation during workforce planning.
Budget entries are not generated as expected
Check whether the role has a role-to-account mapping. If no account mapping exists, the system may not be able to distribute the calculated cost.
Cost is going to the wrong account
Review the Role Account mapping and distribution percentages.
Contributors cannot access assigned plans
Review user permissions, cost center access, and workflow assignment.
Next step
Getting Started with Workforce Planning
Related articles
Create and manage Workforce Plans