
Expense data can be added in two ways:
-
Add expenses manually
-
Upload expenses using a file
Before you begin
Before loading expenses, ensure that:
-
Accounts are available in Master Data.
-
Cost Centers are available in Master Data.
-
Vendors are available if vendor-level reporting or mapping is required.
-
The correct model is selected, such as Spend, Budget, or Forecast.
-
The correct year and month are selected.
-
The uploading file contains all mandatory fields.
-
Upload files are prepared in a supported format:
-
.xlsx -
.csv
-
To simplify file uploads, use the relevant template from:
Admin → Data Dictionary
Using the template helps ensure the file headers align with Yarken fields and improves auto-mapping during upload.
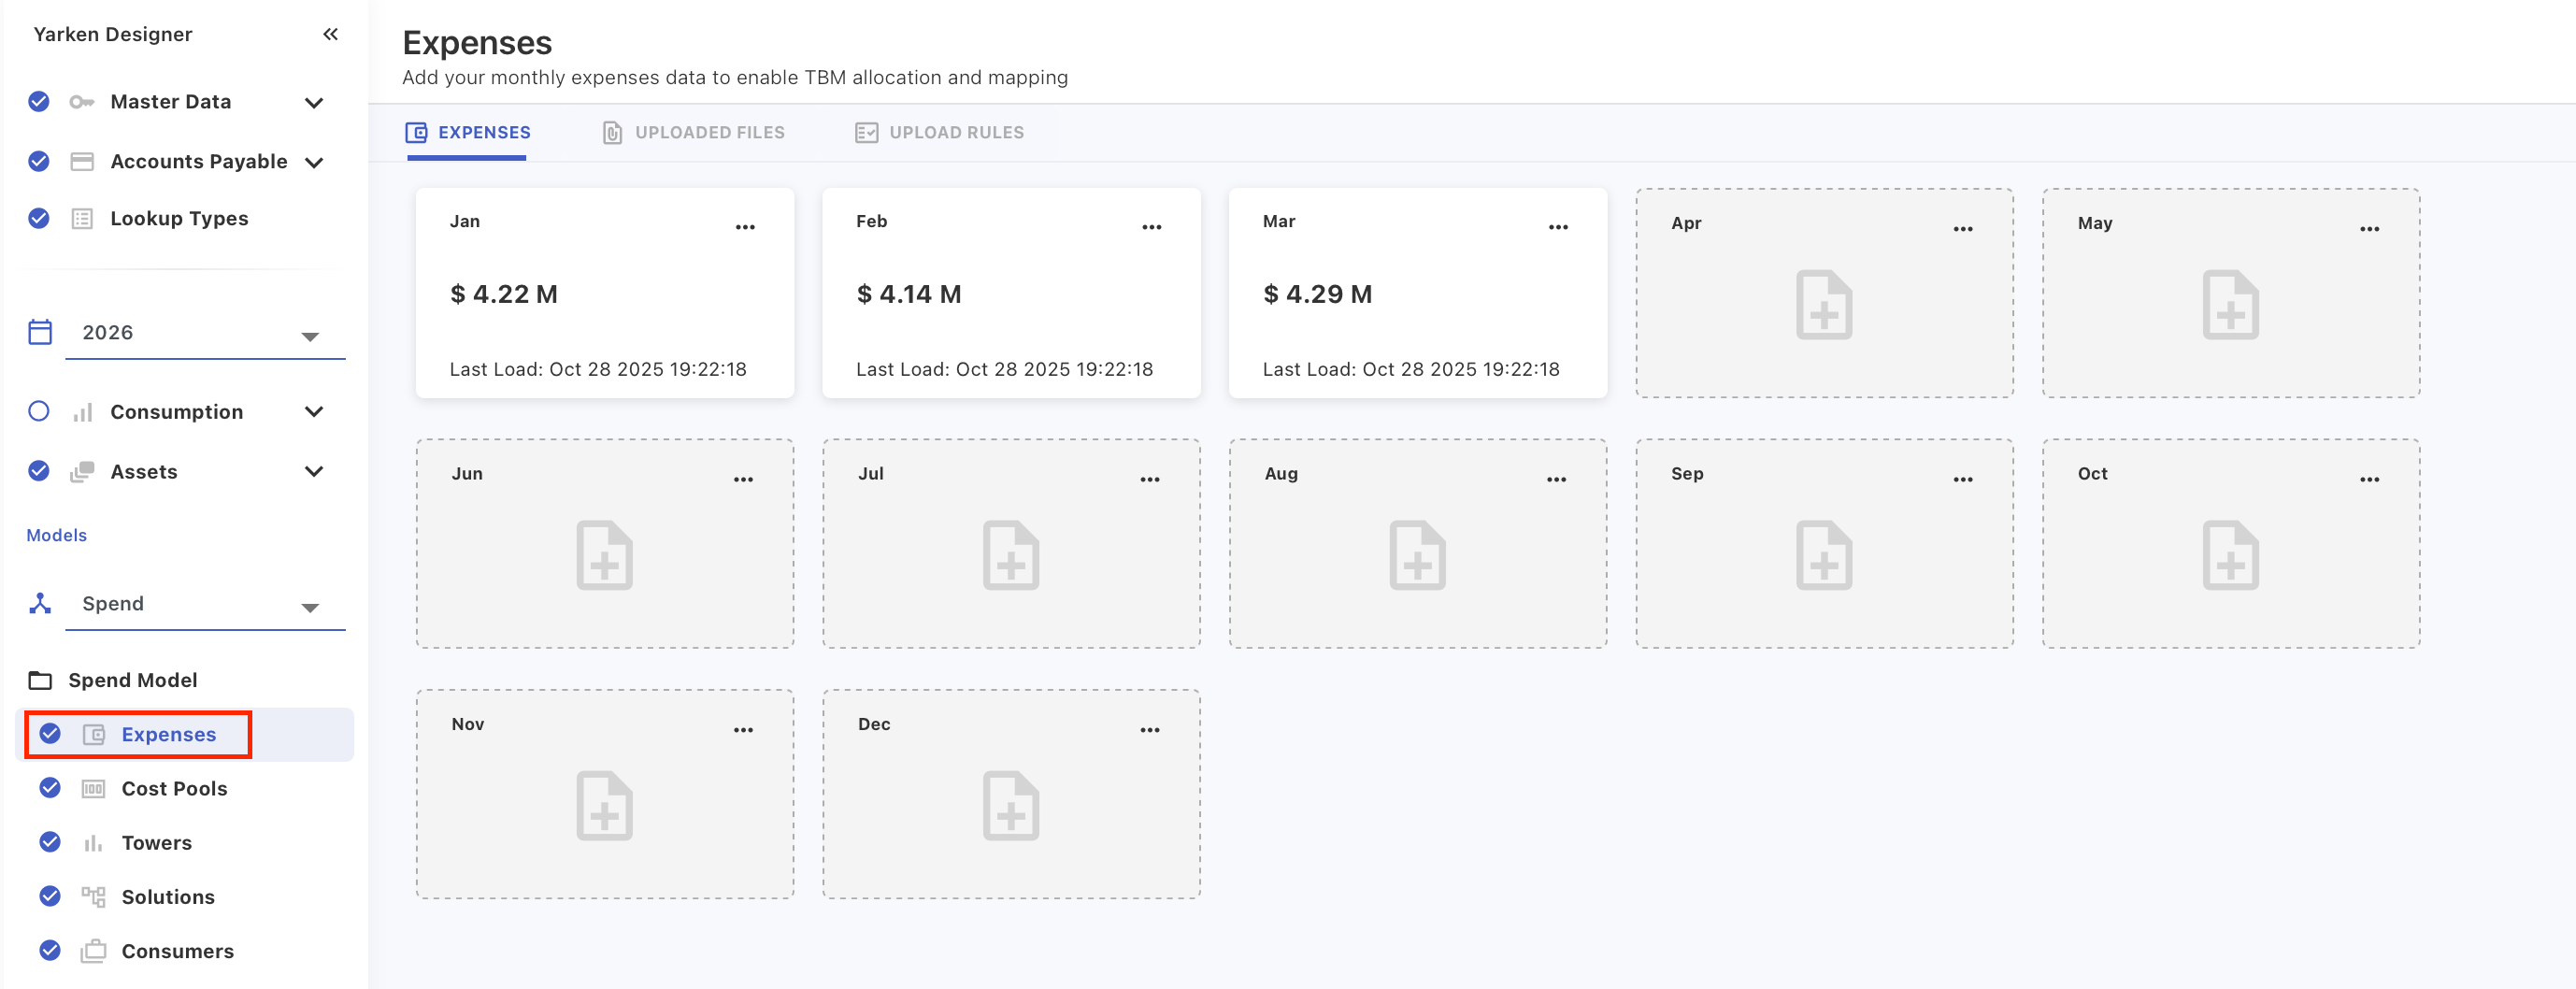
Access expenses
-
Go to Admin → Yarken Designer.
-
In the left navigation, go to Models.
-
Select the required model, such as Spend.
-
Under Spend Model, select Expenses.
-
Select the required fiscal year.
-
Locate the month tile you want to manage.
Each month tile displays:
-
loaded spend amount,
-
last load date,
-
ellipsis menu for actions.
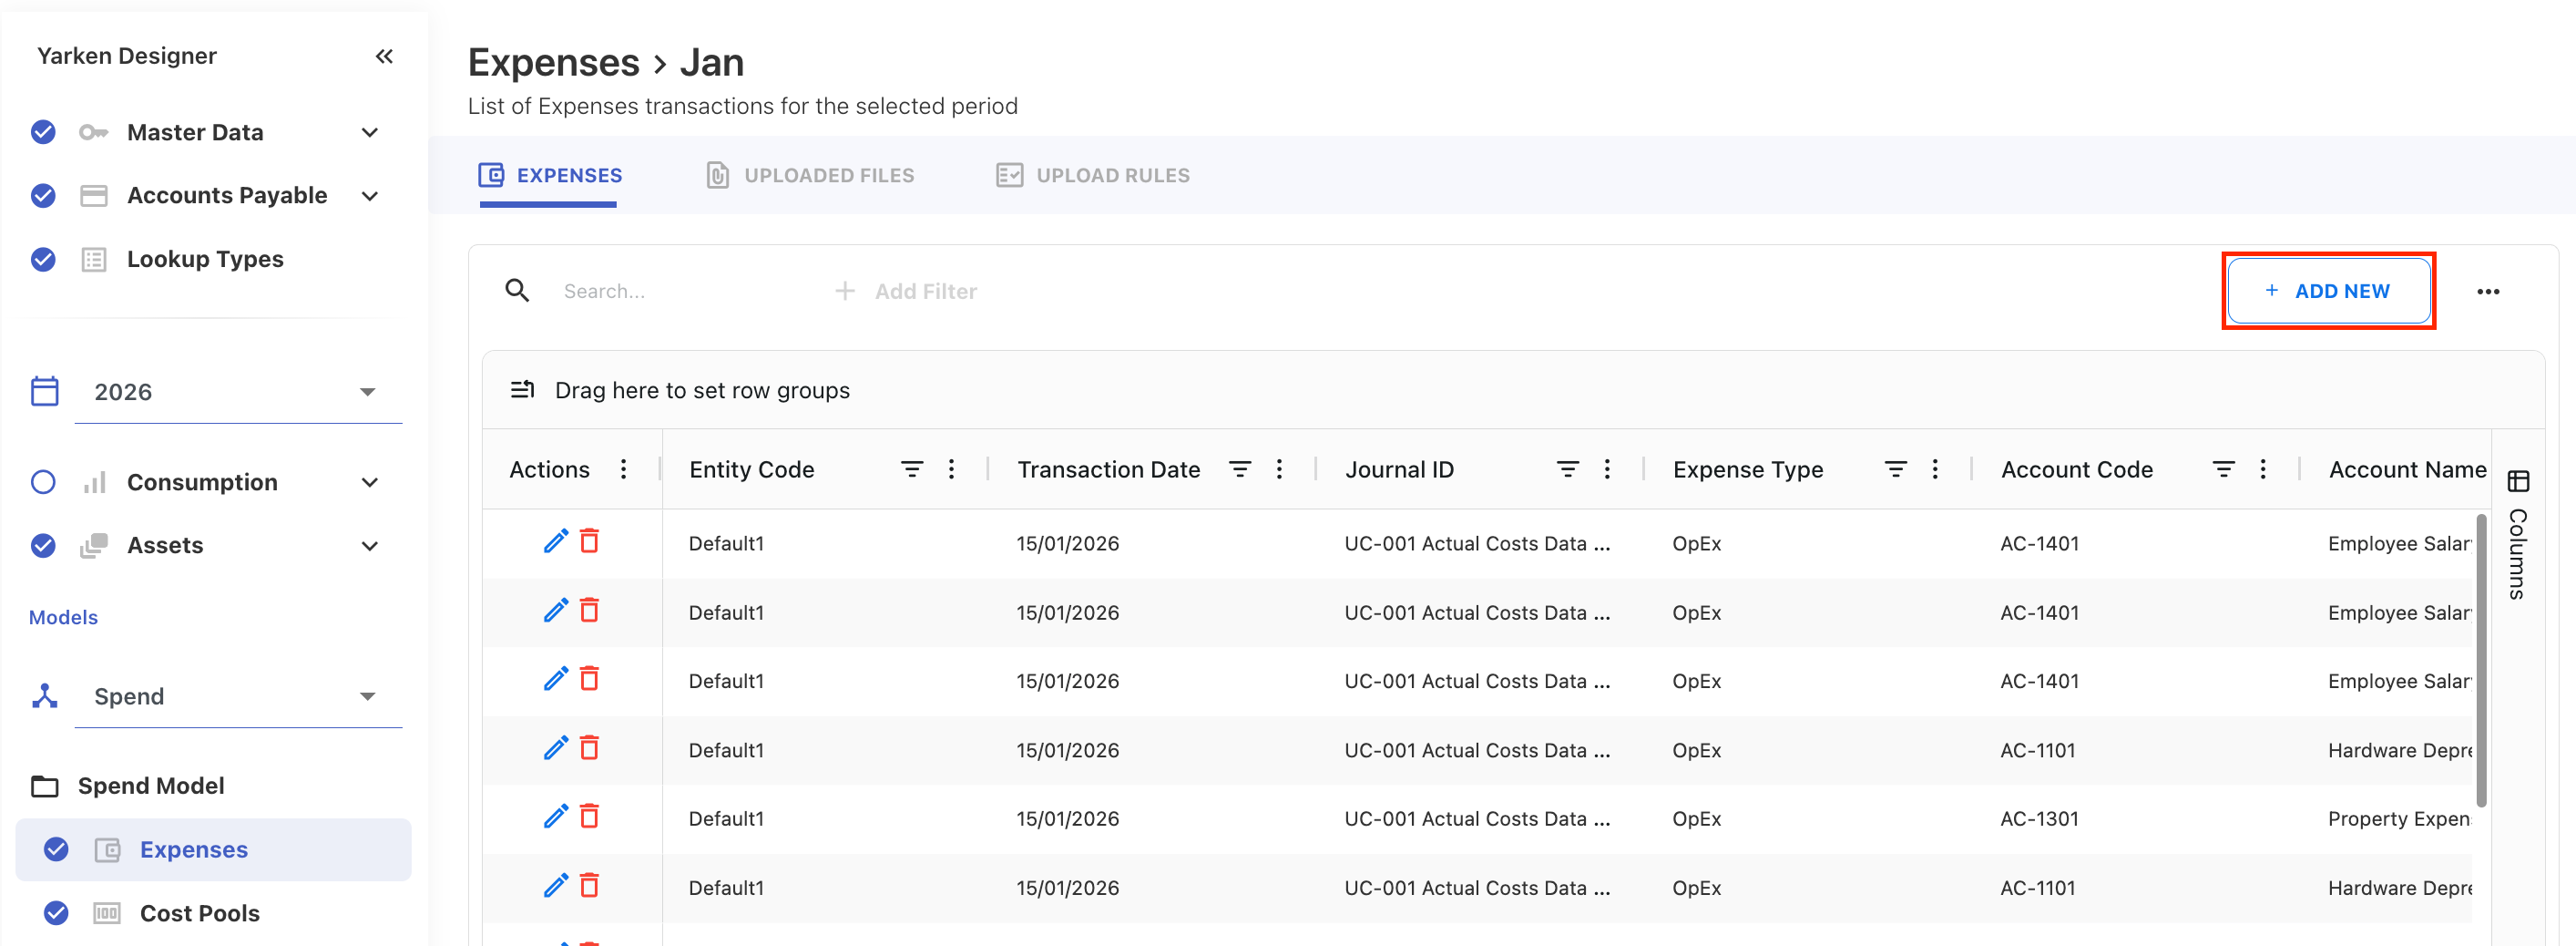
Add expenses manually
Use manual entry when you need to create a small number of expense records.
Procedure
-
On the required month tile, click the ellipsis (… ) menu.
-
Select View or Add Expenses.
-
Click + ADD NEW.
-
In the New Spend popup, enter the required values.
-
Add values in the mandatory fields marked with an asterisk.
-
Add optional fields as needed.
-
Click SAVE.
After saving, the expense record appears in the expense list for the selected month.
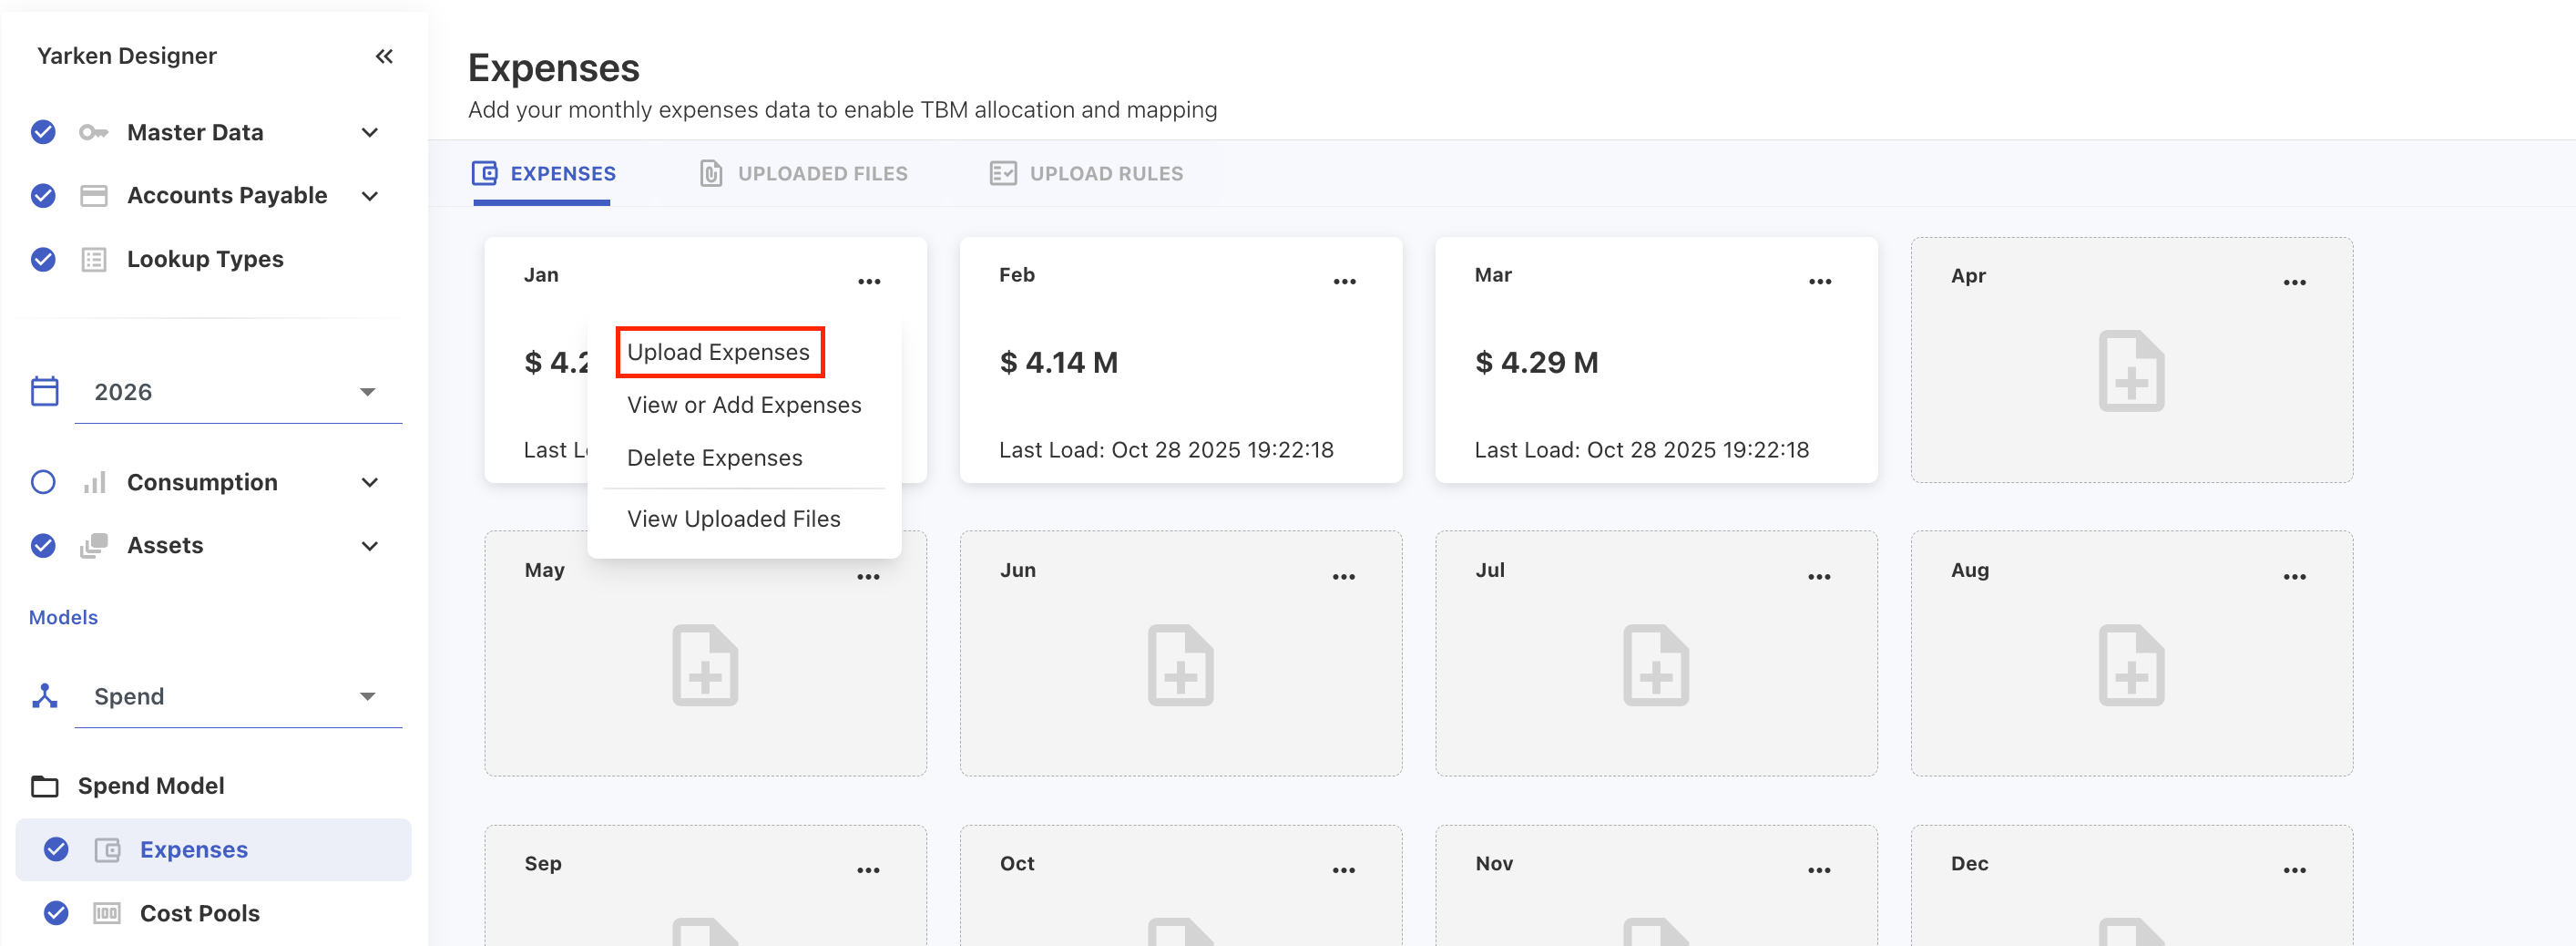
Upload expenses
Use file upload when loading a large volume of expense records.
Procedure
-
On the required month tile, click the ellipsis (… ) menu.
-
Select Upload Expenses.
-
In the upload dialog, browse or drag and drop the file.
-
Review the uploaded data.
-
Click NEXT.
-
Validate field mapping:
-
If the file follows the template, required fields are auto-mapped.
-
If required fields are not mapped, manually select the correct source columns.
-
-
Click FINISH to complete the upload.
After the upload is complete, review the upload status and mapped fields under UPLOADED FILES.
General upload behavior
When uploading expenses:
-
Multiple records with the same Journal ID are allowed.
-
Journal ID alone is not treated as a duplicate restriction during upload.
-
If Entity is not specified in the uploaded file, Yarken applies the Default entity.
-
The upload applies only to the selected model, year, and month.
-
Any configured Upload Rules are executed during the upload process.
Budget and forecast upload behavior
When uploading Budget or Forecast files, Yarken automatically creates allocation rules based on the mapped planning dimensions included in the uploaded file.
If the upload contains mapped values for:
-
Cost Pool + Sub Cost Pool
-
Tower + Sub Tower
the application automatically generates the related Cost Pool or Tower rules during processing.
The following behaviors apply during Budget and Forecast uploads:
-
Entries with the same Cost Pool and Sub Cost Pool are aggregated during processing.
-
Auto-created Cost Pool and Tower rules cannot be edited or deleted manually from the rule screens.
-
To update auto-created rules, update or reload the related Budget or Forecast entries.
Related content