
What are Data Mapping Templates?
Data mapping templates define how the fields (column headers) in your source files (such as master data, assets, consumption files, or rules) map to the destination fields in the application. These templates ensure consistent and accurate loading of data across all manual or automated uploads.
How data mapping templates work
-
When you manual upload a file, the system uses the saved template for the given file type to map each source column to the correct destination field.
-
For automated uploads, the pipeline uses the data mapping template each time.
-
You can edit or replace a template whenever your file structure changes.
Once a mapping template is saved, it becomes the reference point for all future uploads for that file type.
When to use data mapping templates
Use data mapping templates when you want to:
-
Standardize data upload processes
-
Prepare for automated uploads via pipelines
-
Avoid manually mapping fields during every upload
-
Ensure accurate field alignment for recurring file submissions
-
Support integrations or multi-source ingestion with consistent structures
Supported file types
Data mapping templates support a wide range of upload types, including:
-
Master data (Accounts, Cost Centers, Employees, Vendors, Products)
-
Assets and asset mappings
-
Allocation and rule files (Cost Pool Rules, Tower Rules, Solution Rules)
-
Cloud consumption files (Azure, AWS, FOCUS)
-
Spend and budget data
-
Companion metrics
-
License or product usage
Templates ensure consistent and accurate field mapping for all future uploads.
How to use data mapping templates
You can use data mapping templates in two primary ways:
1. For manual uploads
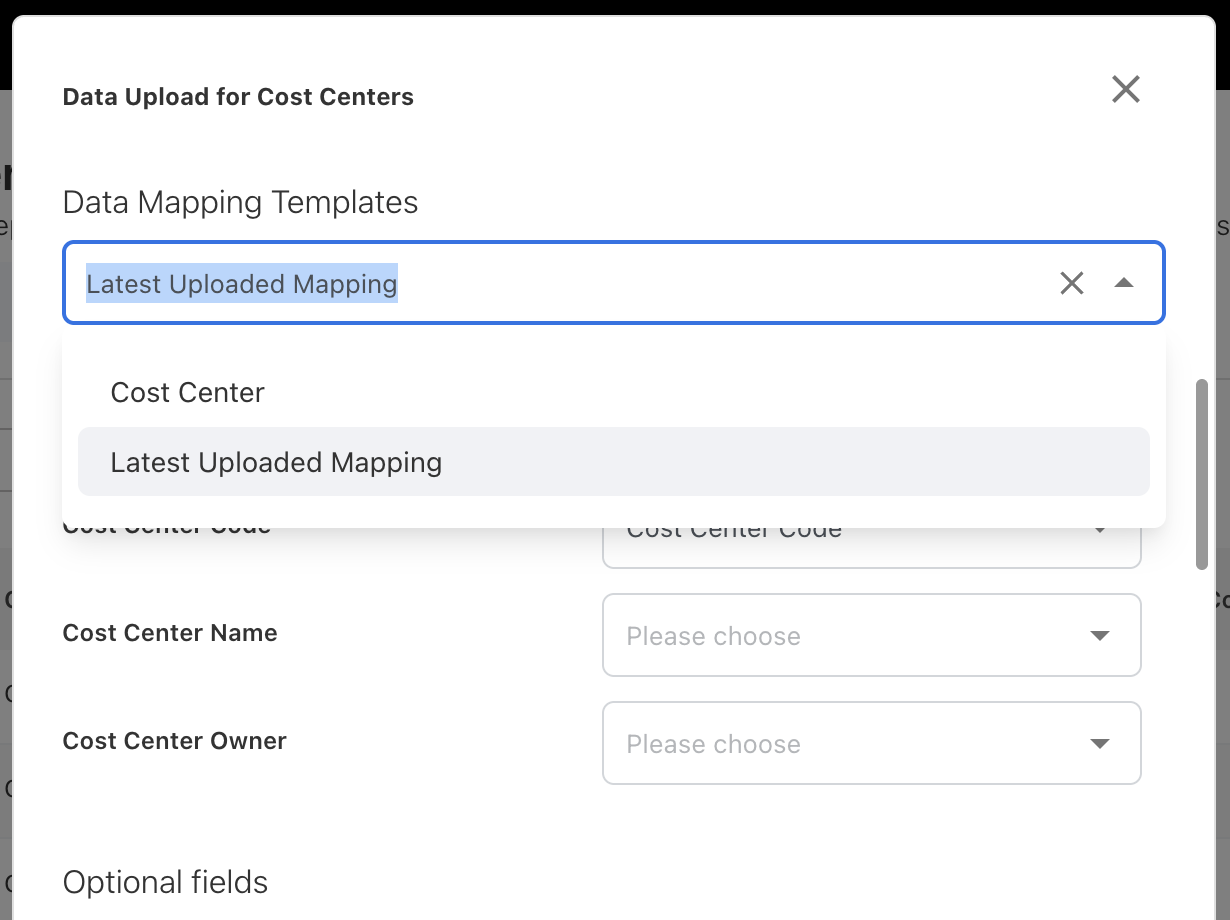
When uploading a file manually:
-
Select latest uploaded mapping template or pre-defined template to instantly apply mappings
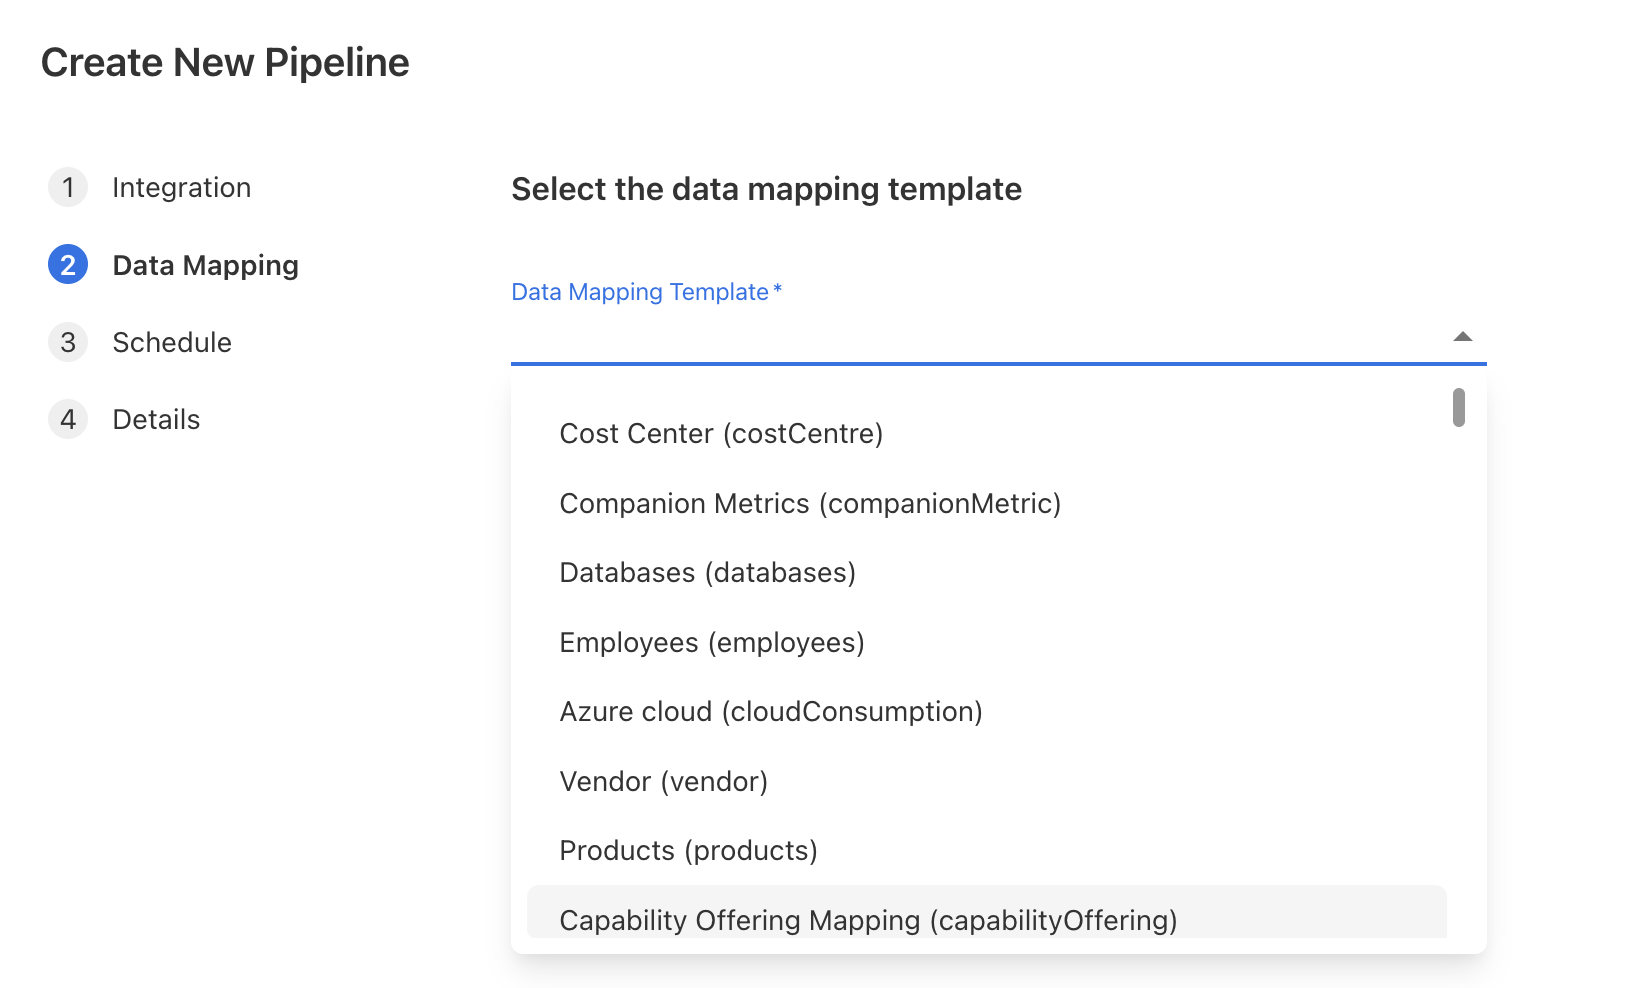
2. For Pipelines
All automated pipelines require a data mapping template to map fields every time the pipeline runs.
Ways to create data mapping templates
You can create data mapping templates through multiple workflows. Each method serves a different user scenario.
1. Creating a new data mapping template
Follow the steps below to create a new data mapping template.
-
Go to Data Mapping Templates.
-
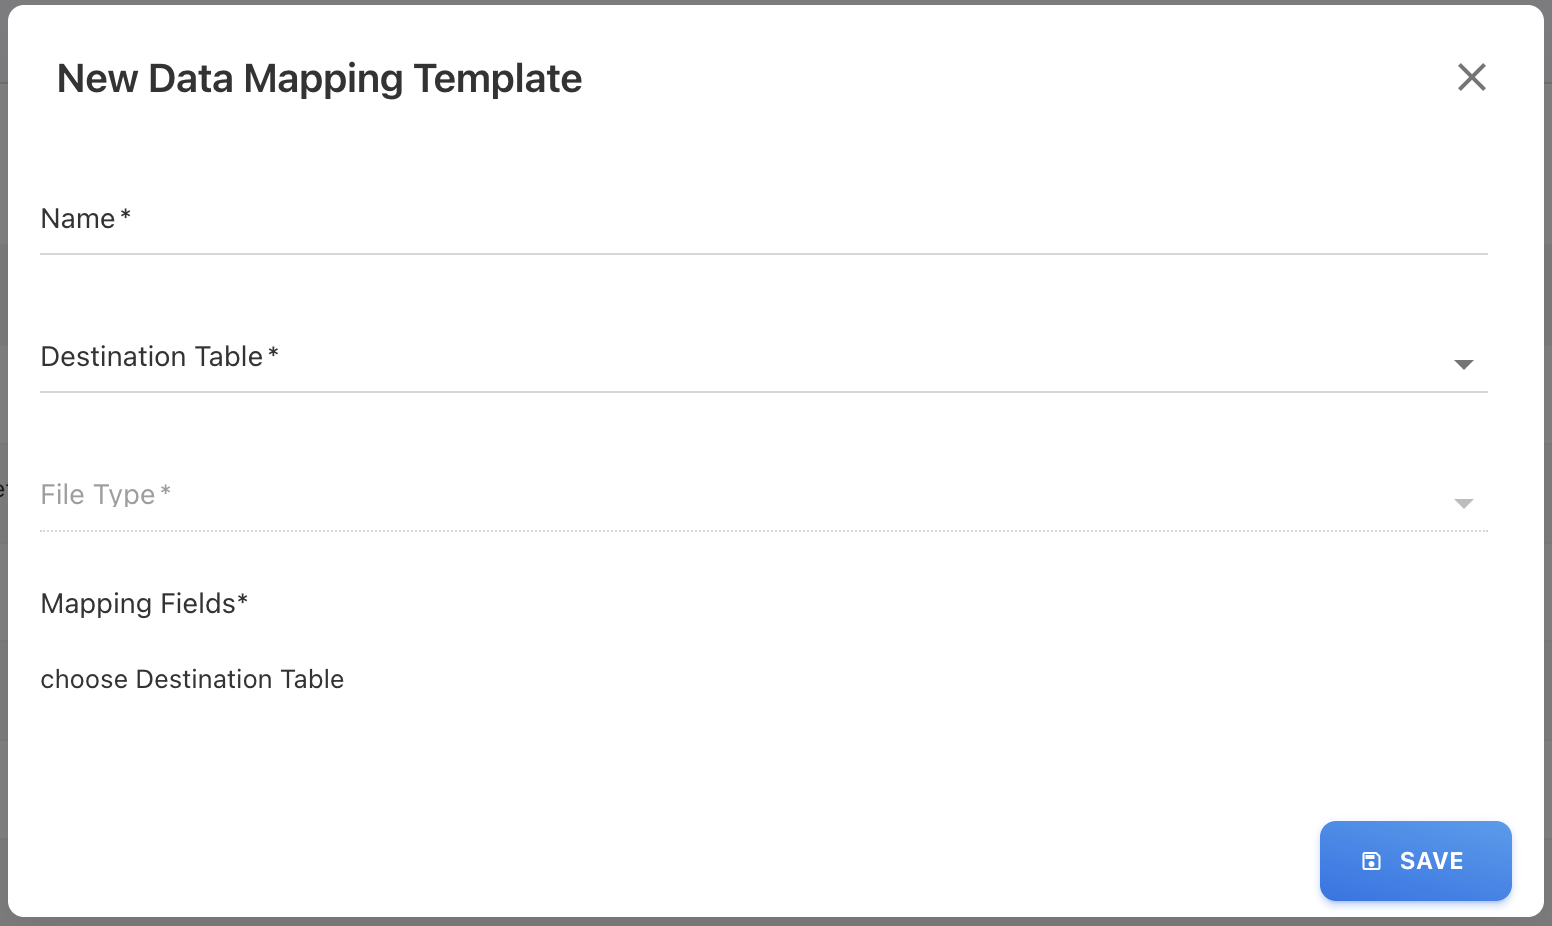
Click + ADD NEW. A New Data Mapping Template popup appears.
-
On the popup, provide the below details:
-
Name: Enter a template name.
-
Destination Table: Select the destination table (the upload type).
-
Mapping Fields: Upload a sample file that contains the correct column headers. All mandatory columns must be included. After uploading, you can preview, edit, and reassign source fields to the appropriate destination fields.
-
-
Click SAVE.
Your template is now ready to use for manual file uploads and automated pipelines.
Use this method when:
-
You do not have an existing template for the file type.
-
You want to define the template in advance before uploading the file.
2. Creating a template from file upload screen
During the manual data upload, you can create the data mapping directly from the data upload screen. This method is helpful when you are manually uploading a file for the first time and want the system to remember the mapping without needing to recreate it later.
When you enable this option:
-
The system saves the field mapping you defined during the upload.
-
This mapping becomes the default template for future automated uploads of this file type.
-
You can choose this mapping during the manual upload from Data Mapping Templates dropdown option.
To create data mapping template during the manual upload,
-
On the data upload screen, map required fields.
-
Select the checkbox:
- Save field mapping for automation.
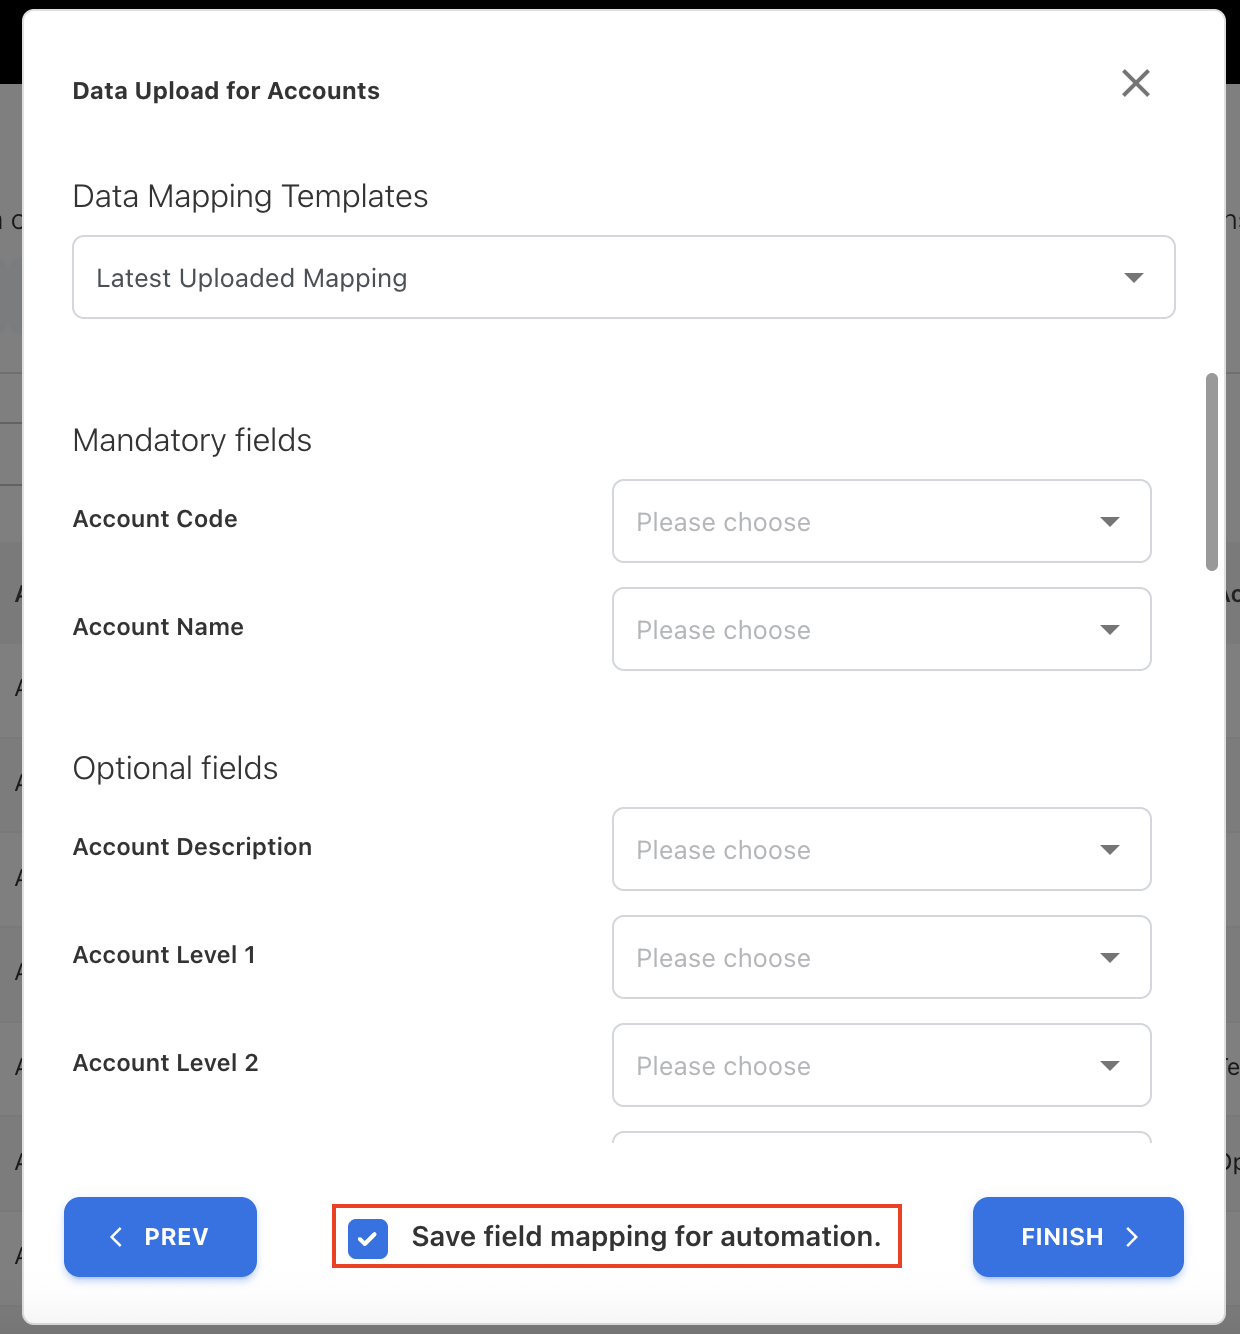
-
Click FINISH to complete the upload.
The system saves this mapping as the default template for that file type.
3. Creating a template from uploaded files tab
While automating the file uploads using Automate option through UPLOADED FILES tab, you can choose to create a new template file or replace existing one.
To create,
-
Go to UPLOADED FILES tab.
-
Click Automate icon next to a uploaded file.
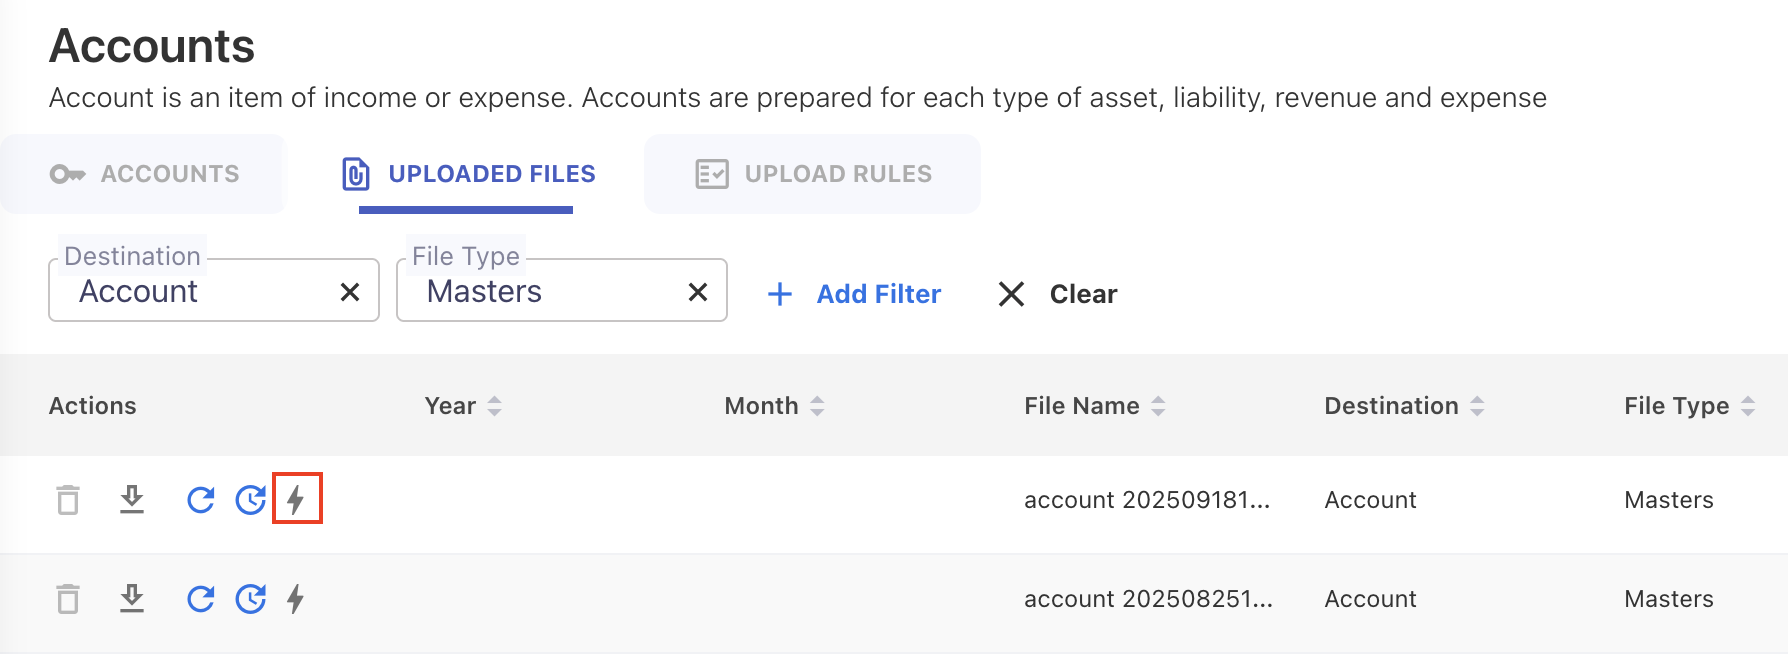
-
Complete the pipeline setup.
When you click Automate icon next to a previously uploaded file:
-
The field mapping from that file becomes the default mapping template
-
The template is saved and applied to all future pipeline uploads for that file type
This method is ideal for Pipeline feature when the uploaded file already contains the correct mapping structure.
Managing data mapping templates
The Data Mapping Templates screen allows you to manage existing templates.
From this screen, you can:
-
View all mapping templates
-
Edit templates when file structures change
Editing restrictions:
Mapping fields for Cloud Consumption file types (such as Azure, AWS, FOCUS) cannot be added or modified manually. These mappings are system-defined due to their standardized structure. However, all other file types can be edited—even if they are already in use by active pipelines.
-
Delete templates no longer in use
Deletion restrictions:
A data mapping template that is currently used by a pipeline (active or inactive) cannot be deleted. To delete it, you must first remove or update the pipeline that references the template.
-
Preview mapping fields
-
Filter or search for templates by name, file type, or destination table
Related content