
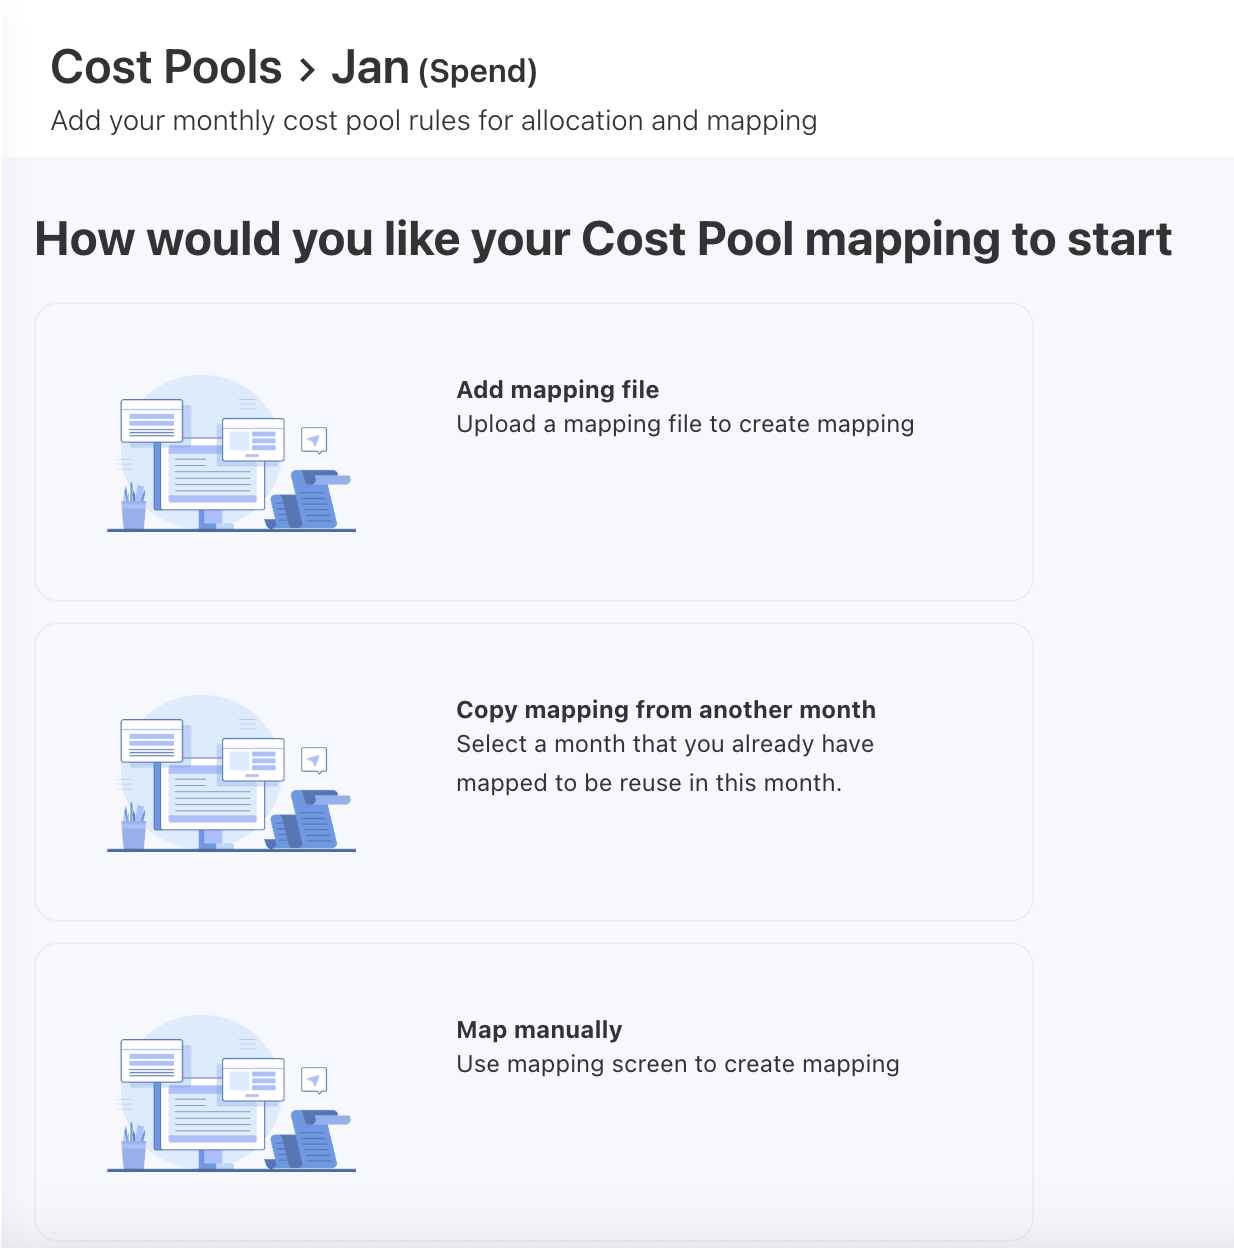
Ways to add Cost Pool rules
YäRKEN supports three flexible ways to create allocation rules:
-
Add mapping file – Upload rules using a template.
-
Copy mapping from another month – Reuse existing rules.
-
Map manually – Create rules directly in the application.
Adding rules using a mapping file
Uploading a mapping file is the fastest way to create or update a large number of rules. This strategy involves a process of uploading a mapping file. You can use the Cost Pool Rules template available in the Data Dictionary.
Prerequisites
Before uploading, ensure your file includes values in the mandatory columns:
-
Priority
-
Filter
-
Cost Pool
-
Sub Cost Pool
Procedure
-
Select the target month tile.
Make sure you are in the correct fiscal year by checking the year filter on the top-left.
-
Click the ellipsis (…) menu and choose Add Rules.
-
Select Add mapping file.
-
Browse or drag and drop the template file.
-
Review the data and click NEXT.
Note: If you have aligned to the template headers or loaded your data into the template, you should see “All required fields have been automapped successfully.”
-
Choose FINISH to complete the upload, or Edit Mapping to review and adjust field mappings.
After uploading the file, you can check the file status, loaded records, mapped fields, and other details under the UPLOADED FILES tab.
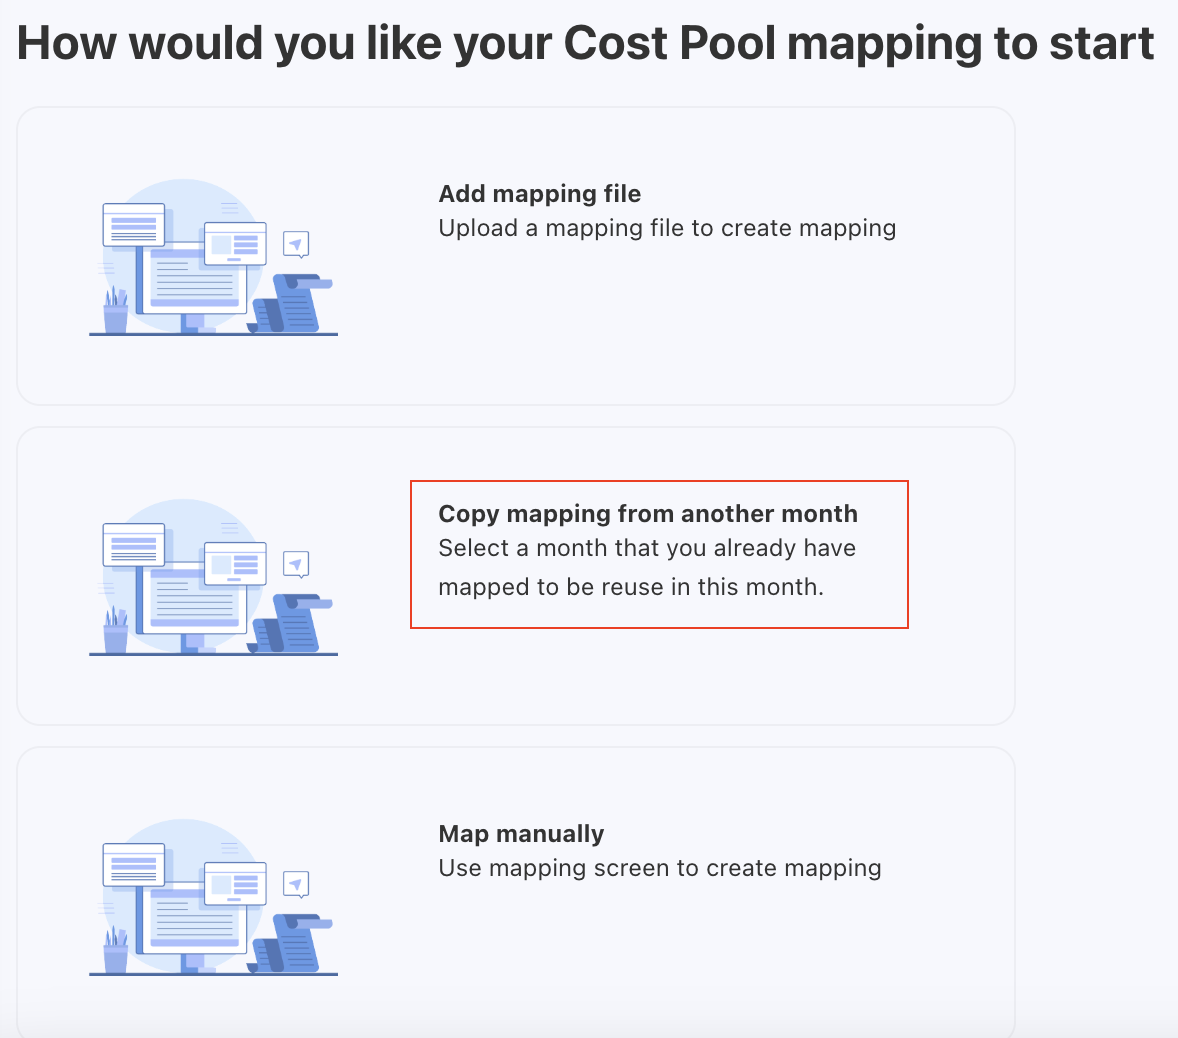
Copying rules from another month
If allocation logic is consistent across months, you can copy rules instead of recreating them.
When copying rules from another month, the existing rules will be deleted and new rules will be added as a full rule set.
To copy,
-
Select a month you want to allocate the spend and click ellipsis (…) menu.
-
Select Add Rules.
-
Choose Copy mapping from another month.
-
On the Copy Cost Pool Mapping popup, select the source year-month and click COPY MAPPING.
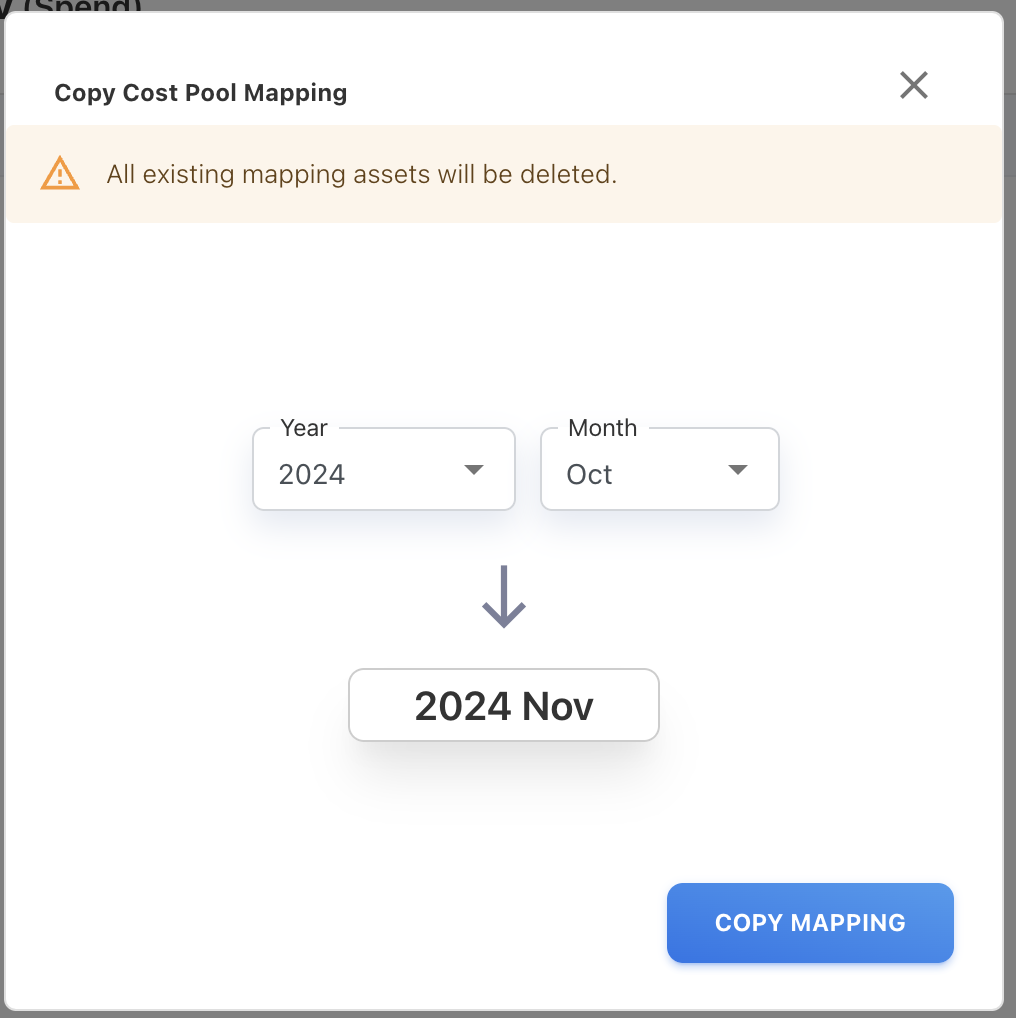
The rules from the selected month are replicated for the target month.
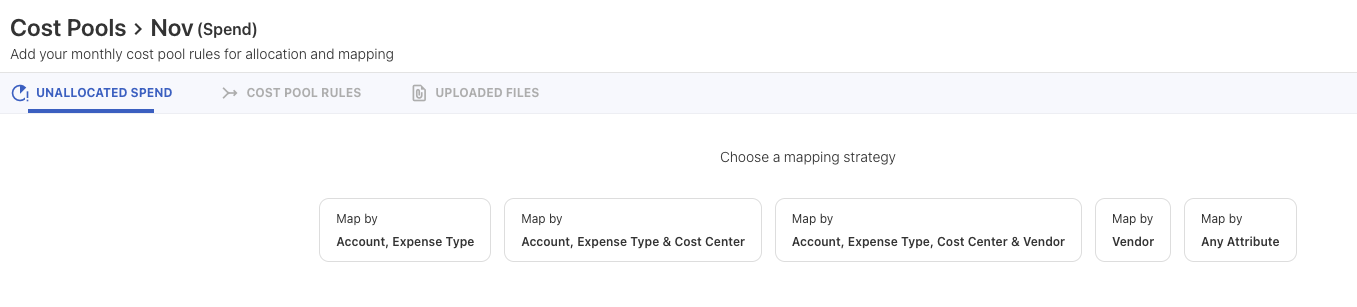
Mapping spend manually
The manual mapping involves assigning spend directly from Accounts, Cost Centers, Vendors, or any attribute to the appropriate cost pool without relying on file uploads. You can use manual mapping when you find any unmapped cost that does not fit into the predefined rules.
You can choose from predefined strategies or define custom conditions:
-
Map by Account, Expense Type
-
Map by Account, Expense Type & Cost Center
-
Map by Account, Expense Type, Cost Center & Vendor
-
Map by Vendor
-
Map by Any Attribute
Procedure
To map manually,
-
Select a month you want to allocate the spend and click ellipsis (…) menu.
-
Select Add Rules.
-
Choose Map manually. A list of predefined strategies appears.
-
Select a strategy that you wish to use:
|
Strategy Name |
Based on |
|---|---|
|
Map by Account, Expense Type |
Account Code + Account Name + Expense Type |
|
Map by Account, Expense Type & Cost Center |
Account Code + Account Name + Expense Type + Cost Center Code + Cost Center Name |
|
Map by Account, Expense Type, Cost Center & Vendor |
Account Code + Account Name + Expense Type + Cost Center Code + Cost Center Name + Vendor Code + Vendor Name |
|
Map by Vendor |
Vendor Code + Vendor Name |
|
Map by Any Attribute |
Conditions that you set while adding rule. |
-
Depending on your selection, follow the below steps:
-
For predefined strategies: Select the one or more rows that you wish to allocate by clicking the checkbox next to each one.
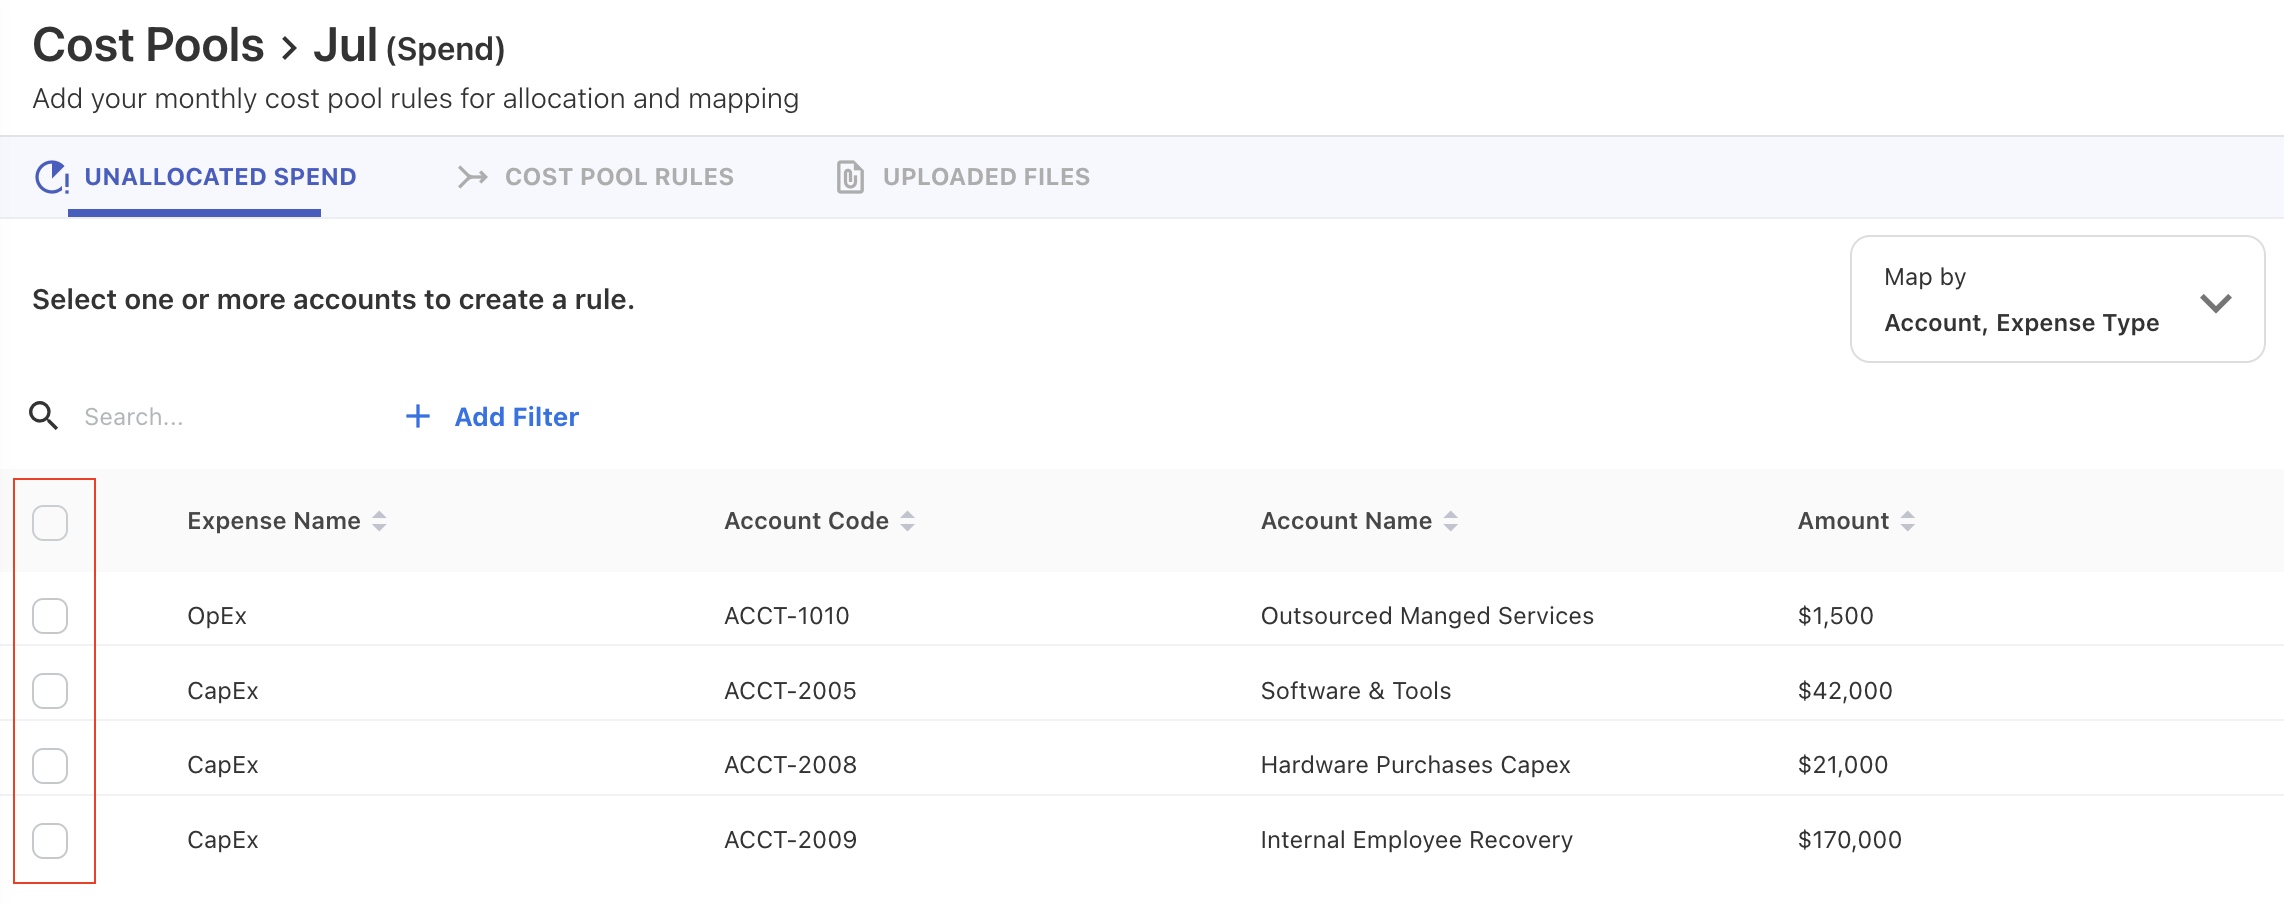
You can see the allocated amount and other columns. You may use the search box or add filters to refine the items. The General Ledger Transaction can be checked by clicking on row. You can switch between different strategies by clicking on the dropdown arrow at the upper-right corner.
-
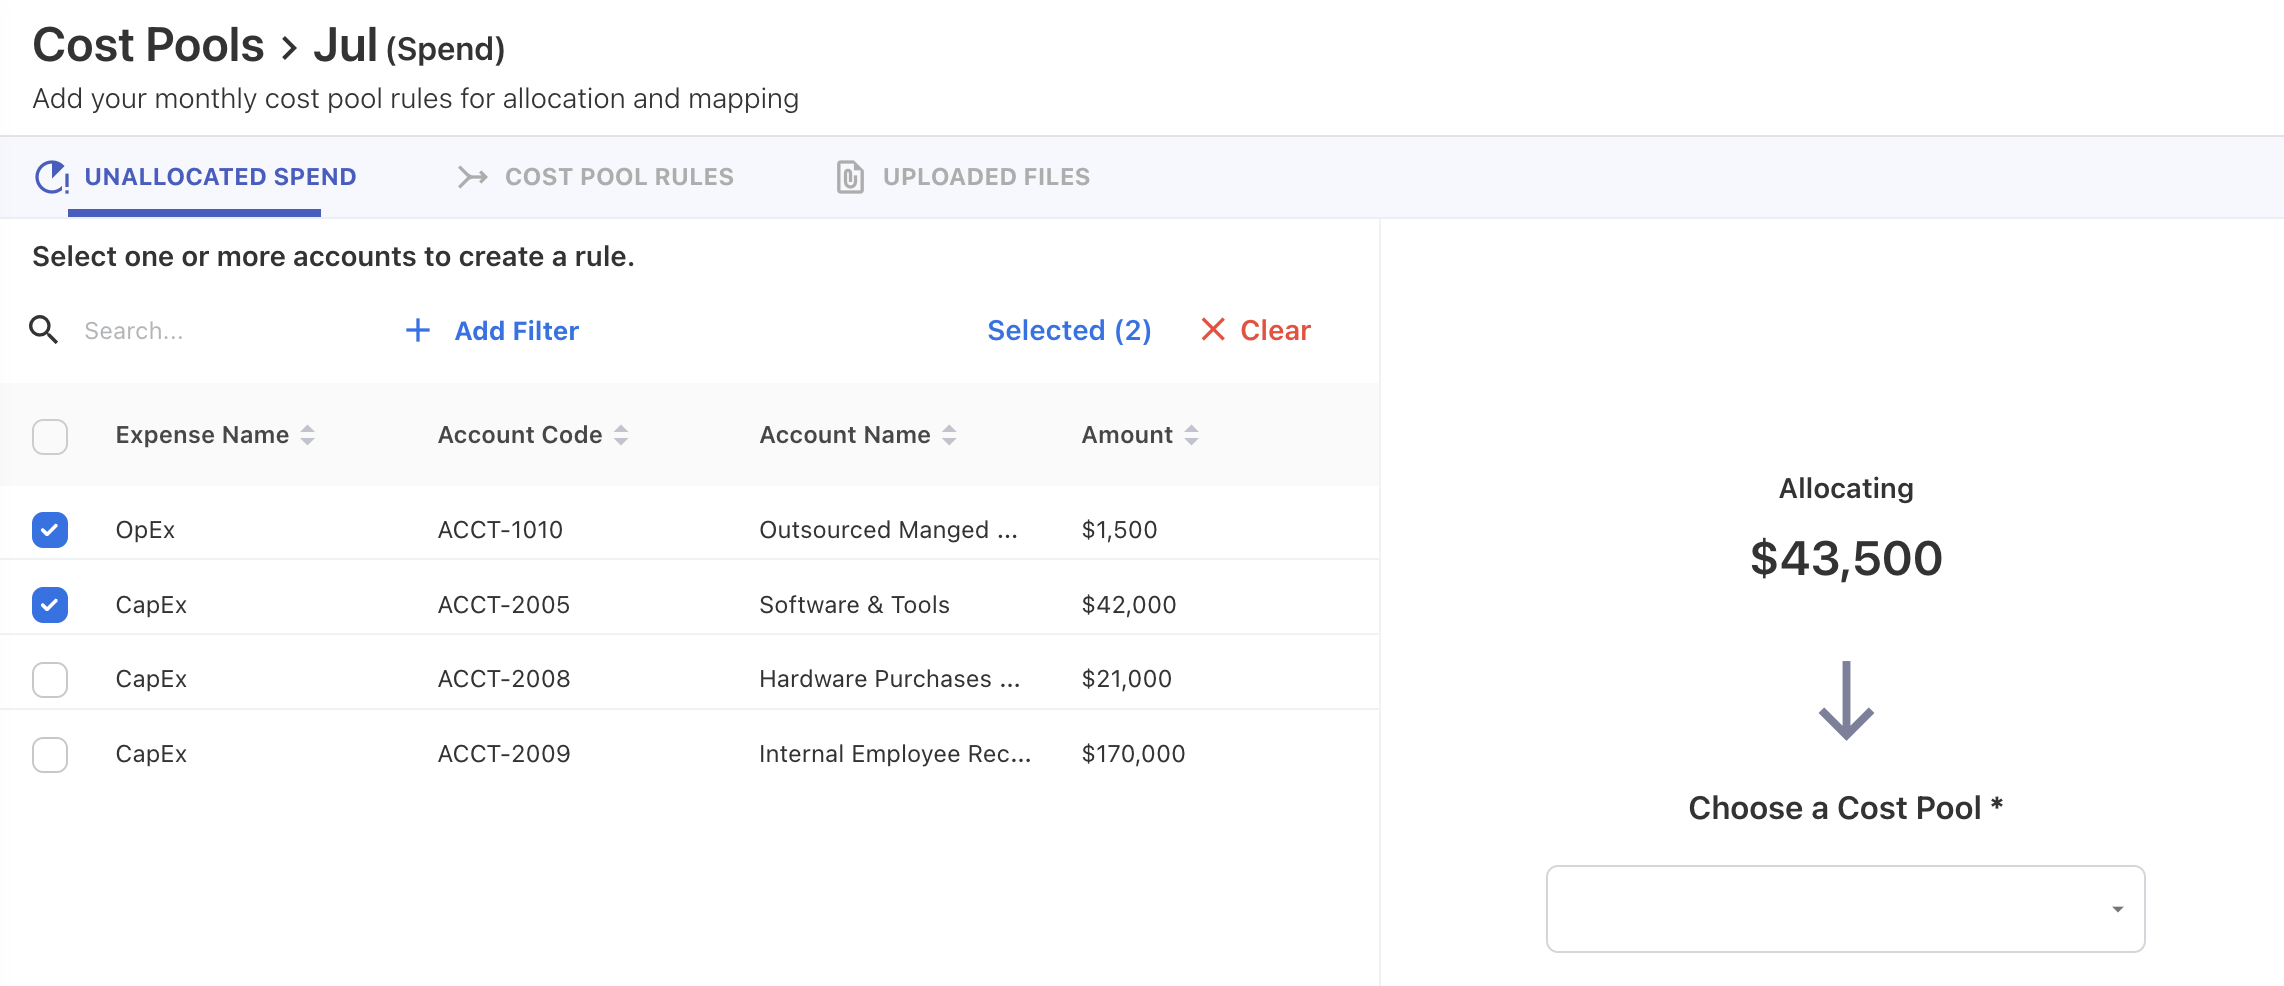
Upon selecting row(s), a small wizard opens to the right for allocating the selected amount to the cost pool.
-
Select the cost pool from the list and click SAVE RULES. A Rules Saved Successfully message appears.
-
-
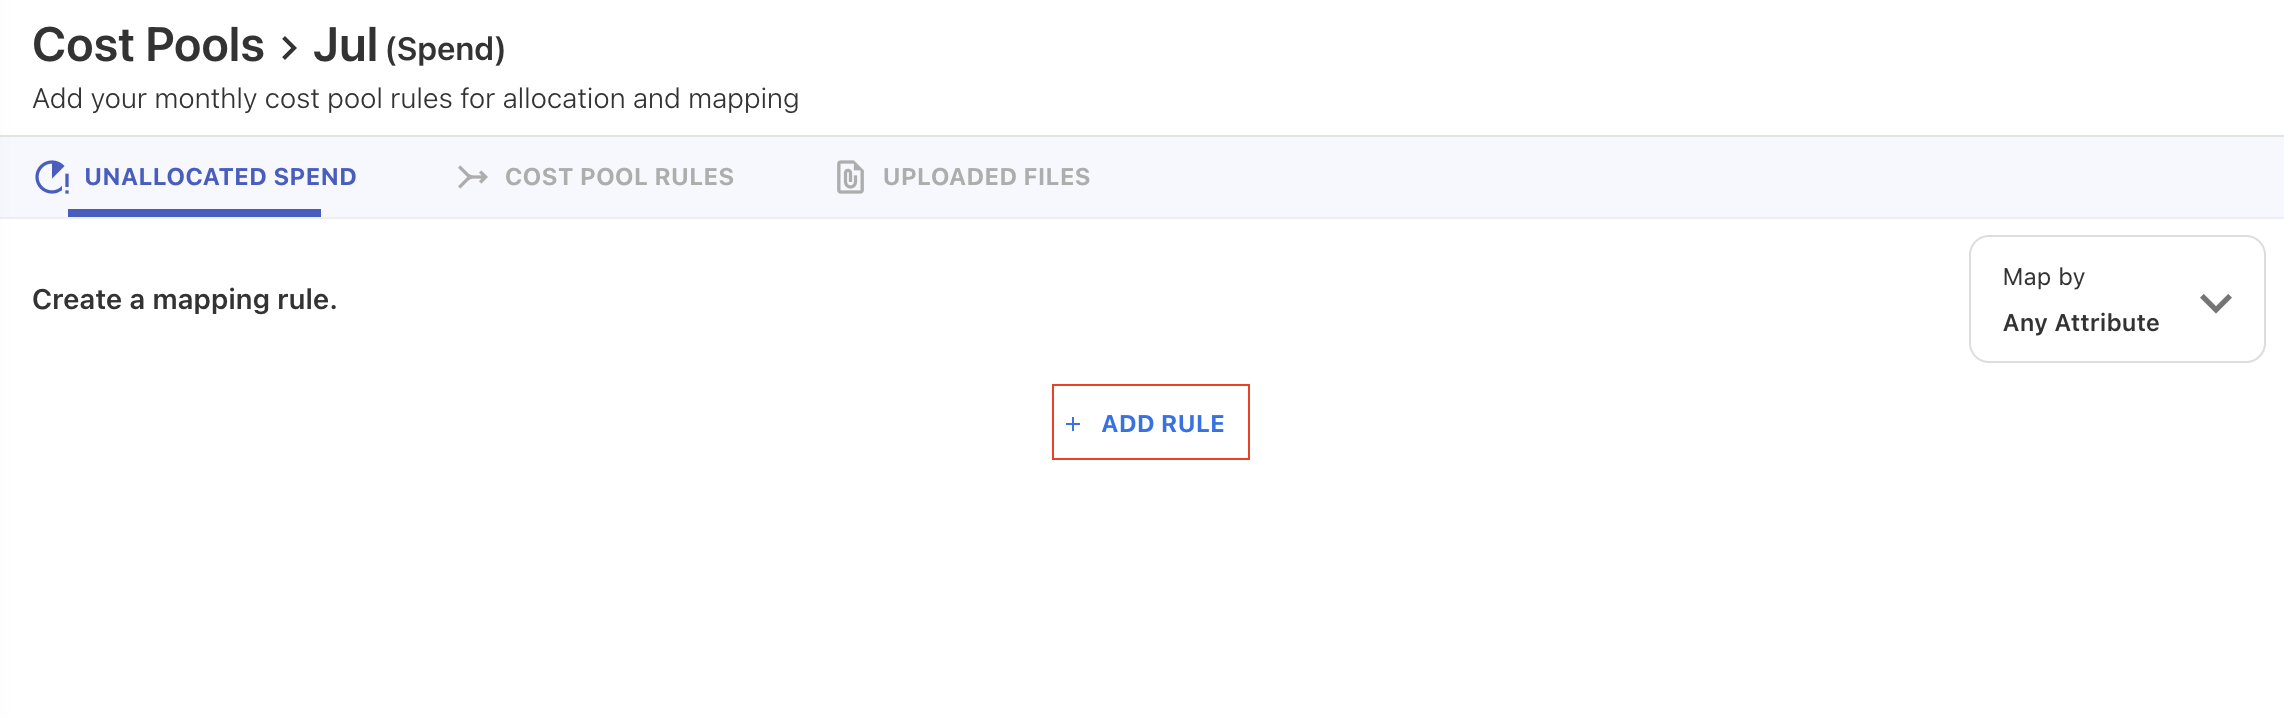
For Any Attribute strategy:
-
Click + ADD RULE from the mapping screen.
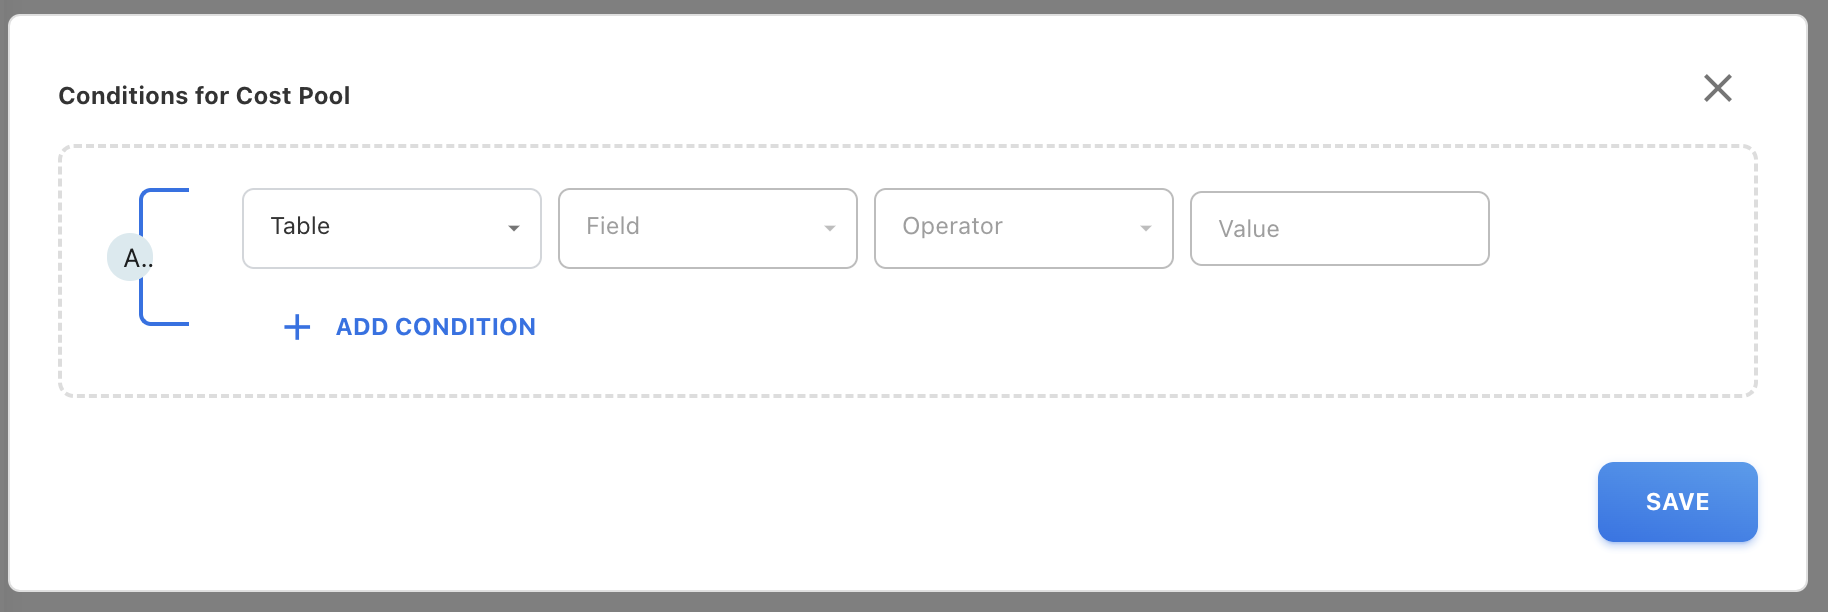
A Conditions for Cost Pool popup opens.
-
On the popup, select the table and specify other conditions.
-
(Optional) Click + ADD CONDITION to add new table.
-
Click SAVE. A small wizard opens to the right for allocating the selected amount to the cost pool.
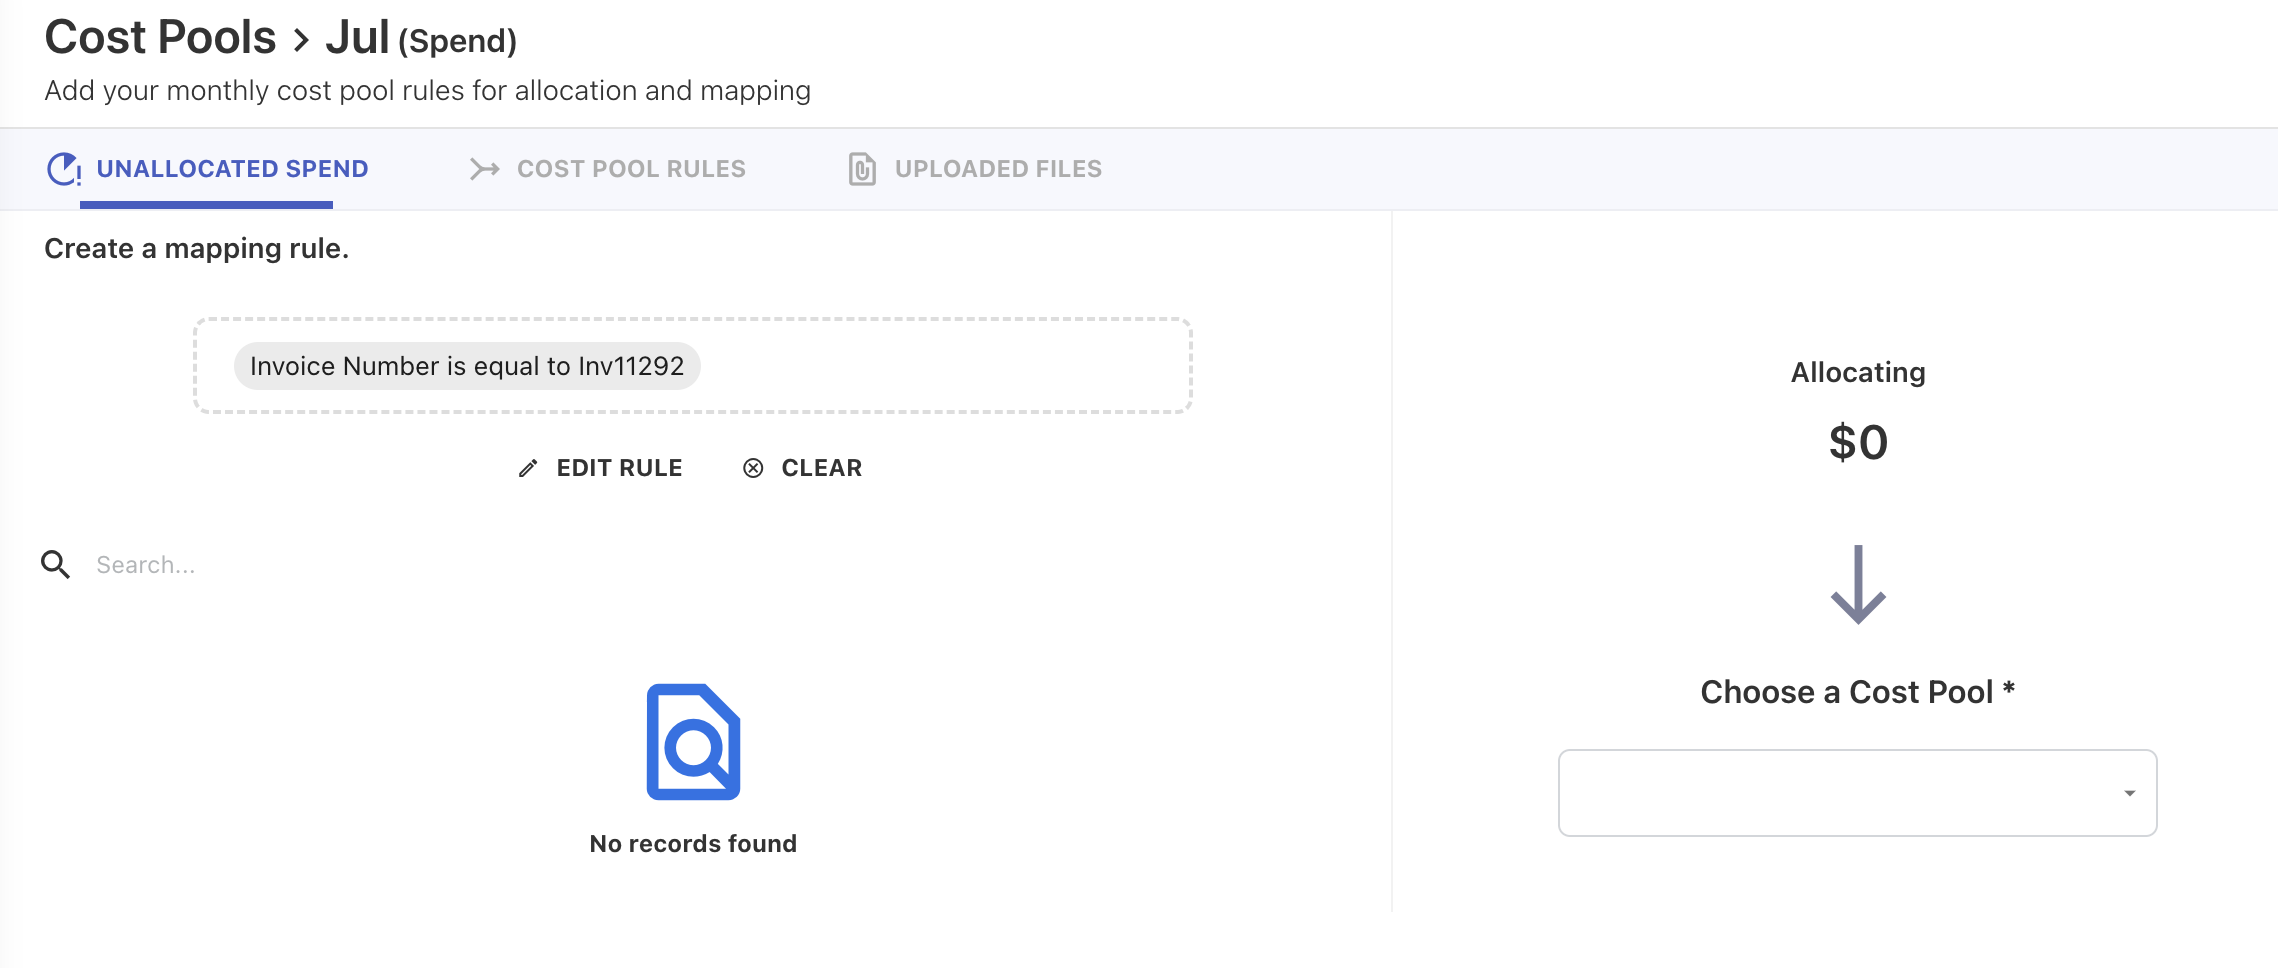
-
Select the cost pool from the list and click SAVE RULES.
-
-
A Rules Saved Successfully message appears and application redirects you to the UNALLOCATED SPEND tab, where you can continue this procedure until you fully allocate all of your spend.
Related content