
Overview
Before Yarken can import AWS billing data, AWS must generate recurring billing exports and store them in Amazon S3.
Yarken supports AWS billing data using both FOCUS 1.0 and FOCUS 1.2 with AWS columns.
If you already use a FOCUS 1.0 export with Yarken, you can continue using it. You do not need to migrate to FOCUS 1.2.
For new exports, you can use FOCUS 1.0 or FOCUS 1.2 depending on your reporting requirements. FOCUS 1.2 provides additional standardized cloud cost and billing information and can be used when you want to take advantage of the additional FOCUS 1.2 fields supported by Yarken.
For more information about FOCUS 1.2 support and optional migration from FOCUS 1.0, see Configure and migrate FOCUS 1.2 data.
Before you begin
Ensure you have:
-
Access to AWS Billing and Cost Management
-
An existing Amazon S3 bucket
-
The required AWS permissions to create a Data Export and configure the S3 destination
Before creating the export, decide which supported FOCUS version you want to use:
-
FOCUS 1.0 — Use this if it meets your current reporting requirements or if you want to maintain an existing FOCUS 1.0 integration.
-
FOCUS 1.2 — Use this if you want to take advantage of the additional FOCUS 1.2 data supported by Yarken.
Procedure
To create a data export,
-
Sign in to the AWS Billing and Cost Management console at https://console.aws.amazon.com/costmanagement/home
-
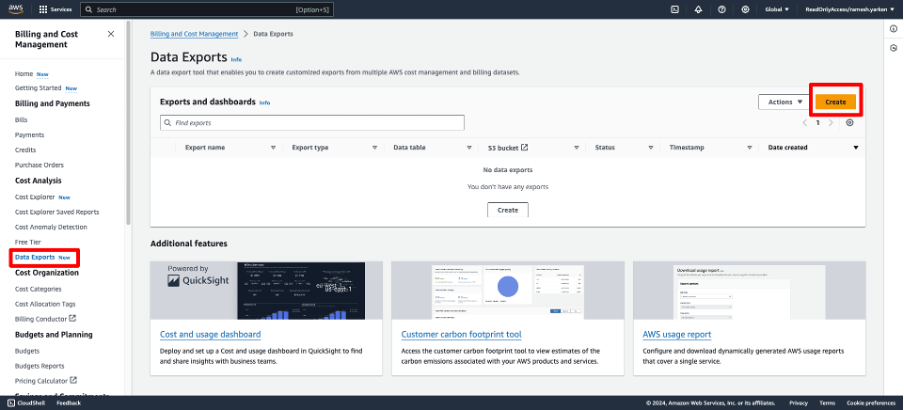
From the left navigation pane, select Data Exports.
-
On the Data Exports page, select Create.
-
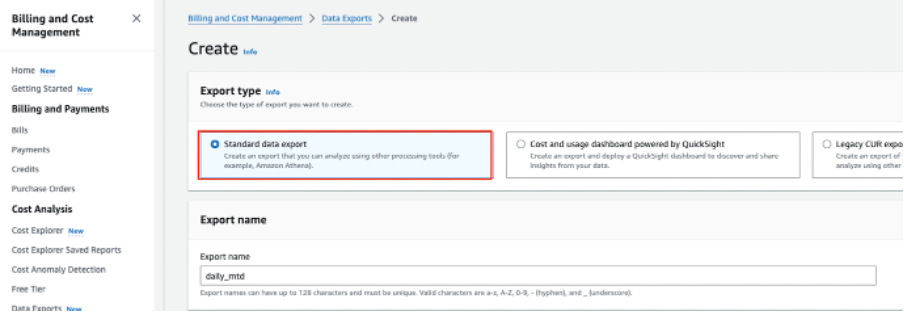
On the Create page, under the Export type, choose Standard data export.
-
Enter Export name.
Note: Export name up to 128 characters and must be unique. Valid characters are a-z, A-Z, 0-9, - (hyphen), and _ (underscore).
-
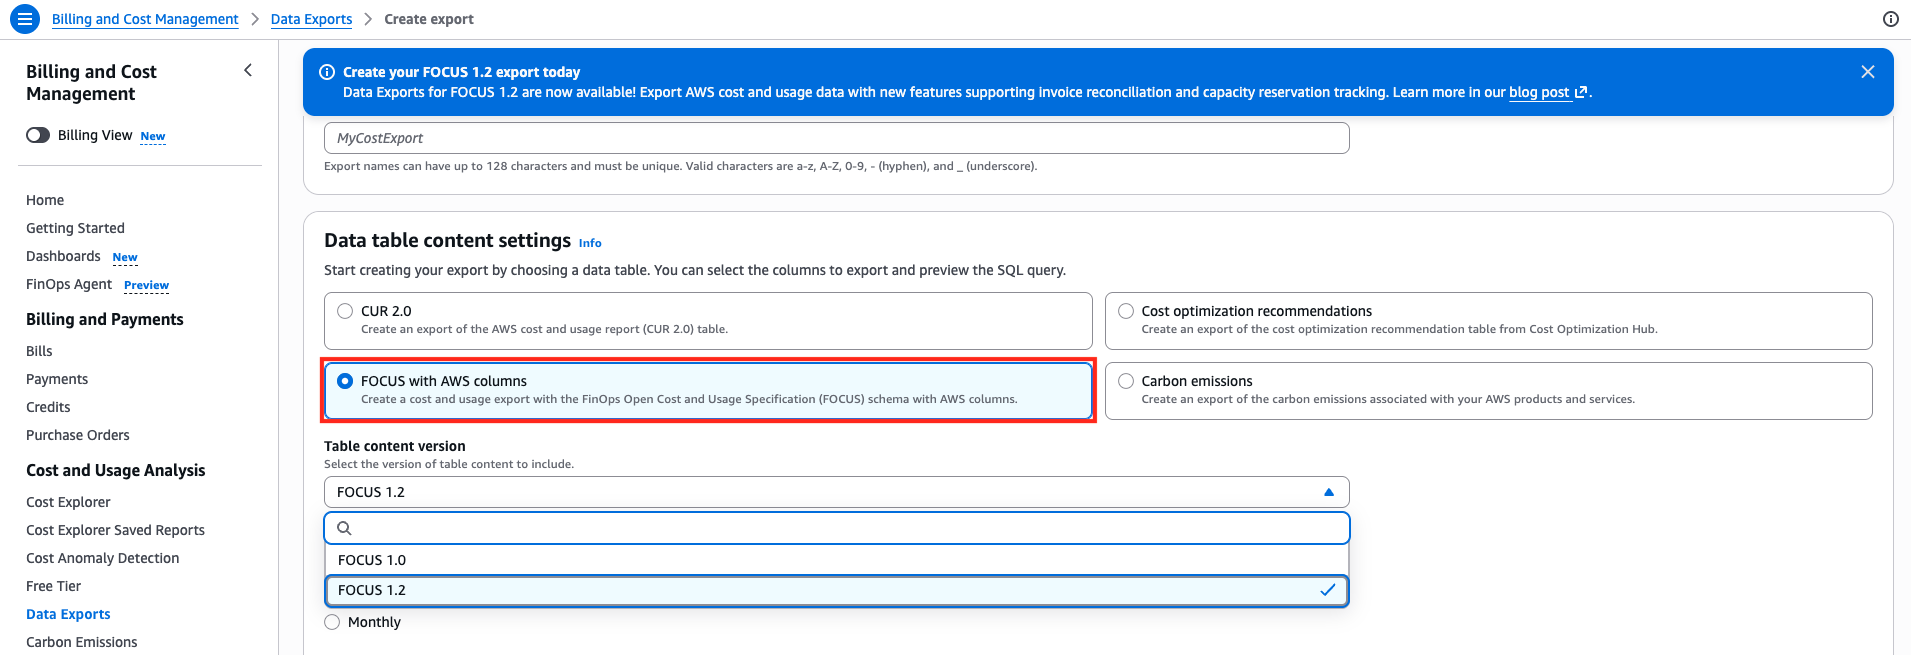
Under Data table content settings, select the FOCUS data table you want to use:
-
FOCUS 1.0 with AWS columns, or
-
FOCUS 1.2 with AWS columns
Yarken supports both FOCUS 1.0 and FOCUS 1.2.
If you are creating a FOCUS 1.2 export to replace an existing FOCUS 1.0 export, create and validate the new export before replacing your existing production export.
-
Note: The Column selection selects all the columns by default.
-
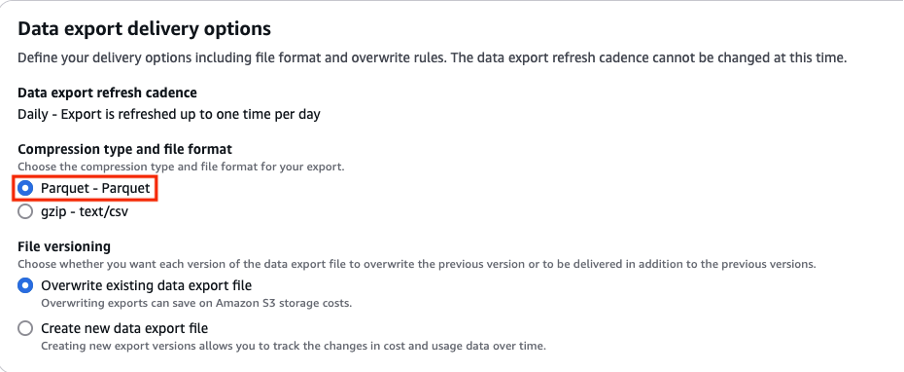
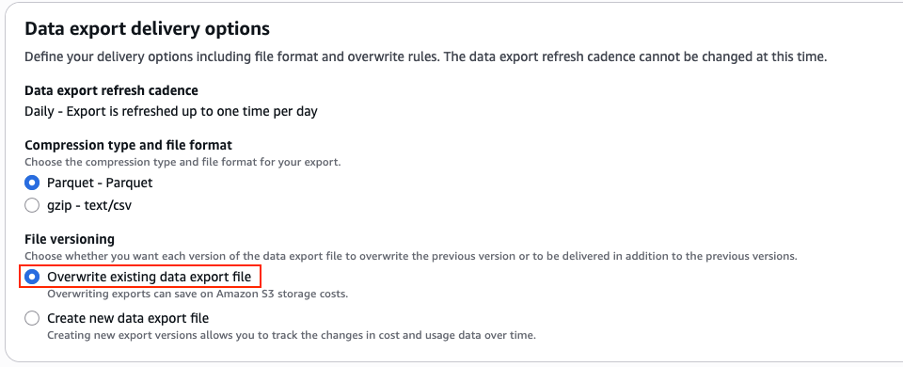
Under Data export delivery options, for Compression type and file format, choose Parquet - Parquet.
-
For File versioning, choose Overwrite existing data export file.
-
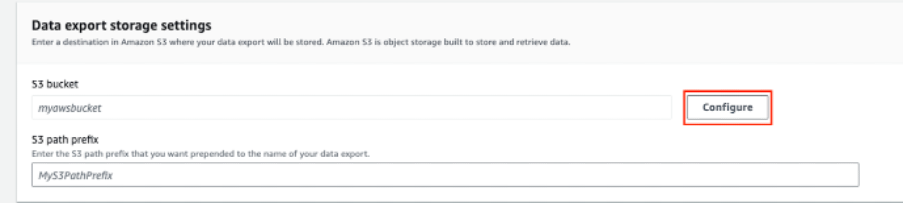
Under Data export storage settings, for S3 bucket name, choose Configure.
-
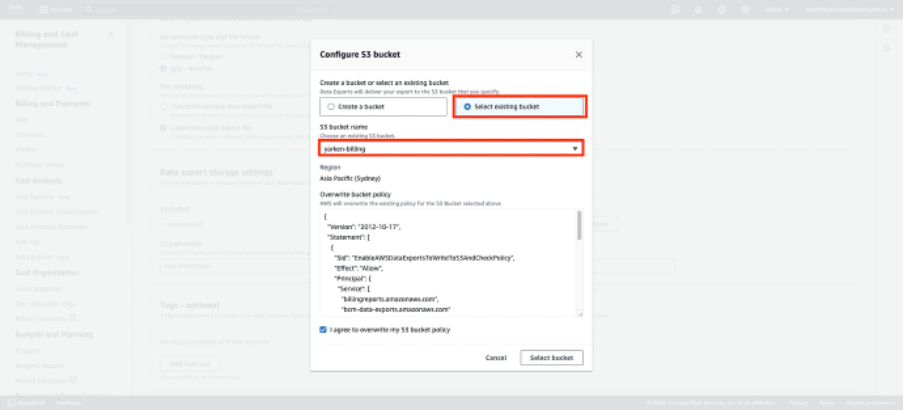
In the Configure S3 bucket dialog box, select Select existing bucket and choose an existing bucket.
-
Review the S3 bucket policy and click Select bucket button.
-
(Optional) For S3 path prefix, enter a name for the file that will be created in your S3 bucket.
-
Click Create.
Once you create a new data export, Data Exports is activated and generates the file on daily basis.
Note: It can take up to 24 hours for AWS to start delivering exports to your Amazon S3 bucket.
Next step:
Continue with Generate AWS Access Key and Secret Key to configure the AWS connection in Yarken.
Related content