
Ways to add Tower rules
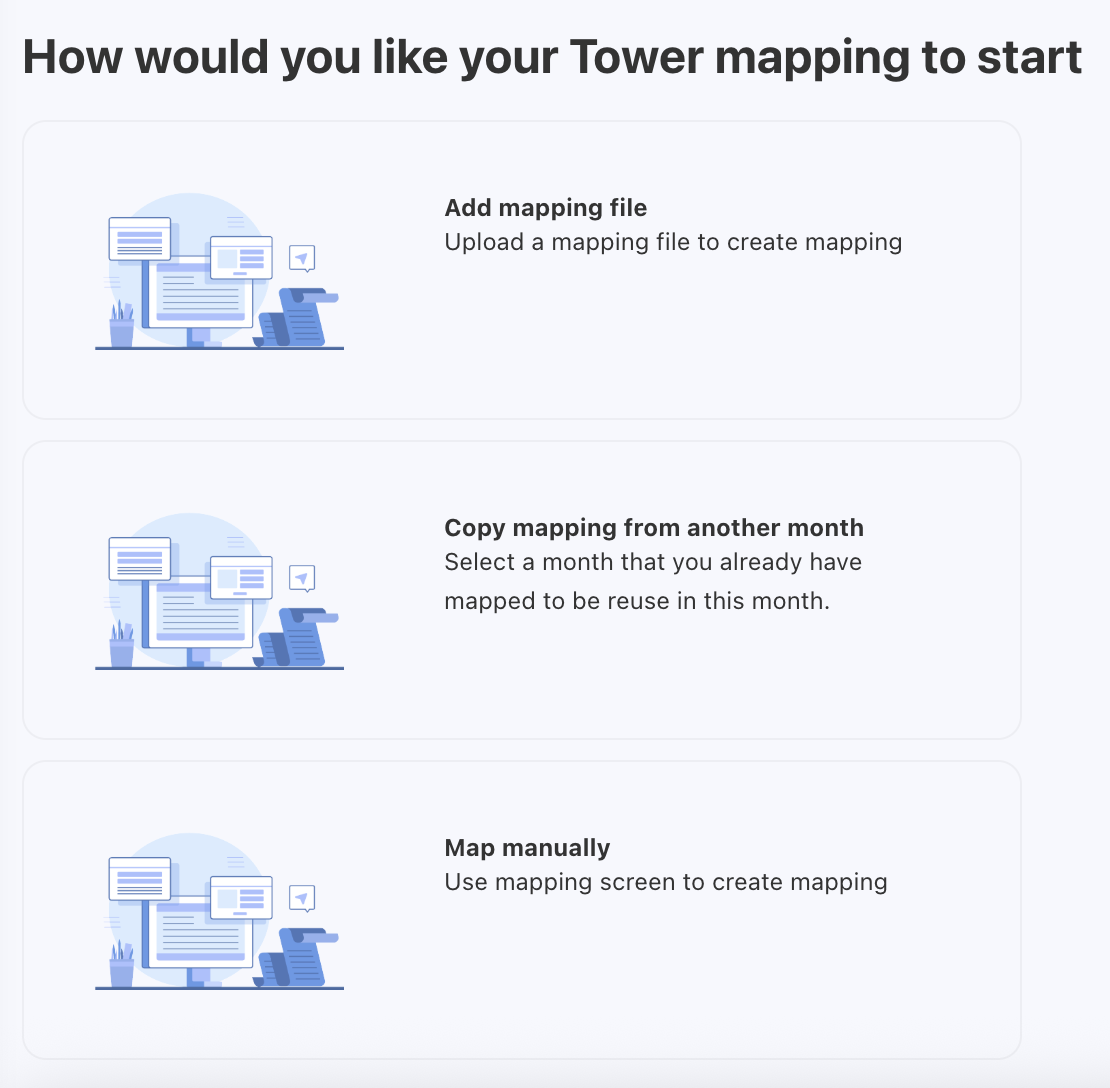
Yarken supports three flexible ways to create allocation rules:
-
Add mapping file – Upload rules using a template.
-
Copy mapping from another month – Reuse existing rules.
-
Map manually – Create rules directly in the application.
Adding rules using a mapping File
This strategy involves a process of uploading a mapping file. You can download and use the template file named Tower Rules from Data Dictionary. The file should include the values in the mandatory columns.
Prerequisites
Before adding mapping file, you should have the value in the below mandatory columns,
-
Priority
-
Filter
-
Tower
-
Sub Tower
-
Portion
-
Serial Number
Procedure
-
Select the target month tile.
Make sure you are in the correct fiscal year by checking the year filter on the top-left.
-
Click the ellipsis (…) menu and choose Add Rules.
-
Select Add mapping file.
-
Browse or drag and drop the template file.
-
Review the data and click Next.
Note: If you have aligned to the template headers or loaded your data into the template, you should see “All required fields have been automapped successfully.”
-
Choose Finish to complete the upload, or Edit Mapping to review and adjust field mappings.
After uploading the file, you can check the file status, loaded records, mapped fields, and other details under the UPLOADED FILES tab.
Copying rules from another month
If allocation logic is consistent across months, you can copy rules instead of recreating them.
When copying rules from another month, the existing rules will be deleted and new rules will be added as a full rule set.
To copy,
-
Select a month you want to allocate the spend and click ellipsis (…) menu.
-
Select Add Rules.
-
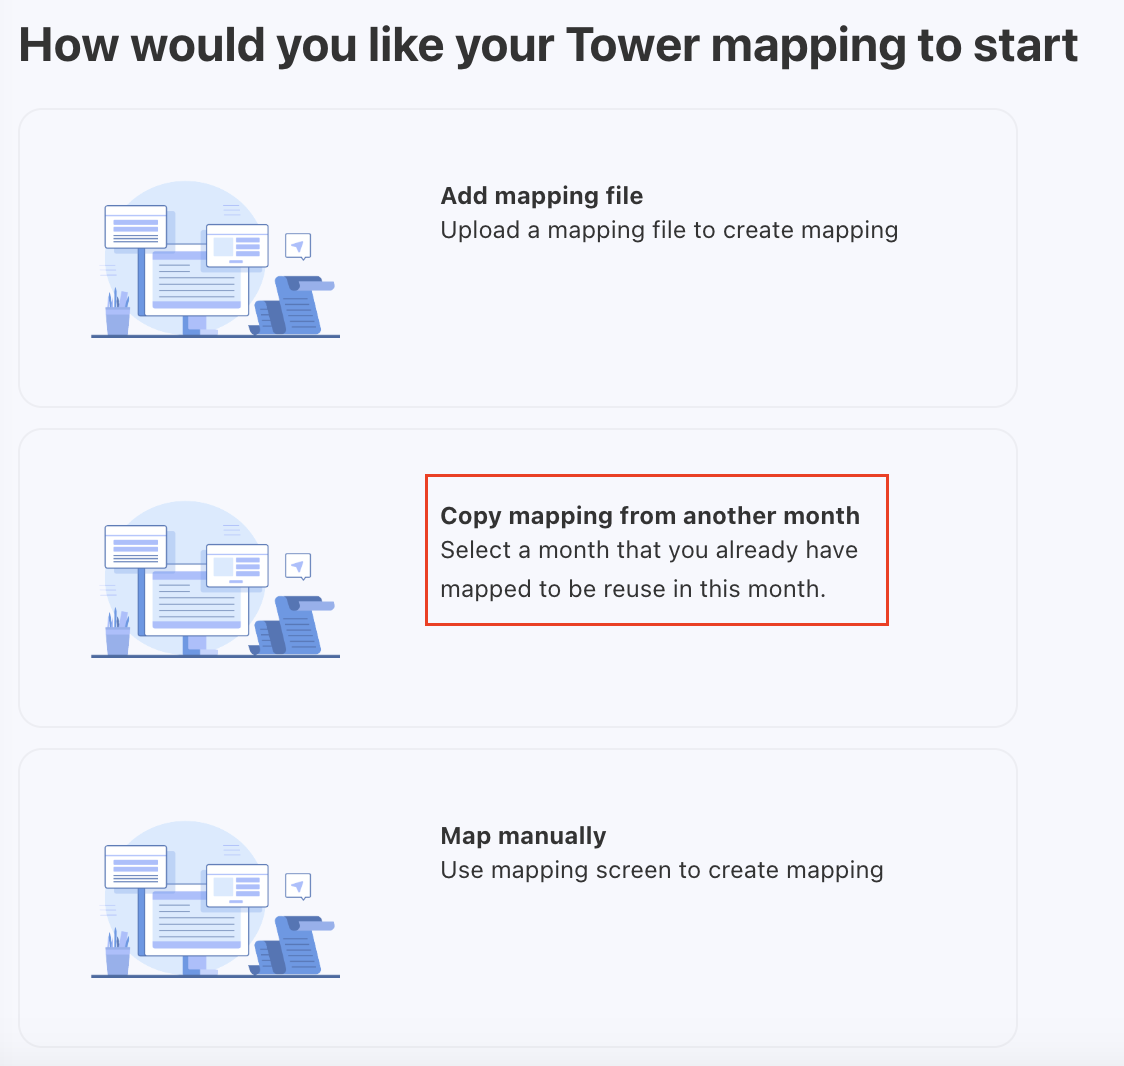
Choose Copy mapping from another month.
-
On the Copy Tower Mapping popup, select the source year-month and click COPY MAPPING.
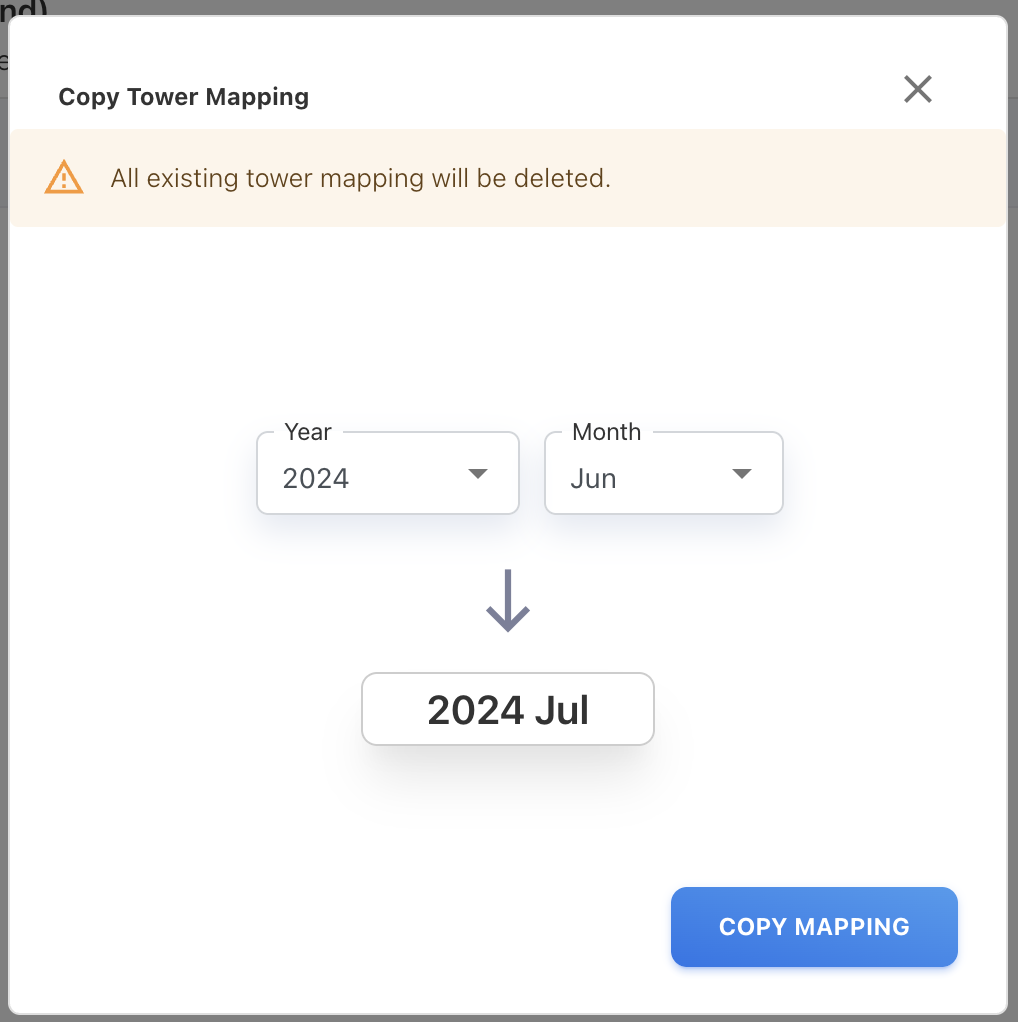
The rules from the selected month are replicated for the target month.
Mapping spend manually
The manual mapping involves assigning spend directly from Expense Type, Cost Pool, Accounts, Cost Centers, Vendors, or any attribute to the appropriate tower without relying on file uploads. You can use manual mapping when you find any unmapped cost that does not fit into the predefined rules.
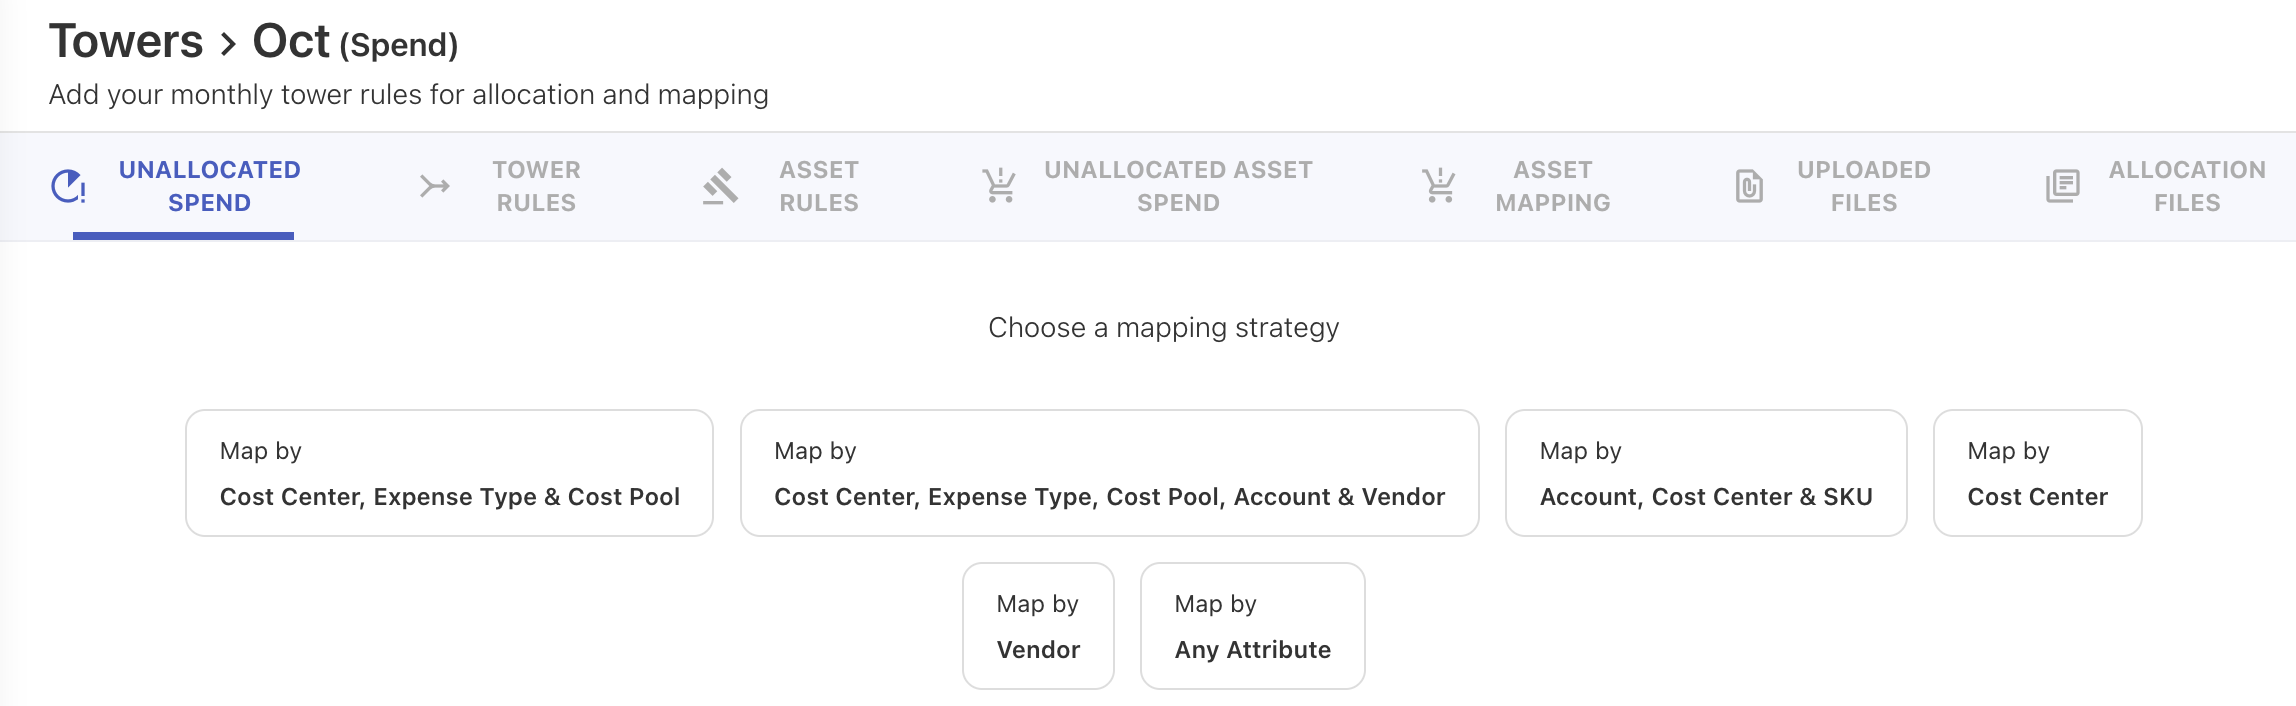
You can choose from predefined strategies or define custom conditions:
-
Map by Cost Center, Expense Type & Cost Pool
-
Map by Cost Center, Expense Type, Cost Pool, Account & Vendor
-
Map by Cost Center
-
Map by Vendor
-
Map by Any Attribute
After selecting a strategy, the spend allocation to tower is carried out using either:
-
Single tower - Allocate spend to one tower at a time.
-
Multiple towers - Allocate spend to multiple towers simultaneously.
The application also allows you to distribute the spend to specific assets or offerings while allocating to towers.
Single Tower allocation
Single Tower allocation is used when the selected spend should be mapped to one Tower at a time.
For each allocation, the spend can be distributed to either a single asset or a single Solution Offering—you cannot allocate spend to both assets and offerings simultaneously.
Procedure
To map manually,
-
Select a month you want to allocate the spend and click ellipsis (…) menu.
-
Select Add Rules.
-
Choose Map manually. A list of predefined strategies appears.
-
Select a strategy that you wish to use:
|
Strategy Name |
Based on |
|---|---|
|
Map by Cost Center, Expense Type & Cost Pool |
Cost Center Code + Cost Center Name + Expense Type + Cost Pool Name + Sub Cost Pool Name |
|
Map by Cost Center, Expense Type, Cost Pool, Account & Vendor |
Cost Center Code + Cost Center Name + Expense Type + Cost Pool Name + Sub Cost Pool Name + Vendor Code + Vendor Name + Account Name + Account Code |
|
Map by Cost Center |
Cost Center Code + Cost Center Name |
|
Map by Vendor |
Vendor Code + Vendor Name |
|
Map by Any Attribute |
Conditions that you set while adding rule. |
-
Depending on your selection, follow the below steps:
-
For predefined strategies: Select one or more rows you want to allocate by clicking the checkbox next to each row.
-
Use Search or Add Filter to refine the list.
-
Click a row to view General Ledger transactions.
-
Switch between strategies using the dropdown in the upper-right corner.
-
Once rows are selected, an allocation wizard opens on the right.
-
Select a Tower from the list.
The Tower is displayed along with its Sub Tower.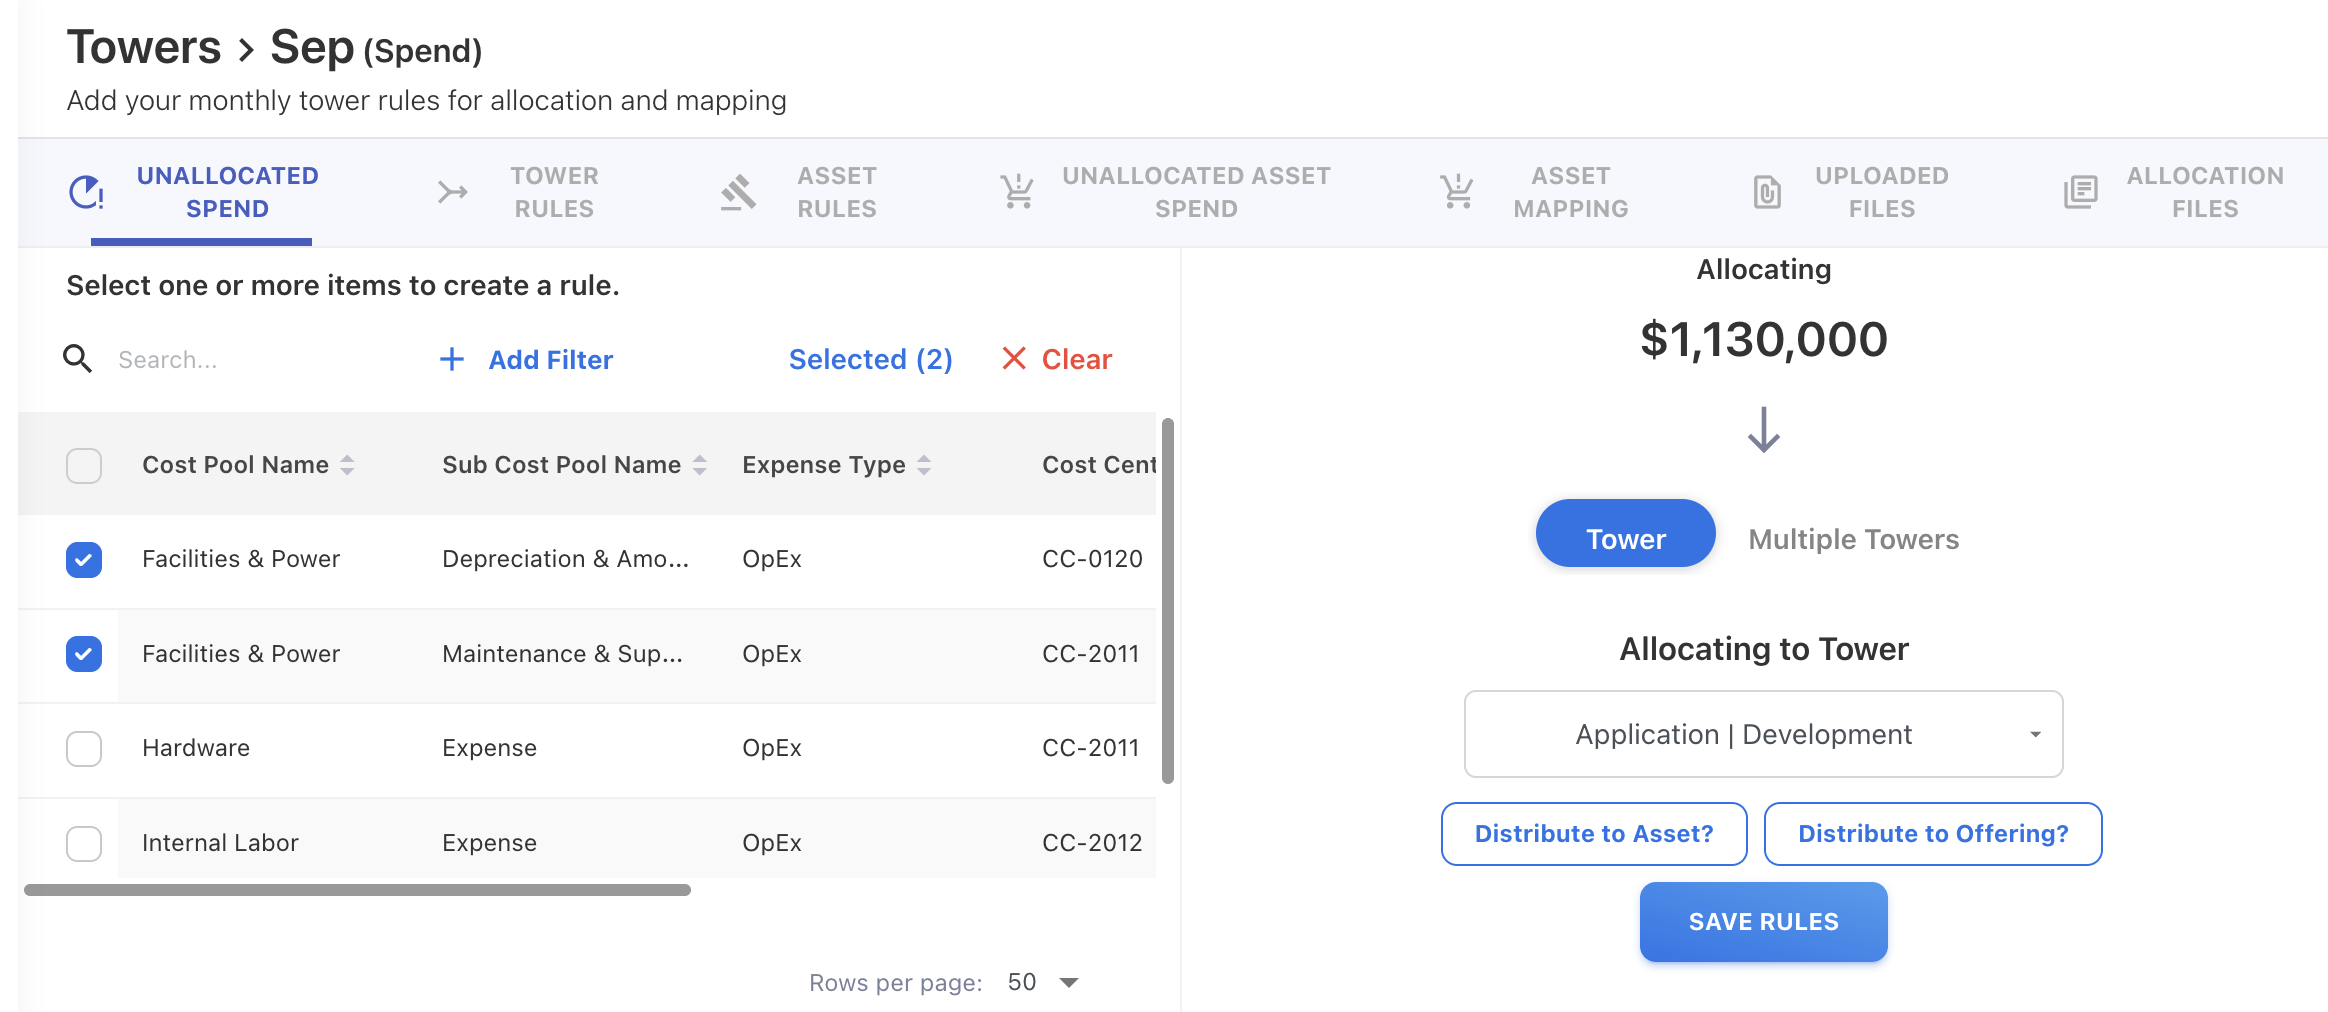
-
Choose how the spend should be distributed either to asset or solution offering:
-
Distribute to Asset:
-
Select an Asset type from the list.
-
Review the number of assets included in the allocation.
-
Choose a split method. For more information on how split method works, refer Spend split methods:
-
Equal
-
By weight
-
By tier
-
By asset ID
-
By asset percentage
-
-
(Optional) Add conditions to refine the asset selection.
-
Click SAVE RULES.
-
-
Distribute to Solution Offering
-
Select a Solution Offering from the list.
-
Review the number of offerings included.
-
Choose a split method. For more information on how split method works, refer Spend split methods:
-
Equal
-
By weight
-
-
(Optional) Add conditions.
-
Click SAVE RULES.
-
-
-
-
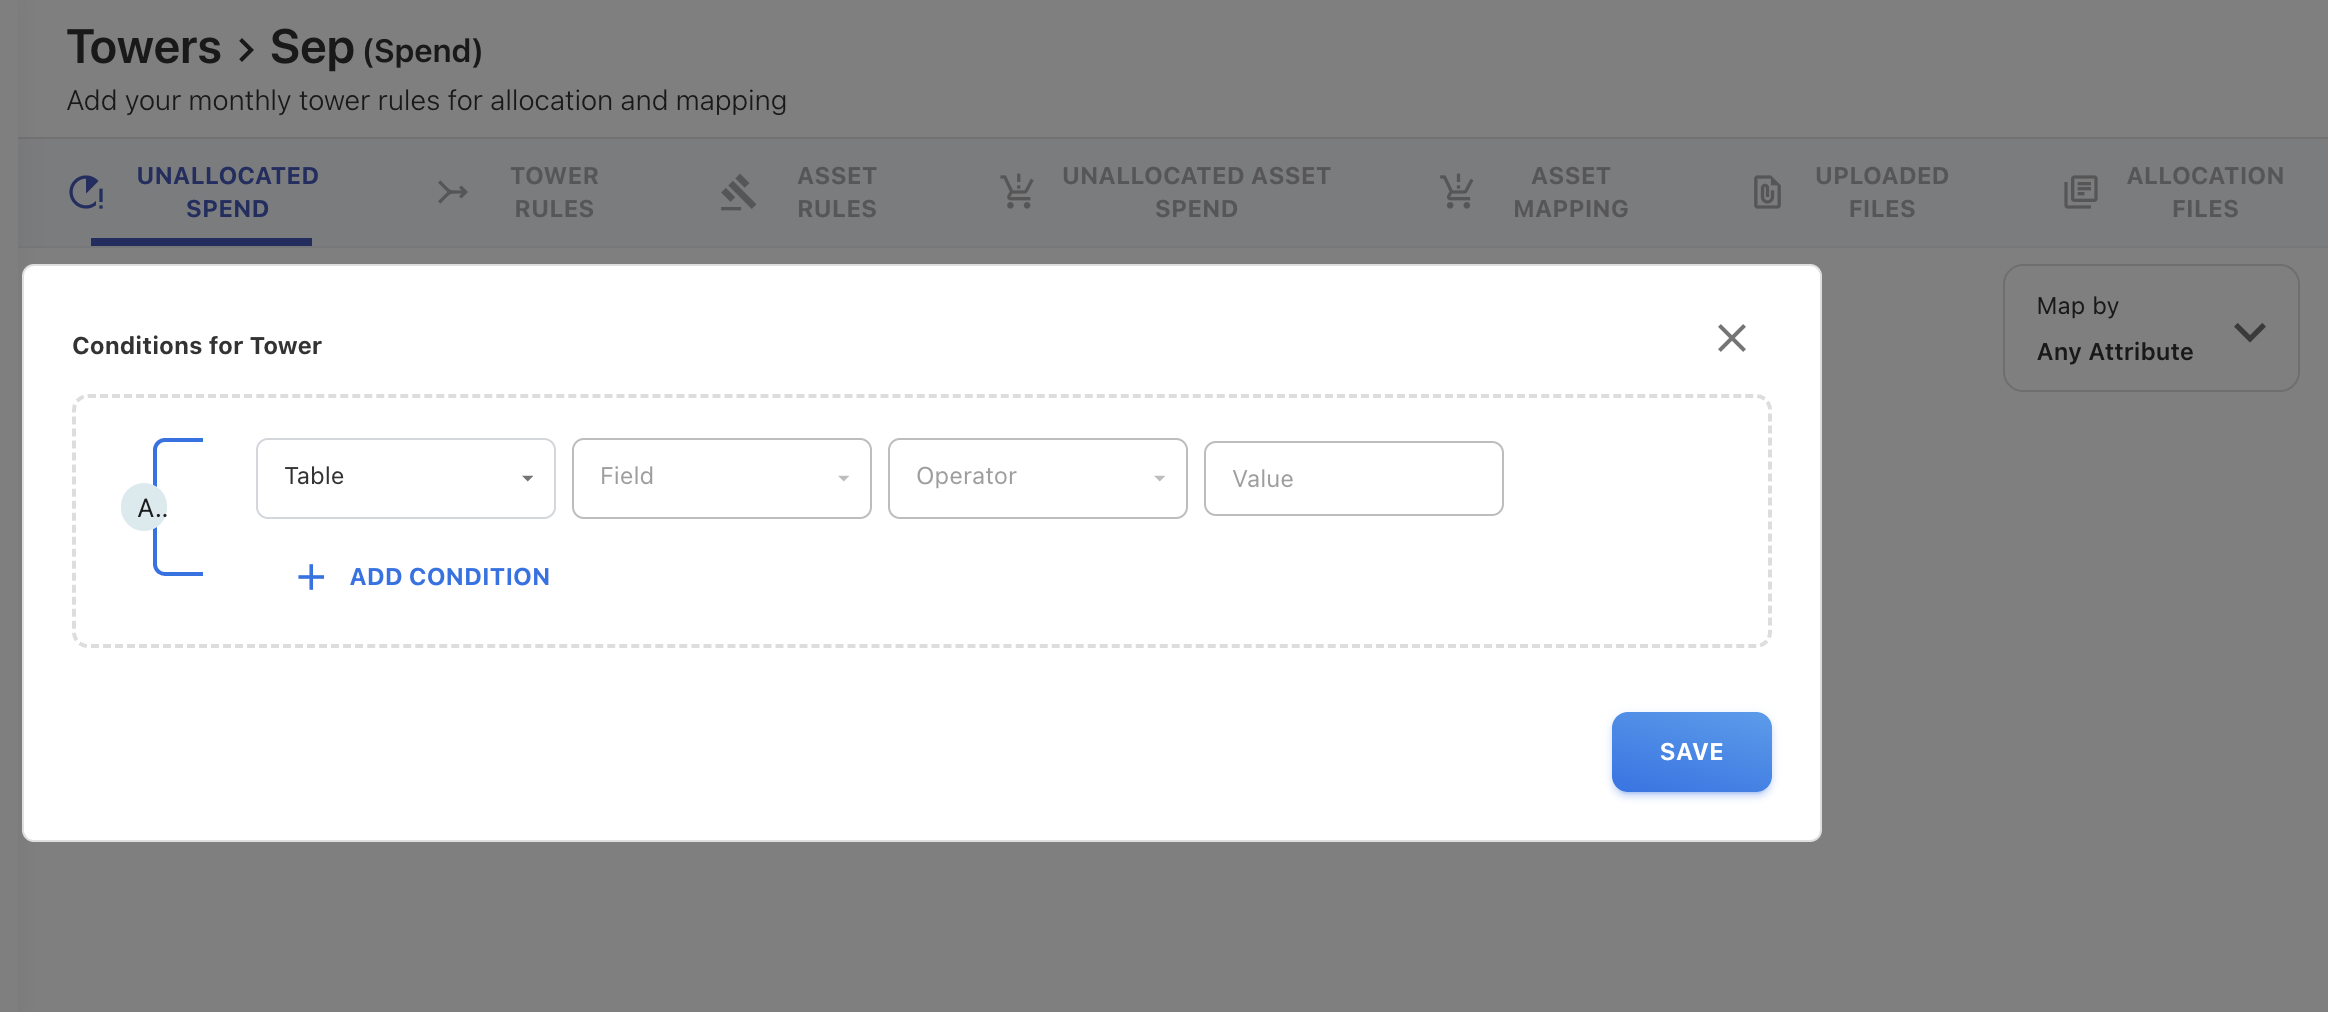
For Any Attribute strategy:
-
Click + Add Rule from the mapping screen.
-
In the popup:
-
Select the table.
-
Define the required conditions.
-
(Optional) Click + Add Condition to include additional tables.
-
-
Click Save. The allocation wizard opens on the right.
-
Select a Tower.
-
Choose Distribute to Asset or Distribute to Solution Offering.
-
Complete the allocation steps.
-
Click Save Rules.
-
-
Multiple Tower allocation
Multi-Tower allocation is used when selected Cost Pool spend must be split across more than one Tower.
In a multi-Tower allocation, you can distribute spend to multiple assets or multiple Solution Offerings simultaneously.
Yarken supports two ways to perform manual multi-Tower allocation:
-
Add Towers manually and assign portions
-
Add Towers using an allocation file
What is an allocation file?
An allocation file is a structured file used to define how Cost Pool spend should split across multiple Towers, Sub Towers, and Assets, all in bulk. Allocation files are used only for multi-Tower allocations and cannot be used for single-Tower allication.
You can use Tower Consumption template available in the Data Dictionary.
An allocation file (.xlsx or .csv) includes following fields :
-
Towers and Sub Towers (Mandatory)
-
Usage (Mandatory)
-
Asset Type and Asset ID (Optional)
Add multiple Towers manually
Procedure
-
Select a month you want to allocate the spend and click ellipsis (…) menu.
-
Select Add Rules.
-
Choose Map manually. A list of predefined strategies appears.
-
Select a strategy that you wish to use.
-
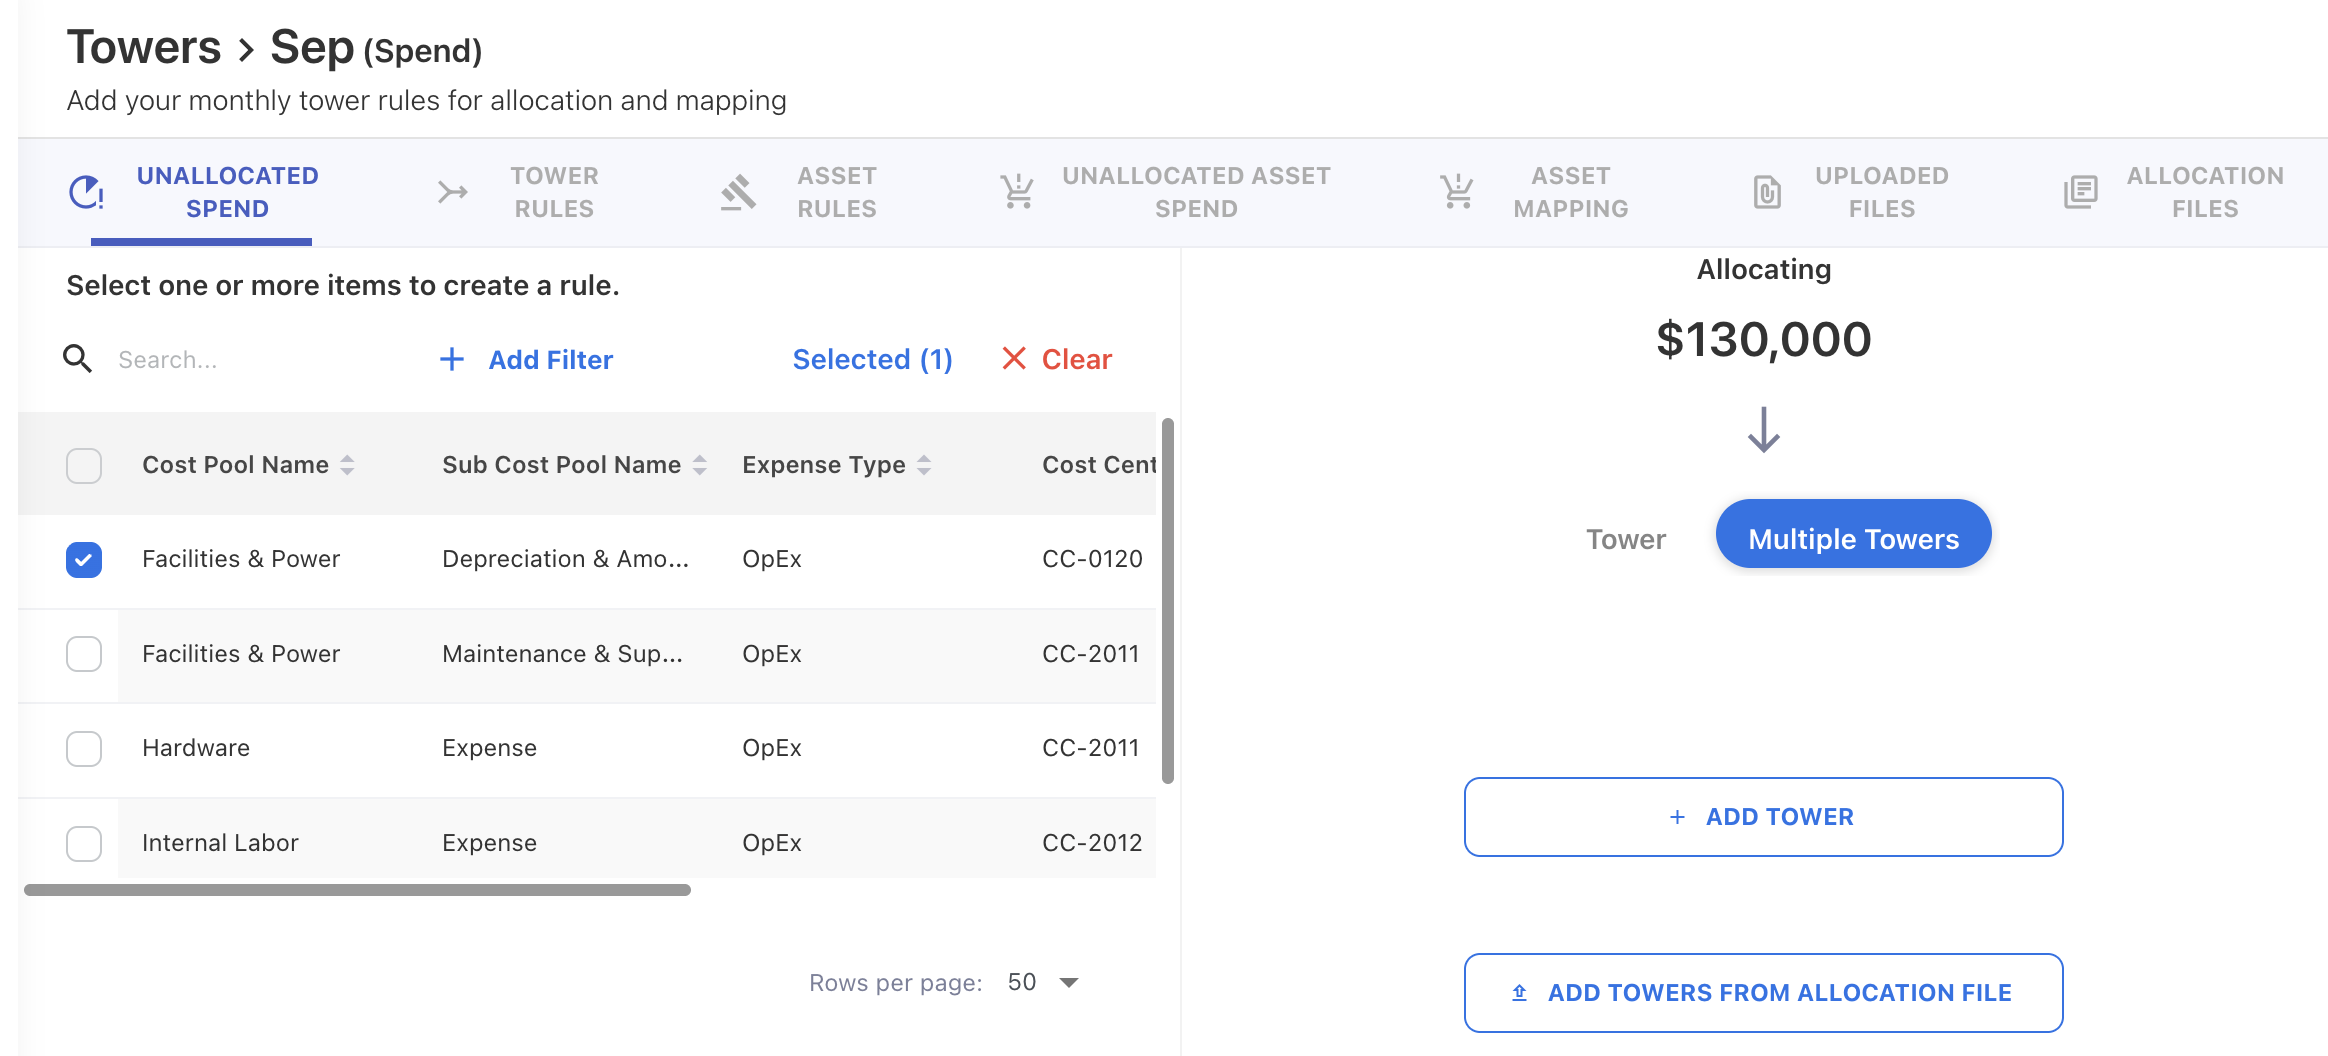
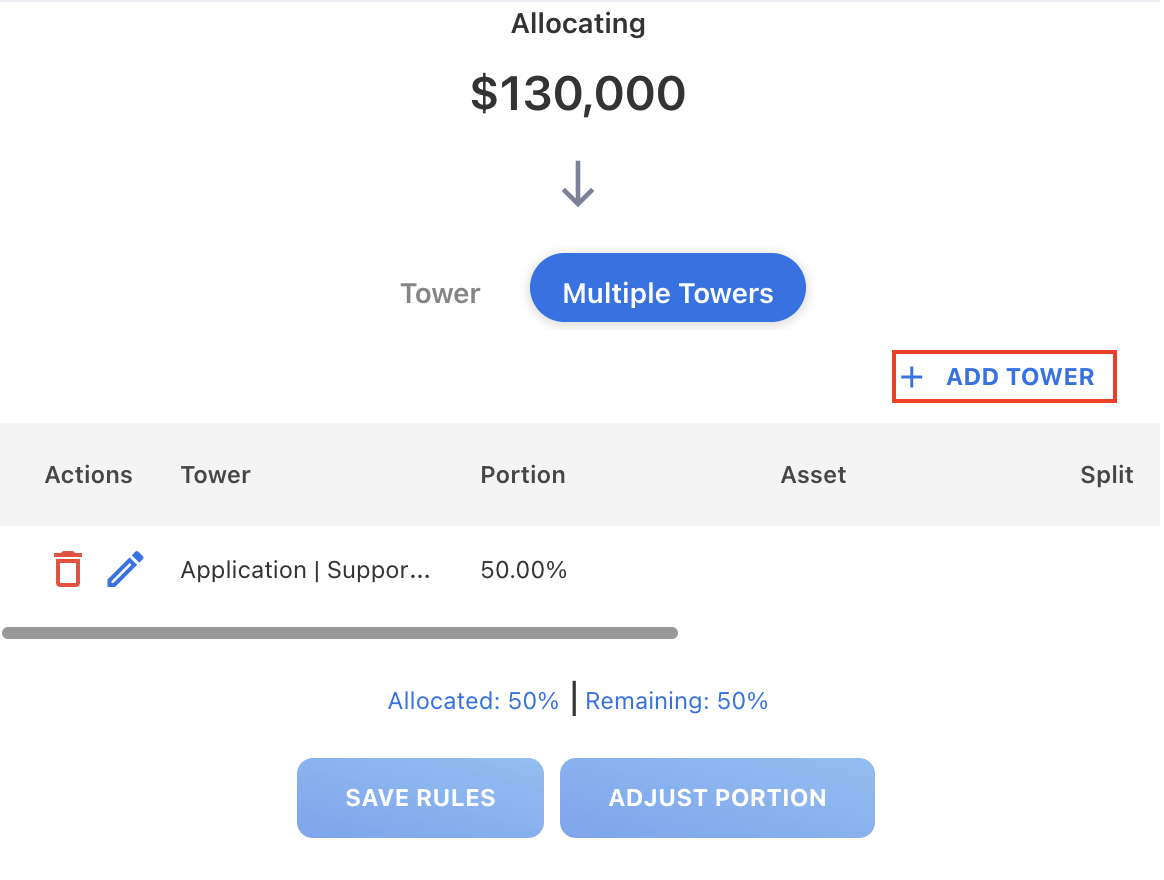
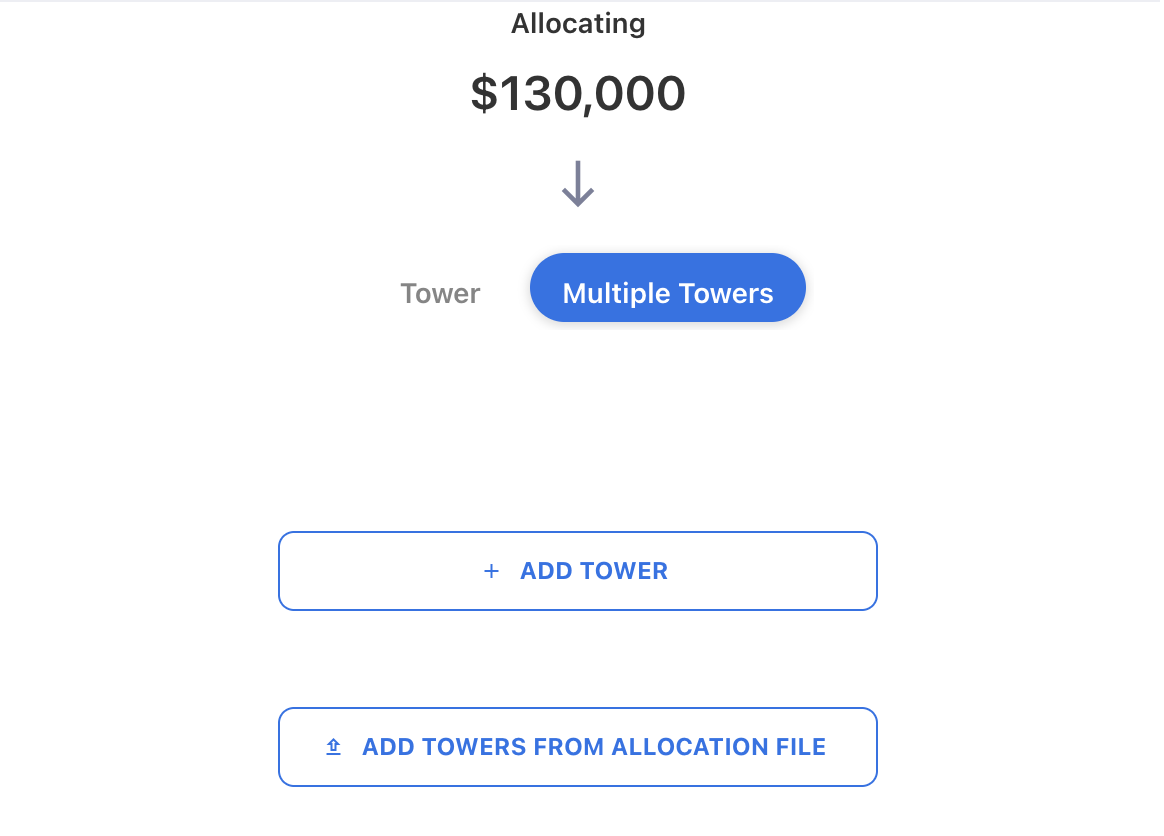
In the allocation panel on the right, select Multiple Towers.
-
Click + ADD TOWER.
-
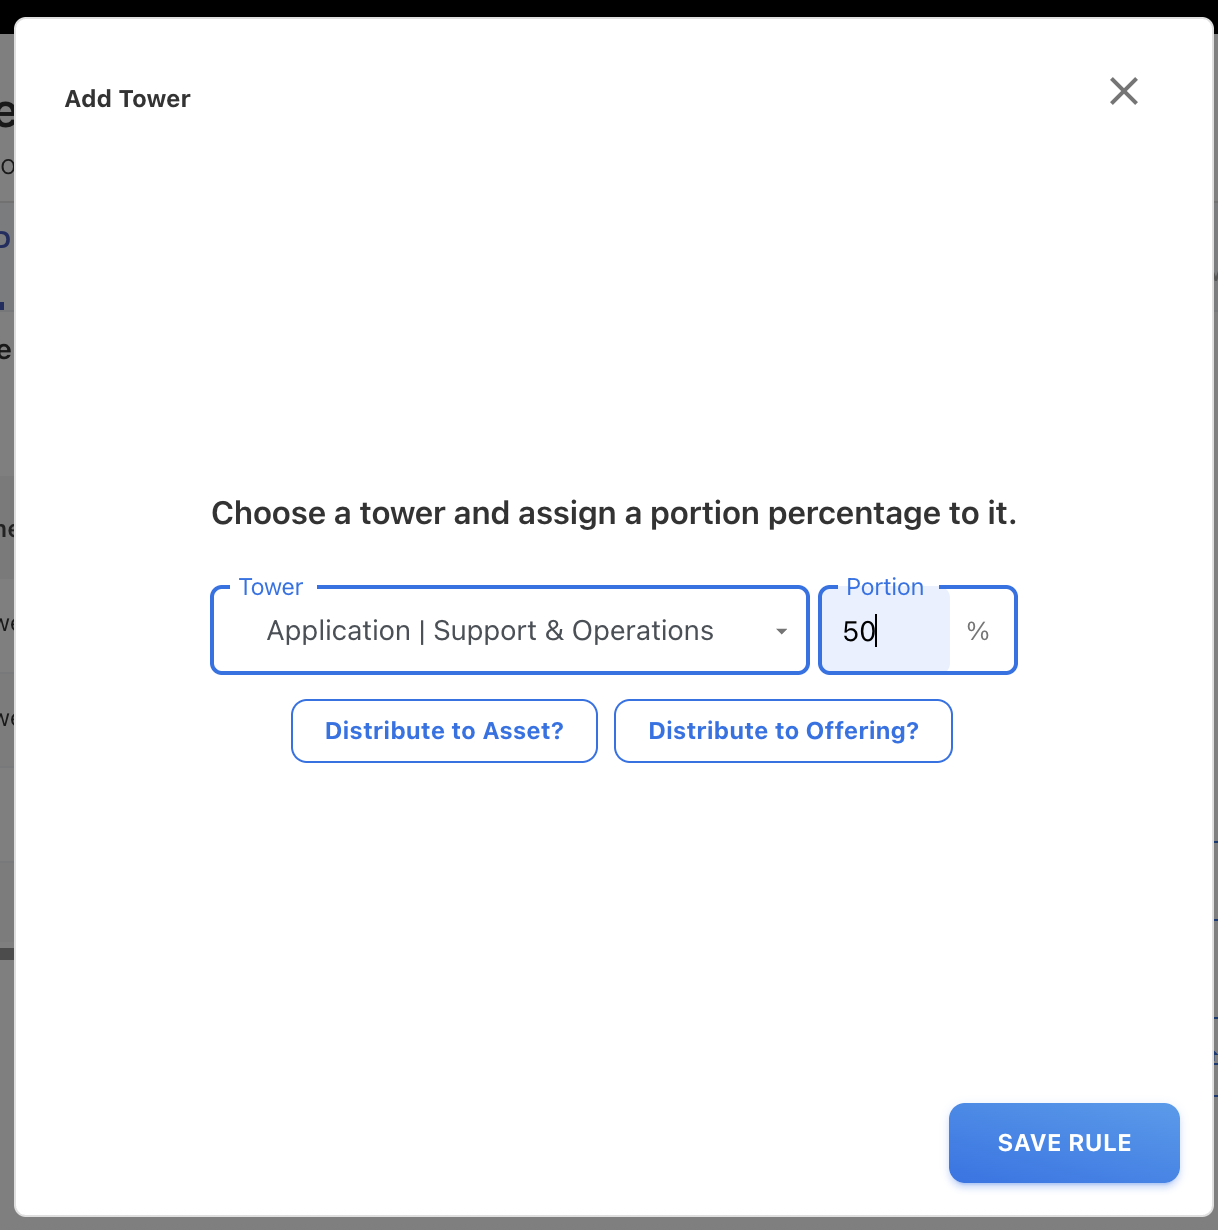
In the Add Tower dialog:
-
Select the Tower / Sub Tower.
-
Enter the Portion percentage for that Tower.
-
-
Choose how the spend should flow:
-
Distribute to Asset, or
-
Distribute to Offering.
-
-
Click SAVE RULE.
-
Repeat + ADD TOWER to add more Towers and ensure that the total allocation equals 100%.
-
Review the Towers, portions, and distribution paths in the summary table.
-
Click SAVE RULES to complete the multi-Tower allocation.
Note: You cannot save the rules if the total allocation does not equal 100%.
Add multiple Towers manually using allocation file
Before adding towers using allocation file, download and prepare the Tower Consumption template from the Data Dictionary.
Prerequisites
Before uploading allocation file,
-
Download and prepare the Tower Consumption template from the Data Dictionary.
-
Add the value in the mandatory fields:
-
Tower and Sub Tower (must match configured tower names)
-
Usage (portion/weight used for splitting)
-
Procedure
-
Select a month you want to allocate the spend and click ellipsis (…) menu.
-
Select Add Rules.
-
Choose Map manually. A list of predefined strategies appears.
-
Select a strategy that you wish to use.
-
In the allocation panel on the right, select Multiple Towers.
-
Click ADD TOWERS FROM ALLOCATION FILE.
-
Upload the allocation file.
-
On the Data Preview screen, add a Rule Name and click NEXT.
All required fields automatically map.
-
Click NEXT to apply the allocation.
After the allocation file is uploaded, you can review the applied allocation rules and the uploaded file details from the VIEW ALLOCATION FILES tab.
Related content