
Introduction
The addition, viewing, editing, and deletion of user-made cost pools, sub cost pools, towers, sub towers, solution types, solution categories, solution names, and system defaults are all covered in this text. Towers, Sub Towers, Cost Pools, Sub Cost Pools, Solution type, Solution Categories, and Solution Names.
Table of Contents
Managing Cost Pools
Cost Pools are essential to cost management, performance assessment, and financial reporting because they help businesses make better decisions, work more efficiently, and turn a profit. Cost Pools can be of various types like External Labor, Facilities & Power, Hardware, Internal Labor, Internal Services, Other, Outside Services, Software, Telecom etc..
Cost Pool data in YäRKEN comprises of the below attributes.
Cost Pool
Only a user with the Admin privilege has access to Cost Pool.
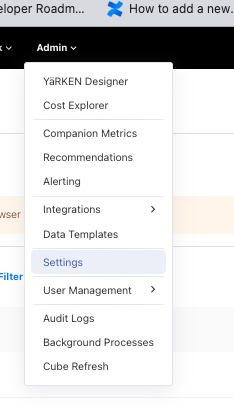
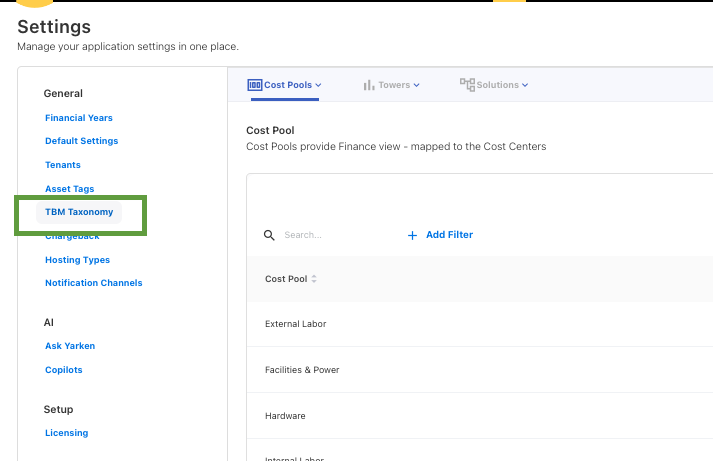
Cost Pool can be accessed when we hover on Admin it will show a menu, Click on Settings, the user can see TBM Taxonomy in the Settings Menu under the category General.
so then hover on TBM Taxonomy to get a sub menu, select on Cost Pool.
|
Admin >> Settings >> TBM Taxonomy |
TBM Taxonomy View
Users will be able to see the Cost Pools, Towers and Solutions in the menu that appears above the page. Click on the arrow icon in the dropdown to see the Sub menu, the list of Sub Menu data will appear in a table based on the selection.
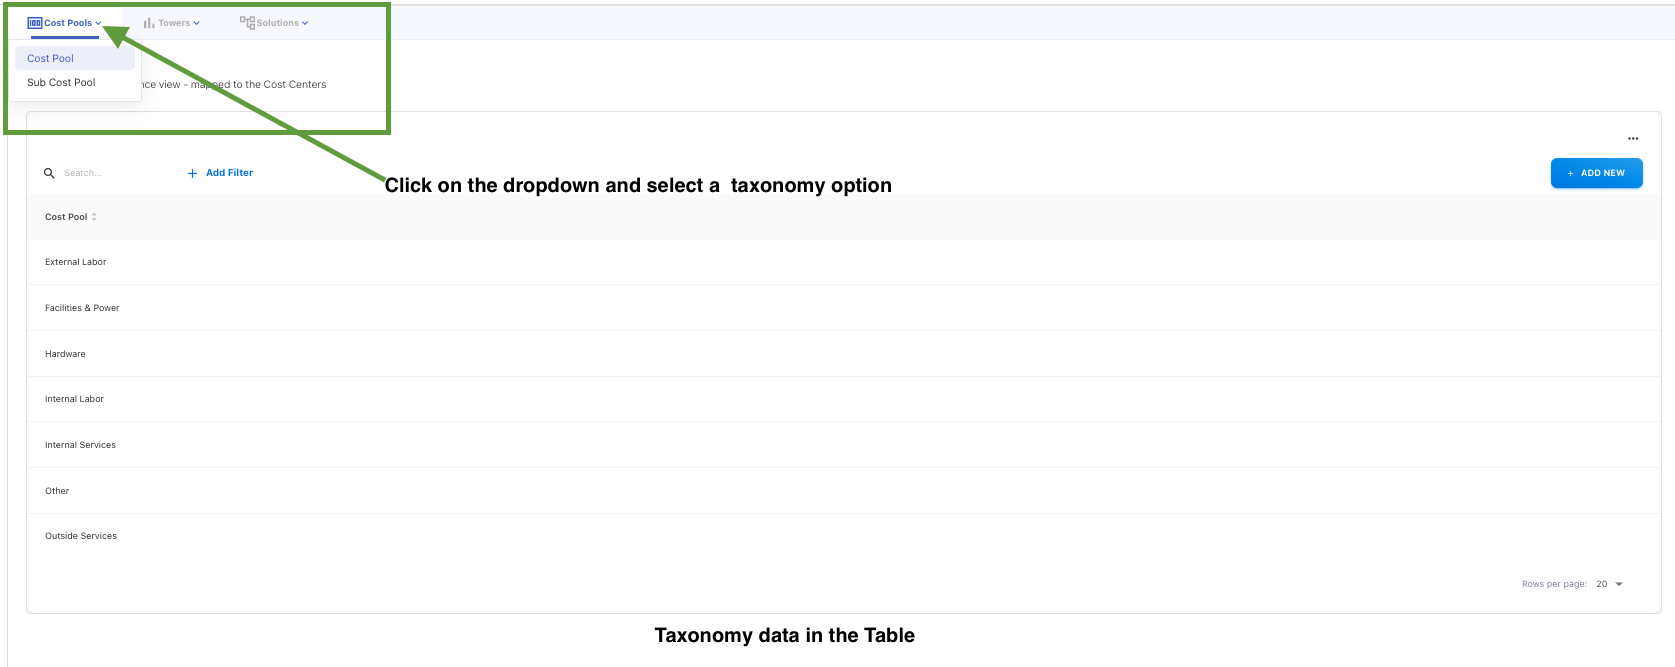
Check the Menu and Sub Menu list given below.
Cost Pools
-
Cost Pool
-
Sub Cost Pool
Towers
-
Tower
-
Sub Tower
Solutions
-
Solution Type
-
Solution Category
-
Solution Name
Adding Cost Pools
Cost Pools can be manually added or the system will have the default Cost Pools
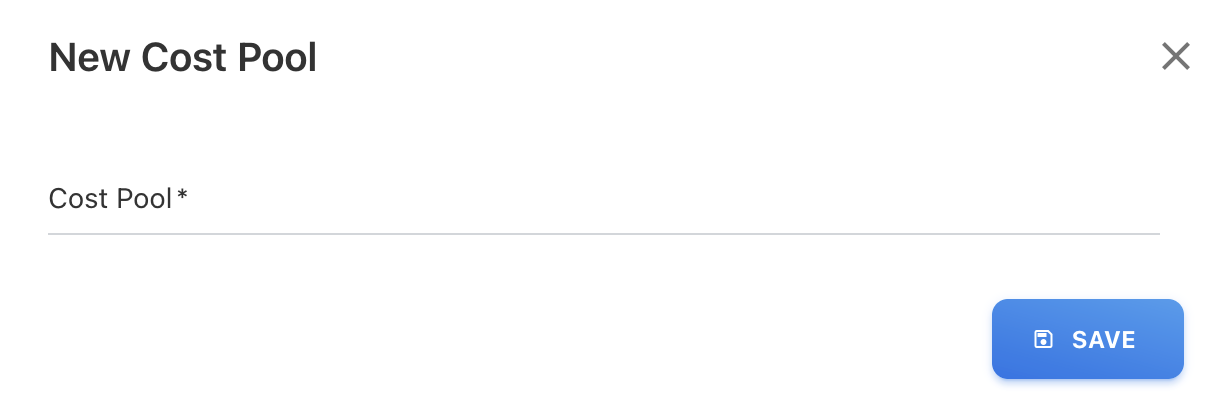
Adding Cost Pool Manually
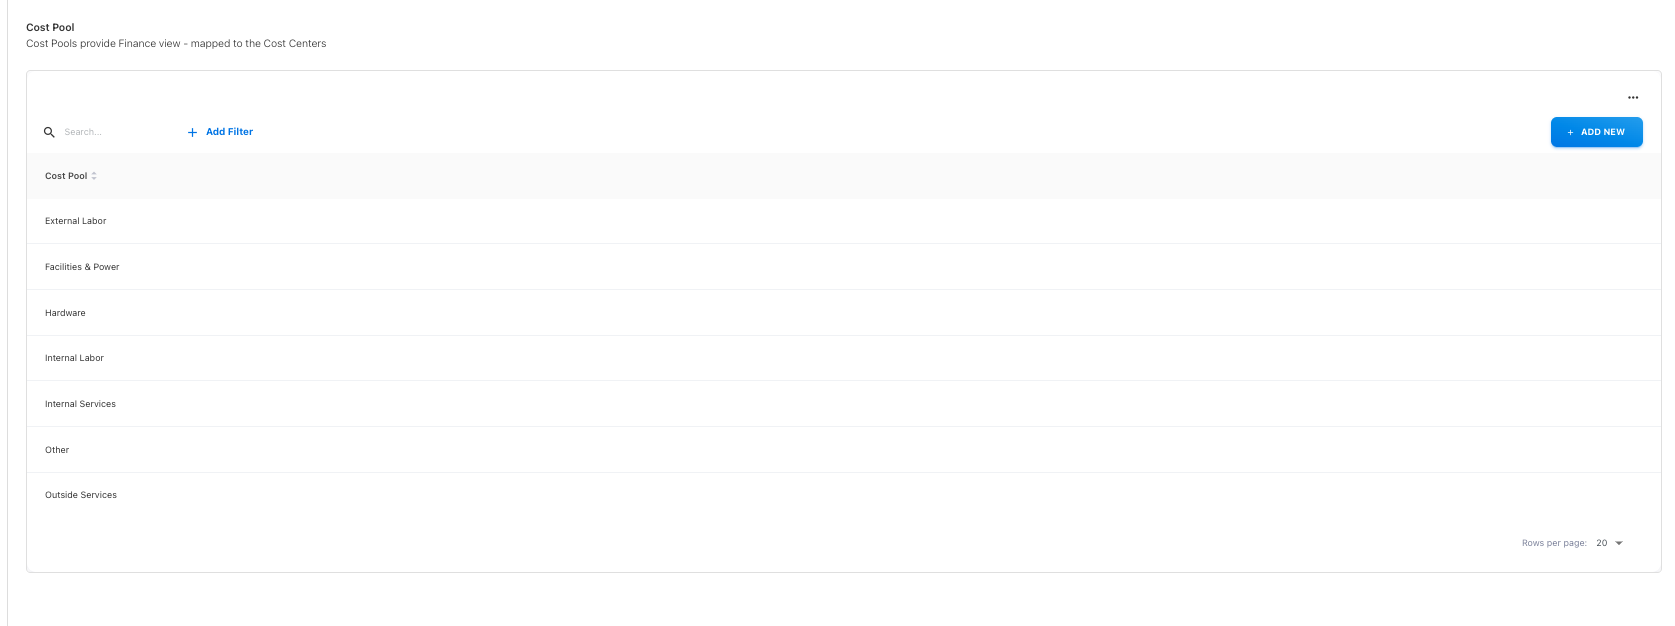
To add Cost Pools manually, click on + ADD NEW button and enter the details. Add you own customized Cost Pools or YäRKEN online help.
Modifying Cost Pools
To modify a Cost Pool use the Edit or Delete option against each Cost Pools which are created by the user.
Edit will open a popup with the existing values for the chosen record, which can be changed and saved.

Delete will remove the corresponding record after confirmation.

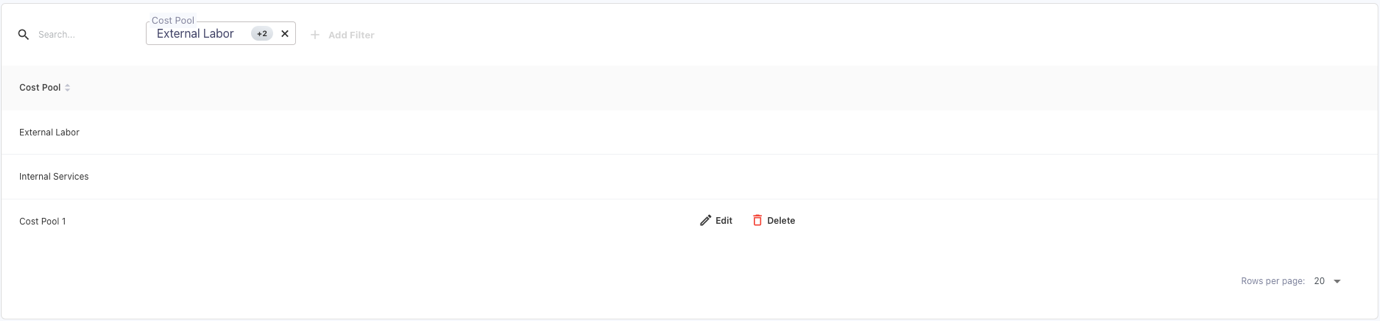
The only cost pools that may be deleted are those that are user-defined, system-defined cost pools cannot be deleted, as you can use there is edit or delete option for only user defined not for system default Cost Pools

As you can see the Cost Pool 1 is the user defined and the rest are system default Cost Pools. The user-defined Cost Pool 1 is shown in the above image, whereas the other Cost Pools are the system defaults. Only Cost Pool 1 will have the ability to edit or delete costs, other cost pools will not have this feature.
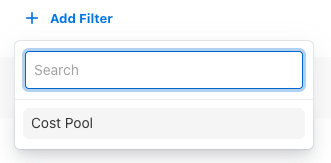
Applying Filters
There is a Cost Pool filter in the filters that the user must select in order to search for Cost Pool. A textbox will then appear where the user can search and either select the options that are visible directly for the Cost Pool, edit or delete it if it is user defined, or simply view System Default. There is also a sorting option in the table that allows you to arrange the data in either ascending or descending alphabetical order

After filtering, the table will appear as this
Downloading Cost Pools
By selecting the three dots next to the + ADD NEW Button, you may download the Cost Pools. A list of all the Cost Pools will then appear, and you can select to download the whole list as a.csv file.
Here, click on these three dots above + ADD NEW Button
This menu will appear, then click on Download to download the whole list of Cost Pools

Managing Sub Cost Pools
Sub-cost pools in an accounting system are subcategories of a main cost pool. Cost related to certain resources or activities are accumulated through cost pools. These expenses become sub cost pools when they are divided into even smaller groupings or subcategories. Sub cost pools are made to give a more thorough understanding of an orgainisation’s cost structure. Management may gain a better understanding of resource allocation and more precise cost allocation to goods, services, and other cost items by dissecting costs into smaller components. Sub Cost Pools examples are as follows: Capital, Expense, Depreciation & Amortization, etc.
Sub Cost Pool data in YäRKEN comprises of the below attributes.
-
Cost Pool
-
Sub Cost Pool
Only a user with the Admin privilege has access to Sub Cost Pool.
Sub Cost Pool can be accessed when we hover on the menu item Cost Pool it will show a sub-menu, select Sub Cost Pool.
Adding Sub Cost Pools
Sub Cost Pools can be manually added or the system will be having the default Cost Pools and Sub Cost Pools pair.
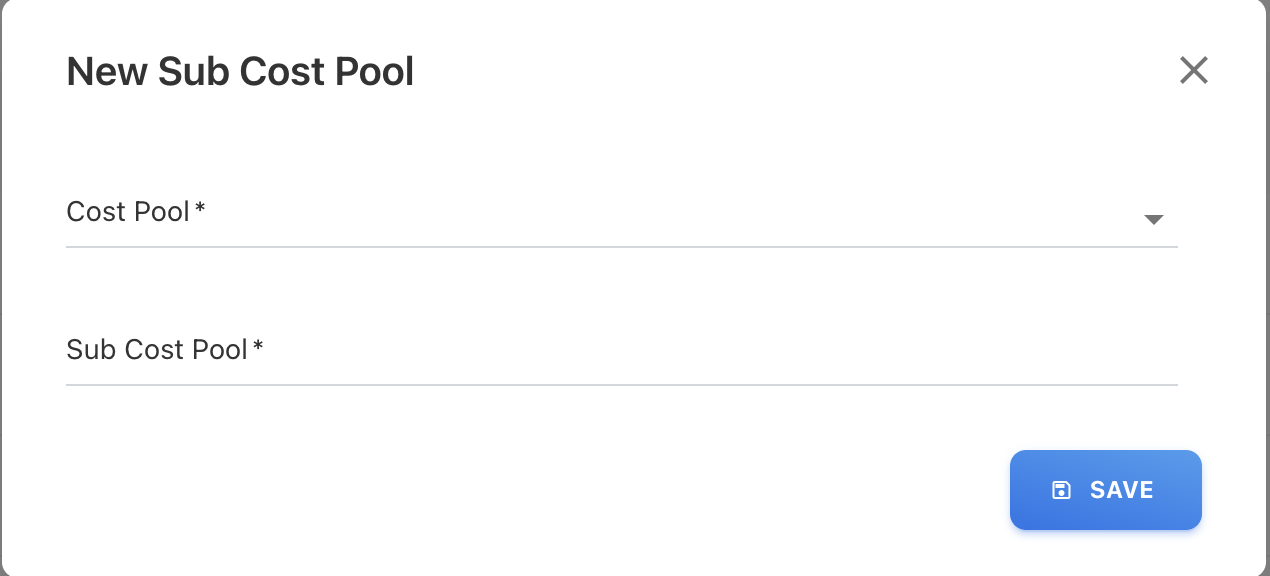
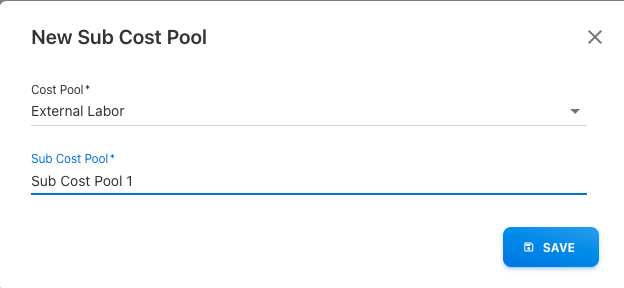
Adding Sub Cost Pool Manually
To add Sub Cost Pools manually, click on + ADD NEW button and Choose the Cost Pools which will give us the list of those that were added in the Cost Pool both the System default and User Defined(if any). Then, add your customised sub cost pool or ask for YäRKEN online help.
Modifying Sub Cost Pools
To modify both Cost Pool and Sub Cost Pool use the Edit or Delete option against each Cost Pool and Sub Cost Pool pair which are created by the user.
Edit will open a popup with the existing values for the chosen record, which can be changed and saved.
Delete will remove the corresponding record after confirmation.

The only cost pool and sub cost pool pair that may be deleted are those that are user-defined, system-defined cost pools and sub cost pools pair cannot be deleted, as you can use there is edit or delete option for only user defined not for system default Cost Pools-Sub Cost Pools pair.

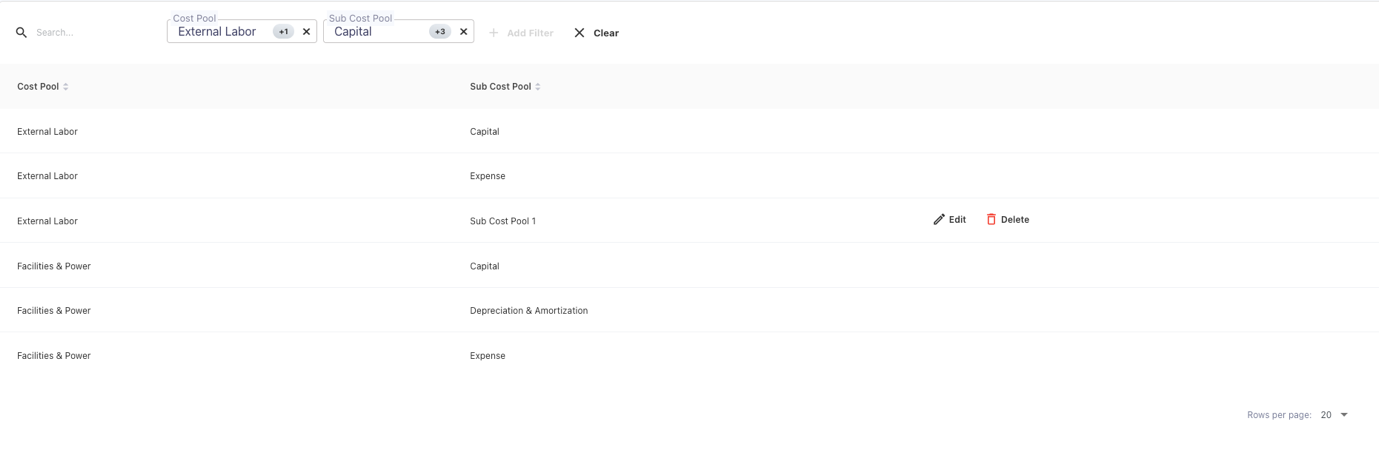
As per above picture the External Labor in Cost Pool and Sub Cost Pool is the user defined and the rest are system default Cost pools and Sub Cost pools pair. The user-defined Sub Cost Pool 1 as Sub Cost Pool and External Labor is shown in the above image, whereas the other Cost pools and Sub Cost pools pair are the system defaults. Only External Labor and Sub Cost Pool 1 pair will have the ability to edit or delete costs, other cost pools and sub cost pools will not have this feature.
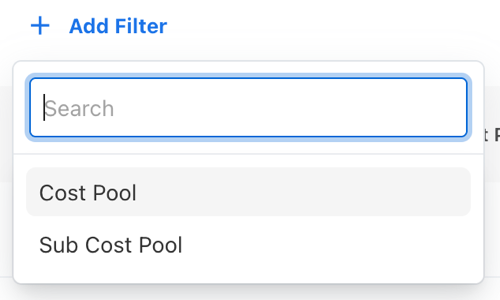
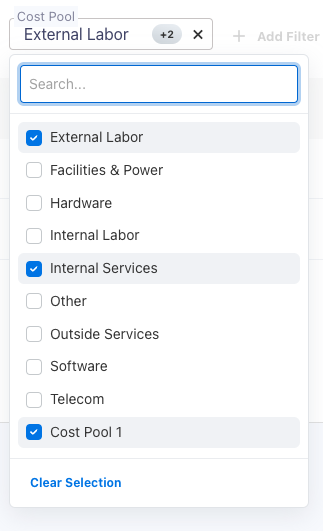
Applying Filters
There is a Cost Pool and Sub Cost Pool filter in the filters that the user must select in order to search for both Cost Pool and Sub Cost Pool. For Cost Pools filter, A textbox will then appear where the user can search and either select the options that are visible directly for the Cost Pool, edit or delete it if it is user defined, or simply view System Default and for Sub Cost Pools it is the same. There is also a sorting option in the table that allows you to arrange the data in either ascending or descending alphabetical order

After filtering, the table will appear as this
Downloading Sub Cost Pools
By selecting the three dots next to the + ADD NEW Button, you may download both the Cost Pools and Sub Cost Pools pair list. A list of all the Cost Pools and Sub Cost Pools pair list will then appear, and you can select to download the whole list as a.csv file.
Here, click on these three dots beside + ADD NEW Button
This menu will appear, then click on Download to download the whole list of the Cost Pools and Sub Cost Pools pair list

Managing Towers
Towers in the TBM Taxonomy usually refer to groups or areas of IT Services or competencies that are available inside a company. These towers are used to categorize and arrange IT expenses, activities, and resources in accordance with their roles or objectives. Towers can be of various types like Application, Compute, Data Center, Delivery, End User, IT Management, Network, Output, Platform, Security & Compliance, Storage, etc..
Tower data in YäRKEN comprises of the below attributes.
Tower
Only a user with the Admin privilege has access to Tower.
The tower can be accessed By hovering on the menu item Towers and clicking on the towers.
Adding Towers
Towers can be manually added or the system will be having the default Towers
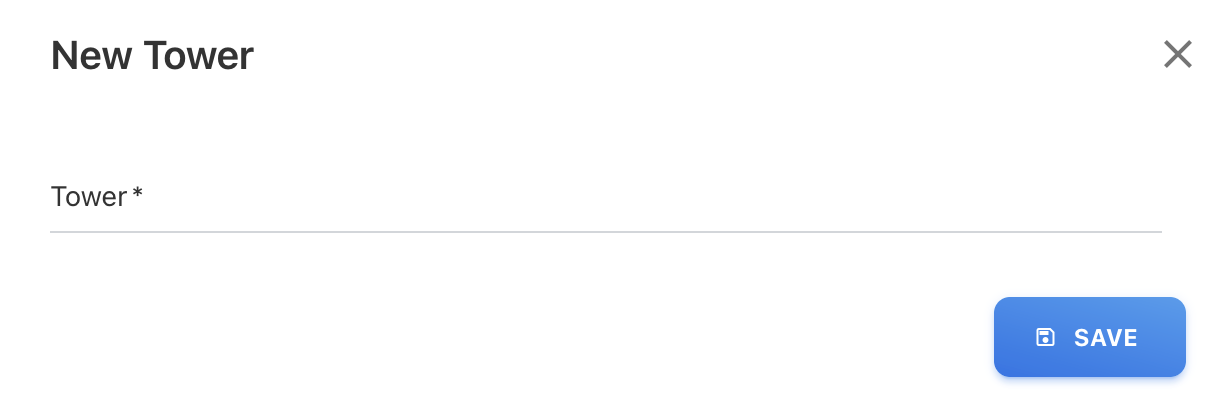
Adding Tower Manually
To add Cost Pools manually, click on + ADD NEW button and enter the details. Add you own customized Cost Pools or YäRKEN online help.
Modifying Towers
To modify a Tower use the Edit or Delete option against each Towers which are created by the user.
Edit will open a popup with the existing values for the chosen record, which can be changed and saved.
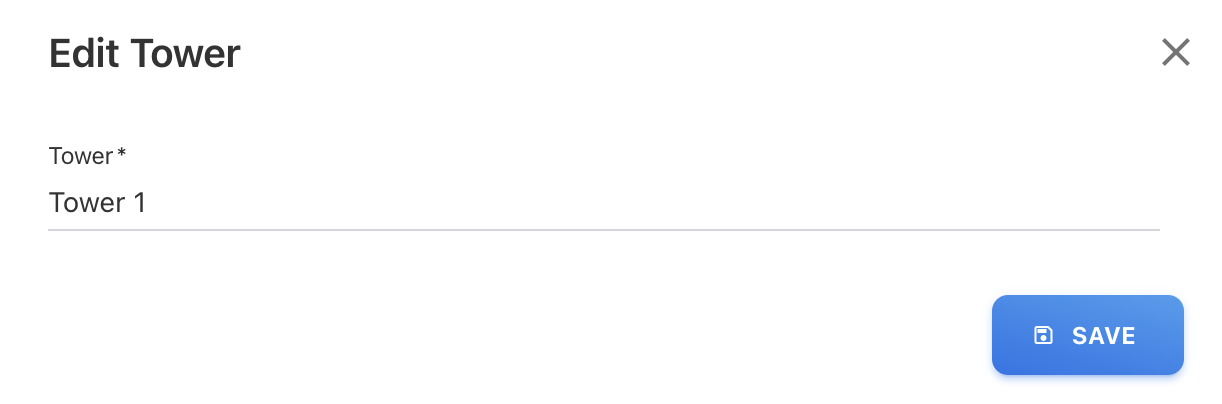
Delete will remove the corresponding record after confirmation.

The only Towers that may be deleted are those that are user-defined, system-defined Towers cannot be deleted, as you can use there is edit or delete option for only user defined not for system default Towers
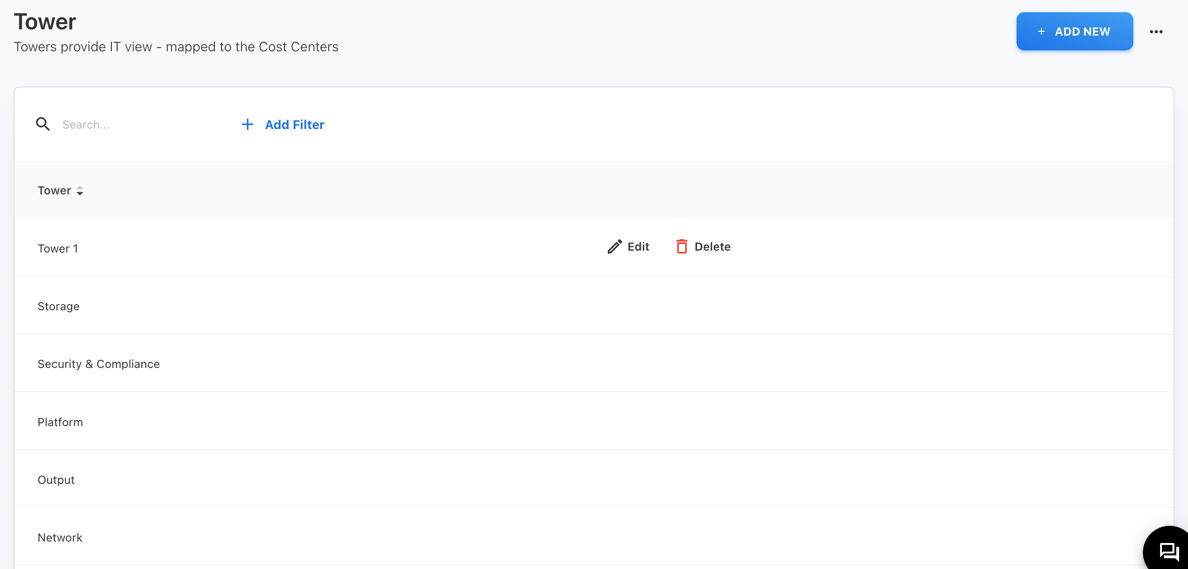
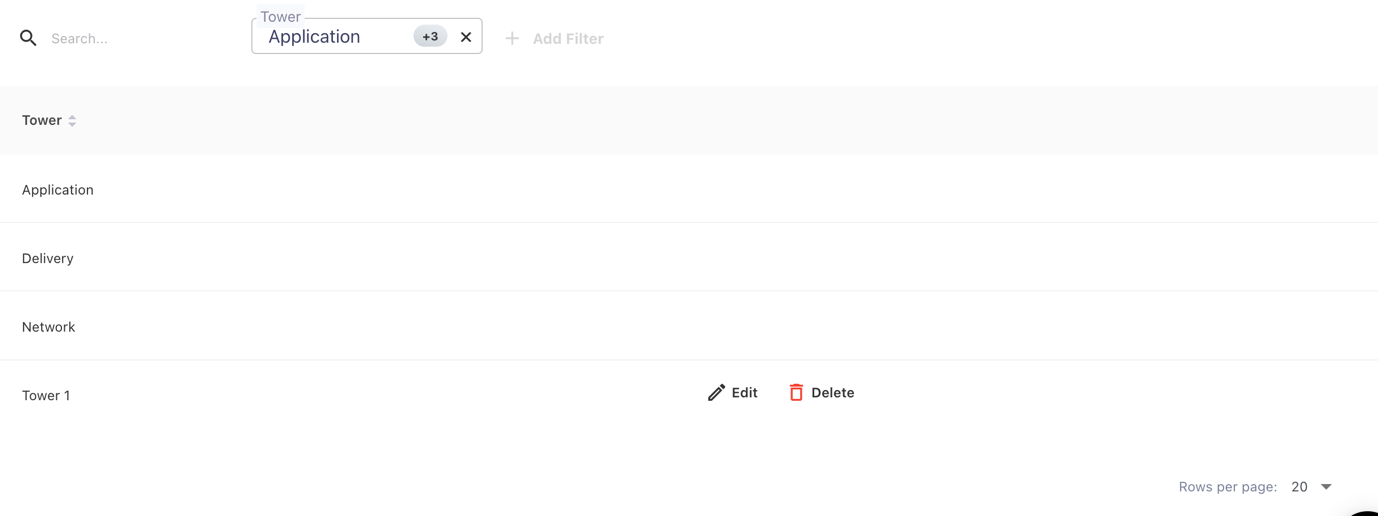
As you can see the Tower 1 is the user defined and the rest are system default Towers. The user-defined Tower 1 is shown in the above image, whereas the other Towers are the system defaults. Only Tower 1 will have the ability to edit or delete costs, other Towers will not have this feature.
Applying Filters
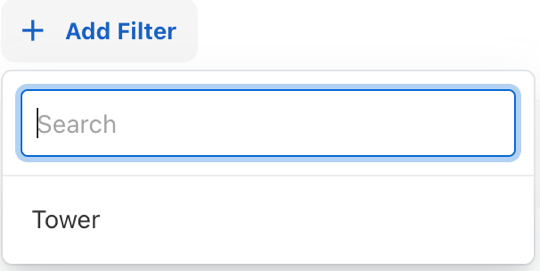
There is a Tower filter in the filters that the user must select in order to search for Tower. A textbox will then appear where the user can search and either select the options that are visible directly for the Tower, edit or delete it if it is user defined, or simply view System Default. There is also a sorting option in the table that allows you to arrange the data in either ascending or descending alphabetical order
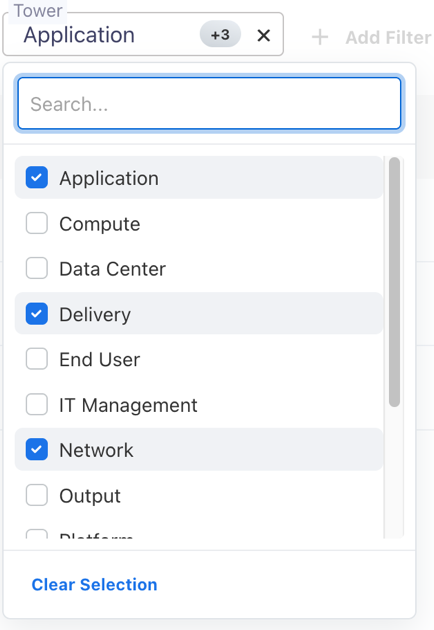
After filtering, the table will appear as this
Downloading Towers
By selecting the three dots next to the + ADD NEW Button, you may download the Towers. A list of all the Towers will then appear, and you can select to download the whole list as a.csv file.
Here, click on these three dots beside + ADD NEW Button
This menu will appear, then click on Download to download the whole list of Towers

Managing Sub Towers
Sub-towers usually refer to additional divisions or specialized sectors inside bigger towers or domains of IT services in the context of TBM or IT management. Sub Towers examples are as follows: Application Development, Application Support & Operations, Business Software, Cloud, Converged Infrastructure, Mainframe, Servers, etc.
Sub Tower data in YäRKEN comprises of the below attributes.
-
Tower
-
Sub Tower
Only a user with the Admin privilege has access to Sub Tower.
Sub Towers can be accessed when we hover on Admin it will show a menu, so then hover on TBM Taxonomy to get a sub menu, select on Sub Towers.
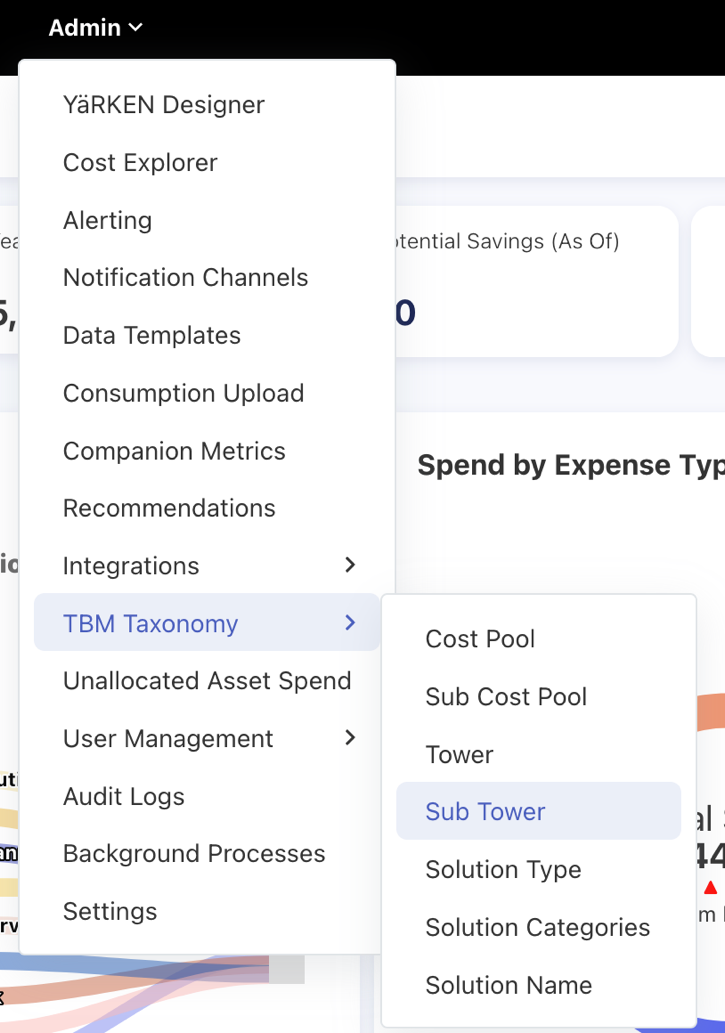
|
Admin >> TBM Taxonomy >> Sub Tower |
Adding Sub Towers
Sub Towers can be manually added or the system will be having the default Towers and Sub Towers pair.
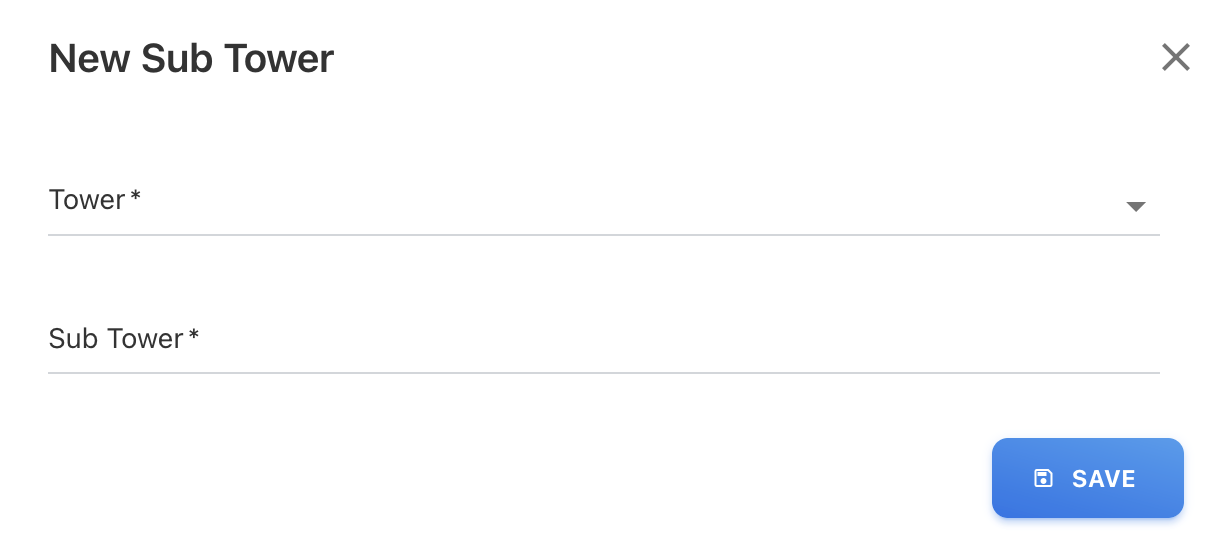
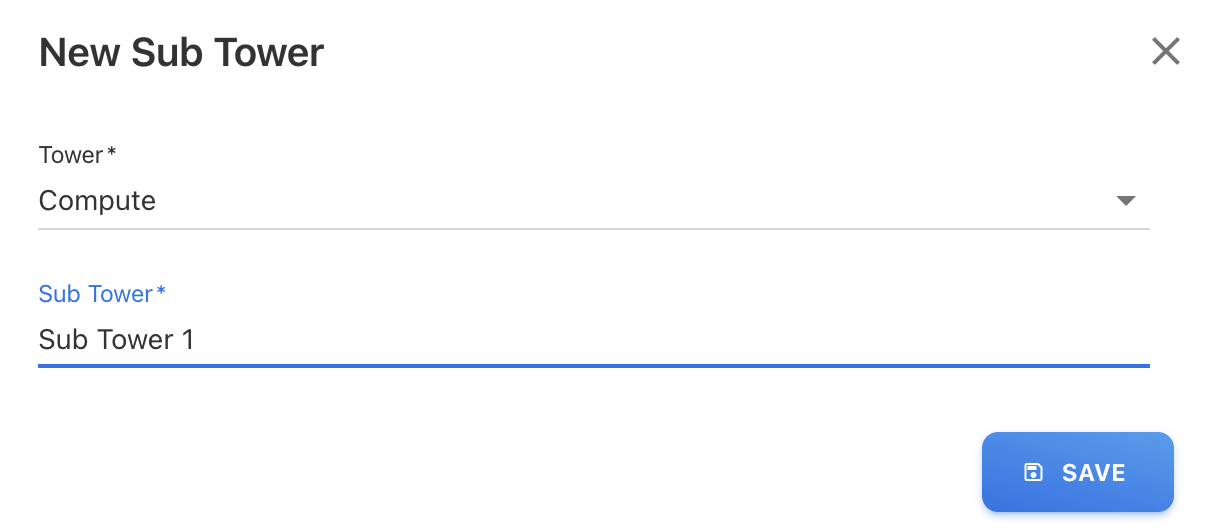
Adding Sub Tower Manually
To add Sub Towers manually, click on + ADD NEW button and Choose the Towers which will give us the list of that Towers, which were add in Tower both the System default and User Defined(if any). Then, Add your Customized Sub Tower or ask for YäRKEN online help.
Modifying Sub Towers
To modify both Tower and Sub Towers use the Edit or Delete option against each Towers and Sub Towers pair which are created by the user.
Edit will open a popup with the existing values for the chosen record, which can be changed and saved.
Delete will remove the corresponding record after confirmation.

The only tower and sub tower pair that may be deleted are those that are user-defined, system-defined towers and sub towers pair cannot be deleted, as you can use there is edit or delete option for only user defined not for system default Towers-Sub Towers pair.
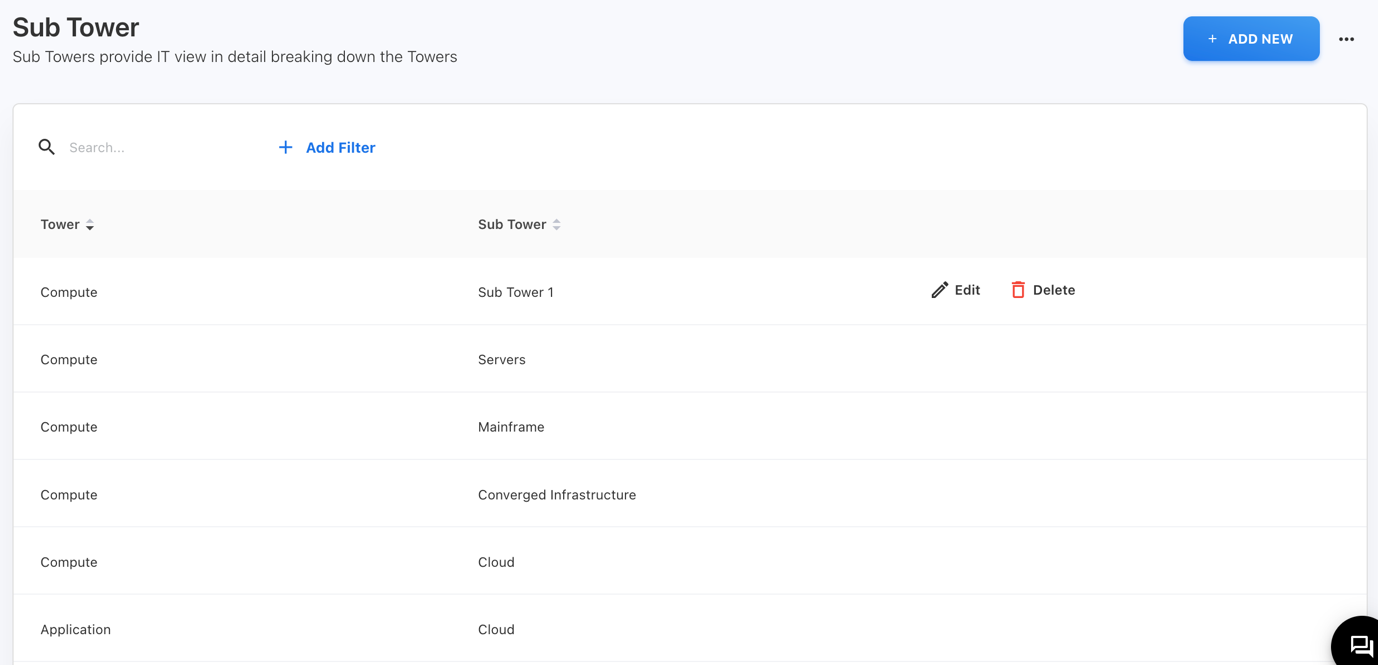
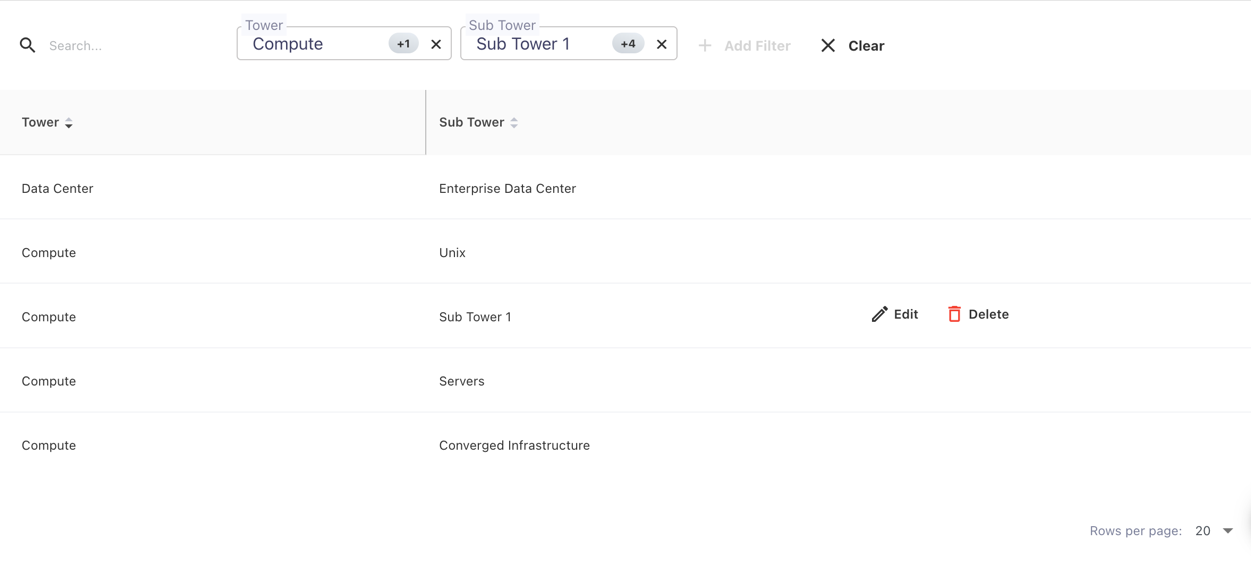
As per above picture the Compute in Tower and Sub Tower is the user defined and the rest are system default Towers and Sub Towers pair. The user-defined Sub Tower 1 as Sub Tower and Compute is shown in the above image, whereas the other Towers and Sub Towers pair are the system defaults. Only Compute and Sub Tower 1 pair will have the ability to edit or delete costs, other towers and sub towers will not have this feature.
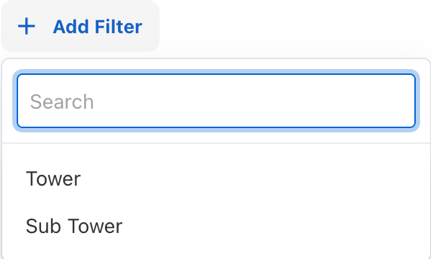
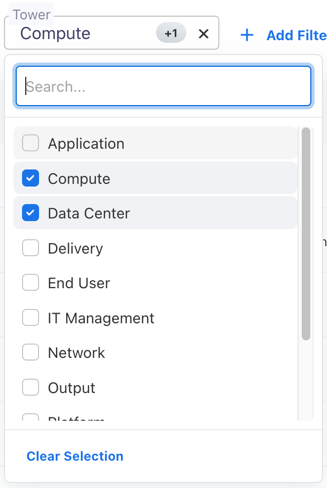
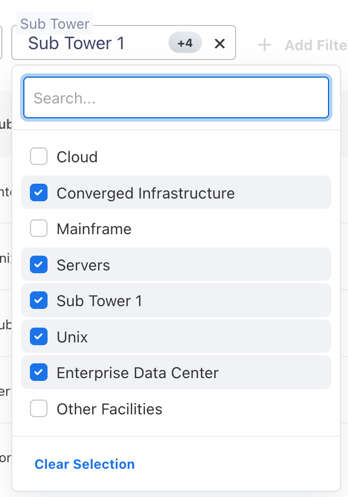
Applying Filters
There is a Tower and Sub Tower filter in the filters that the user must select in order to search for both Tower and Sub Tower. For Towers filter, A textbox will then appear where the user can search and either select the options that are visible directly for the Tower, edit or delete it if it is user defined, or simply view System Default and for Sub Towers it is the same. There is also a sorting option in the table that allows you to arrange the data in either ascending or descending alphabetical order
After filtering, the table will appear as this
Downloading Sub Towers
By selecting the three dots next to the + ADD NEW Button, you may download both the Towers and Sub Towers pair list. A list of all the Towers and Sub Towers pair list will then appear, and you can select to download the whole list as a.csv file.
Here, click on these three dots beside + ADD NEW Button
This menu will appear, then click on Download to download the whole list of the Towers and Sub Towers pair list

Managing Solution Type
Solution Type usually means how solutions are categorized or classified in a certain environment, like business, technology, or problem-solving. Depending on the sector or industry it may either. Solution Type can be of various types like Business, Delivery, Infrastructure, Platform, Shared & Corporate, Workplace, etc..
Solution Type data in YäRKEN comprises of the below attributes.
Solution Type
Only a user with the Admin privilege has access to Solution Type.
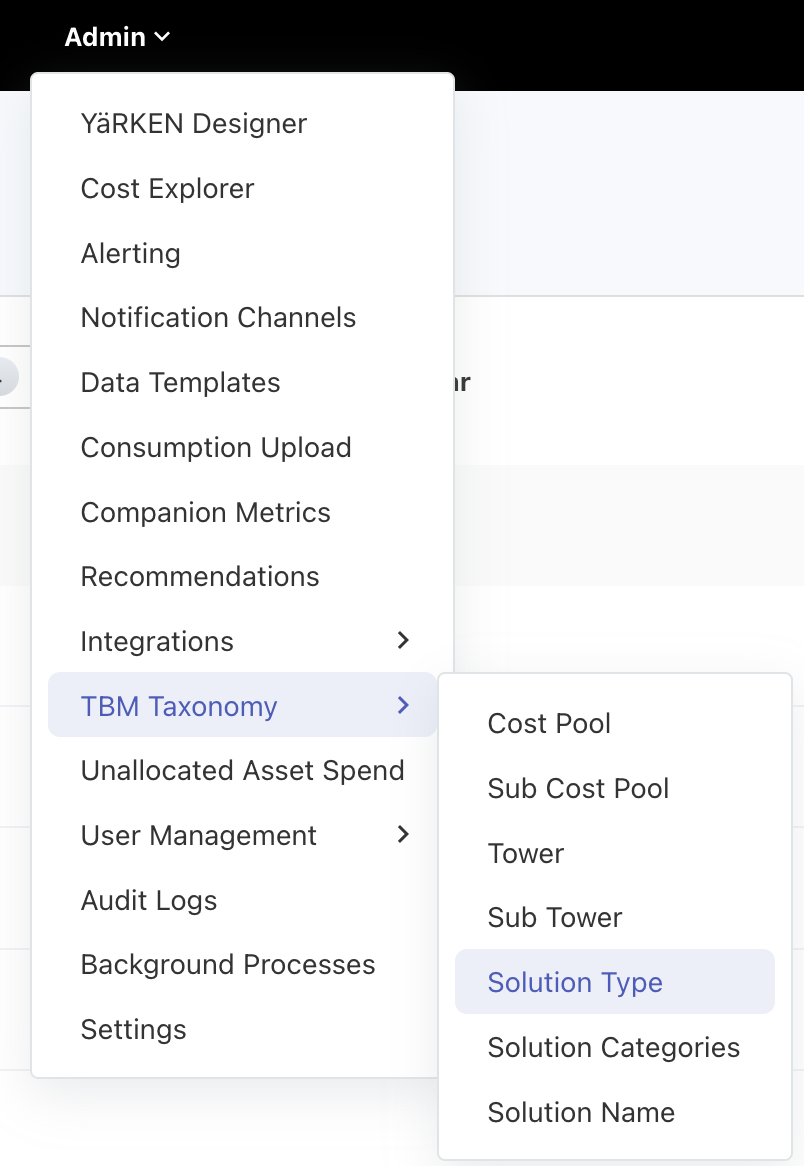
Solution Type can be accessed when we hover on Admin it will show a menu, so then hover on TBM Taxonomy to get a sub menu, select on Solution Type.
|
Admin >> TBM Taxonomy >> Solution Type |
Adding Solution Types
Solution Types can be manually added or the system will be having the default Solution Types
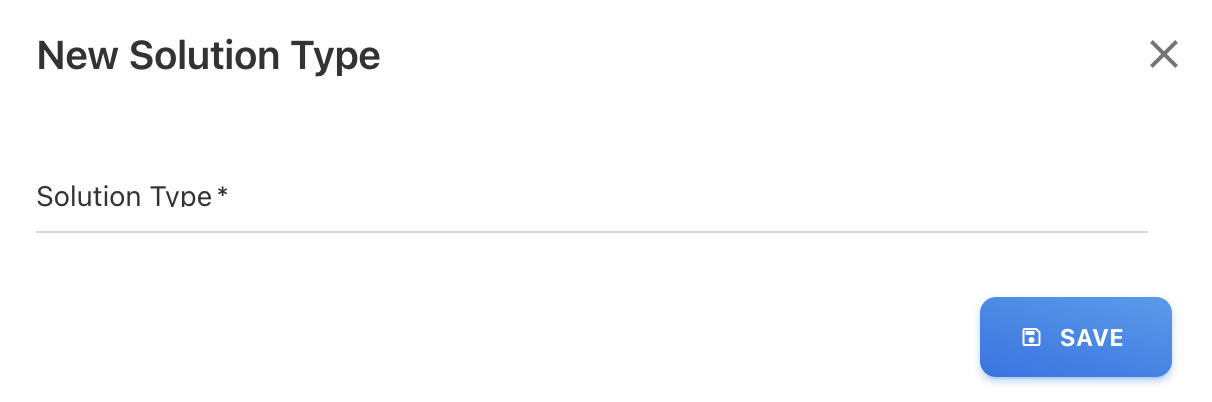
Adding Solution Type Manually

To add Solution Types manually, click on + ADD NEW button and enter the details. Add you own customized Solution Types or YäRKEN online help.
Modifying Solution Types
To modify a Solution Type use the Edit or Delete option against each Solution Types which are created by the user.
Edit will open a popup with the existing values for the chosen record, which can be changed and saved.

Delete will remove the corresponding record after confirmation.
The only Solution Types that may be deleted are those that are user-defined, system-defined Solution Types cannot be deleted, as you can use there is edit or delete option for only user defined not for system default Solution Types
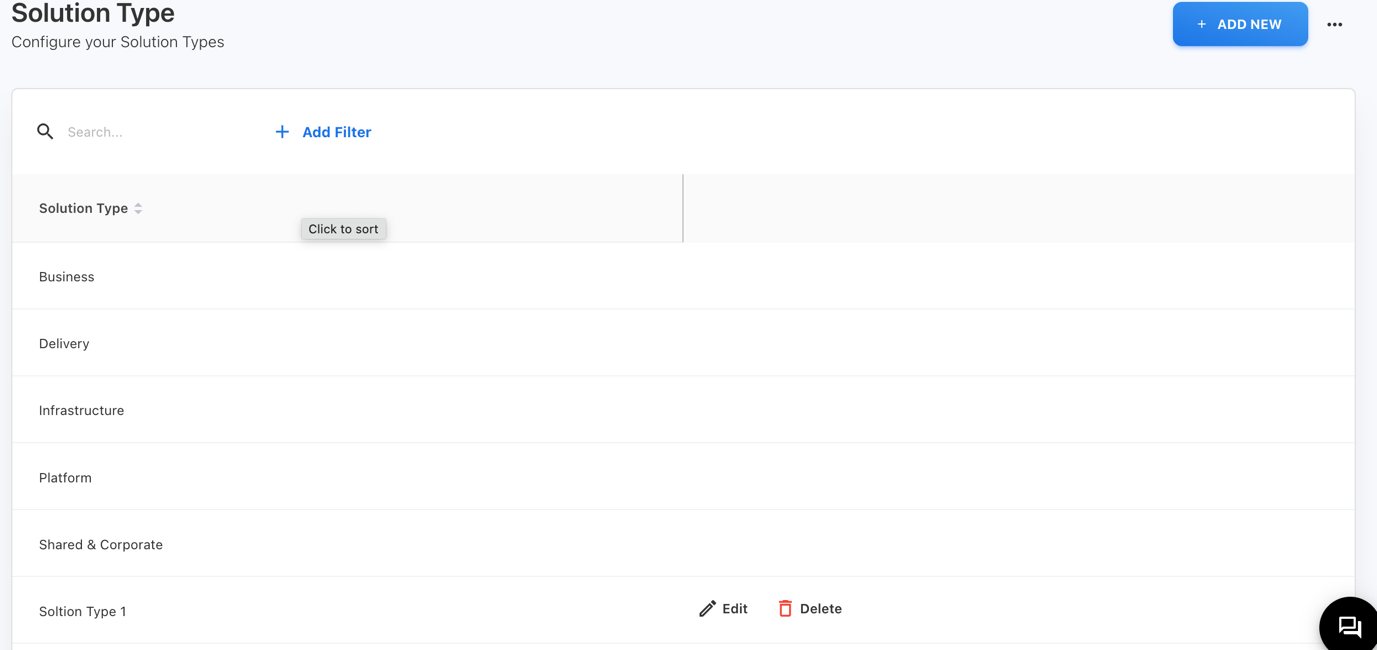
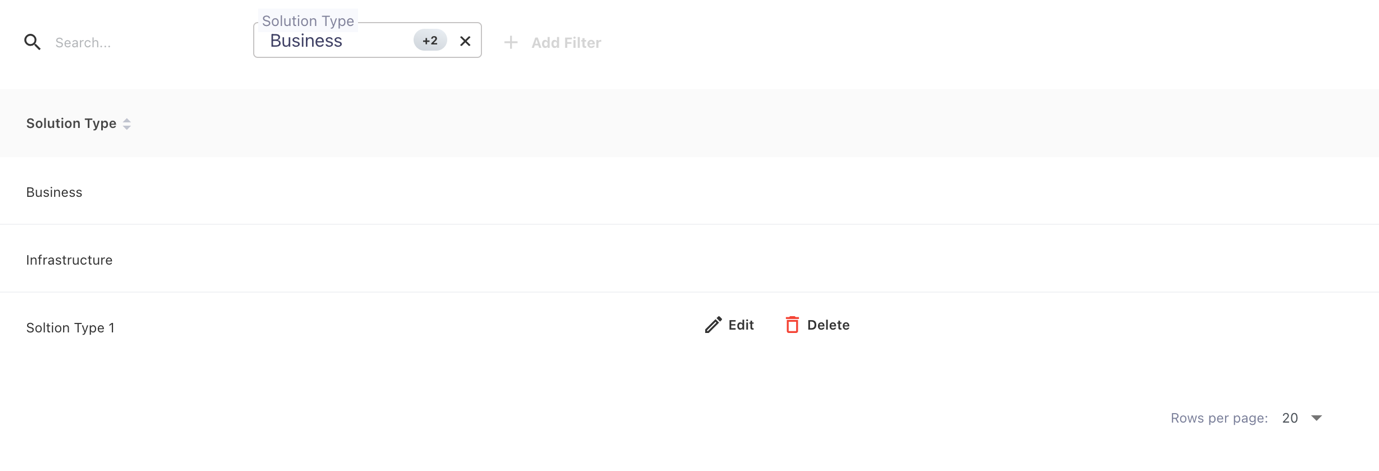
As you can see the Solution Type 1 is the user defined and the rest are system default Solution Types. The user-defined Solution Type 1 is shown in the above image, whereas the other Solution Types are the system defaults. Only Solution Type 1 will have the ability to edit or delete costs, other Solution Types will not have this feature.
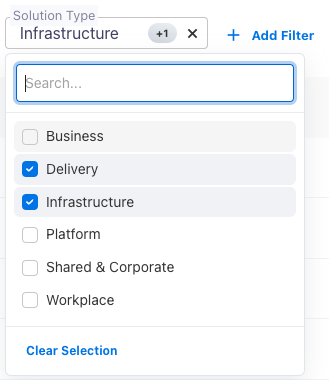
Applying Filters
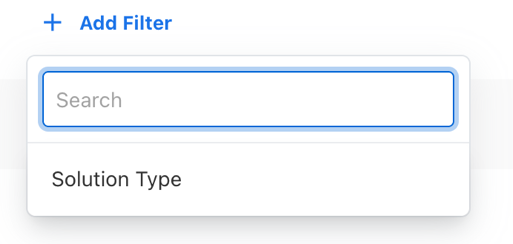
There is a Solution Type filter in the filters that the user must select in order to search for Solution Type. A textbox will then appear where the user can search and either select the options that are visible directly for the Solution Type, edit or delete it if it is user defined, or simply view System Default. There is also a sorting option in the table that allows you to arrange the data in either ascending or descending alphabetical order
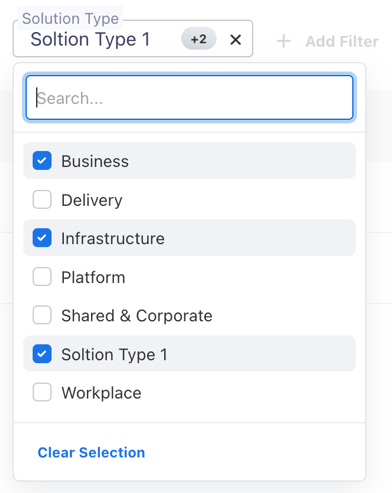
After filtering, the table will appear as this
Downloading Solution Types
By selecting the three dots next to the + ADD NEW Button, you may download the Solution Types. A list of all the Solution Types will then appear, and you can select to download the whole list as a.csv file.
Here, click on these three dots beside + ADD NEW Button
This menu will appear, then click on Download to download the whole list of Solution Types

Managing Solution Category
Solution Category in TBM serves as a handy classification system, organizing tech solutions by their functions or business roles. It's like a digital filing cabinet, grouping technologies into neat categories such as infrastructure, apps, and security. Solution Category examples are as follows: Customer Service, Manufacturing & Delivery, Product Management, Sales & Marketing etc.
Solution Category data in YäRKEN comprises of the below attributes.
-
Solution Type
-
Solution Category
Only a user with the Admin privilege has access to Solution Category.
Solution Category can be accessed when we hover on Admin it will show a menu, so then hover on TBM Taxonomy to get a sub menu, select on Solution Category.
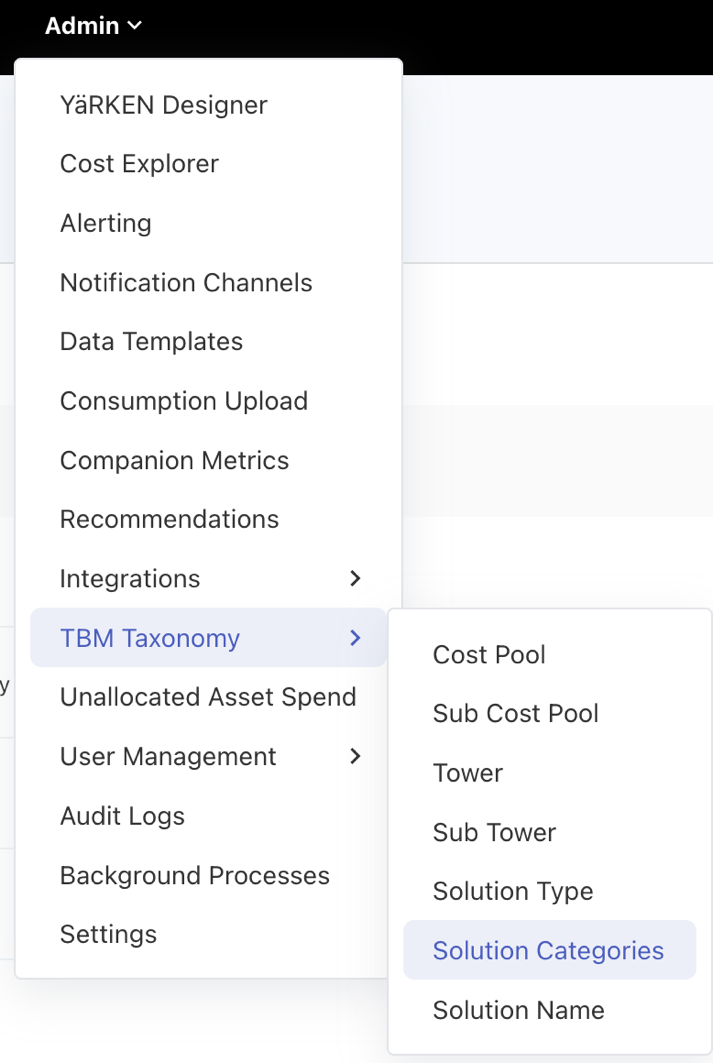
|
Admin >> TBM Taxonomy >> Solution Categories |
Adding Solution Categories
Solution Categories can be manually added, or the system will be having the default Solution Type and Solution Categories pair.
Adding Solution Categories Manually
To add Solution Categories manually, click on + ADD NEW button and Choose the Solution Type which will give us the list of that Solution Type, which were add in Solution Type both the System default and User Defined(if any). Then, Add your Customized Solution Categories or ask for YäRKEN online help.

Modifying Solution Categories
To modify both Solution Type and Solution Categories use the Edit or Delete option against each Solution Type and Solution Categories pair which are created by the user.
Edit will open a popup with the existing values for the chosen record, which can be changed and saved.

Delete will remove the corresponding record after confirmation.

The only Solution Type and Solution Categories pair that may be deleted are those that are user-defined, system-defined Solution Type and Solution Categories pair cannot be deleted, as you can use there is edit or delete option for only user defined not for system default Solution Type and Solution Categories pair.
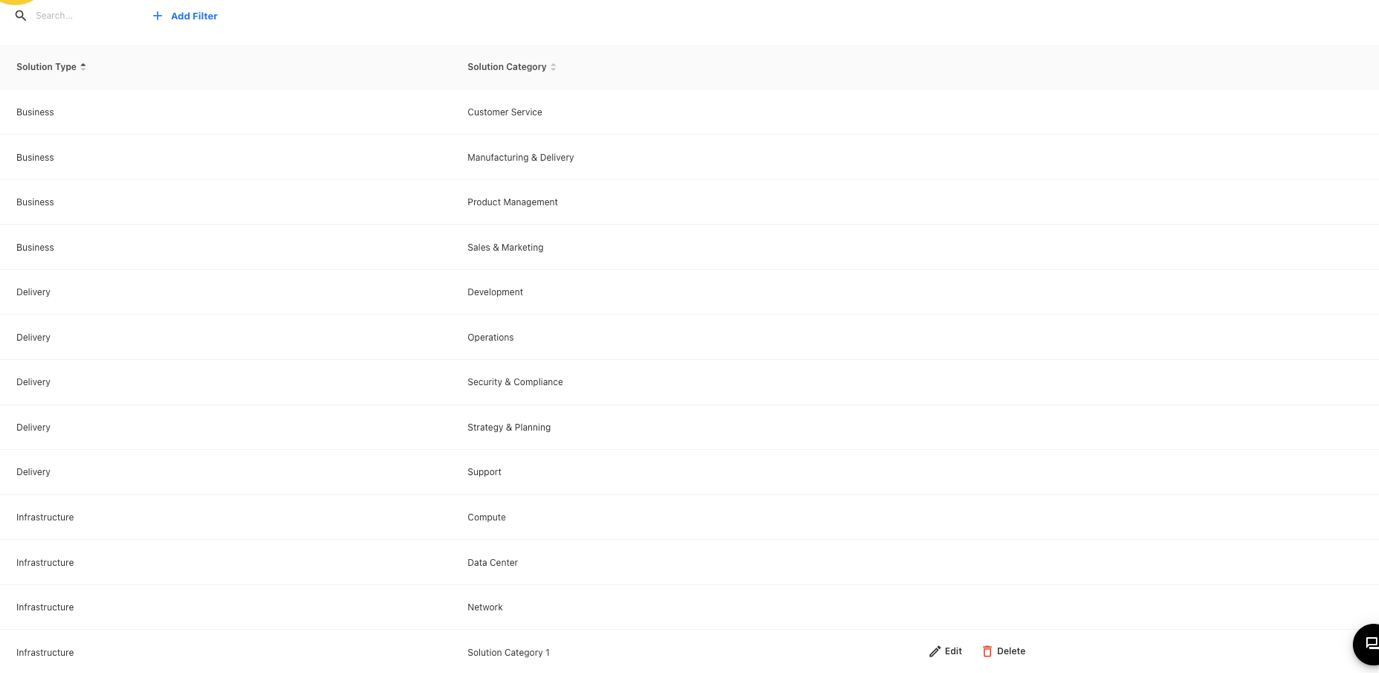
As per above picture the Infrastructure in Solution Type and Solution Category is the user defined and the rest are system default Solution Type and Solution Category pair. The user-defined Solution Category 1 as Solution Category and Infrastructure is shown in the above image, whereas the other Solution Type and Solution Category pair are the system defaults. Only Infrastructure and Solution Category 1 pair will have the ability to edit or delete costs, other Solution Type and Solution Category will not have this feature.
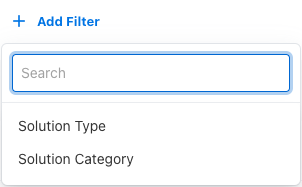
Applying Filters
There is a Solution Type and Solution Category filter in the filters that the user must select in order to search for both Solution Type and Solution Category. For Solution Type filter, A textbox will then appear where the user can search and either select the options that are visible directly for the Solution Type, edit or delete it if it is user defined, or simply view System Default and for Solution Category it is the same. There is also a sorting option in the table that allows you to arrange the data in either ascending or descending alphabetical order
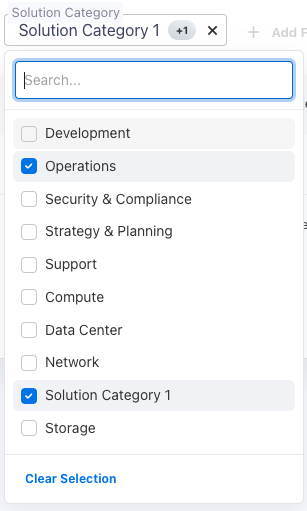
After filtering, the table will appear as this

Downloading Solution Category
By selecting the three dots next to the + ADD NEW Button, you may download both the Solution Type and Solution Category pair list. A list of all the Solution Type and Solution Category pair list will then appear, and you can select to download the whole list as a.csv file.
Here, click on these three dots beside + ADD NEW Button
This menu will appear, then click on Download to download the whole list of the Solution Type and Solution Category pair list

Managing Solution Name
Solution Name refers to the unique identifier given to a specific technology solution within the context of TBM. It's like a name tag for your favourite gadget, helping you easily recognize and distinguish it from others in the digital toolbox. Solution Name examples are as follows: Oder Management, Customer Care, Service Deleivery, Resource Planning, Product Delivery etc.
Solution Name data in YäRKEN comprises of the below attributes.
-
Solution Category
-
Solution Name
Only a user with the Admin privilege has access to Solution Name.
Solution Name can be accessed when we hover on Admin it will show a menu, so then hover on TBM Taxonomy to get a sub menu, select on Solution Name.
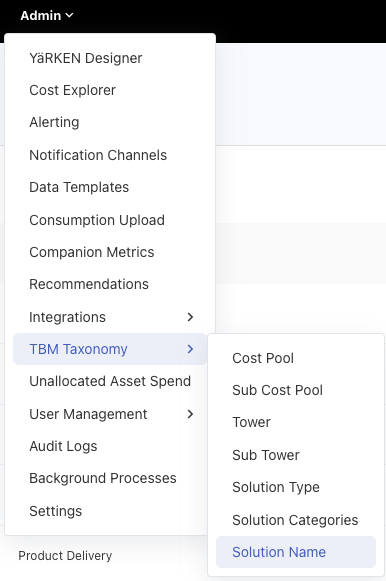
|
Admin >> TBM Taxonomy >> Solution Name |
Adding Solution Name
Solution Name can be manually added, or the system will be having the default Solution Category and Solution Name pair.
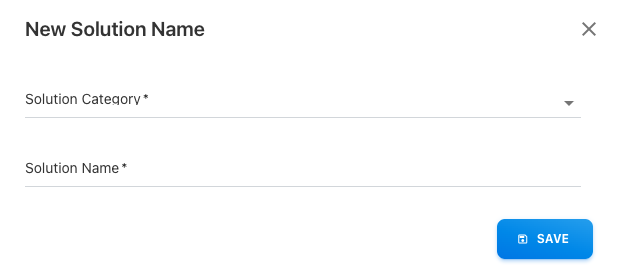
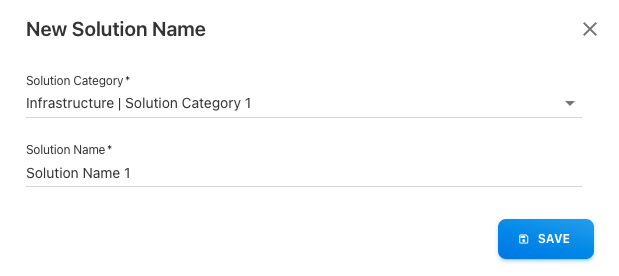
Adding Solution Name Manually
To add Solution Name manually, click on + ADD NEW button and Choose the Solution Category which will give us the list of that Solution Category, which were add in Solution Category both the System default and User Defined(if any). Then, Add your Customized Solution Name or ask for YäRKEN online help.
Modifying Solution Name
To modify both Solution Category and Solution Name use the Edit or Delete option against each Solution Category and Solution Name pair which are created by the user.
Edit will open a popup with the existing values for the chosen record, which can be changed and saved.
Delete will remove the corresponding record after confirmation.

The only Solution Category and Solution Name pair that may be deleted are those that are user-defined, system-defined Solution Category and Solution Name pair cannot be deleted, as you can use there is edit or delete option for only user defined not for system default Solution Category and Solution Name pair.
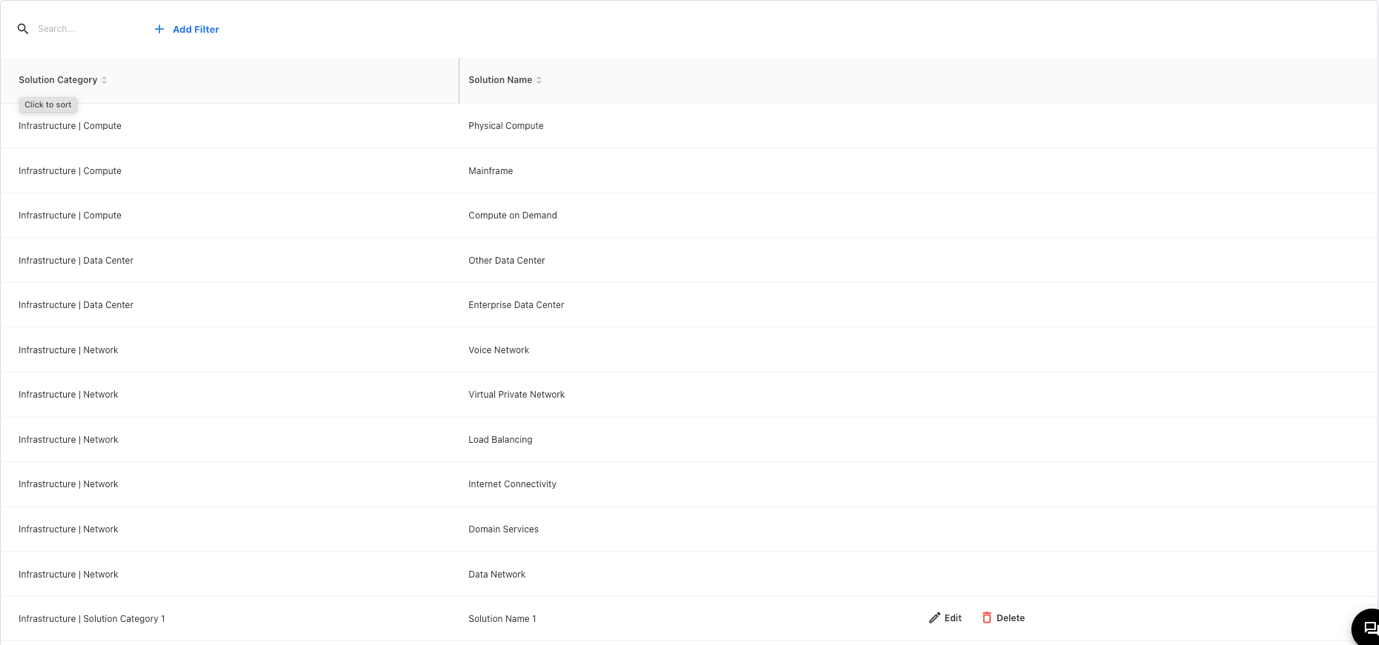
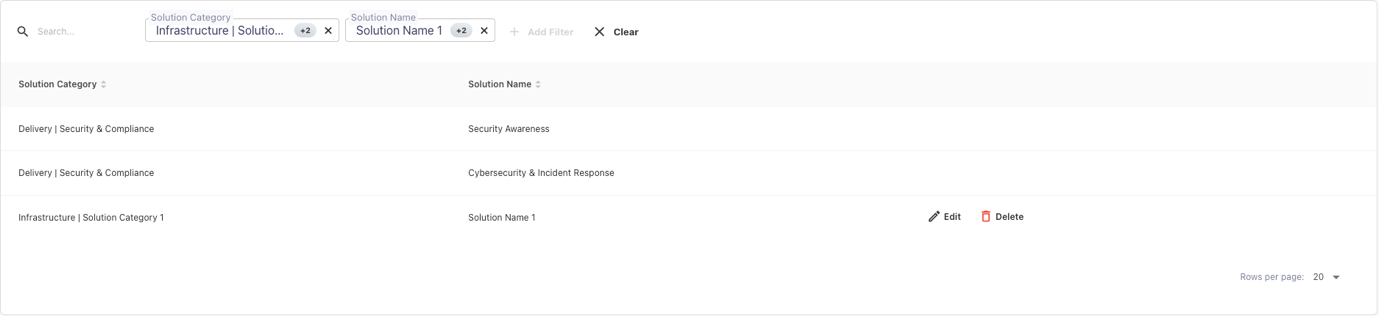
As per above picture the Infrastructure | Solution Category 1 in Solution Category and Solution Name is the user defined and the rest are system default Solution Category and Solution Name pair. The user-defined Solution Name 1 as Solution Name and Infrastructure | Solution Category 1 is shown in the above image, whereas the other Solution Category and Solution Name pair are the system defaults. Only Infrastructure | Solution Category 1 and Solution Name 1 pair will have the ability to edit or delete costs, other Solution Category and Solution Name will not have this feature.
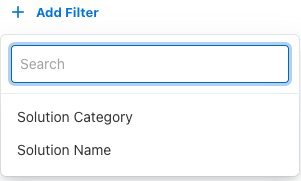
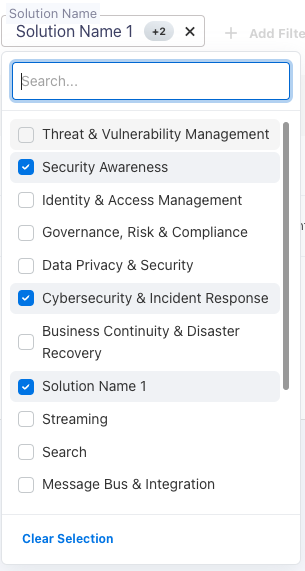
Applying Filters
There is a Solution Category and Solution Name filter in the filters that the user must select in order to search for both Solution Category and Solution Name. For Solution Type filter, A textbox will then appear where the user can search and either select the options that are visible directly for the Solution Category, edit or delete it if it is user defined, or simply view System Default and for Solution Name it is the same. There is also a sorting option in the table that allows you to arrange the data in either ascending or descending alphabetical order
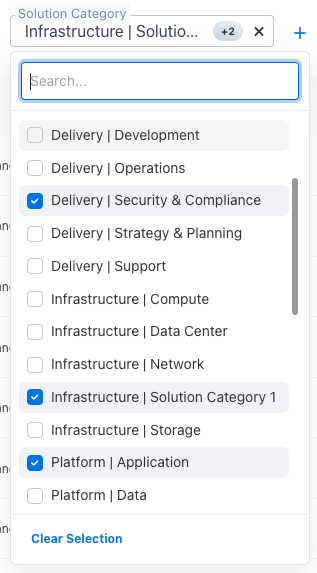
After filtering, the table will appear as this
Downloading Solution Name
By selecting the three dots next to the + ADD NEW Button, you may download both the Solution Category and Solution Name pair list. A list of all the Solution Category and Solution Name pair list will then appear, and you can select to download the whole list as a.csv file.
Here, click on these three dots beside + ADD NEW Button
This menu will appear, then click on Download to download the whole list of the Solution Category and Solution Name pair list
