
Introduction
This document is one of the many how-to guides that explain how to use or work on a specific feature within the YäRKEN application.
This document tells about how to manage cloud consumption data.
Table of Contents
Managing cloud consumption data
Our solution may be used to analyze costs by loading complex CUR(cloud usage report) files, which are cloud consumption statistics obtained from providers such as Amazon AWS, Microsoft Azure, etc. You can allocate your spending to the application for which this consumption occurred in addition to cost analysis.
Our system can accept CUR files and offers provider-specific column mapping, meaning it will automatically map files from any provider and internally convert them to the FOCUS format. The details of FOCUS format can be found in YäRKEN online help. For more understanding please refer to it.
Only a user with the Admin privilege has access to manage the Cloud consumption data.
Cloud consumption can be accessed via the YäRKEN Designer under the Consumption upload menu.
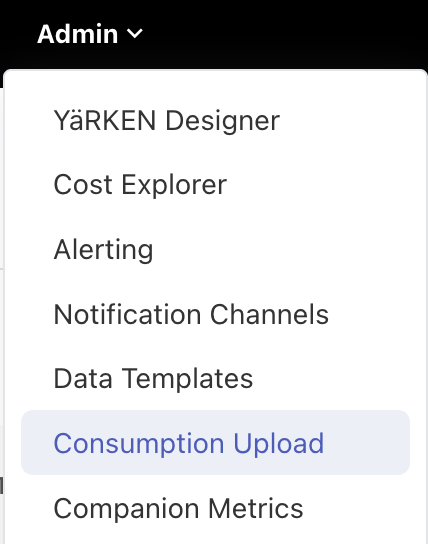
|
Admin >> YaRKEN Designer >> Consumption Upload |
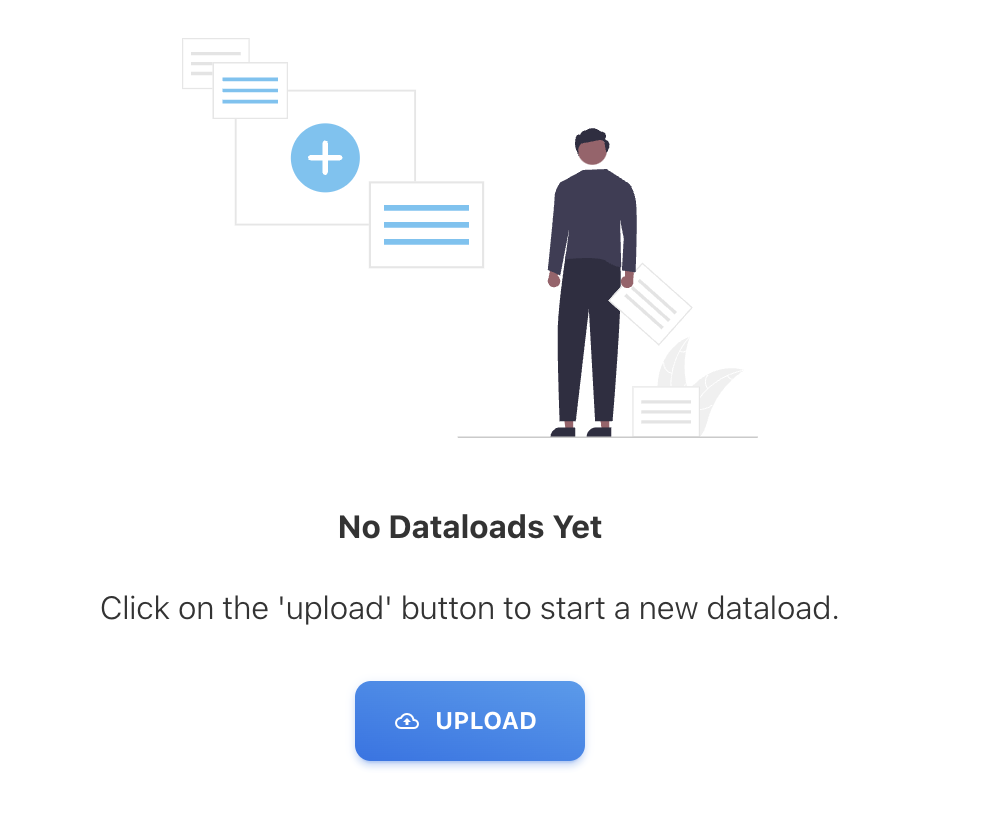
Uploading Cloud Consumption data
To upload a CUR file, click on ^ UPLOAD button
Choose file type to load cloud spend
After clicking on ^ UPLOAD button it will open the popup for choosing a file type
You can choose Azure, AWS_v2, FOCUS or AWS_legacy file types to load the file.
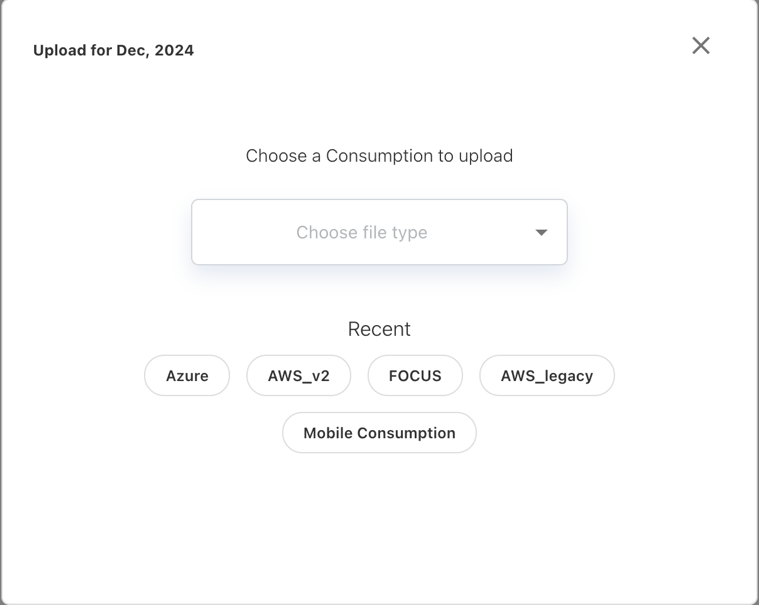
After file type selection , choose browse to pick a file or drag and drop a file on
the Cloud icon.
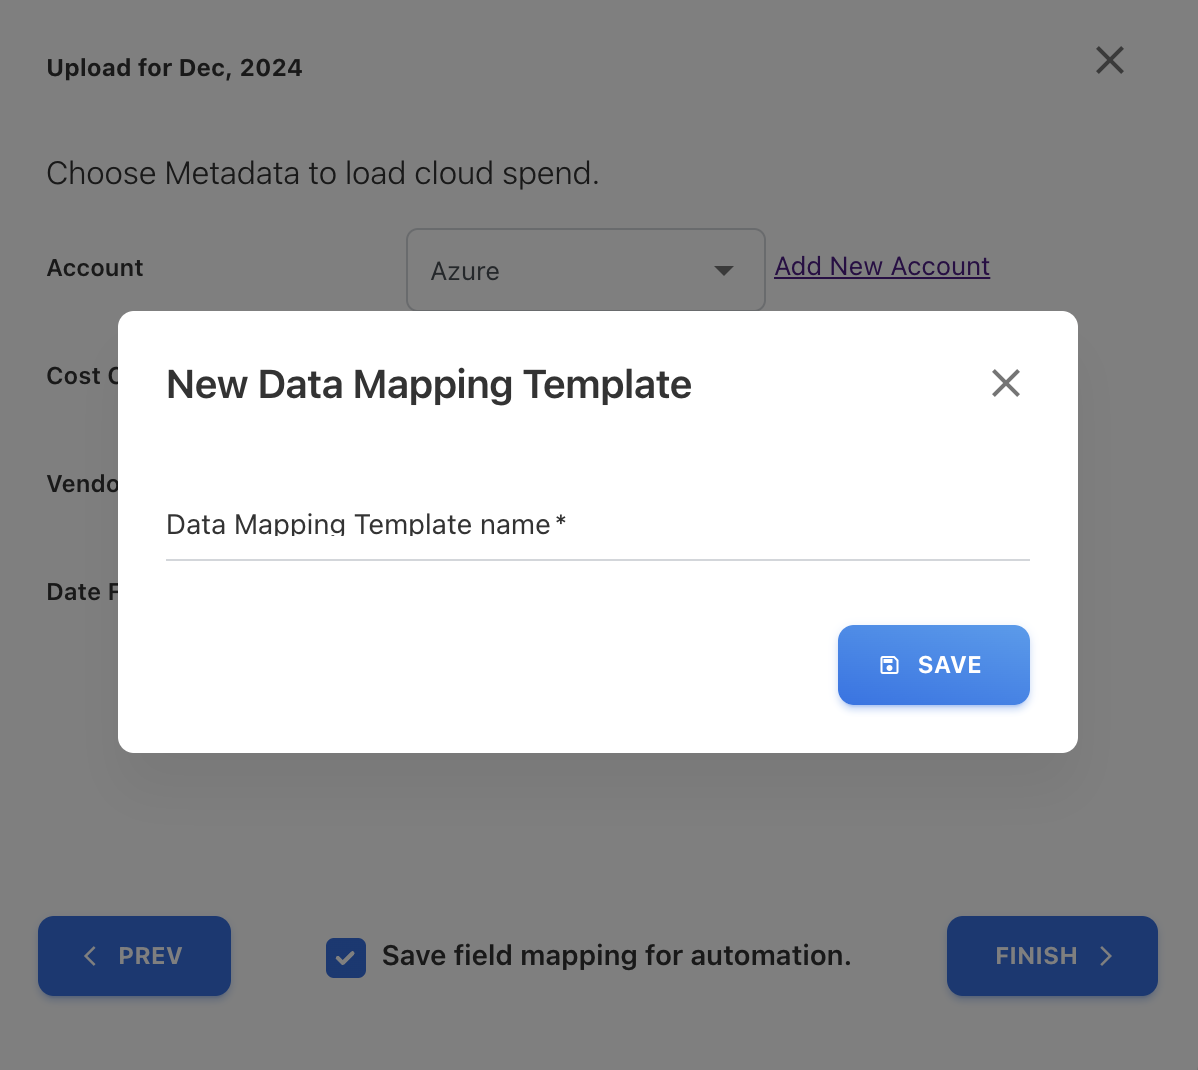
Choose metadata to load cloud spend
Metadata required to load cloud are
-
Account
-
Cost Center
-
Vendor
-
Date Format
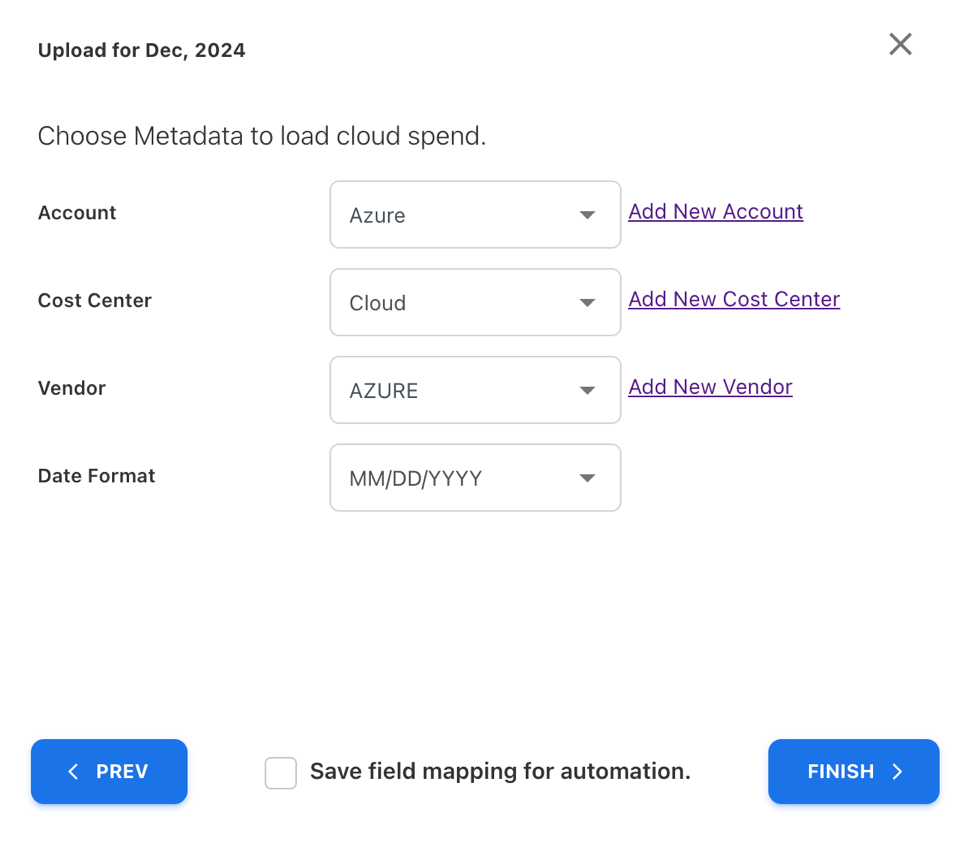
Save field mapping for automation
By selecting check box “save field mapping for automation” you can save this mapping template with required metadata to use in Integration.
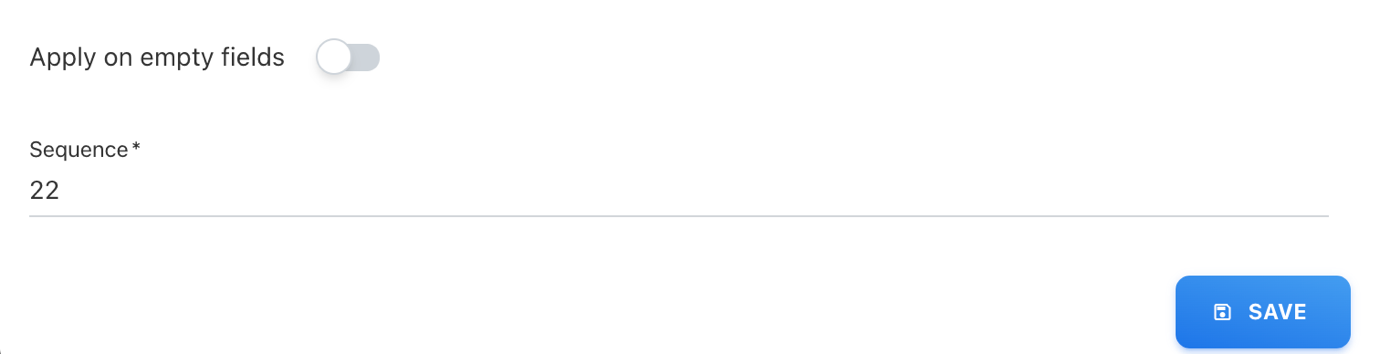
Creating upload rules
To publish cloud consumption spend you must have upload rules for Team and Cloud Asset Name before loading cloud consumption data. If you want to create rules after loading cloud consumption data then you can use reload option to apply new rules. Click on UPLOAD RULES to manage upload rules.
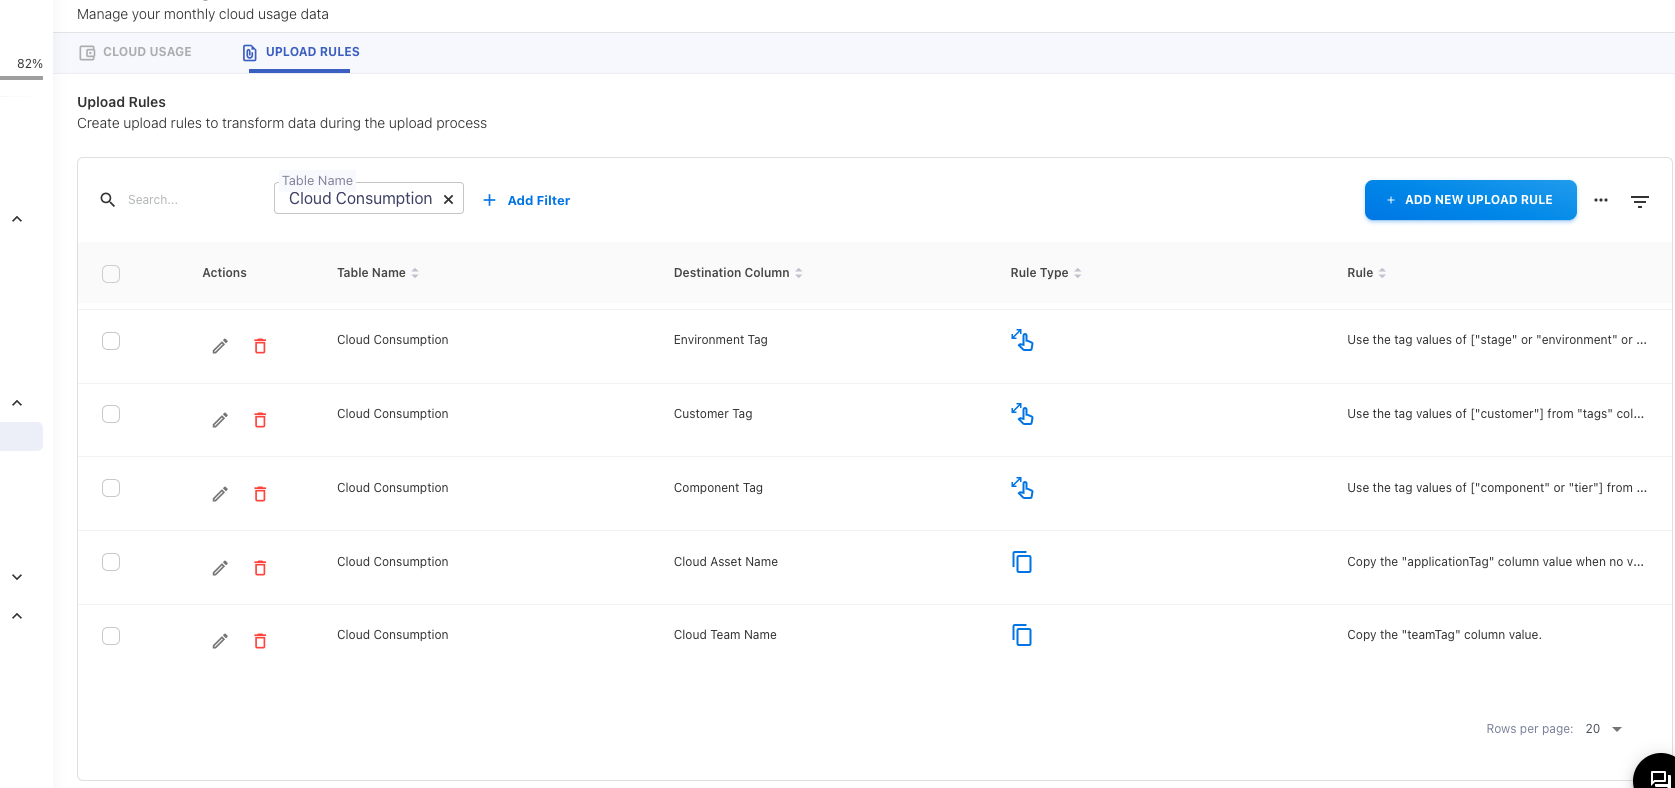
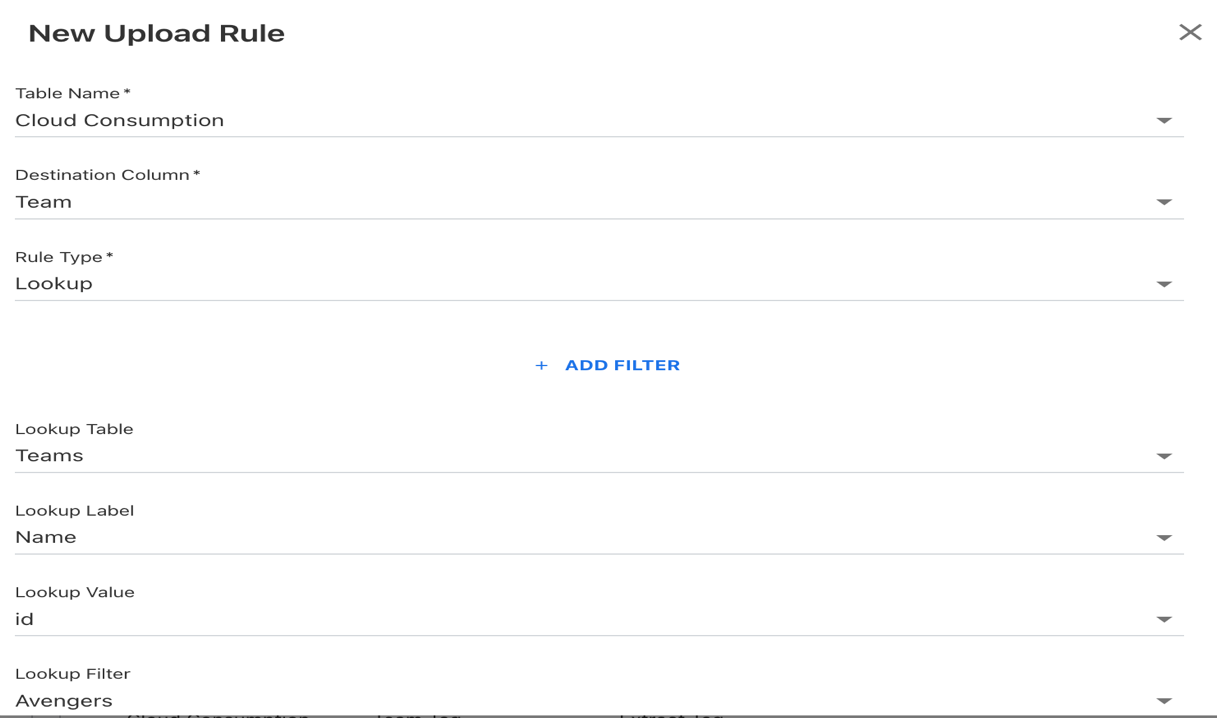
To create upload rule, click on + ADD NEW UPLOAD RULE in the Upload Rules screen and enter the details. The details of each of the attributes can be found in the YäRKEN data dictionary document or YäRKEN online help.
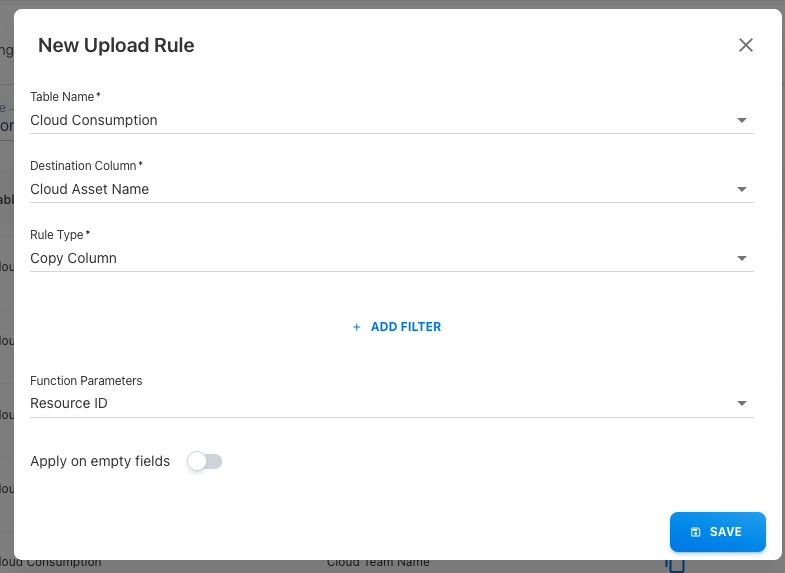
To create rule for cloud Asset Name , pick Table Name as Cloud Consumption , Destination Column as Cloud Asset Name and pick Rule type you want such as copy column , concat , etc . After picking rule type do the further actions appropriately
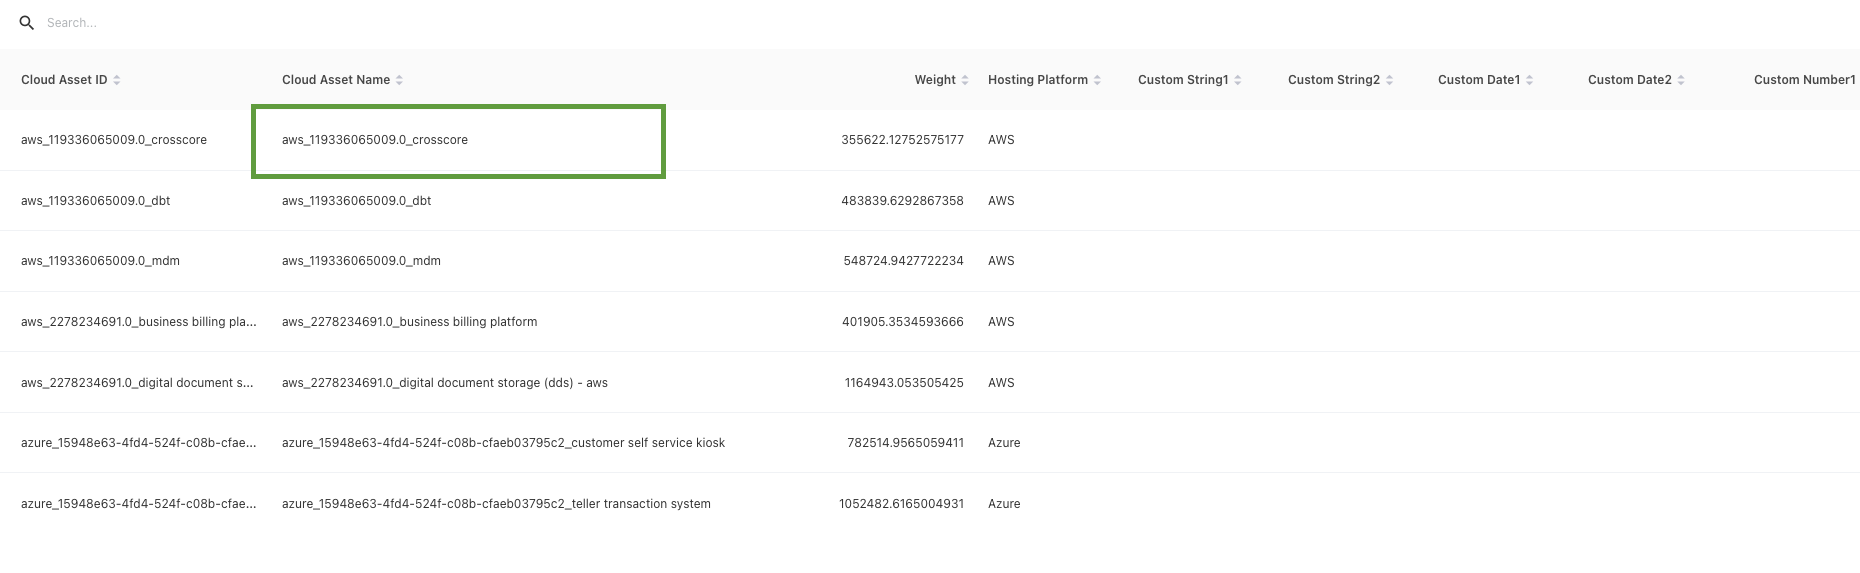
NOTE: Once the user has created the upload rule for the cloud asset name, the cloud assets will be created upon publishing the cloud spend. The asset name will be a concatenation of the Provider in the file, the Billing Account ID, and the column chosen in the upload rules for the Cloud Asset Name.
To create rule for Team , pick Table Name as Cloud Consumption , Destination Column as Team and pick Rule type as Lookup and do the further actions appropriately.
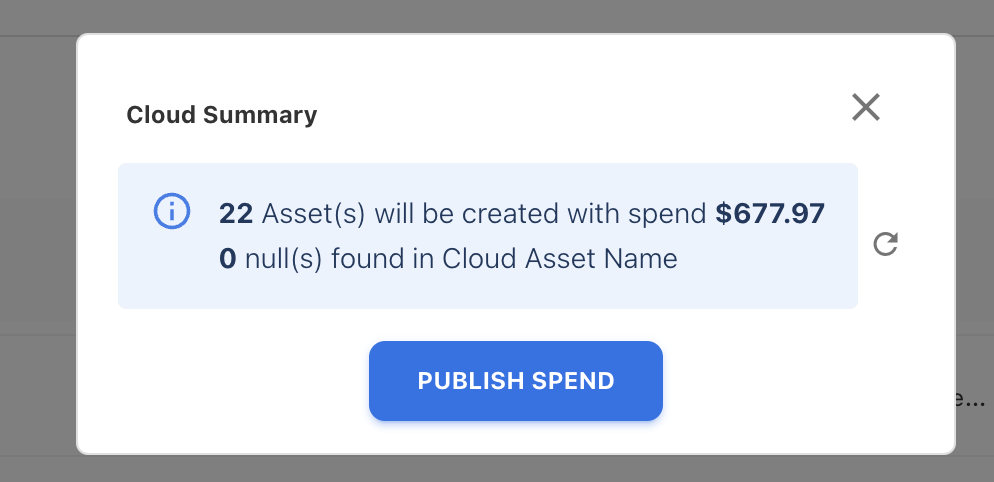
Publishing cloud spend
To Once you have upload rule on cloud Asset Name and Team , it will create a cloud spend view with columns
-
Provider
-
Account
-
Cost center
-
Vendor
-
Cloud Asset
-
Team
-
Spend
To view cloud spend you can navigate to
|
Admin >> Settings >> Cloud Spend |
To publish cloud spend, click on PUBLISH button in the Cloud Spend screen and click on PUBLISH SPEND.
Actions
The actions you can perform once upload cloud consumption data are:
-
Automate
-
Reload
-
Download
-
Delete
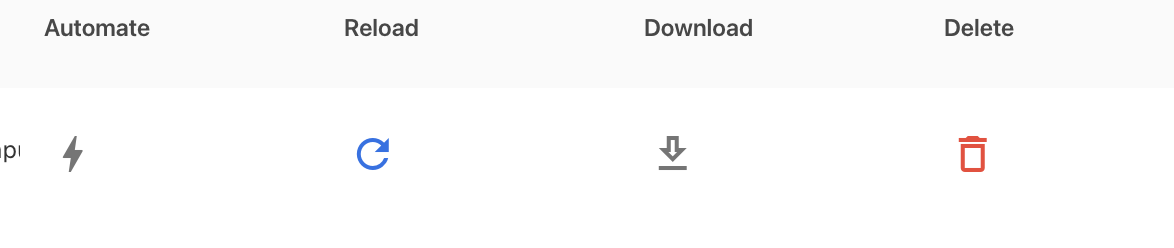
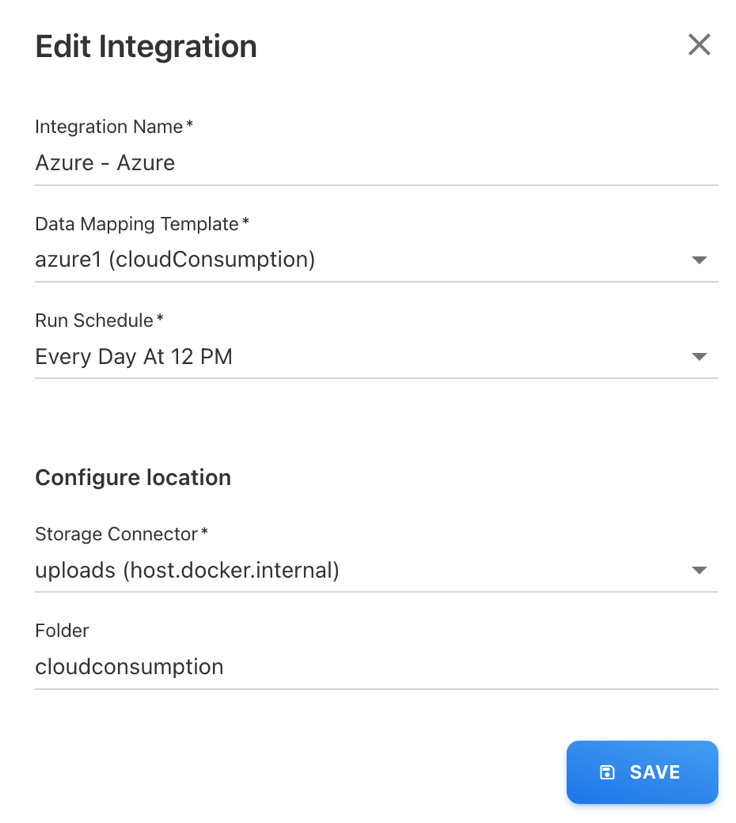
Automate:
It is used to automate the cloud consumption file upload. Once you click on this button it create new Integration.
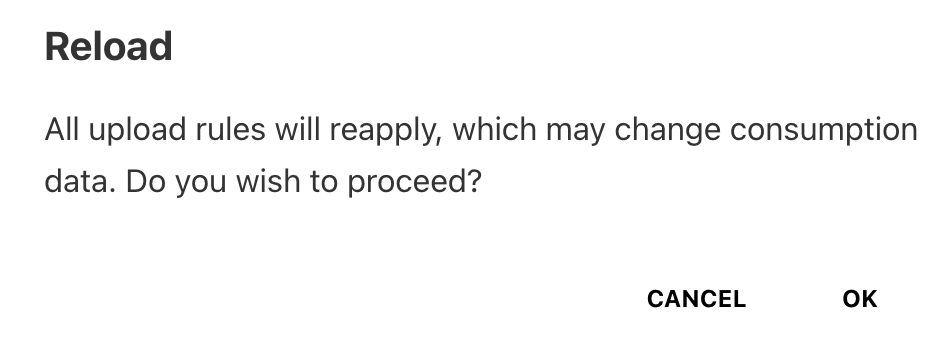
Reload:
It is used to reload the cloud consumption file. It is useful to apply newly created upload rules for existing cloud consumption data.
Download:
It is used to download the cloud consumption data. The same data which you uploaded.
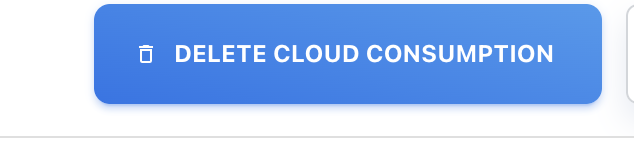
Delete:
Delete Cloud Consumption:
This action will delete focus format cloud consumption data from the external location
Delete Button:
This action will delete cloud consumption data i.e CUR file from your system.
1
I