Introduction
This document is one of the many how-to guides that explain how to use or work on a specific feature within the YäRKEN application.
This document tells about how to manage cost pool allocation by creating cost pool mapping rules in the application.
Table of Contents
Managing Cost Pool Allocation
Cost pool mapping is used to create successful cost pool spend allocation. The cost pool mapping rule creates spend distribution at the cost pool level.
Only a user with Admin privileges has access to manage the cost pool-level data.
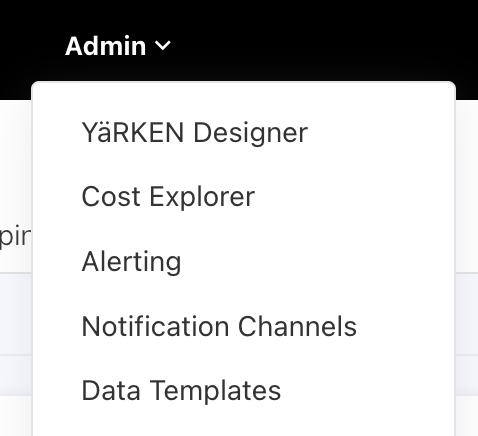
Cost pool mapping can be accessed via the YäRKEN Designer sub-menu option under the Admin menu.
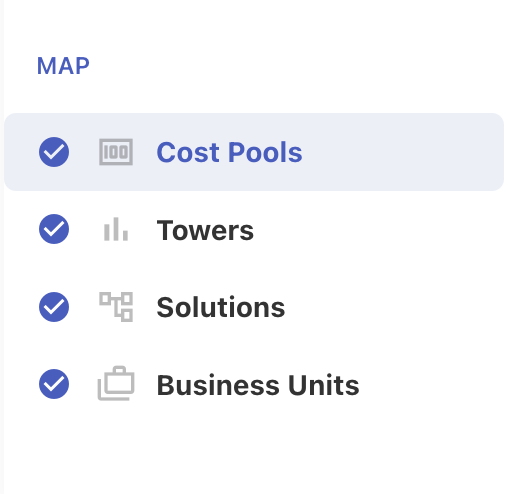
Once on the Designer page, the left collapsible panel shows Cost Pools which contains the link to access the cost pool mapping page.
|
Admin >> YaRKEN Designer >> Spend Model >> Cost Pools |
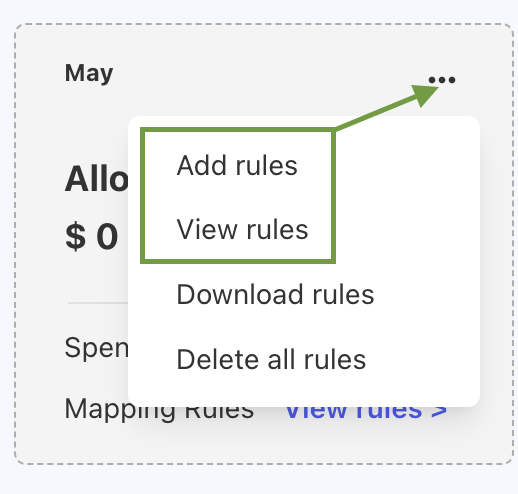
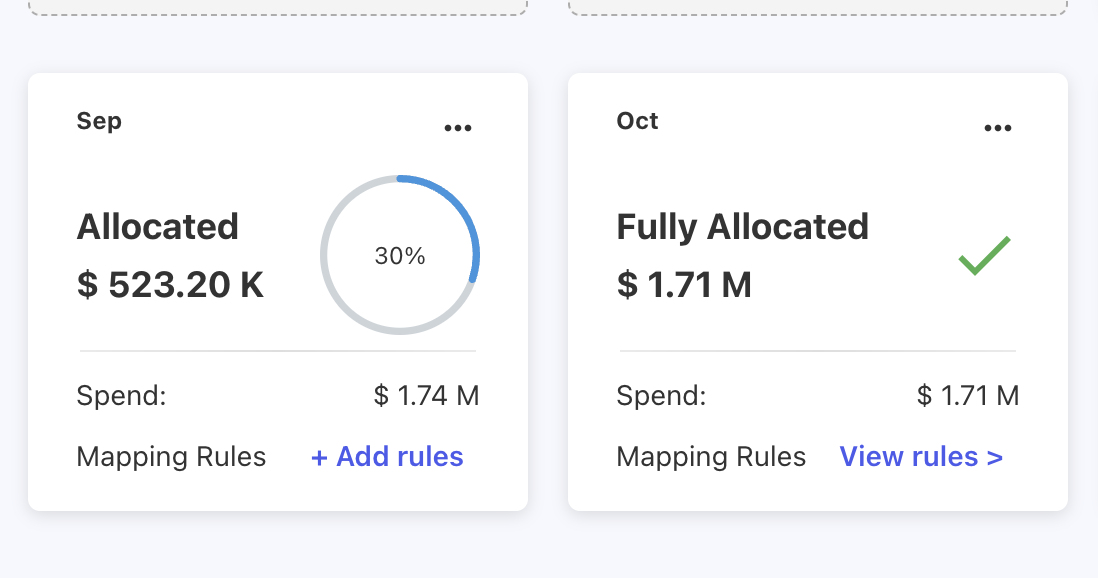
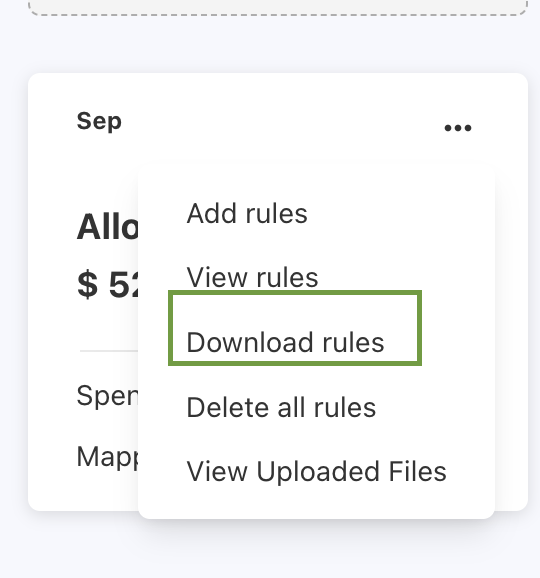
Users can now see all the cost pool-level monthly spend distribution in 12-month tiles for the selected year in the Spend tab. Click on the "…" in the tile to get the option to access the cost pool mapping rule for that particular month. The user can choose "Add rules" and "View rules" to access and manage cost pool mapping.
Adding Cost Pool Mapping rule
Rules can either manually add or uploaded using an Excel or CSV file or can be copied from any other month’s data.
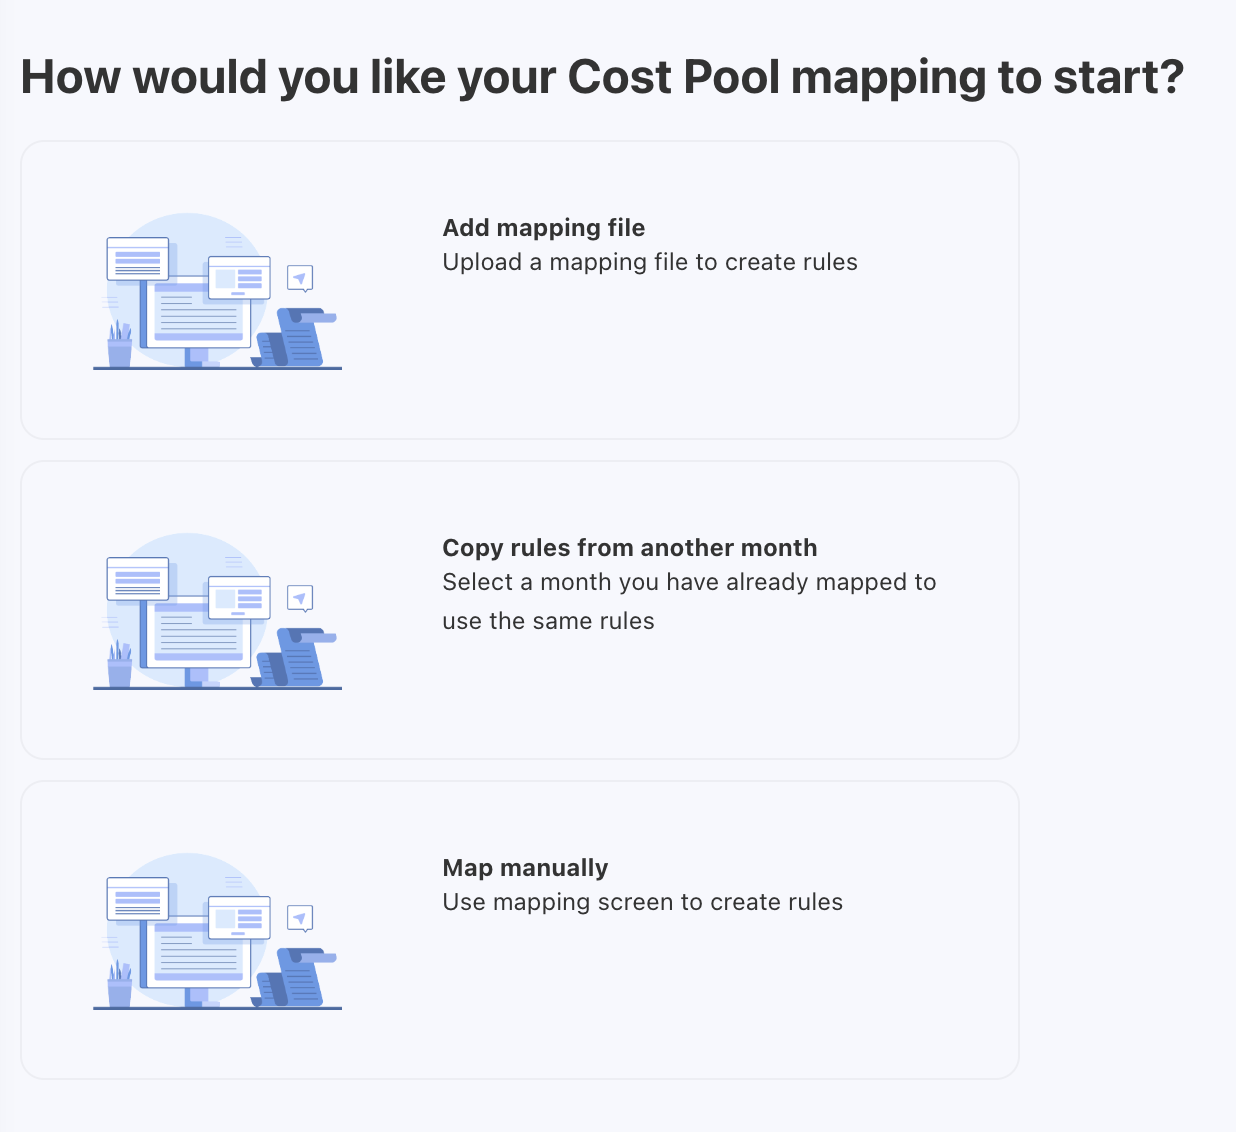
Adding Rule Manually
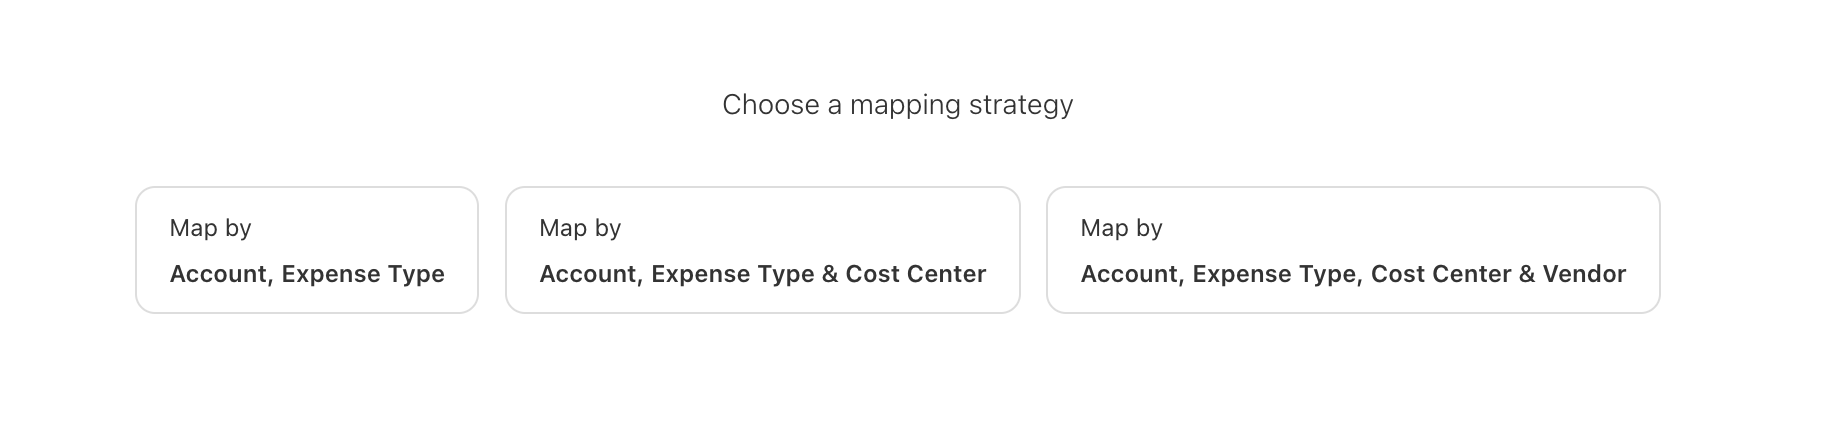
To add a cost pool rule manually in YäRKEN, it can be created by using any of the three mapping strategies mentioned below:
-
Map by Account, Expense Type
-
Map by Account, Expense Type & Cost Center
-
Map by Account, Expense Type, Cost Center & Vendor
Upon clicking on any of these options, the user sees the list of spend details in a table grouped by the master categories available in the strategy.
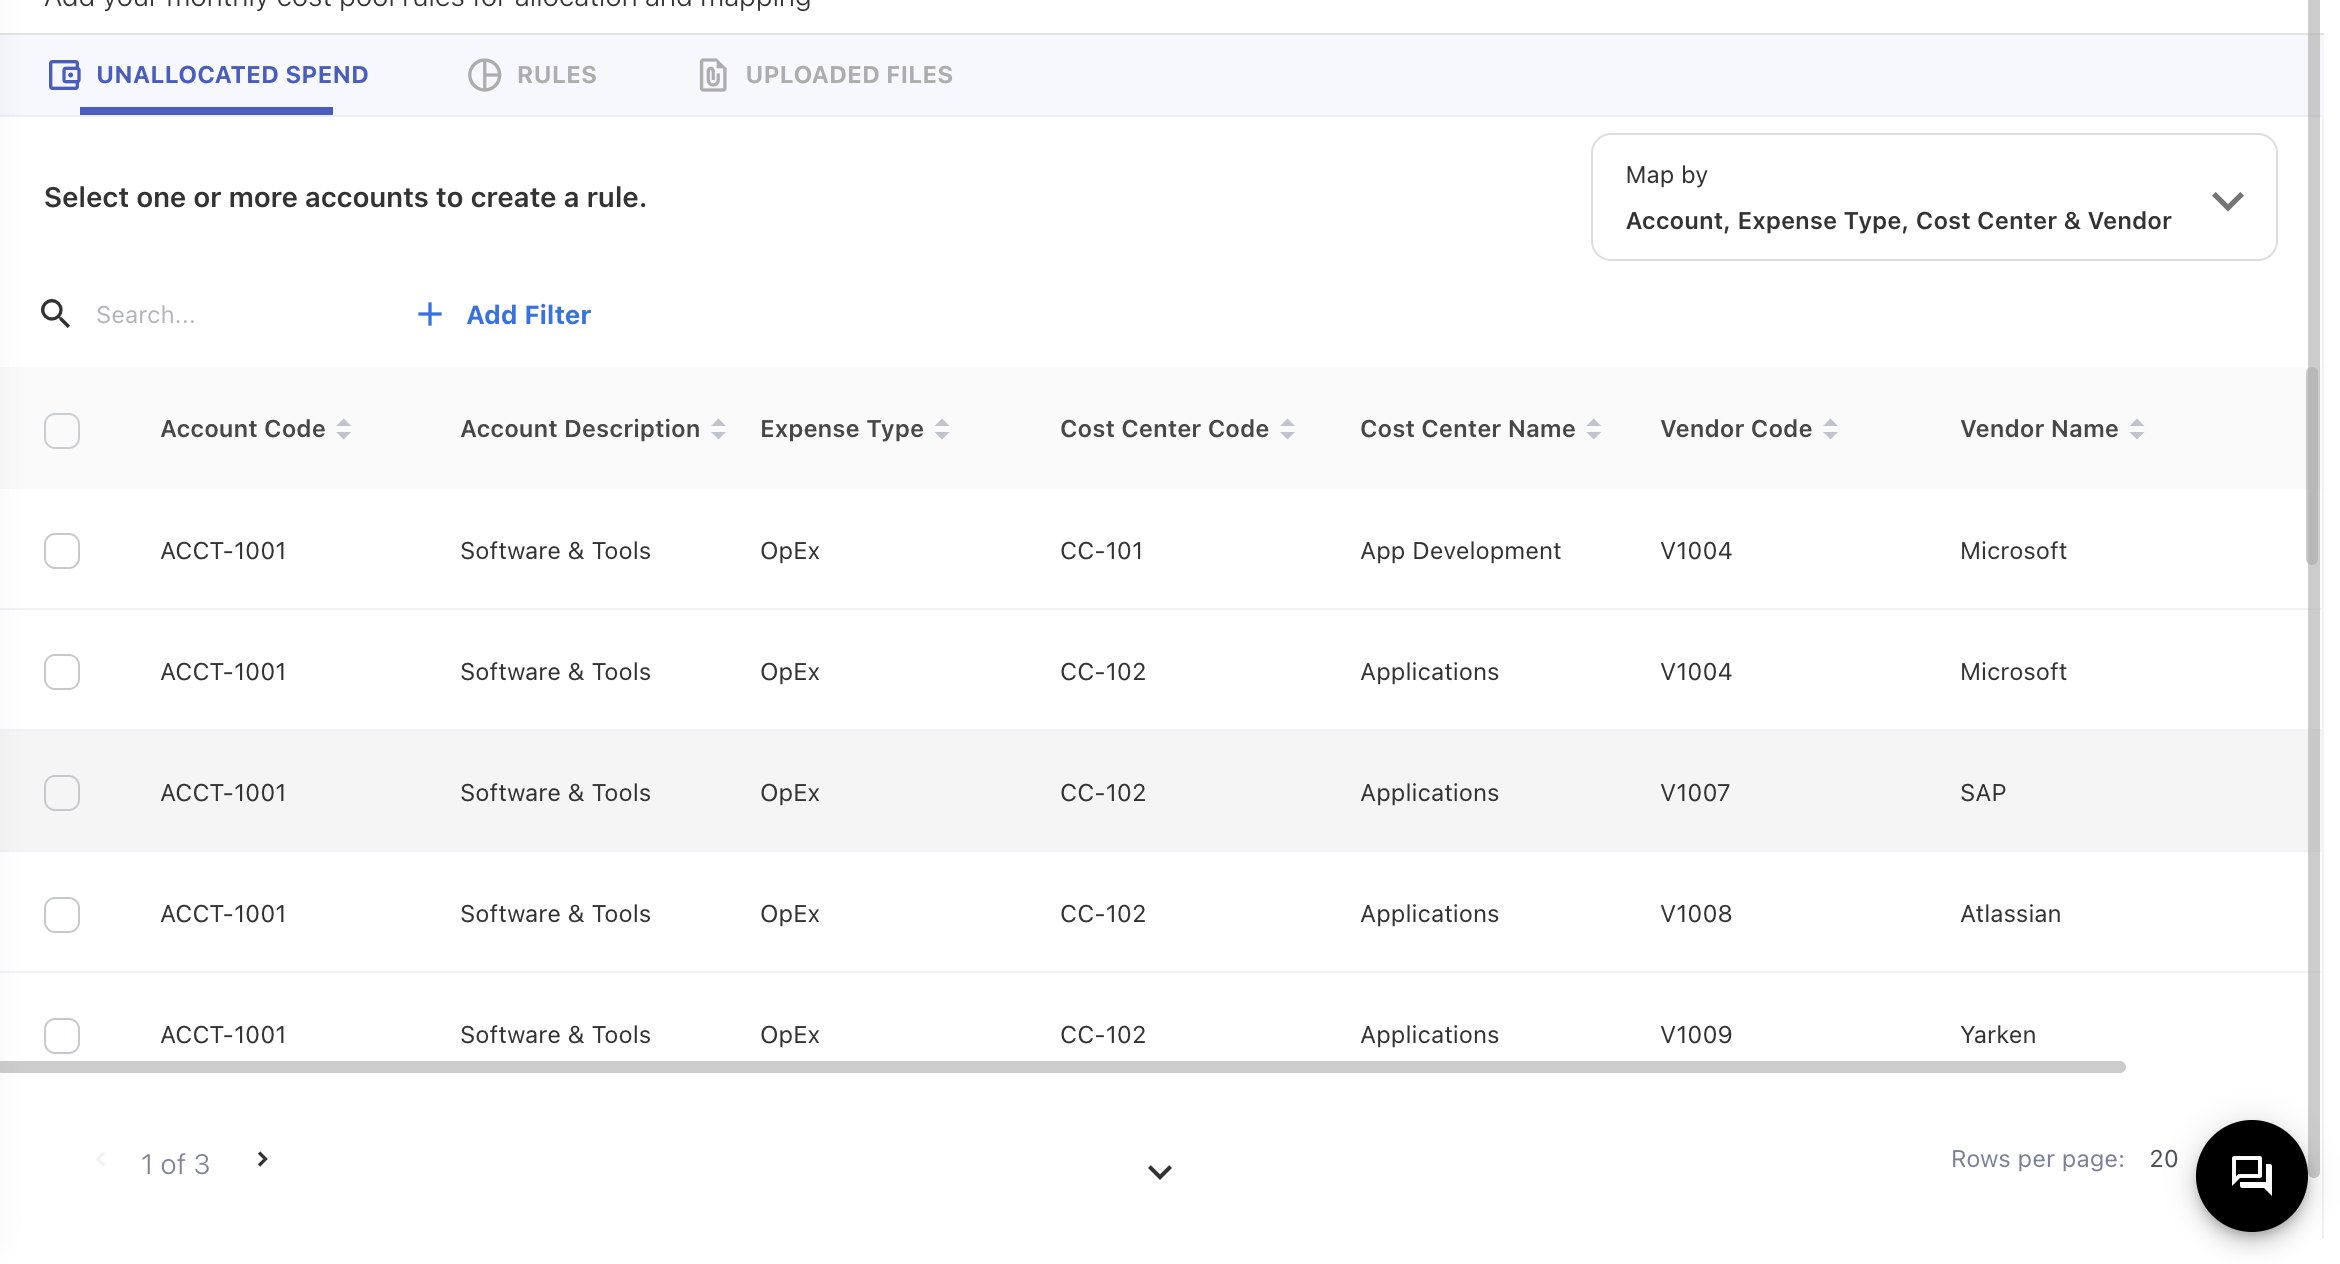
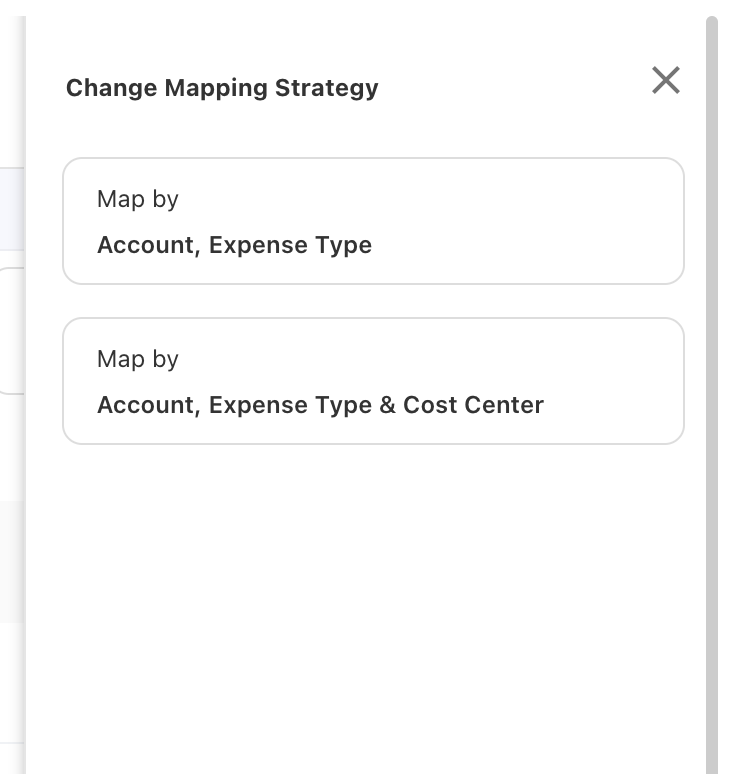
Users can still change the mapping strategy through the drop-down menu provided in the top right corner.

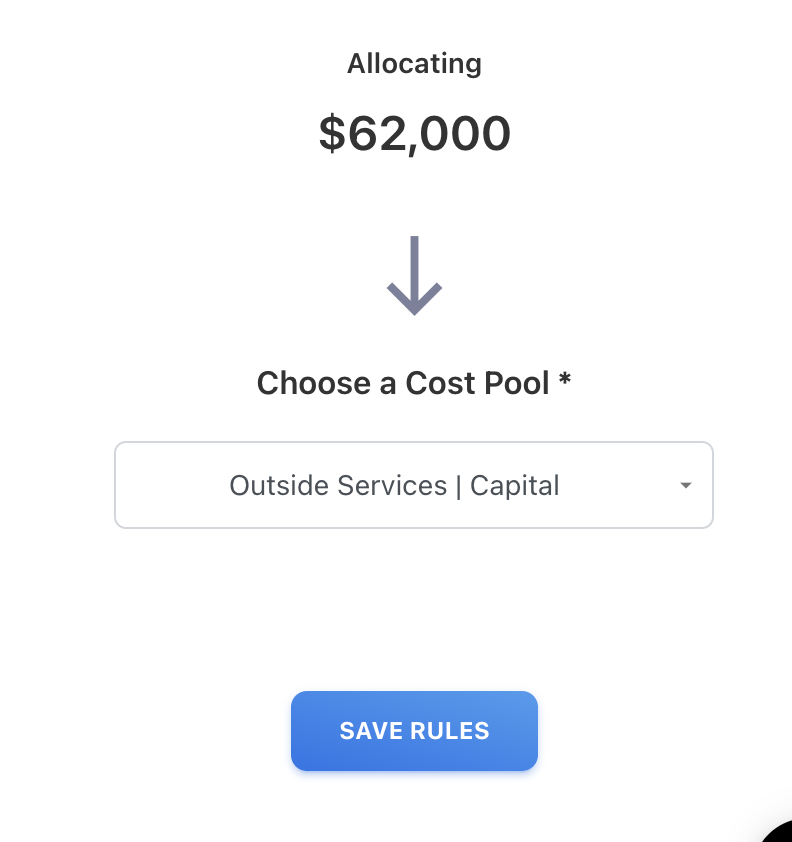
Users can select multiple rows from the table. Once the user selects the spend, they can see the total amount selected and the dropdown to select the cost pool.
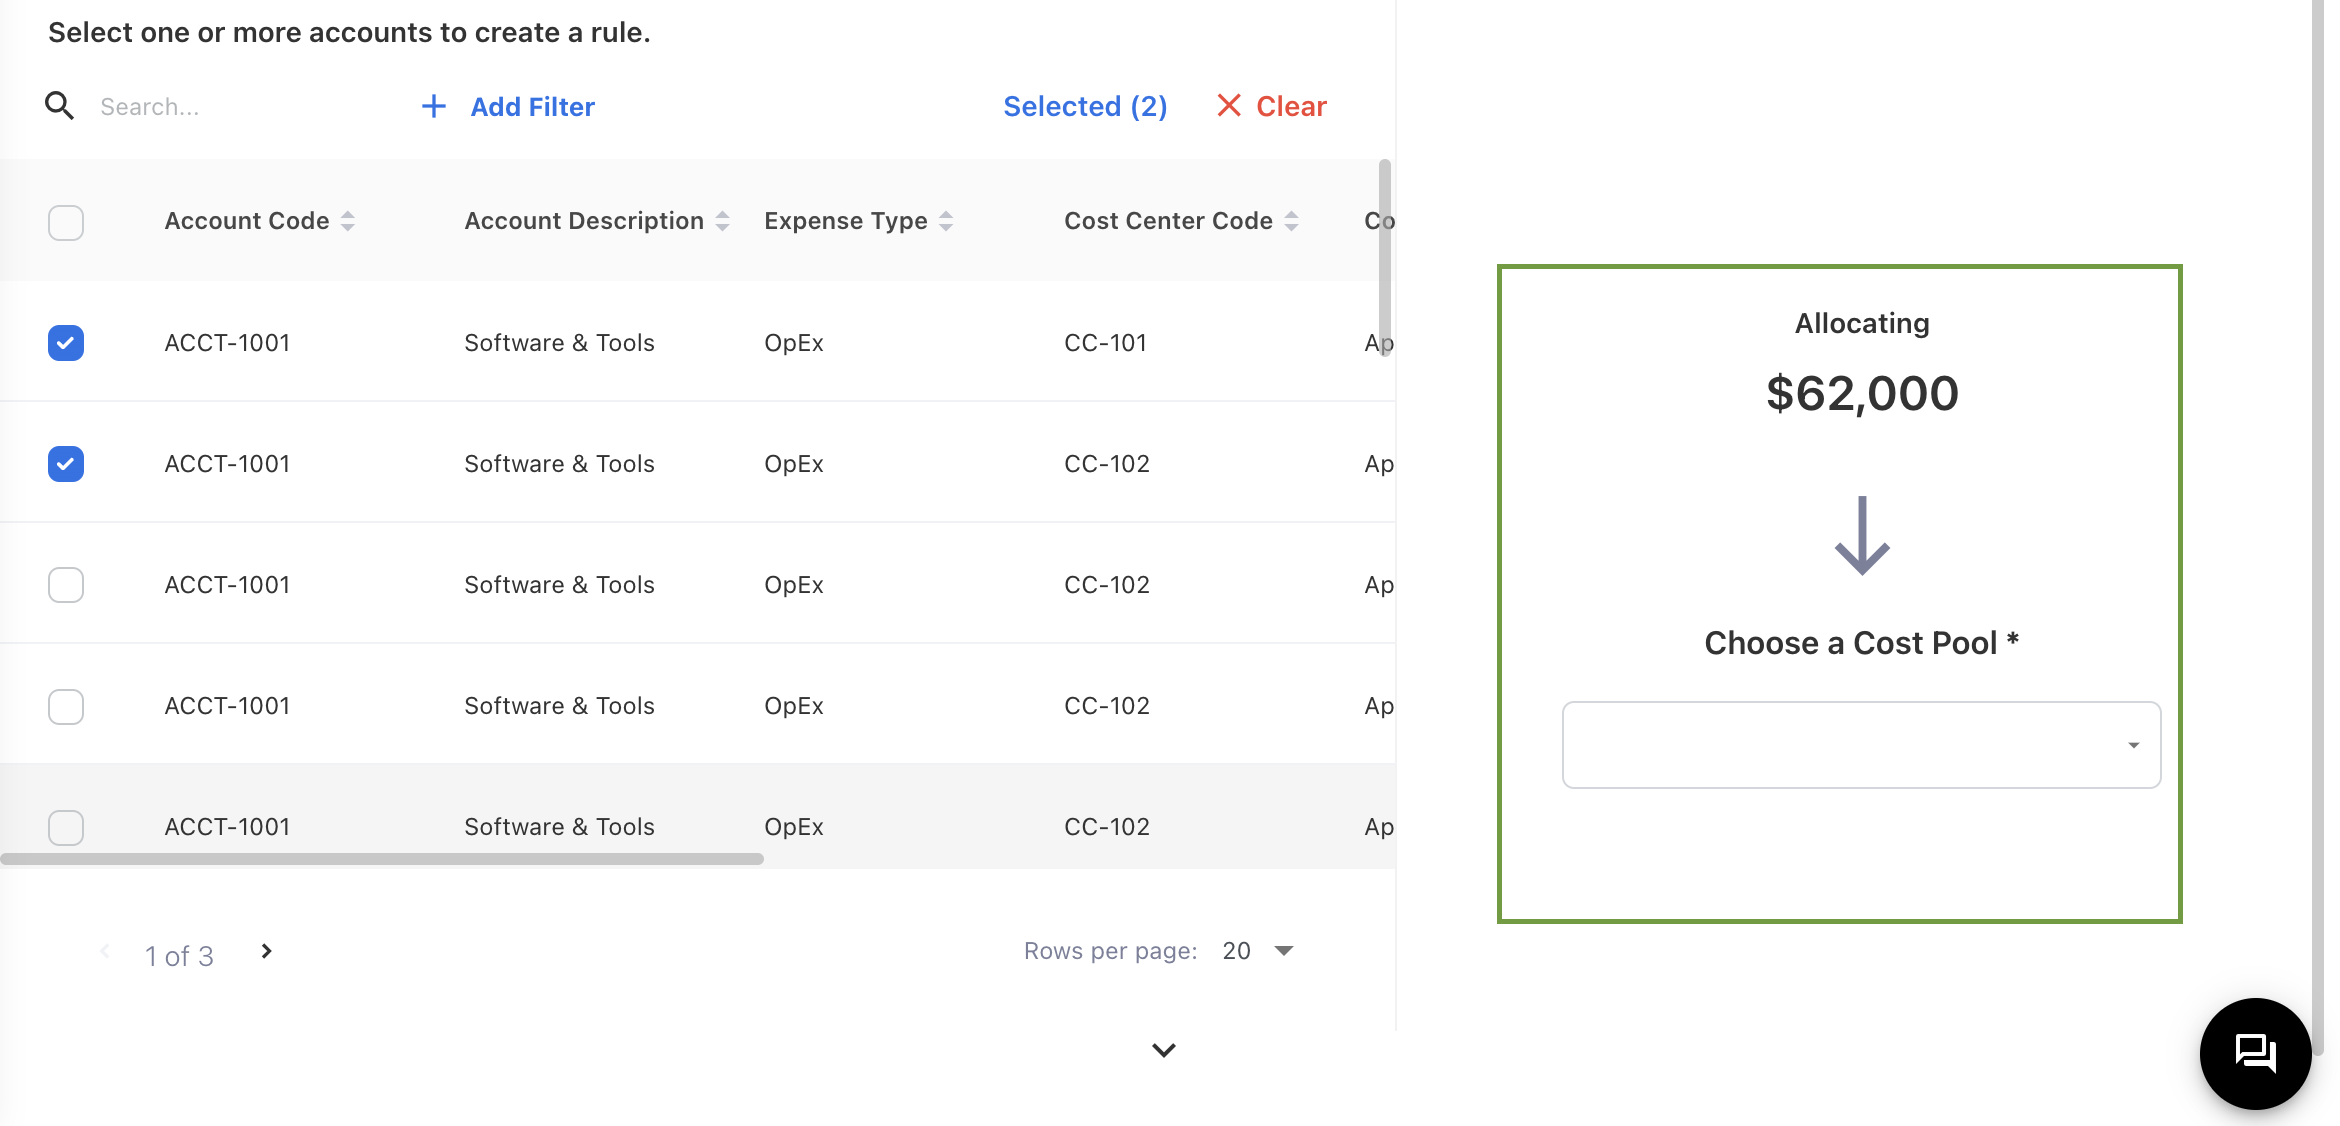
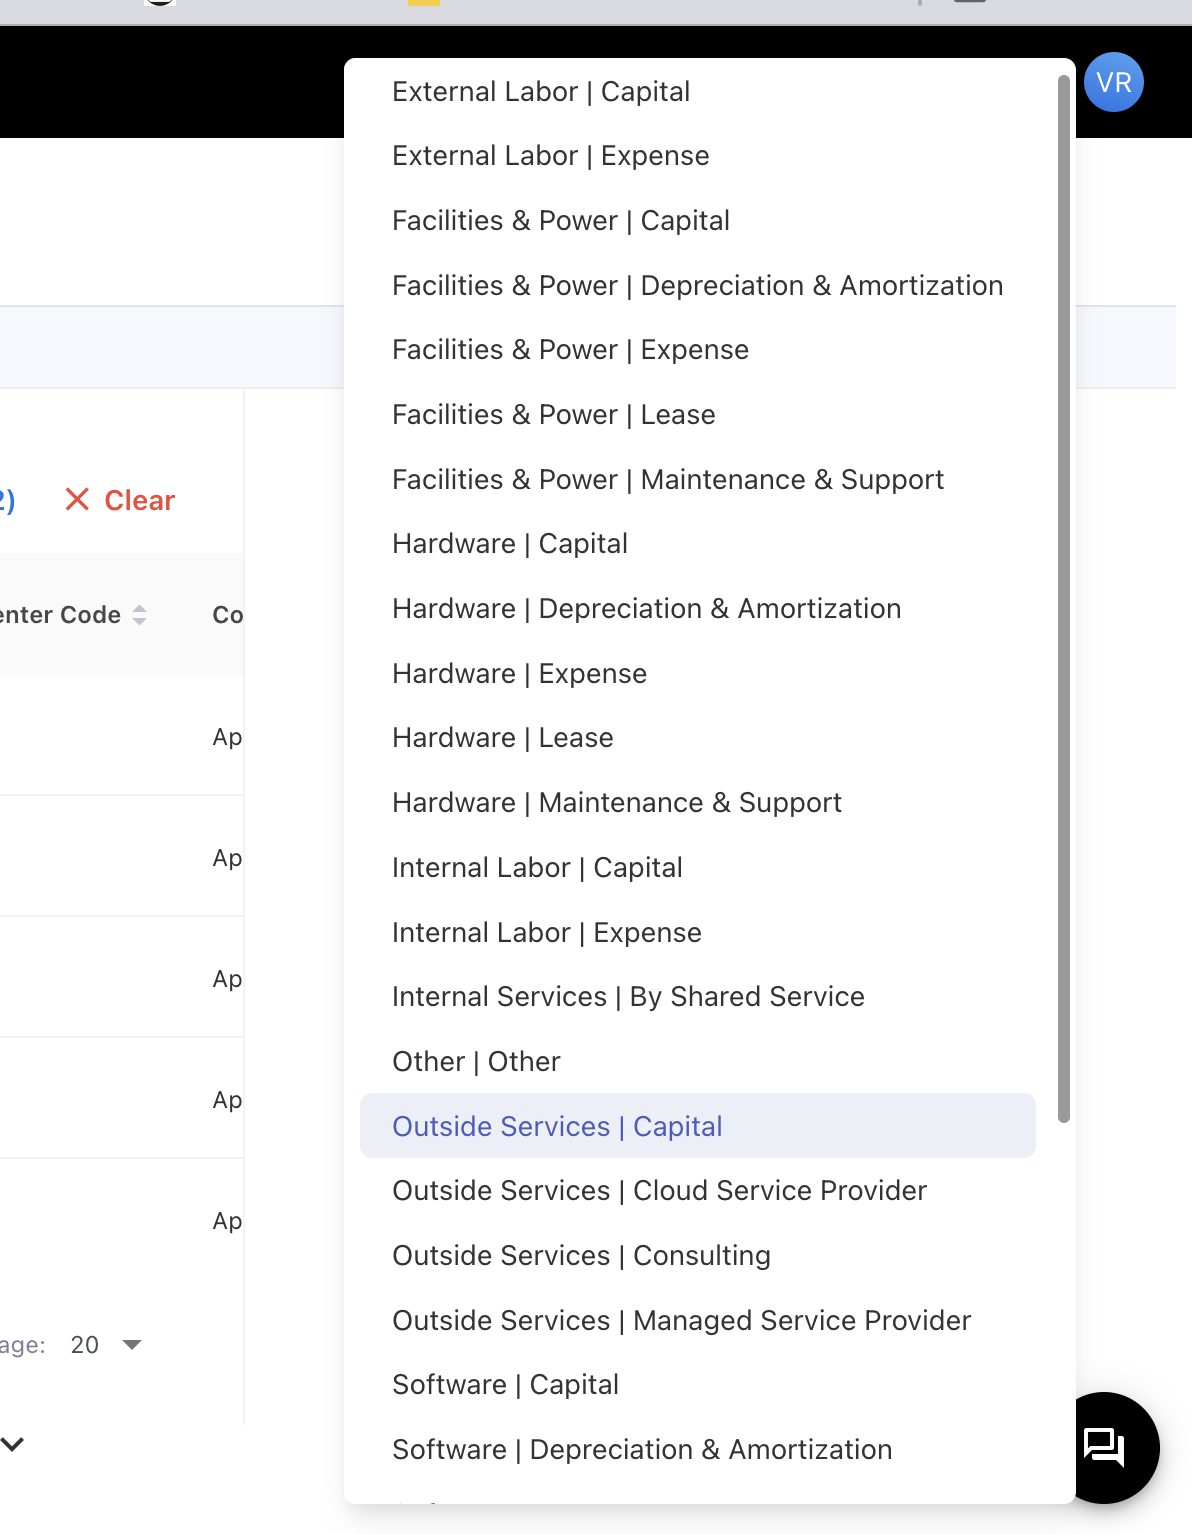
Click on the dropdown, and the user gets the cost pool list in <Cost pool>| <Sub cost pool> format. Select a <Cost pool> | <Sub cost pool> to allocate the spend.
Create rules by clicking on SAVE RULES.
Users can view the rules created in the RULES tab.
Uploading Cost Pool Mapping
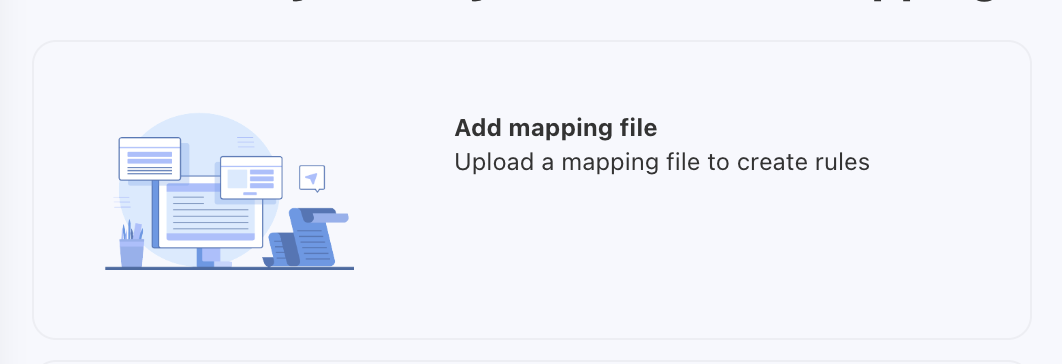
To upload a file with one or more cost pool mapping rules, click on the Add mapping file option.
A pop-up shown below will appear to upload the file.
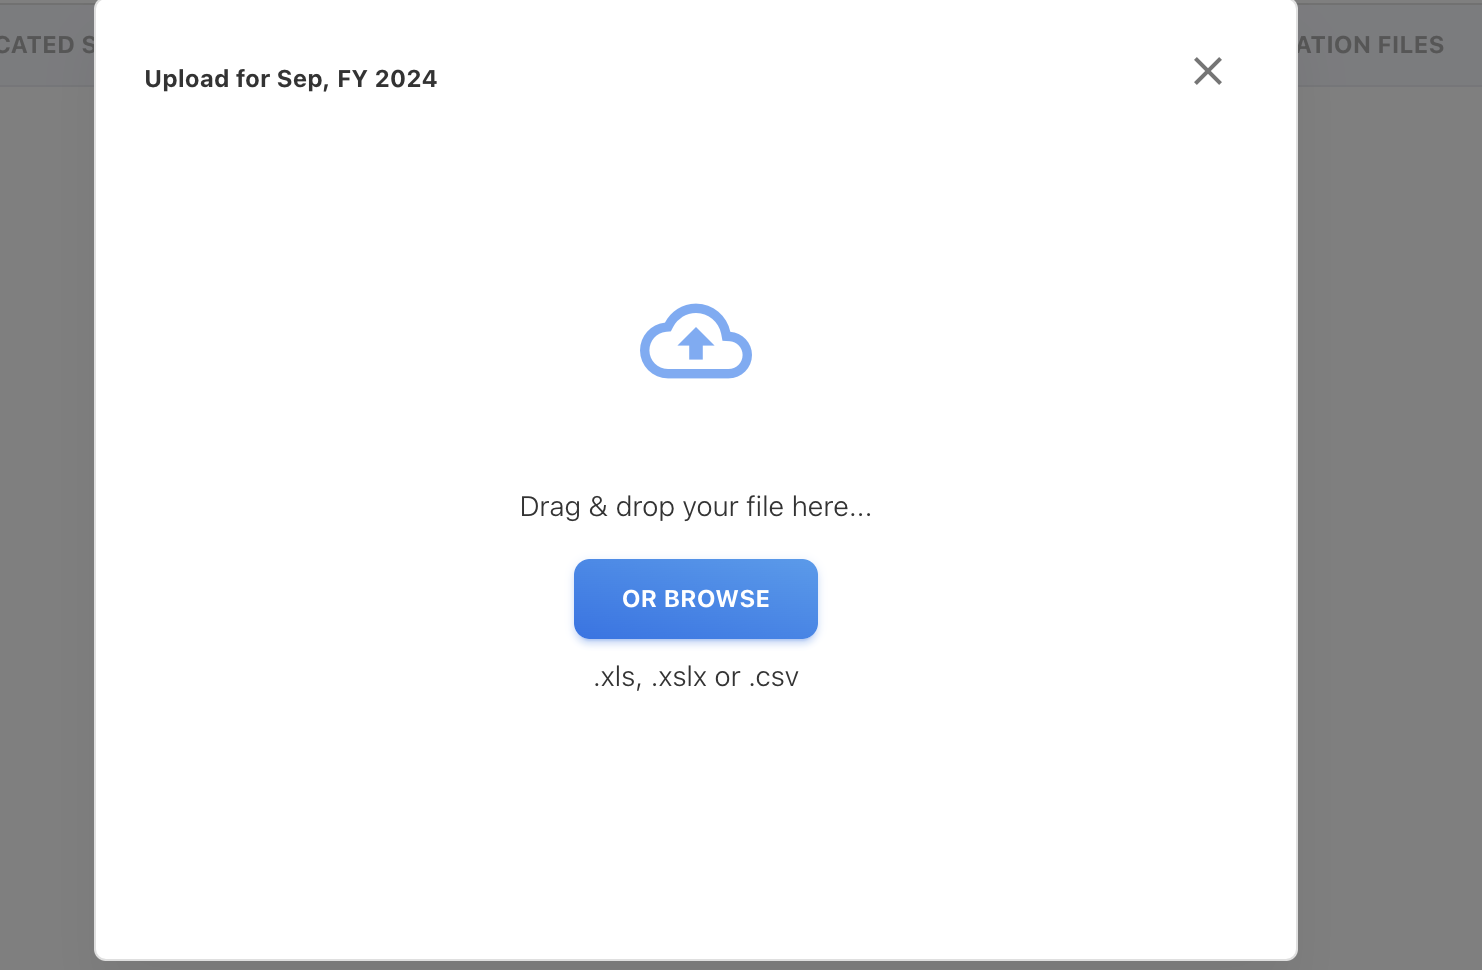
Choose 'Browse' to pick a file, or drag a file and drop it onto the cloud icon. Users can preview the file being uploaded. Click on NEXT to map the fields. Users can view the successful auto-mapped page if the mandatory fields are auto-mapped.
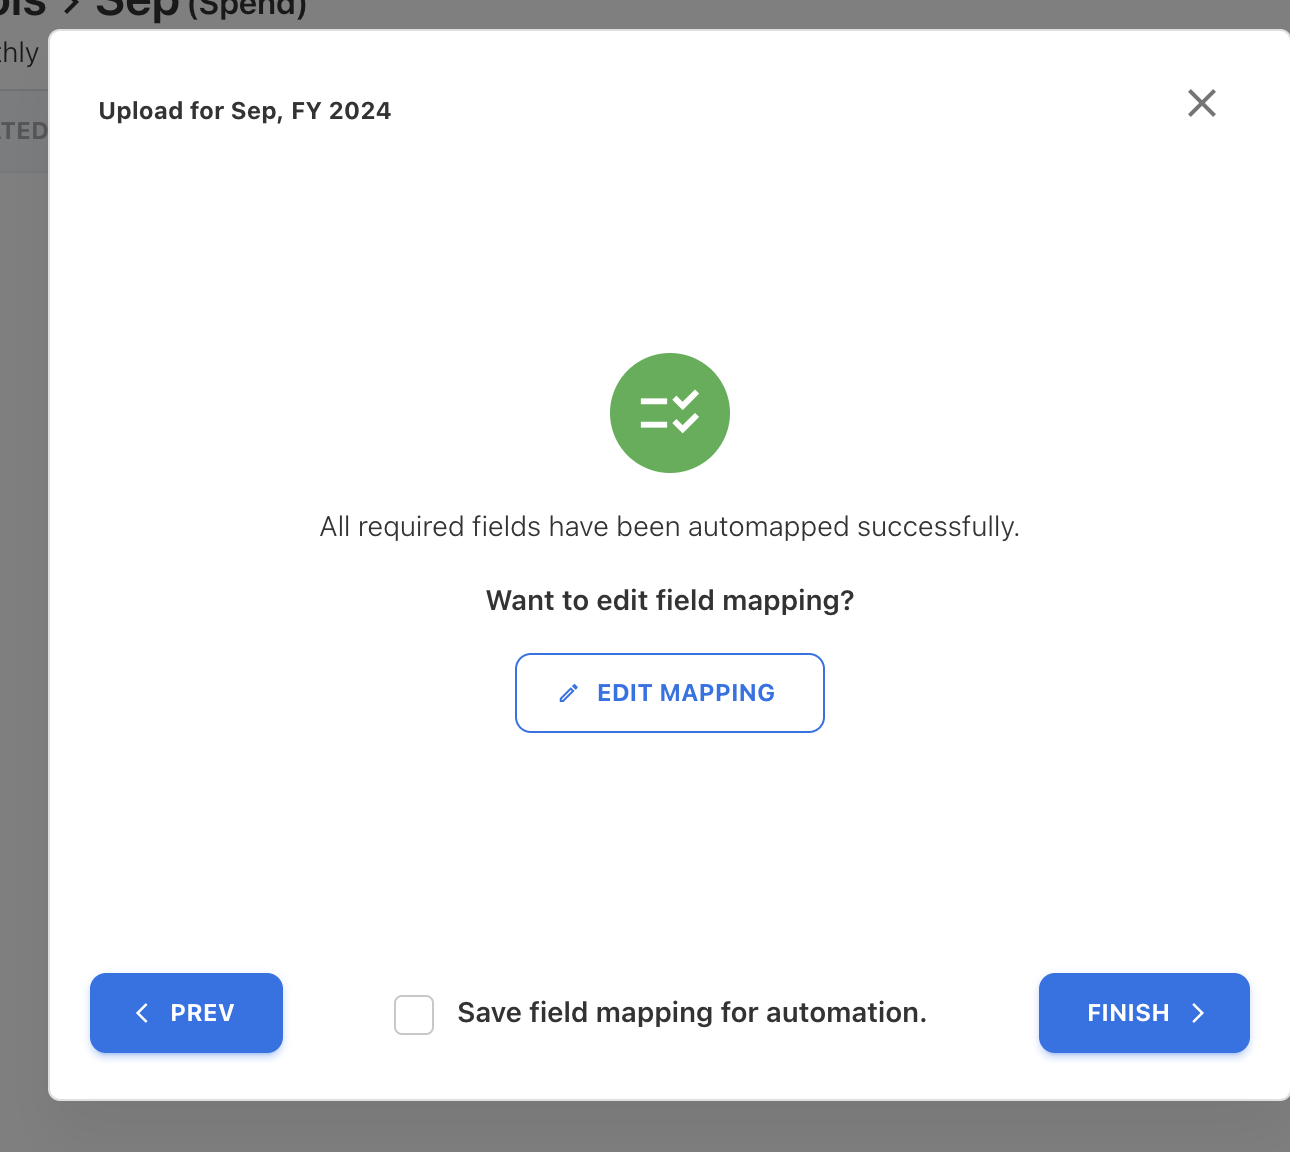
If the mandatory field names in the form do not match the column names in the file, columns will not be successfully auto-mapped. To ensure successful mapping, the user must manually select the columns for mapping. Once the mandatory fields are mapped, click on FINISH.
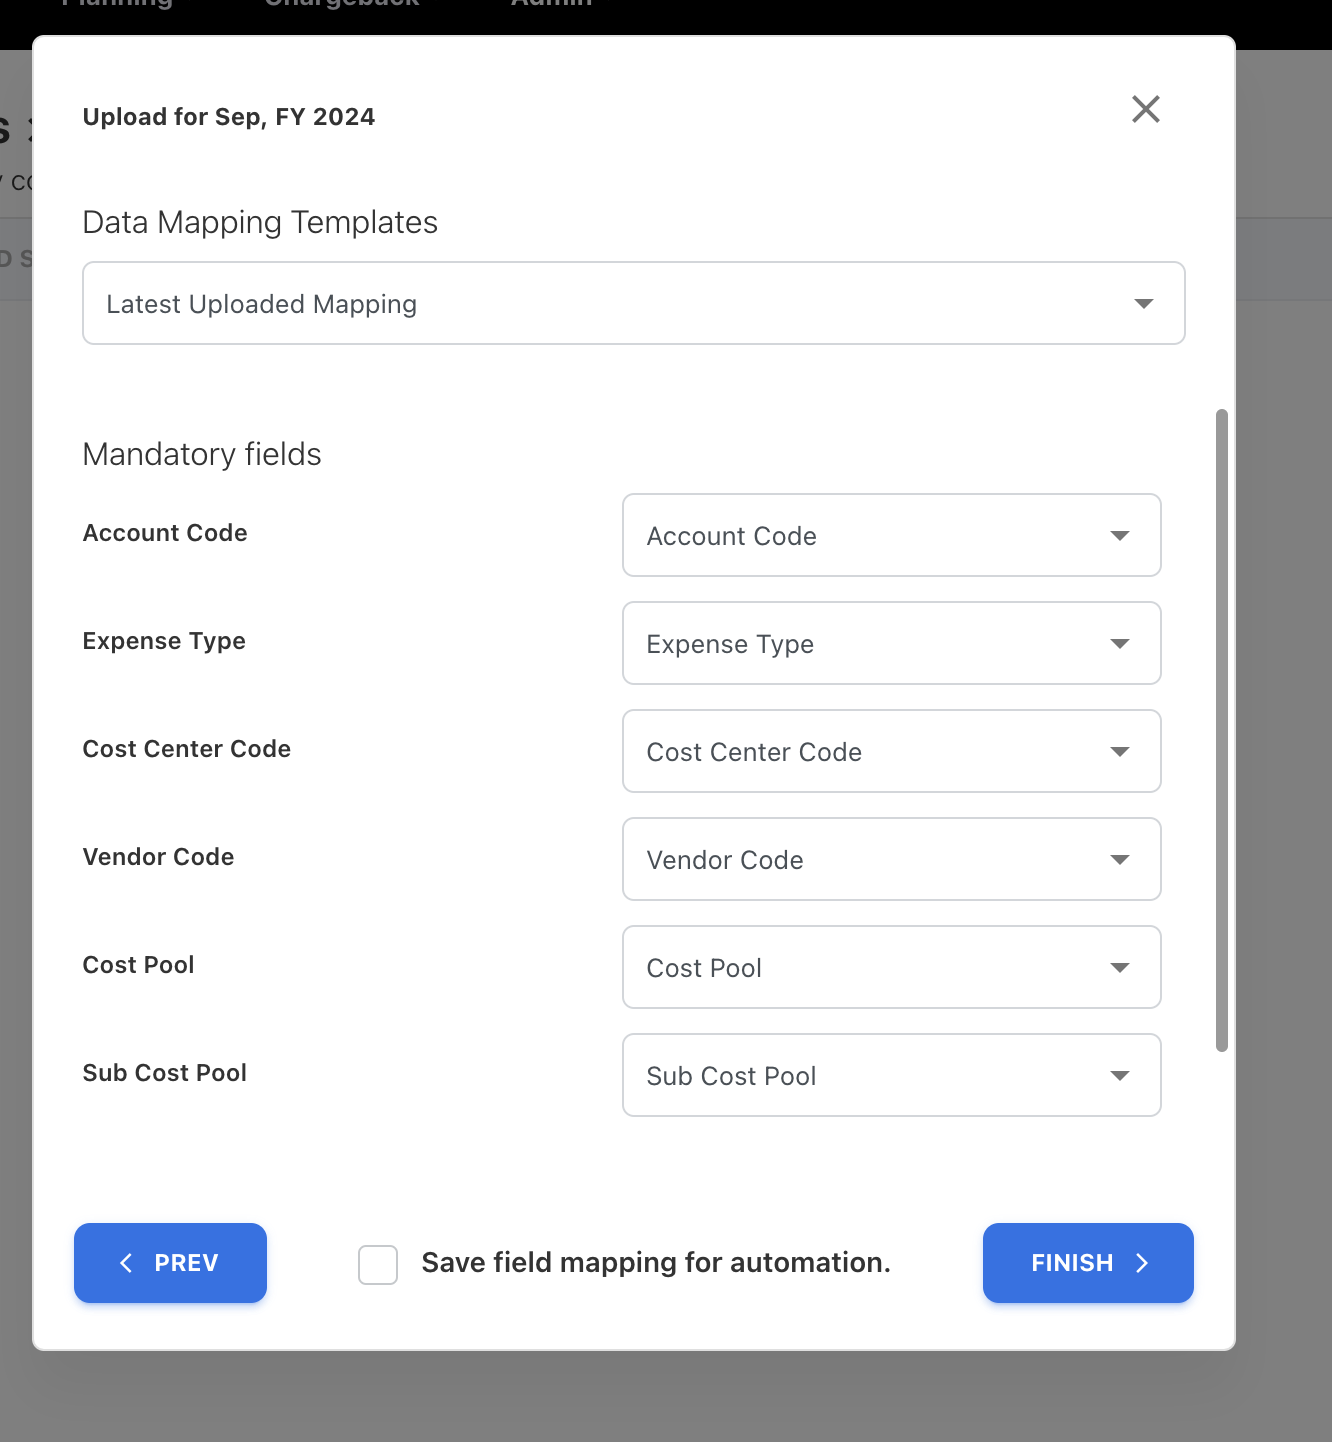
The mandatory fields are:
-
Account Code
-
Expense Type
-
Cost Center Code
-
Vendor Code
-
Cost Pool
-
Sub Cost Pool
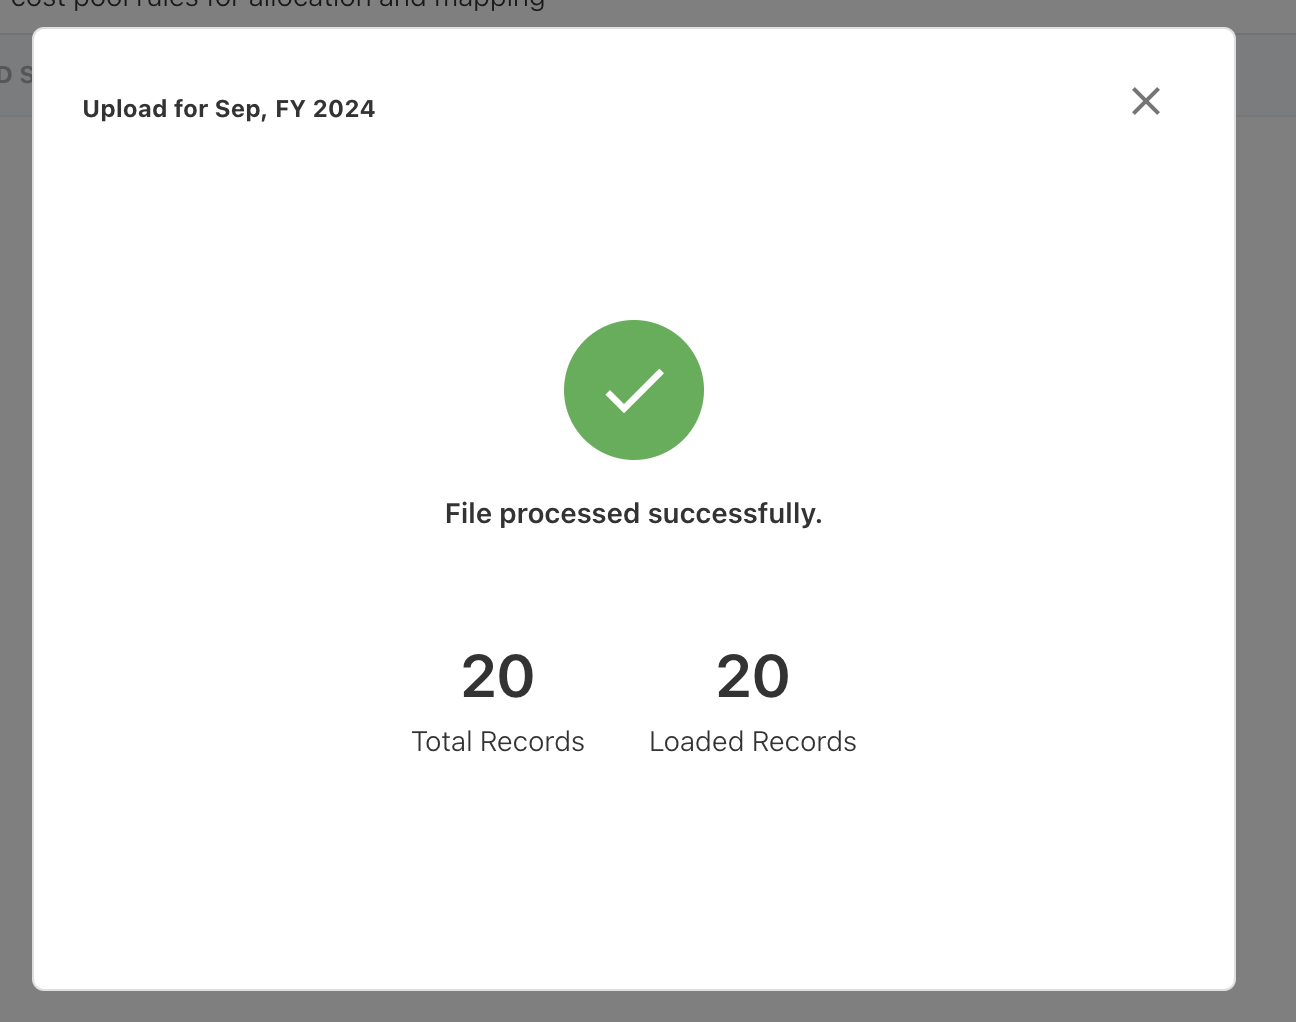
The user gets the File process status
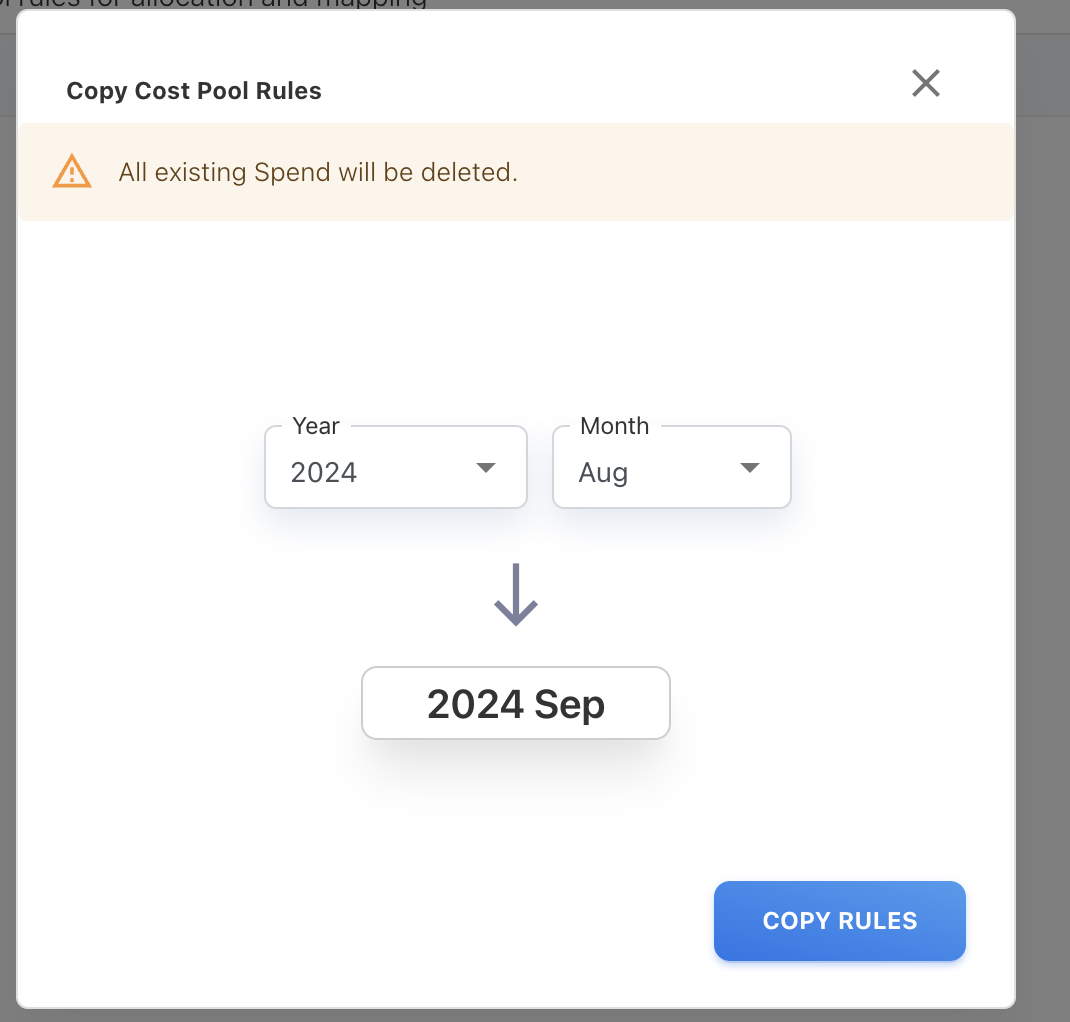
Copy Cost Pool Mapping
To copy cost pool rules, select the Month and Year from the dropdown menu containing valid Cost Pool mapping rules, then click on 'Copy Rules.
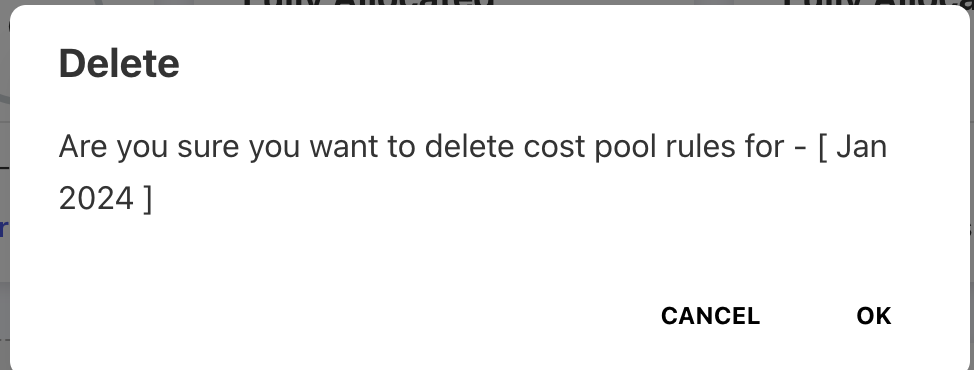
Note: Uploading and copying the cost pool mapping will delete any existing rules for the selected month. An alert box will prompt if a rule already exists. Click 'YES' to proceed."
View Cost Pool Allocation
Users can view the allocated spend to the cost pool and the percentage of allocation in the monthly tab.
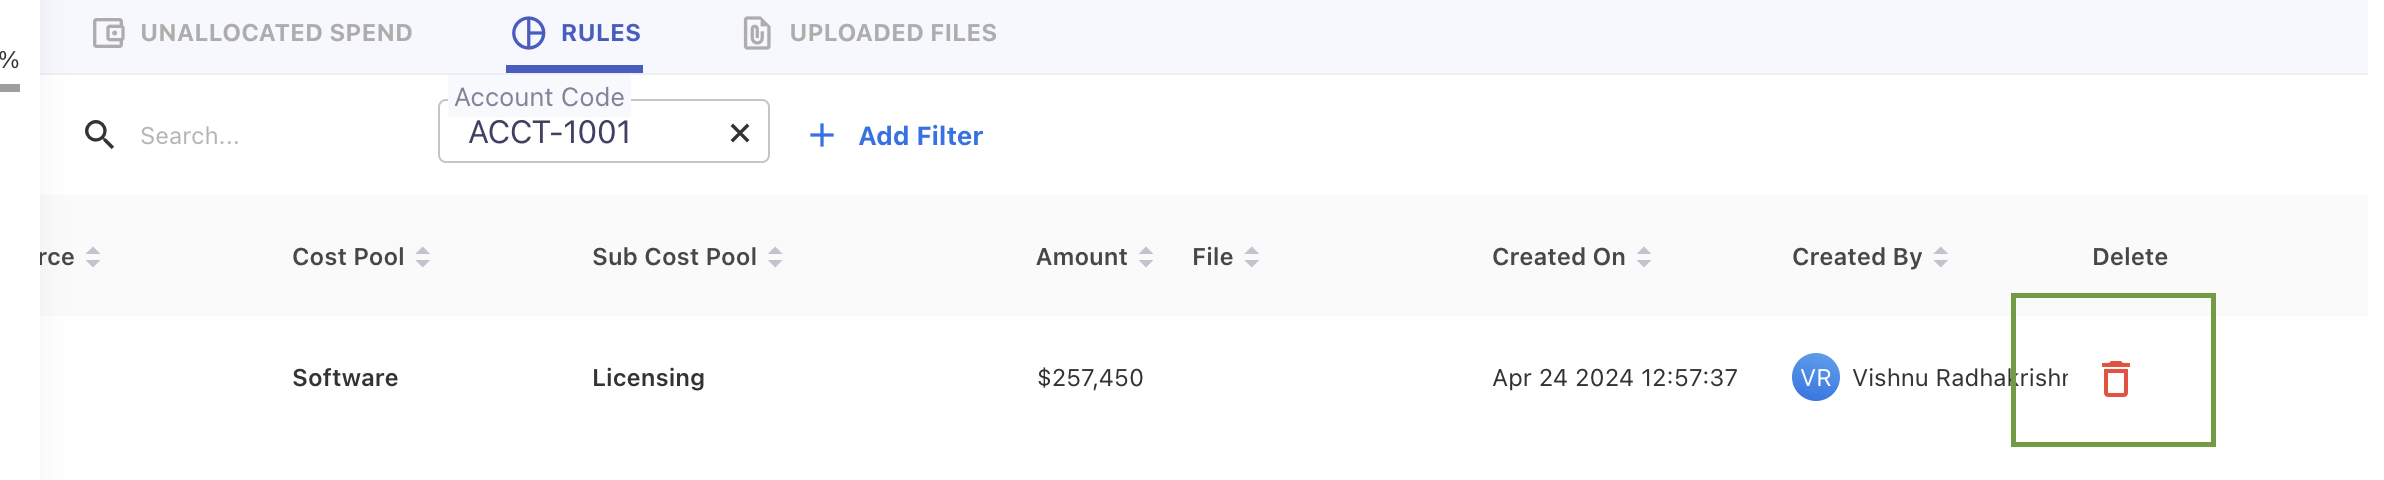
Click on the "View rules" option, located within the "..." menu, to access and view the Cost Pool rules.

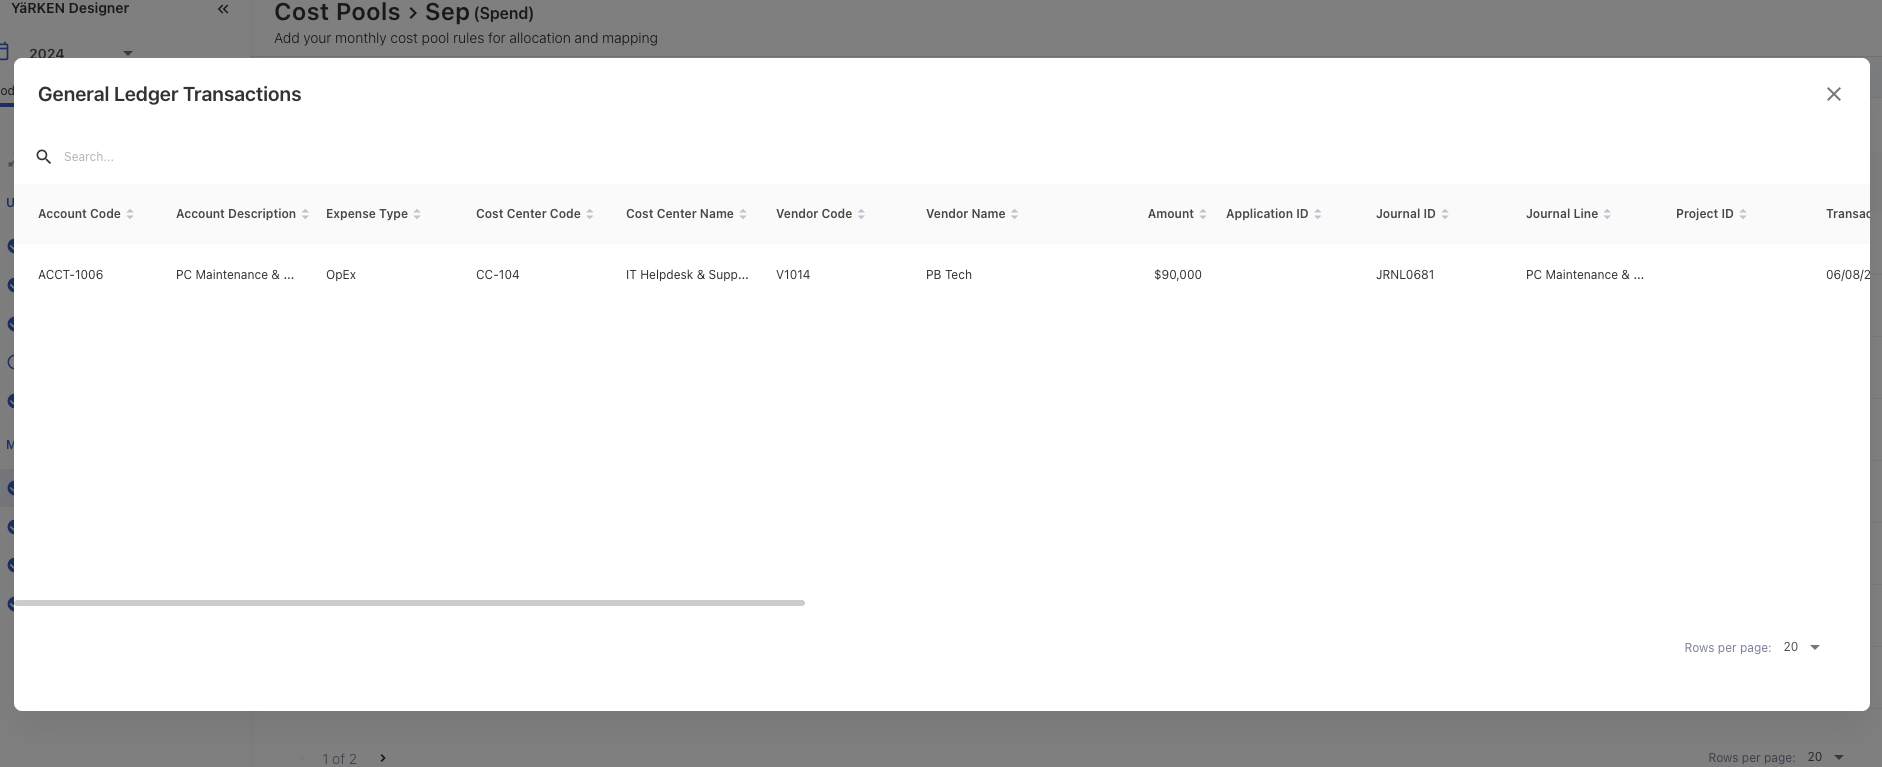
Click on the row to view the General Ledger Transactions.
Click on ![]()
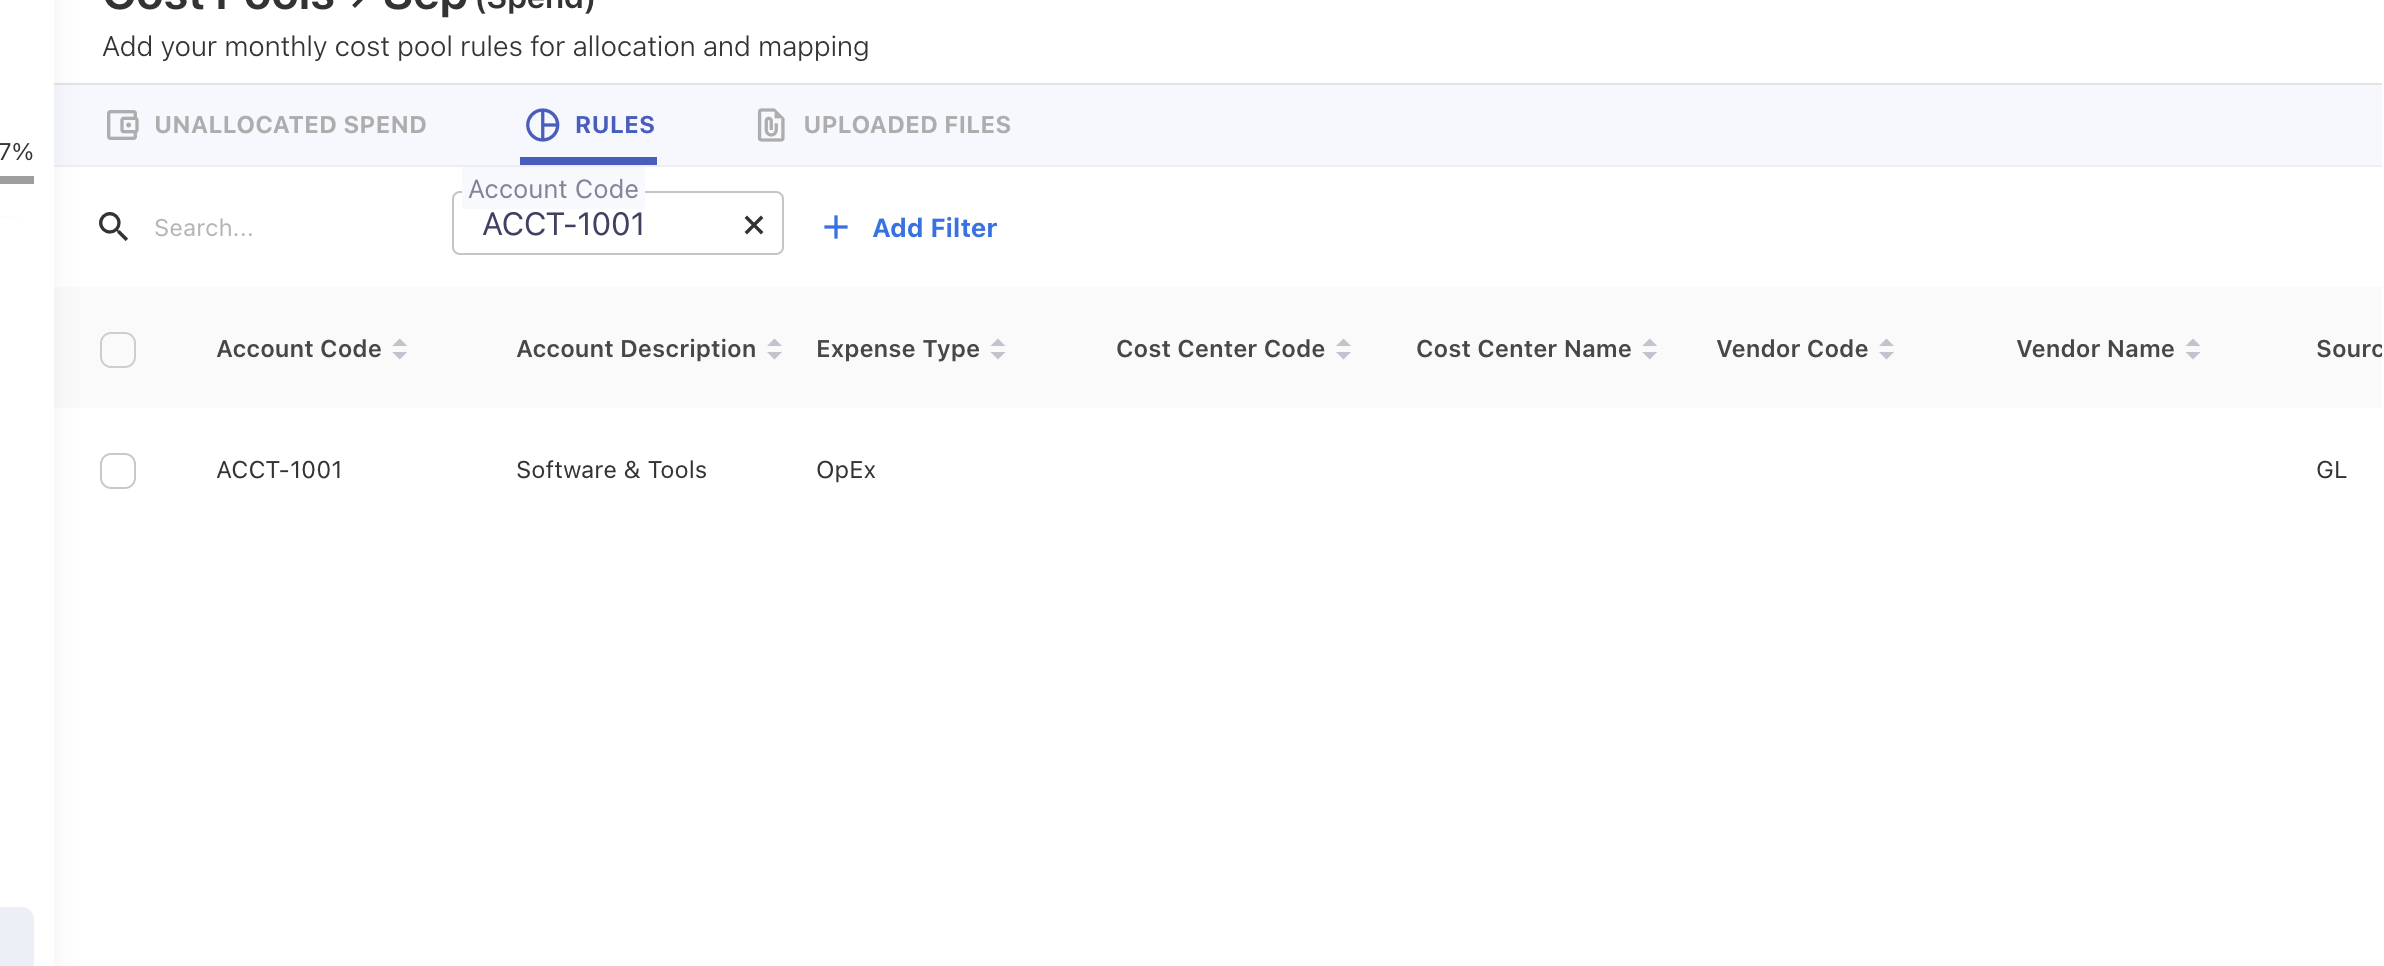
Applying filters
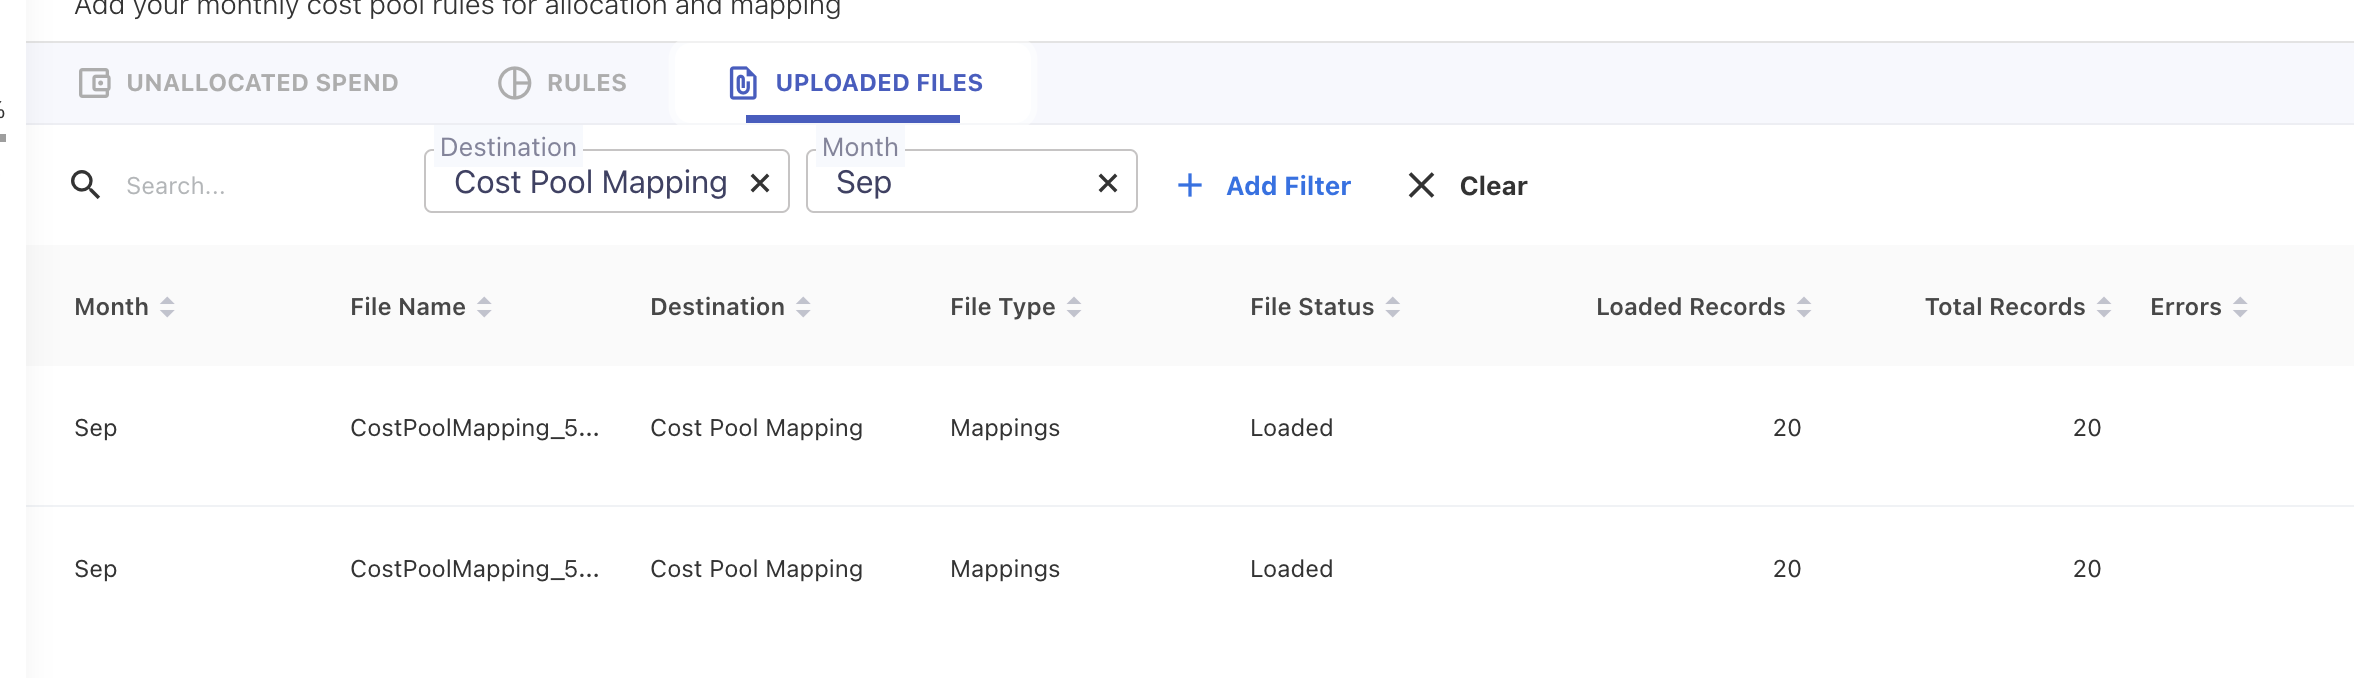
Users can filter the rule list by clicking on + Add Filter and selecting column names. Filters will then provide the filtered data.
Modifying Cost Pool Mapping Rules
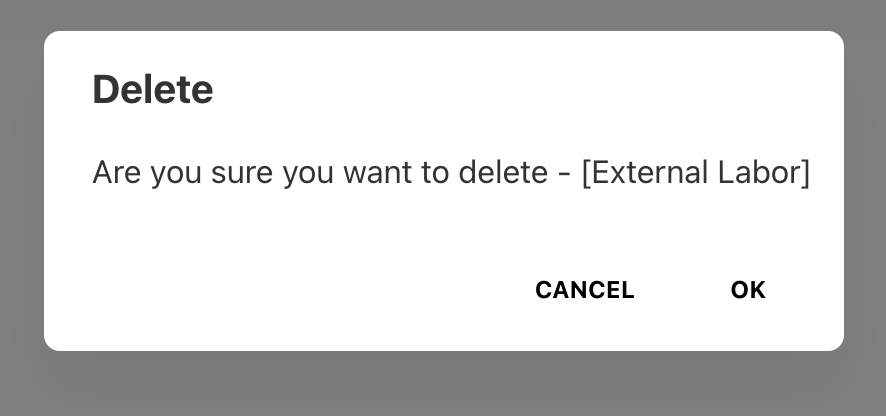
To modify a Cost Pool Mapping, delete the existing rule, and then create a new rule. The delete option is available in every row for this purpose.
Deleting multiple rules is also possible by selecting the checkbox against each rule. The option to delete all or only the selected rules will be provided, and the Admin can choose the appropriate option as required.
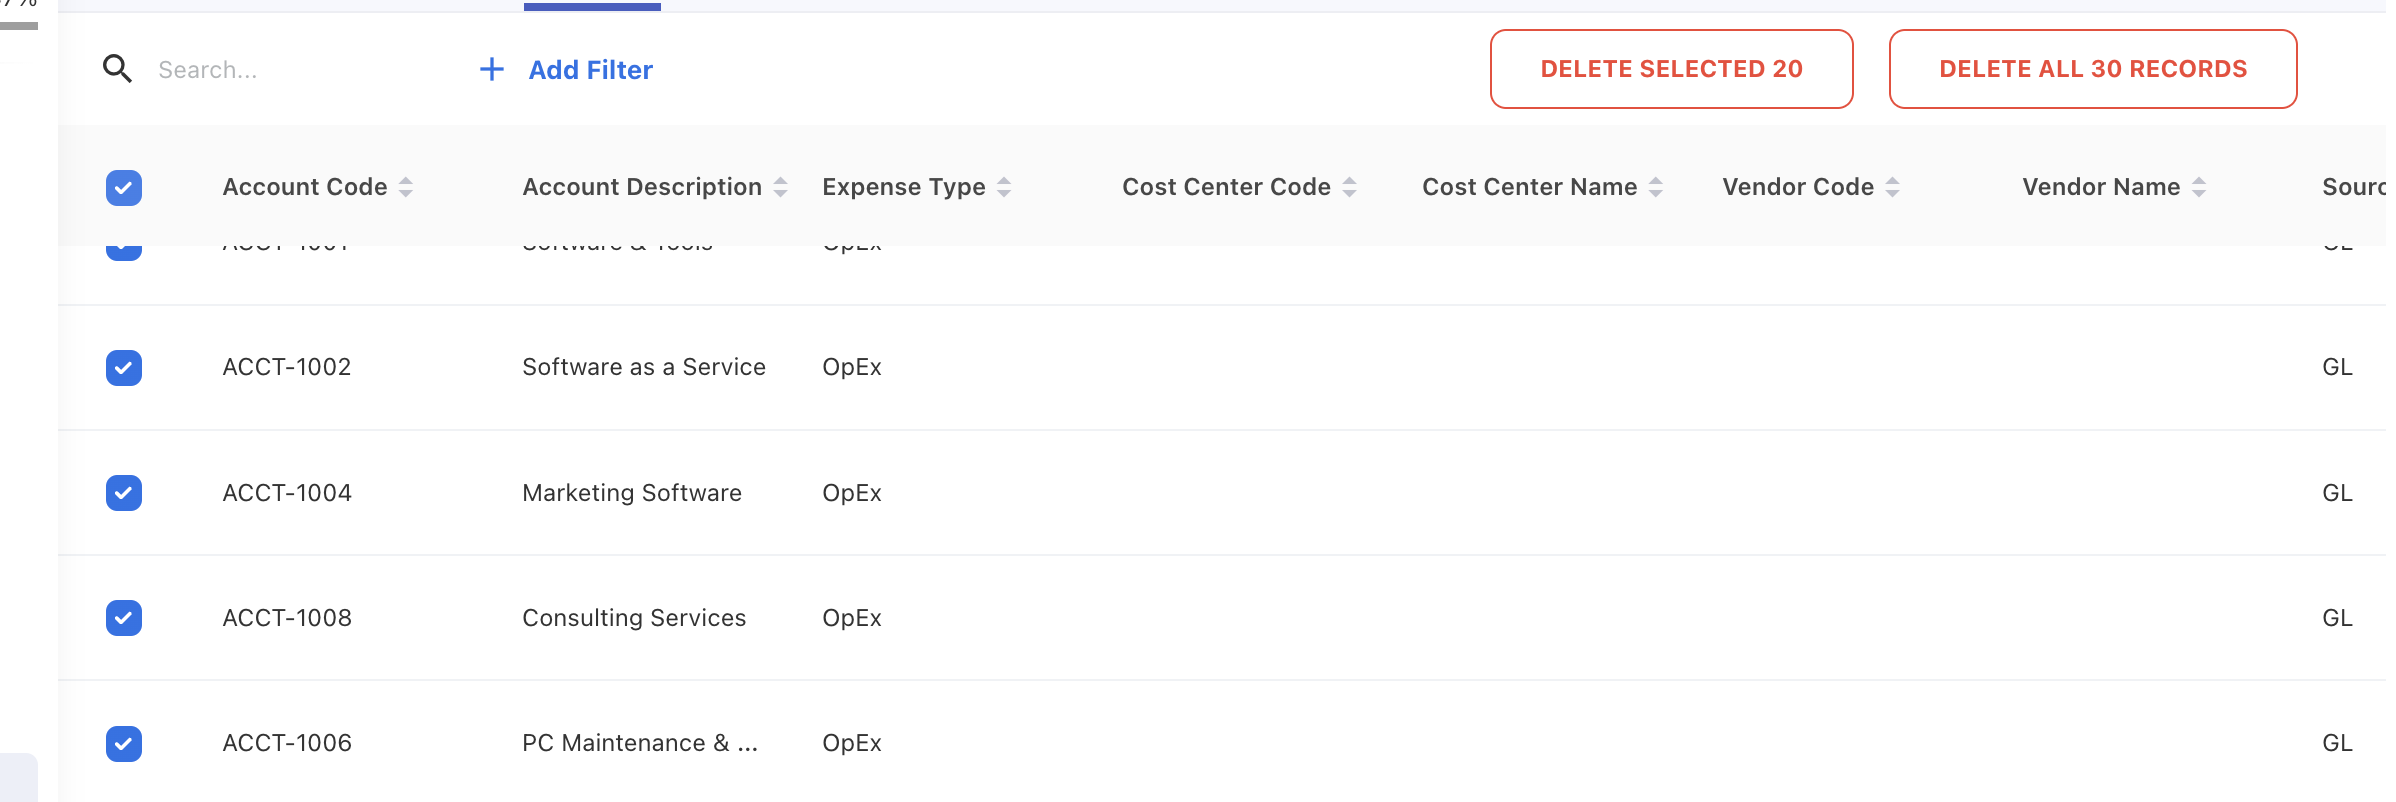
Users can delete all the rules in one click by clicking on Delete all rules available in “…”.
Downloading Cost Pool Mapping Rules
Rules can be downloaded by clicking Download rules available in “…”.
Uploaded Files
All the uploaded files will be available in the UPLOADED FILES tab. Use the filter option to get filtered Asset Rule files uploaded.