
Introduction
This document provides comprehensive information about the settings. It includes details on how to navigate the settings, manage them, and shows where changes to the settings are reflected.
Table of Contents
Settings
Definition:
Settings in a software or application serve the purpose of allowing users to customize and control various aspects of their experience. They provide options to adjust preferences, manage functionalities, and personalize the interface to better suit individual needs.
Settings can be accessed via the Admin >> Settings menu as Shown in Figure 1.
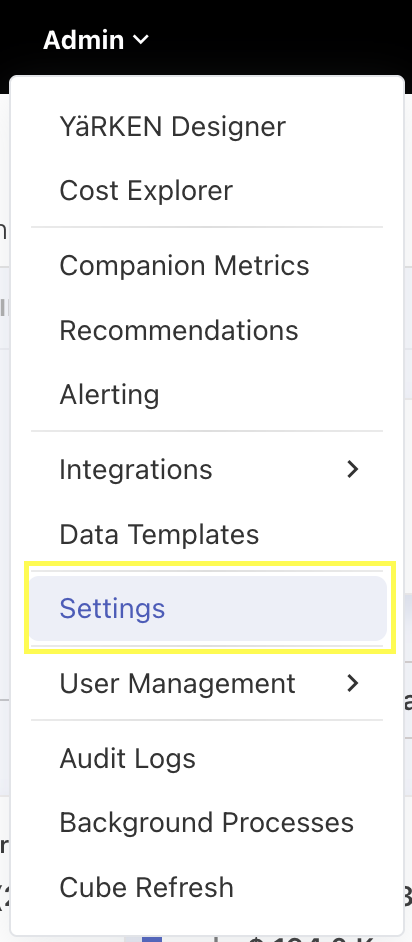
Figure 1
In settings, we have three categories: General, AI, and Setup, each with its own subcategories, as shown in Figure 2.
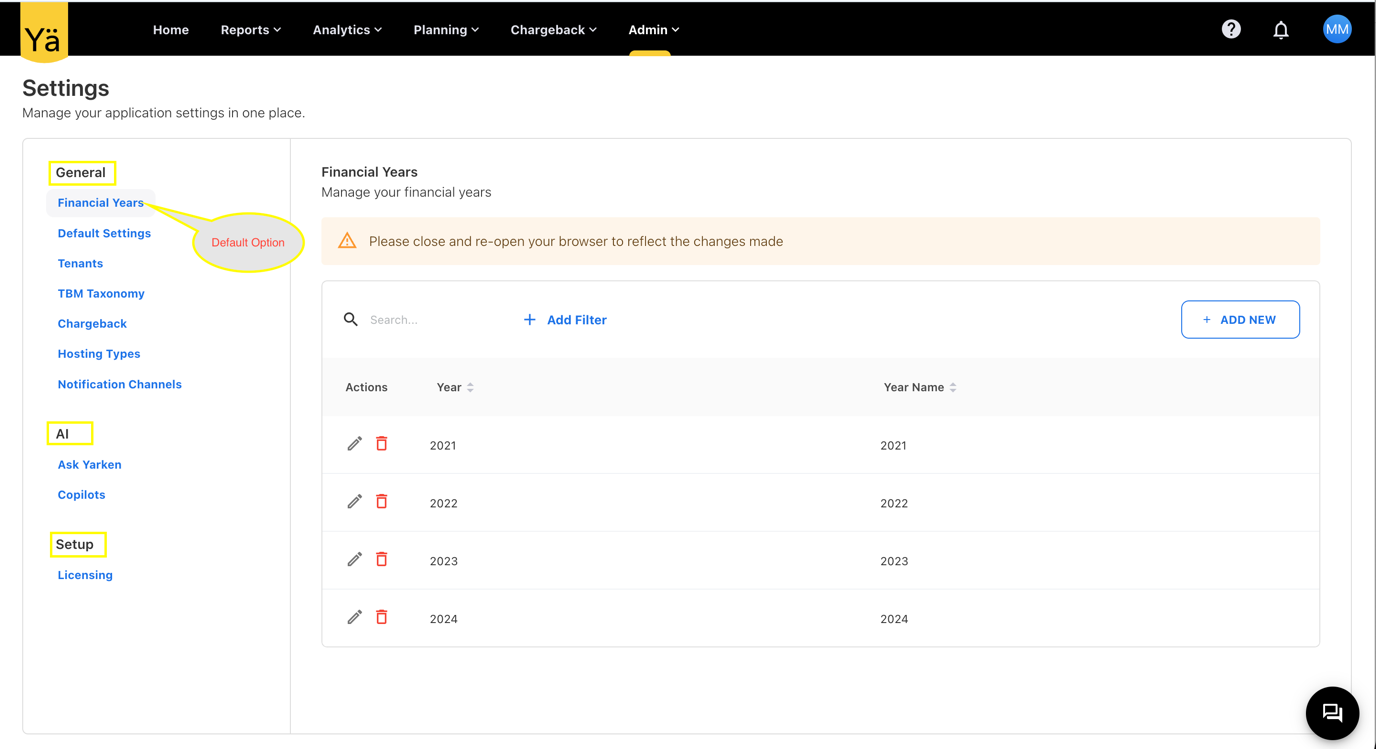
Figure 2
When you click on Settings, you will see this screen ( Figure 2). The default option will be Financial Year. On the right side, you will see these settings Like add new, edit , delete.
General:
In General, you can see options like the settings used in the application. Such as like Financial Year, Default Settings, Tenants, TBM Taxonomy, Chargeback, Hosting Types and Notification Channels.
Financial Year:
Under the Financial Year setting, you can add years based on your requirements. It has a basic table structure with Edit, Delete, + Add Filter to filter years, and + Add New buttons to add a new year.
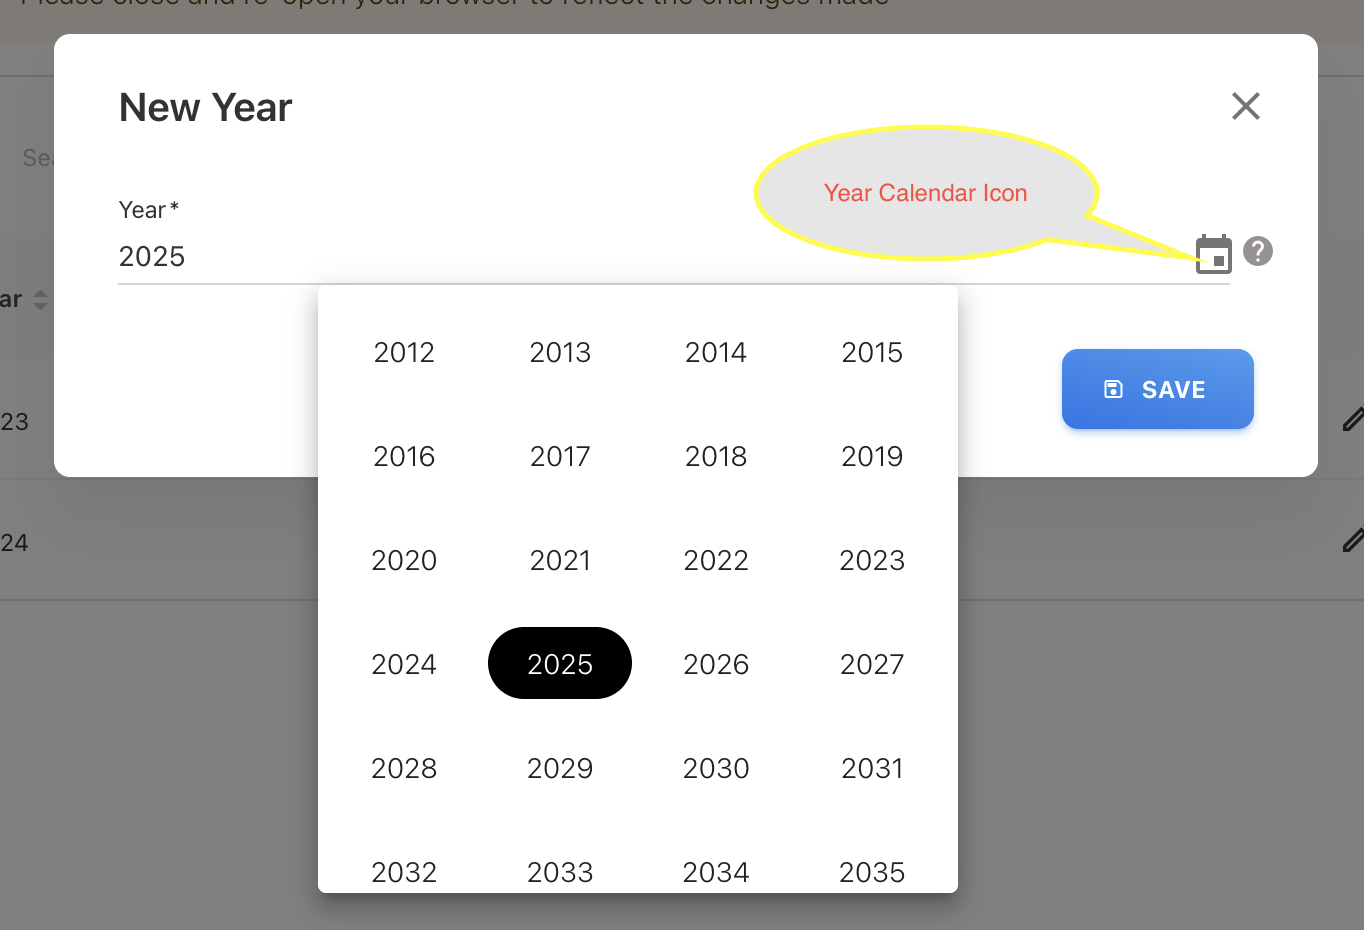
Figure 3
Once you click the Add New button, you will get a popup like in Figure 3. There, you can add a year manually or select a year by clicking the year calendar icon. Click the Save button once you choose the year. Then, you will see that the year has been added to the table.
Once you add a new year, you must close and reopen the browser for that year to be reflected in your application.Added new year will be shown in table. In the application’s year filter you can see added new year.
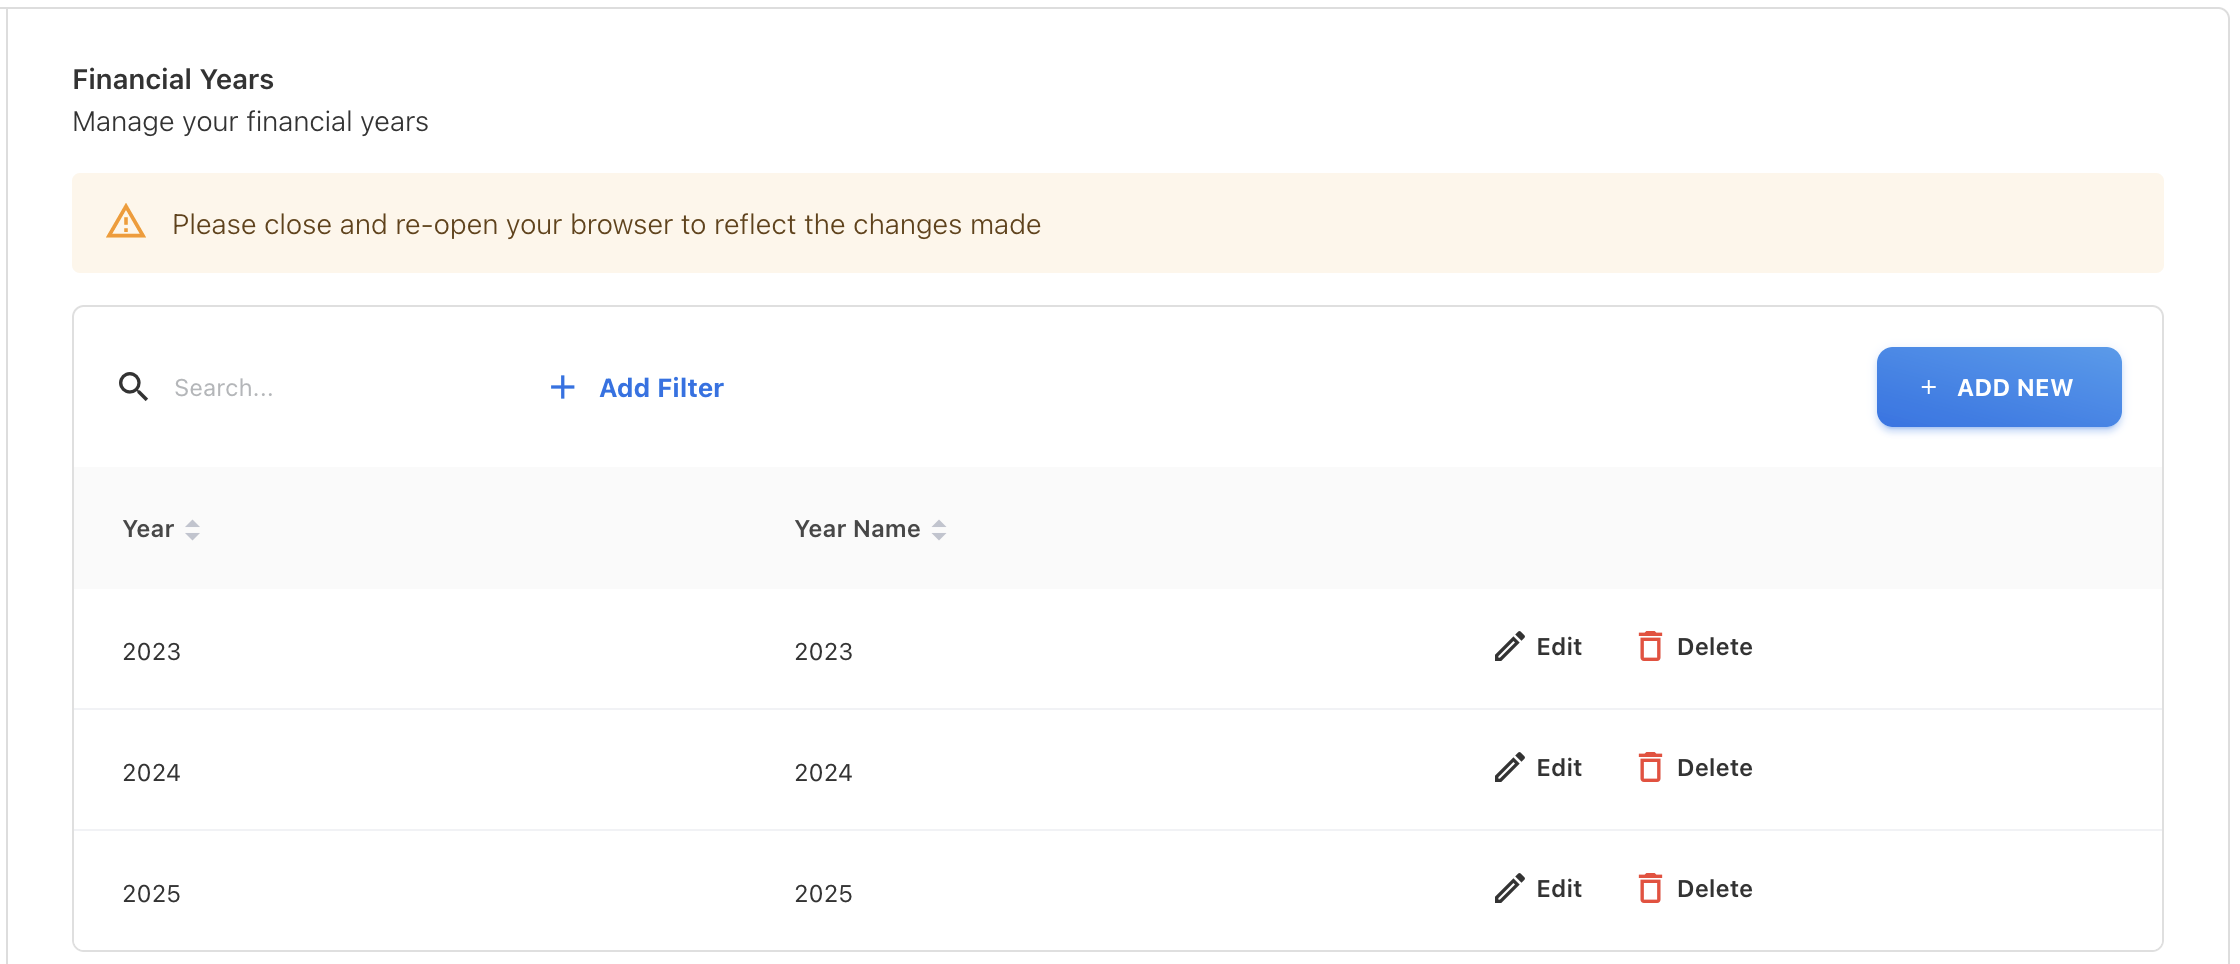
Figure 4
Default Settings:
The Default Settings include options to manage your financial year settings and the threshold values for RAG status.
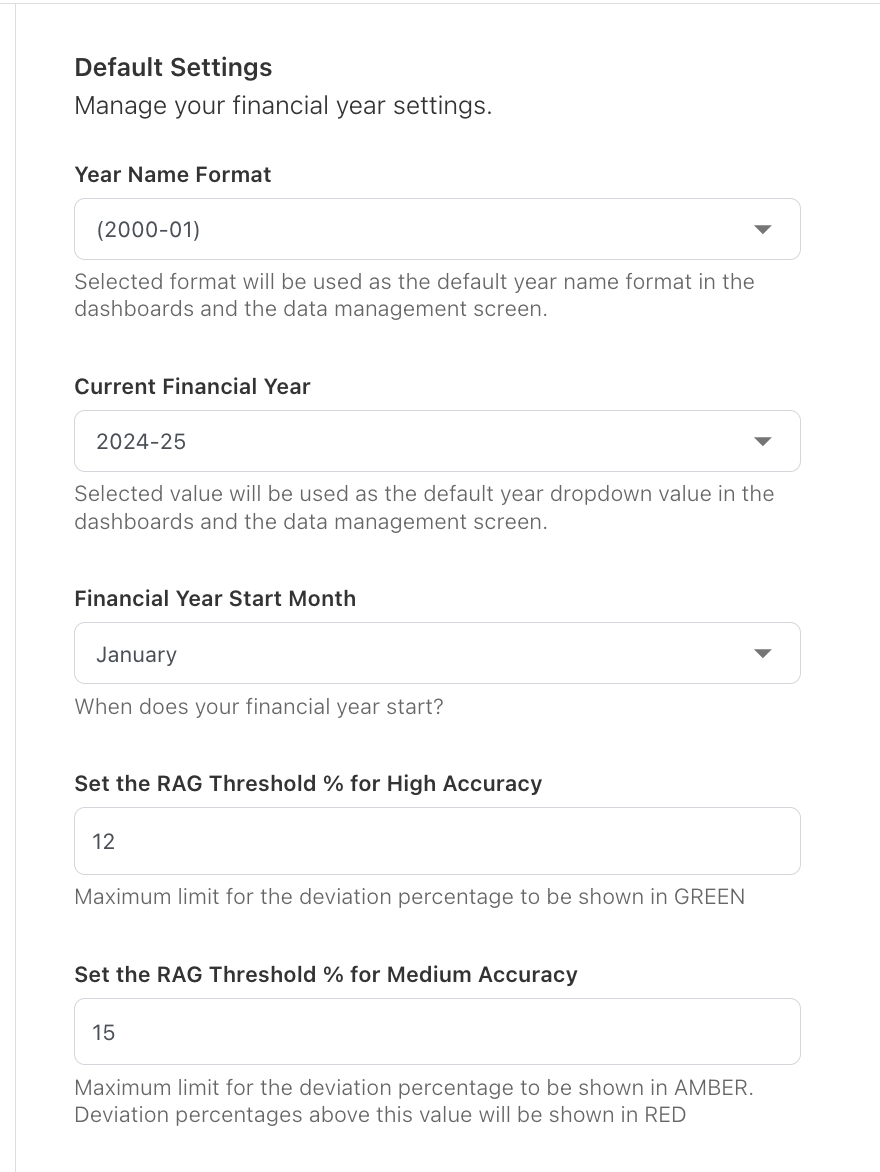
Figure 5
Figure 5 will show all the functionalities available in Default Settings.
Year Name Format
You can select the year name format for how you want it to appear in the application. The available formats are shown in Figure 6. Currently, we have chosen the (2000-01) format, so the year name will appear in this format in all year filters, as shown in Figure 7.
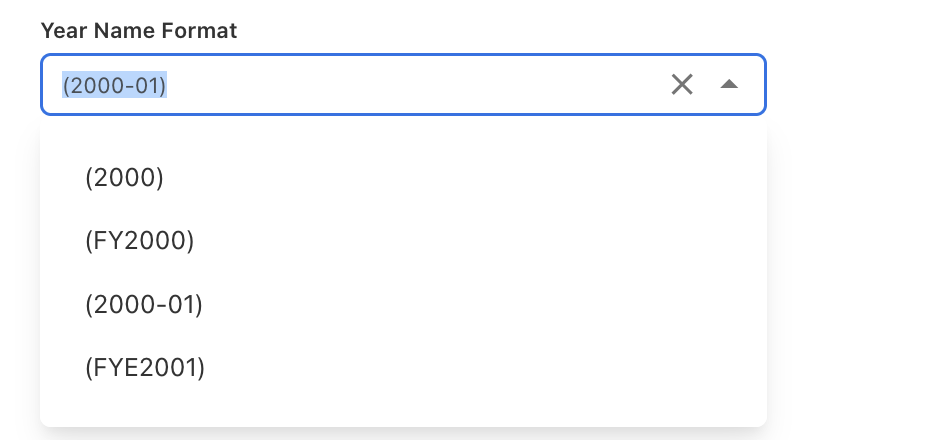
Figure 6
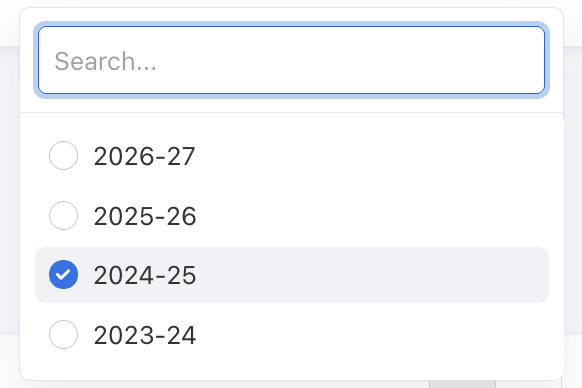
Figure 7
Current Financial Year
The years created in the financial year settings will be listed in the current financial year dropdown as Figure 8. The selected value will be used as the default year dropdown value in the dashboards and the data management screen.
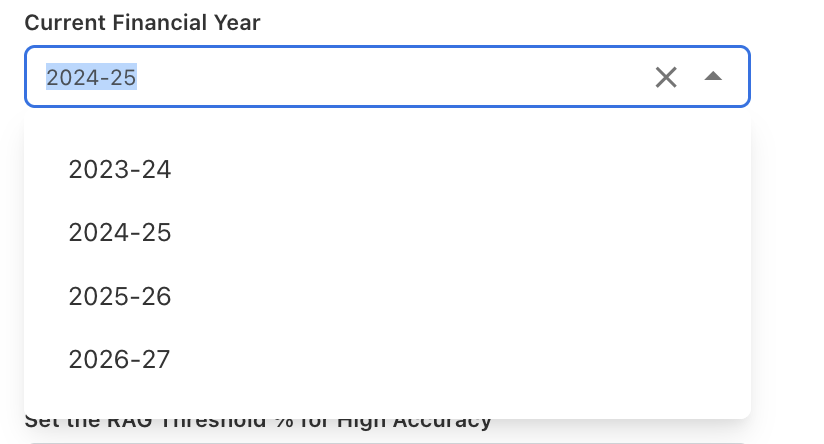
Figure 8
Financial Year Start Month
Here you can select the financial year start month as shown in Figure 9. Once selected, the chosen month will be the default starting month in the dashboard and data management month filter, as shown in Figure 10.
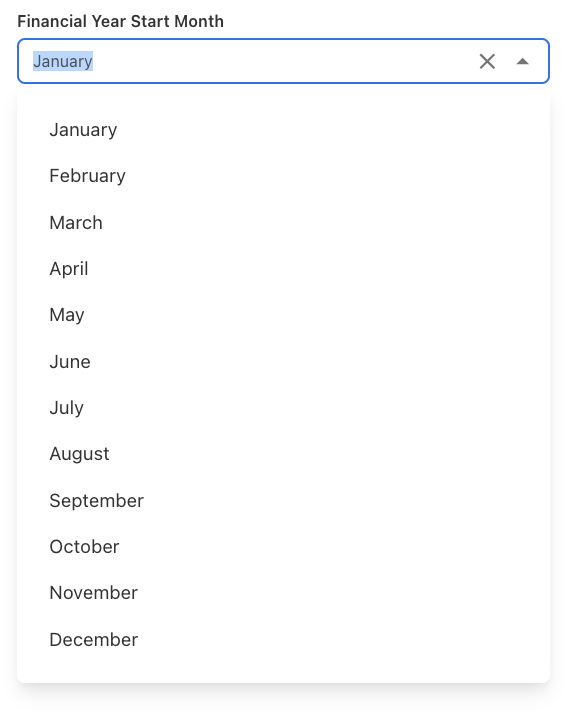
Figure 9

Figure 10
RAG Threshold High and Medium accuracy
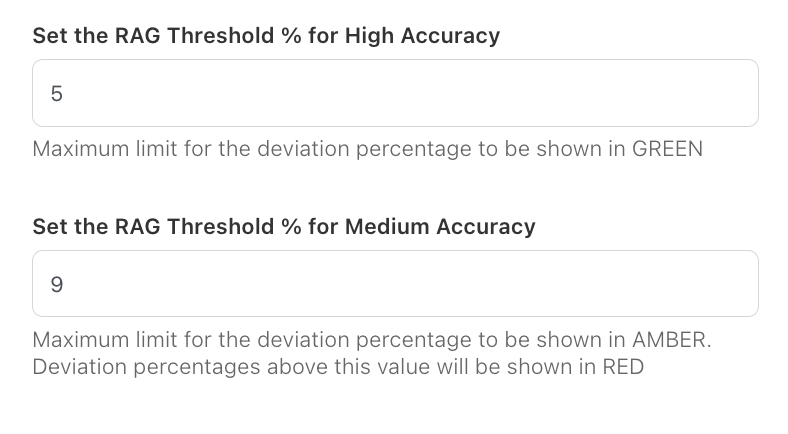
Figure 11
Here, you can set the RAG threshold percentages for high and medium accuracy. For example, if 5% is your high accuracy threshold, the RAG status will show green up to 5%. If 9% is your medium accuracy threshold, the RAG status will show amber from 5% to 9%. Anything above 9% will show red in the forecast overview chart.
Users
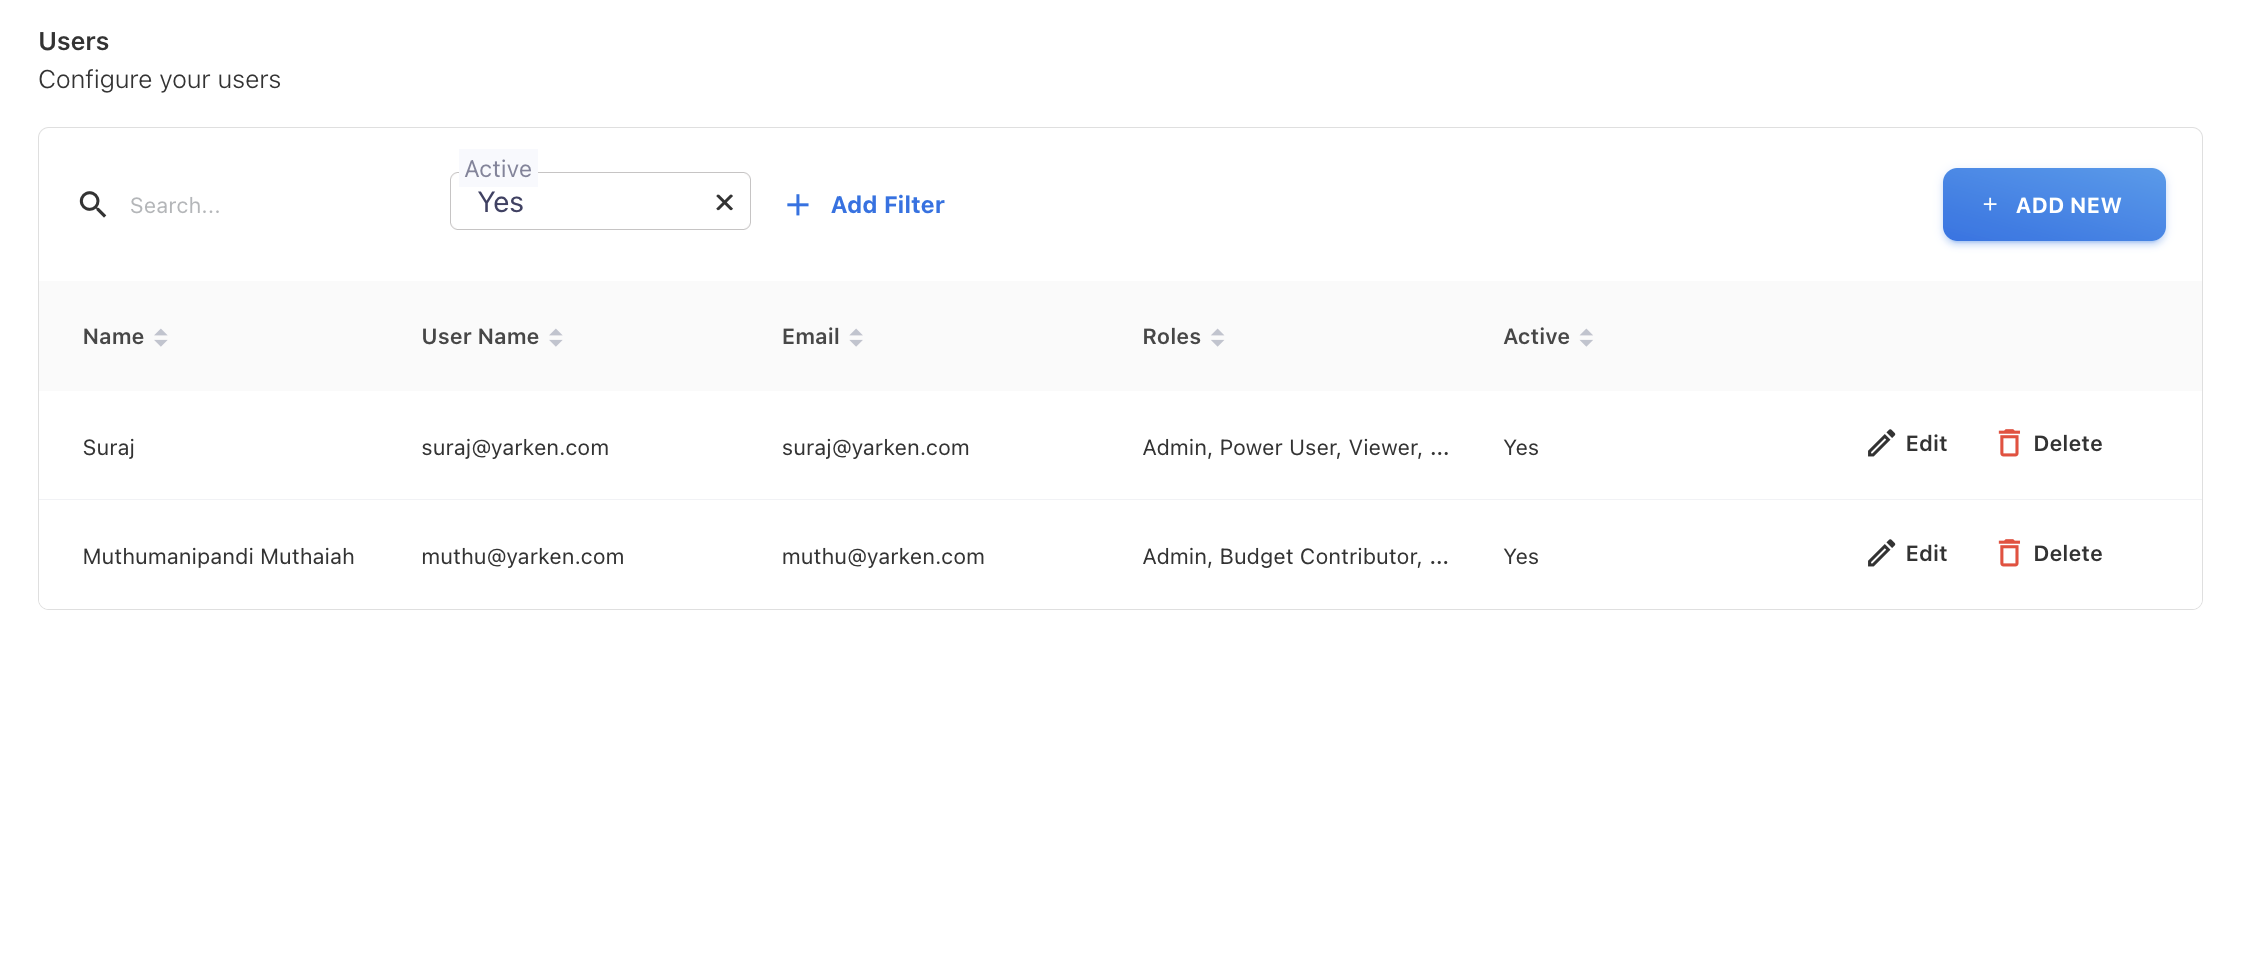
Figure 12
Here, you can configure your users. Figure 12 shows an overall view of the users' configuration. There, you can create, edit, and delete users. While creating a user, you can configure user roles such as admin, budget contributor, etc., as shown in Figure 13.
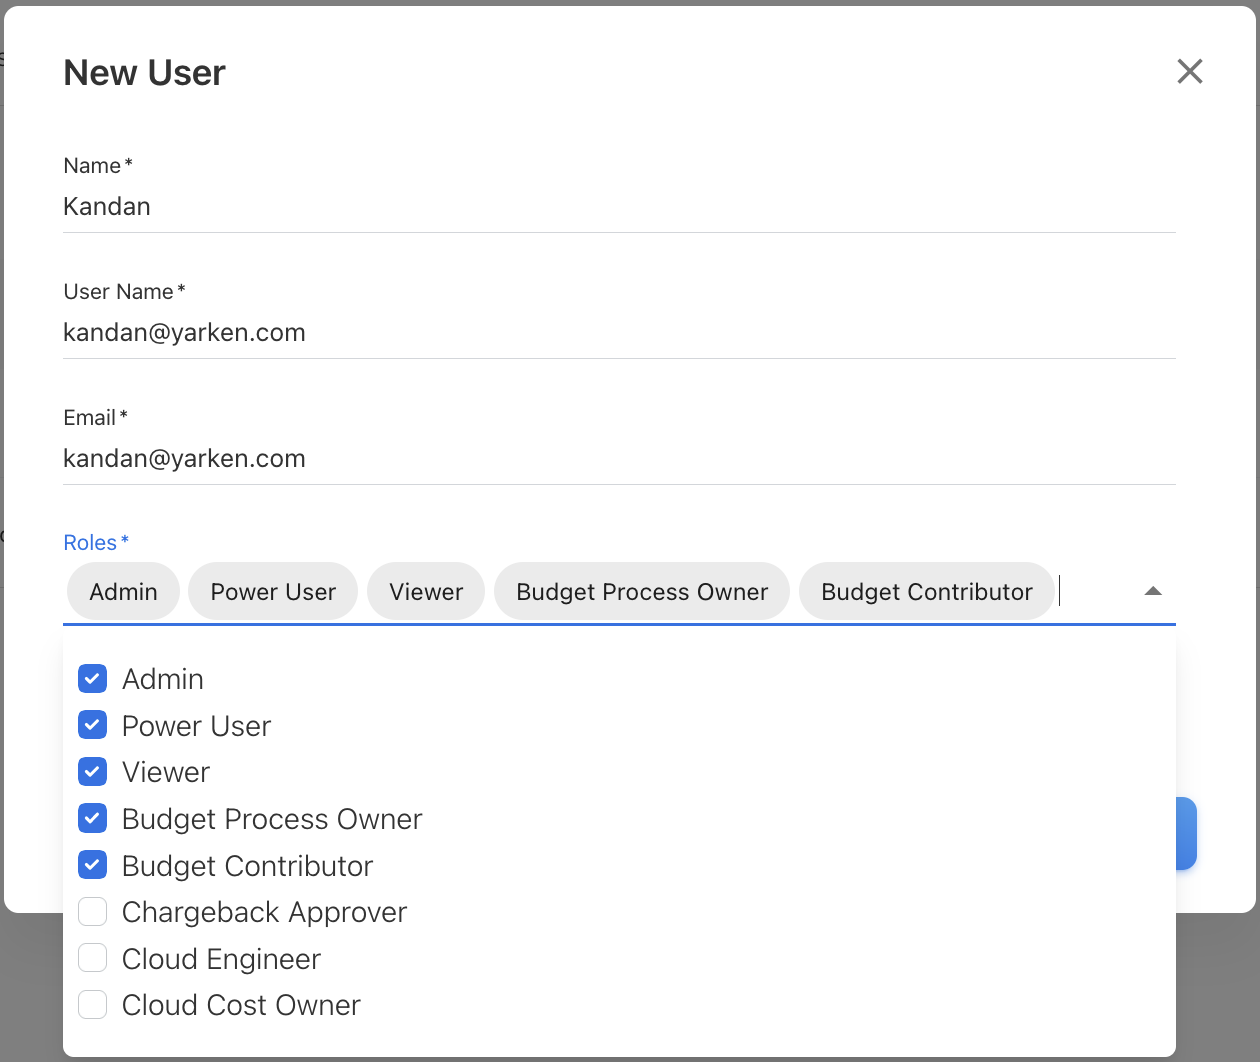
Figure 13
Asset Tags
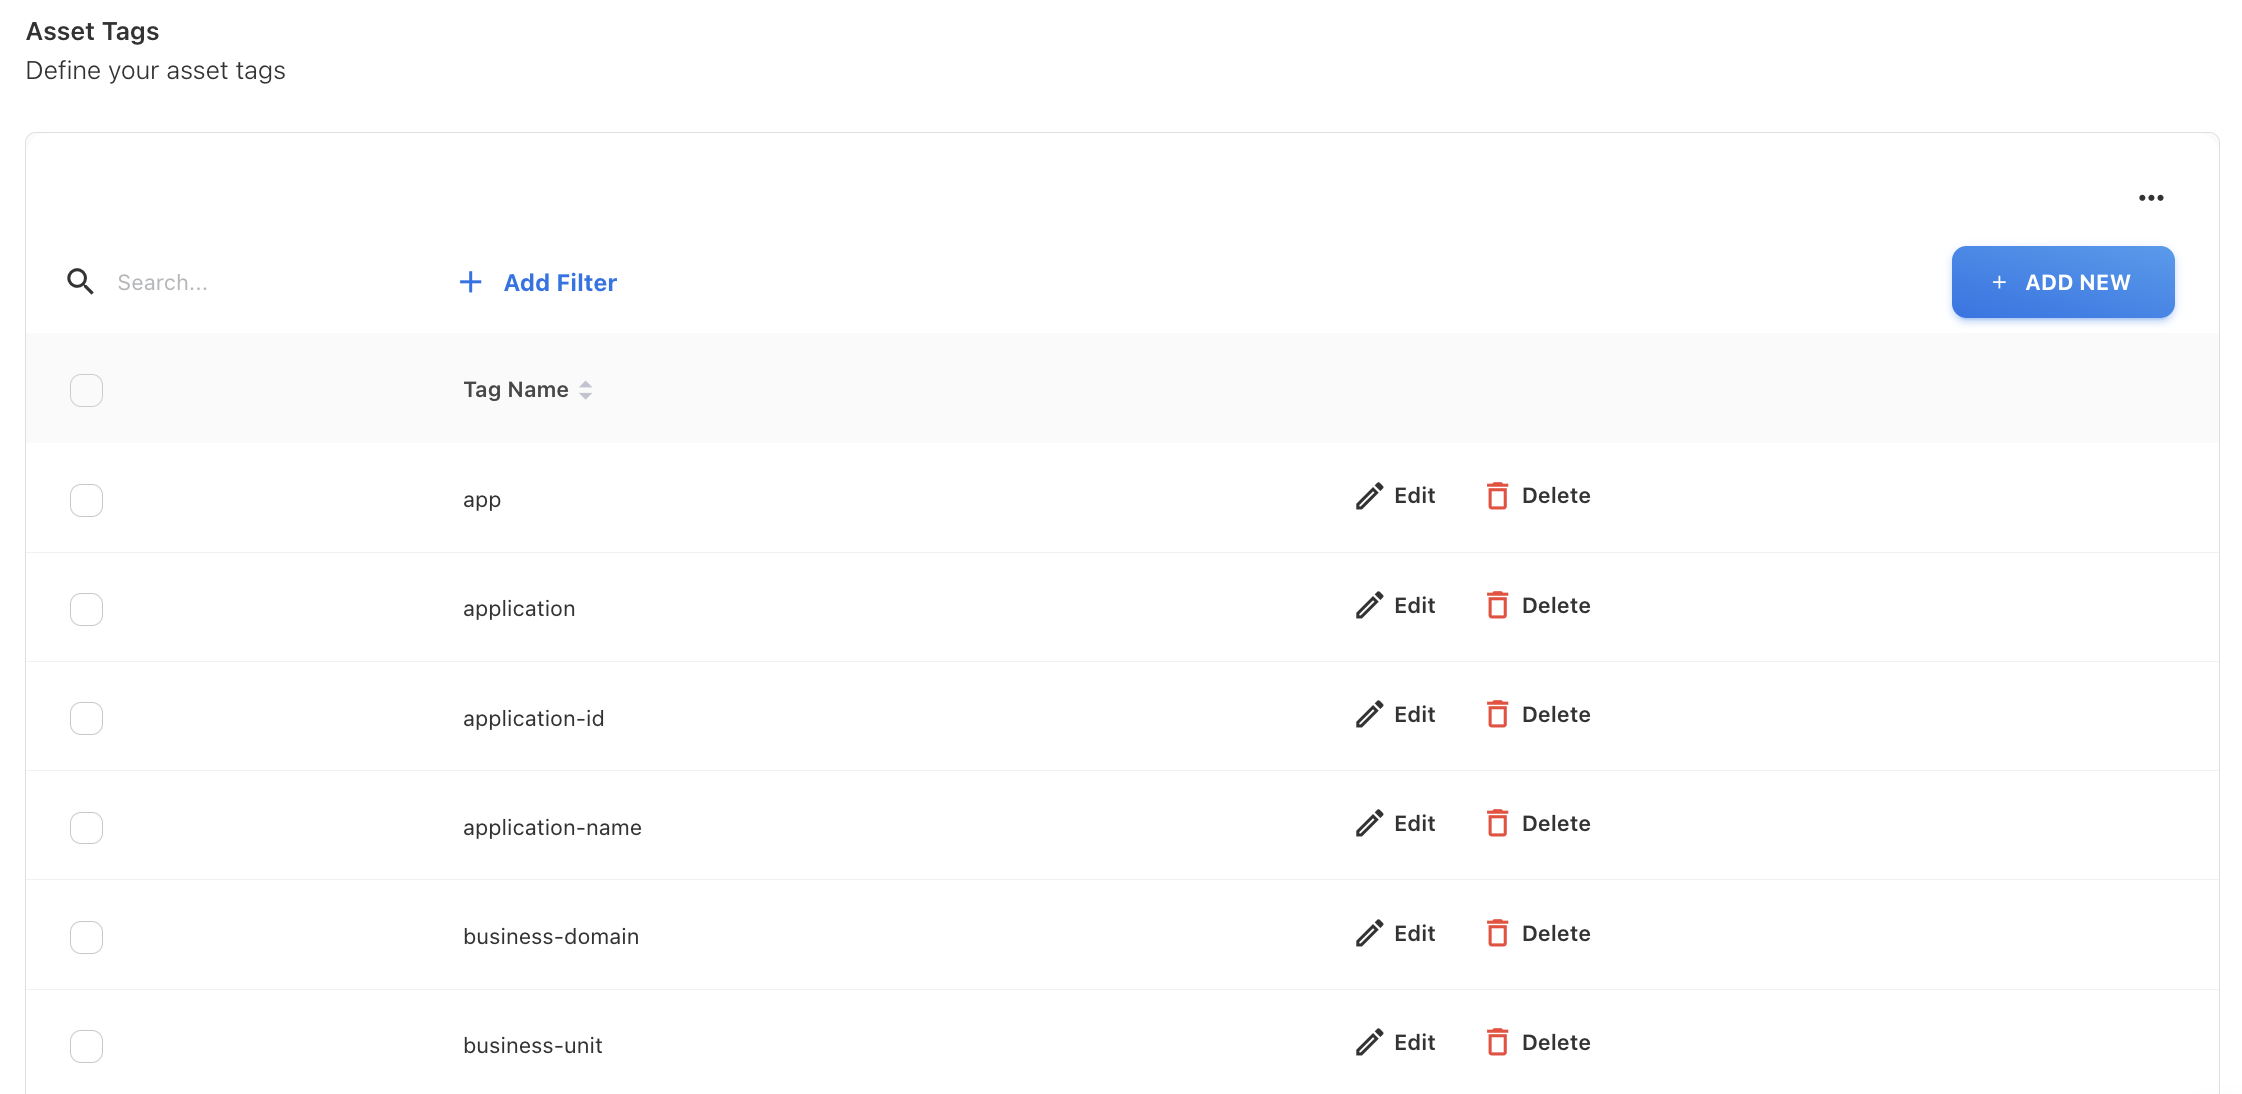
Figure 14
The above image shows a list of asset tags available in our application. Here, you can add asset tags as desired. The asset tags from the cloud consumption file will be displayed in the table.
These asset tags will be options in creating upload rules, as shown in Figure 15, when the Rule type is Extract Tag, and the Choose tag column is Tags. In the Choose Tag section, you will get all the asset tags as options. For more information about upload rules, you can refer to the upload rules documentation.
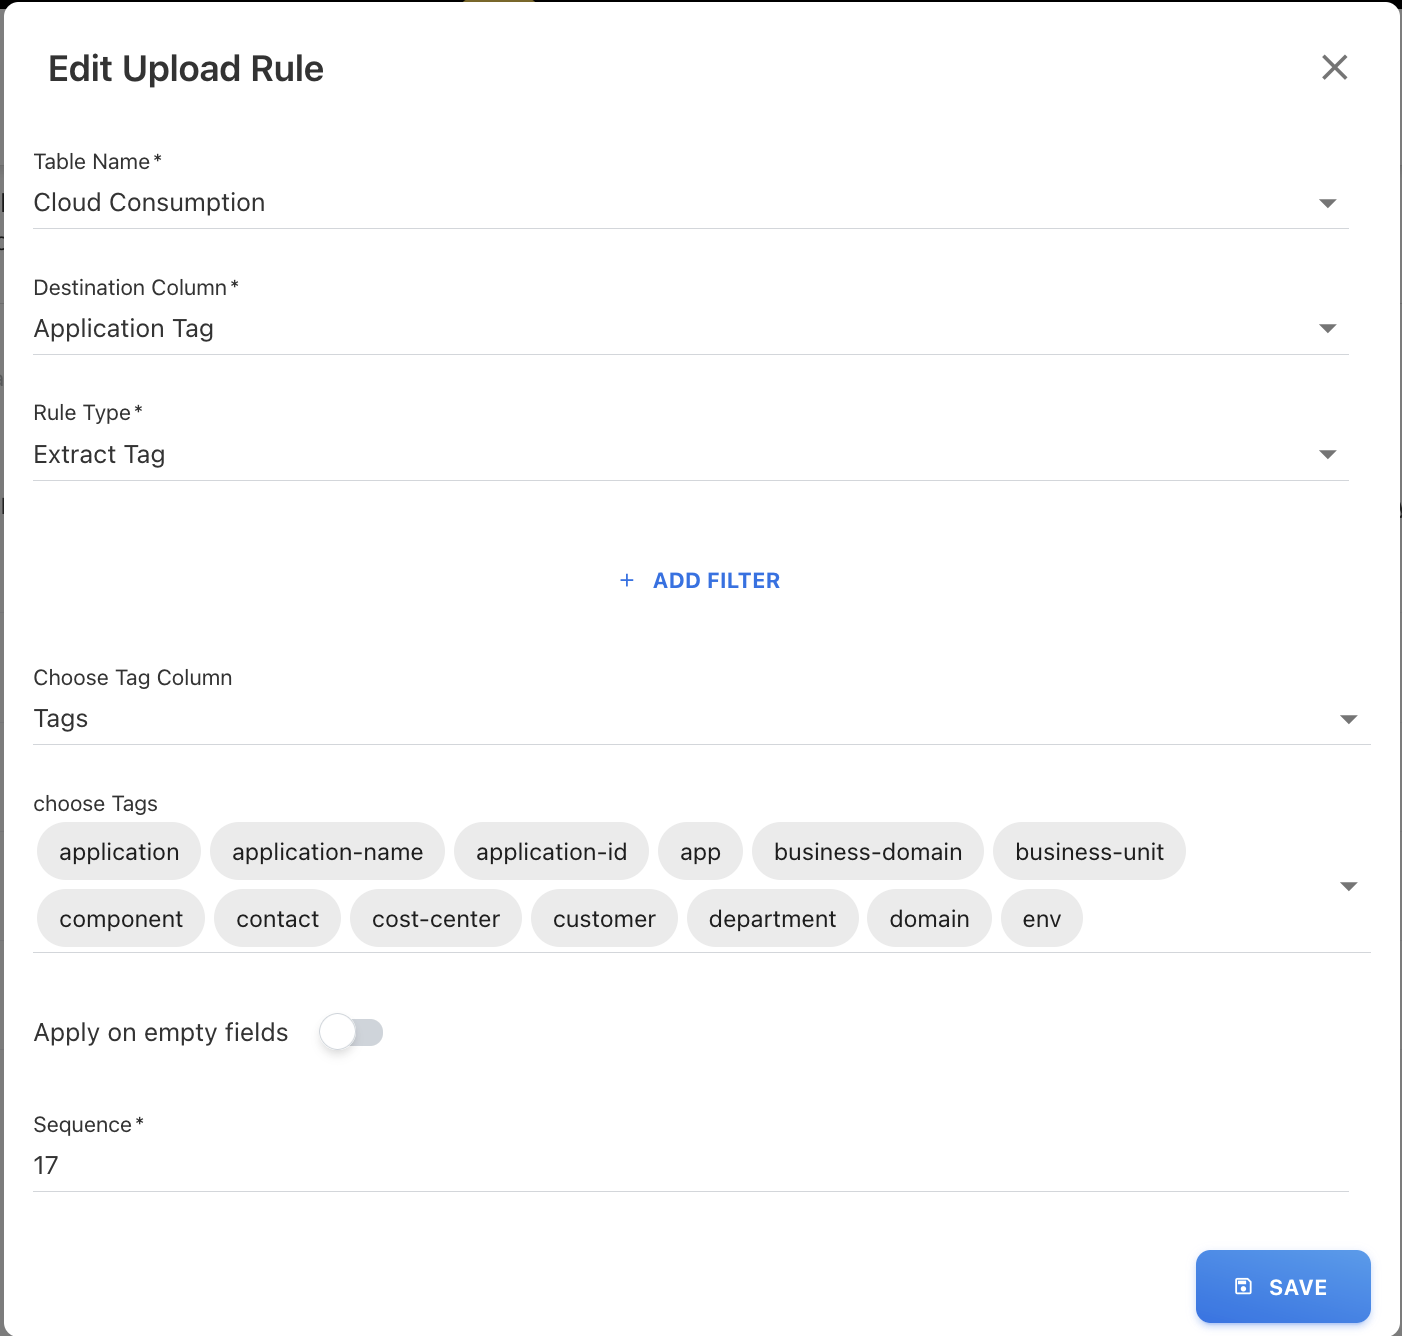
Figure 15
Chargeback
Here, you can manage the chargeback definition. Any report you save in the TBM Business Units Analytics cube with Business Unit and Solution Offering fields will be an option in the saved reports for the chargeback setting.
Path to TBM Business Units : Analytics >> TBM Business Unit
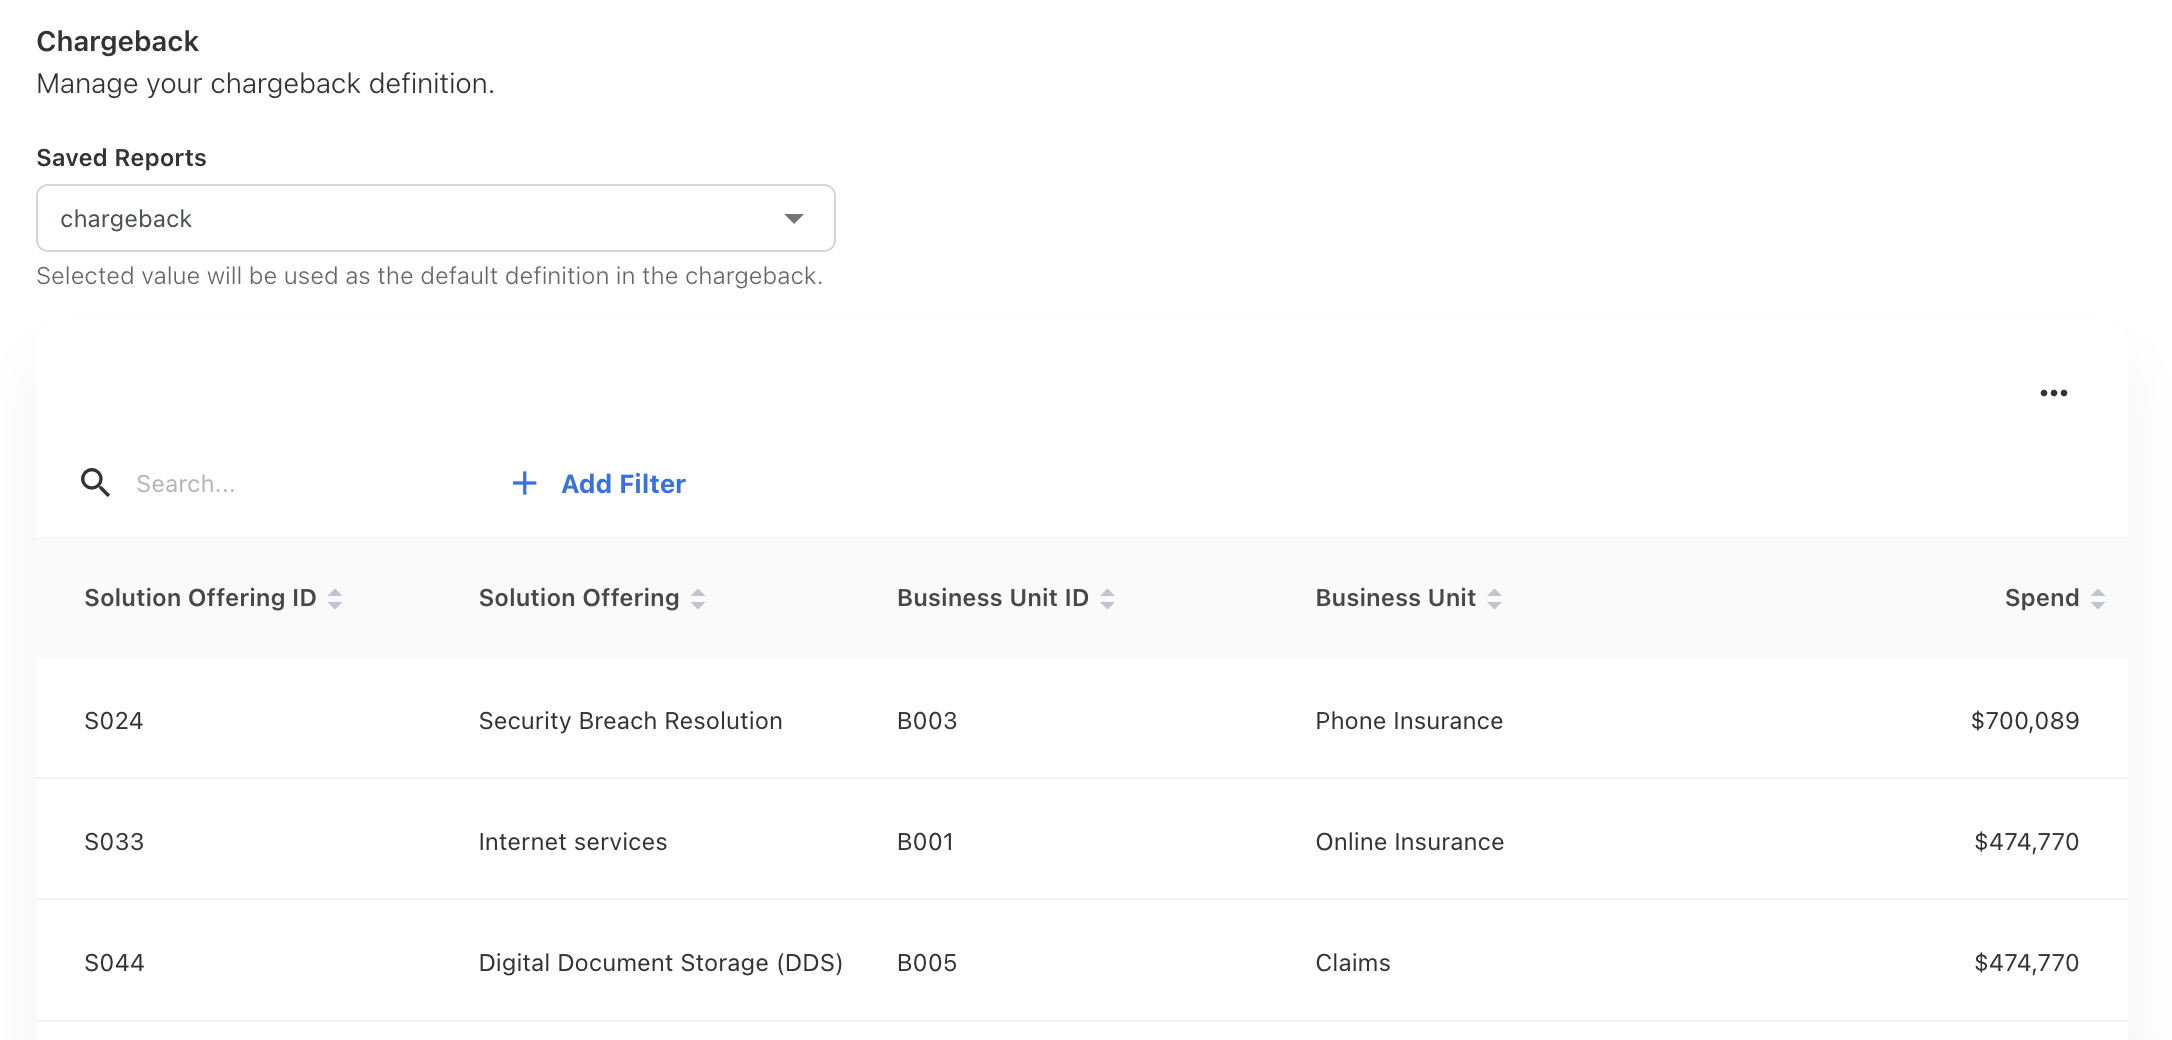
Figure 16
Figure 16 shows an overview of the chargeback settings. In Figure 17, saving a report from TBM Business Units Analytics will be one of the options in the saved reports for chargeback. There, we have mentioned the chargeback report name and selected fields. Here, my report name, “chargeback document,” will be an option in the saved reports for chargeback settings.
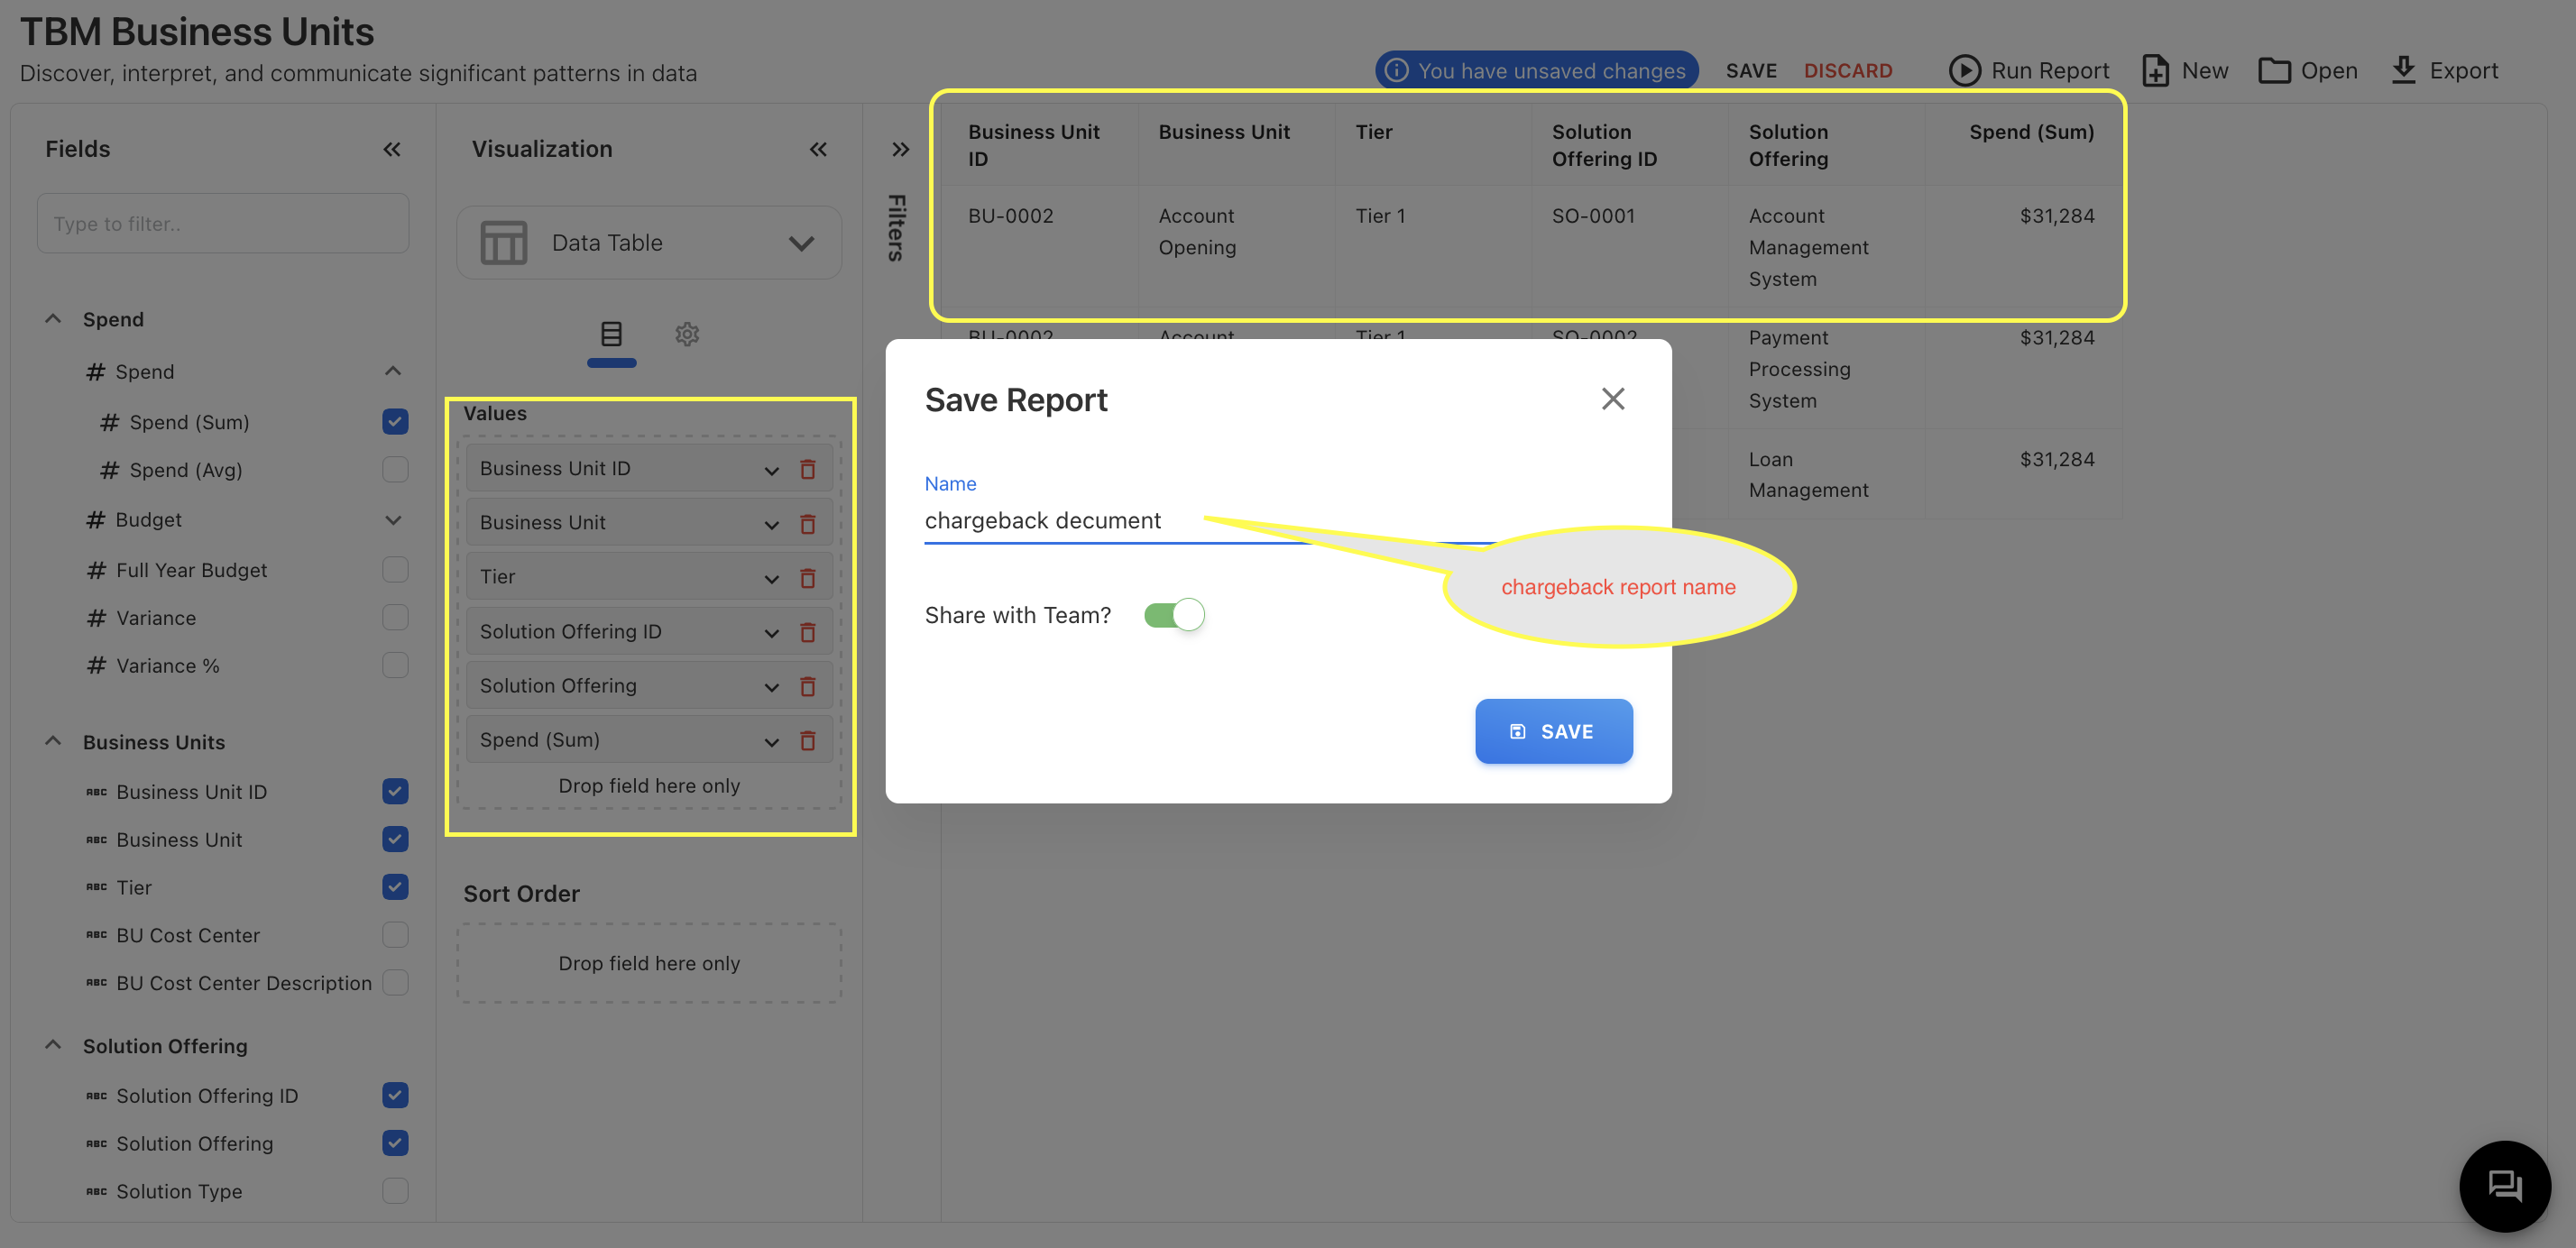
Figure 17
In Figure 18, you can see the saved report “chargeback document” as one of the options in the saved reports. By saving a report from the TBM Business Units Analytics cube, you can modify your chargeback definition.
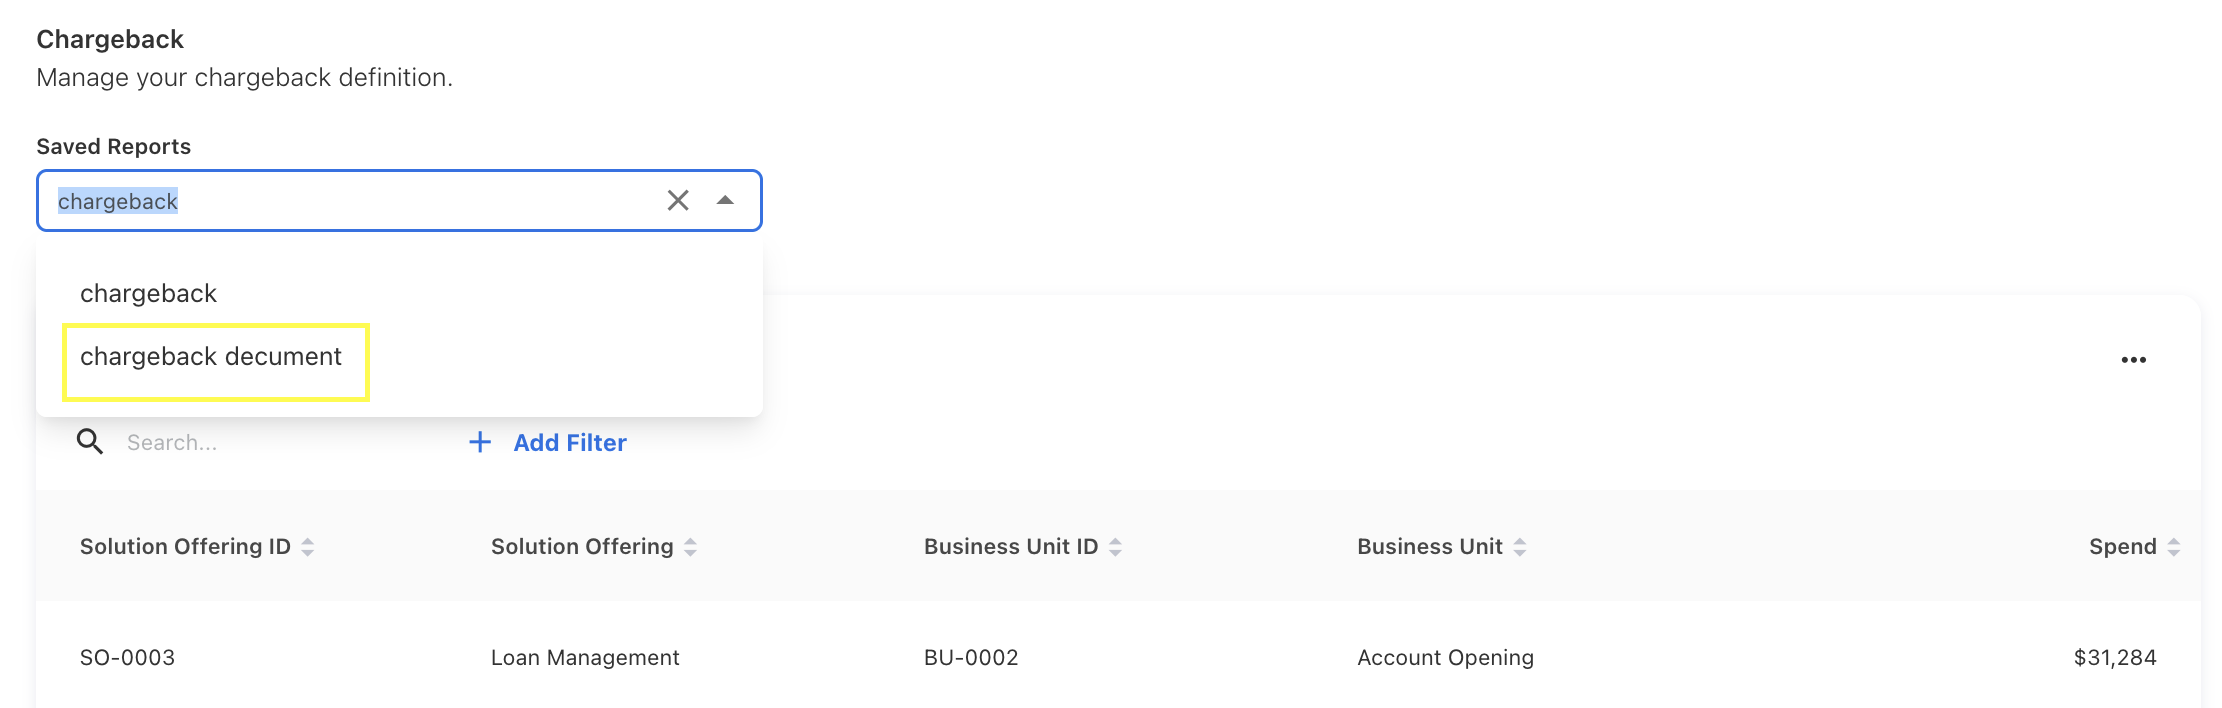
Figure 18
For more information about chargeback, you can refer to the chargeback document.
Team
Here, you can configure your cloud teams. You can add new teams, delete, and edit existing teams. After adding a team, you can manage its members through the "Manage Members" option. The members' options will be users in the system.
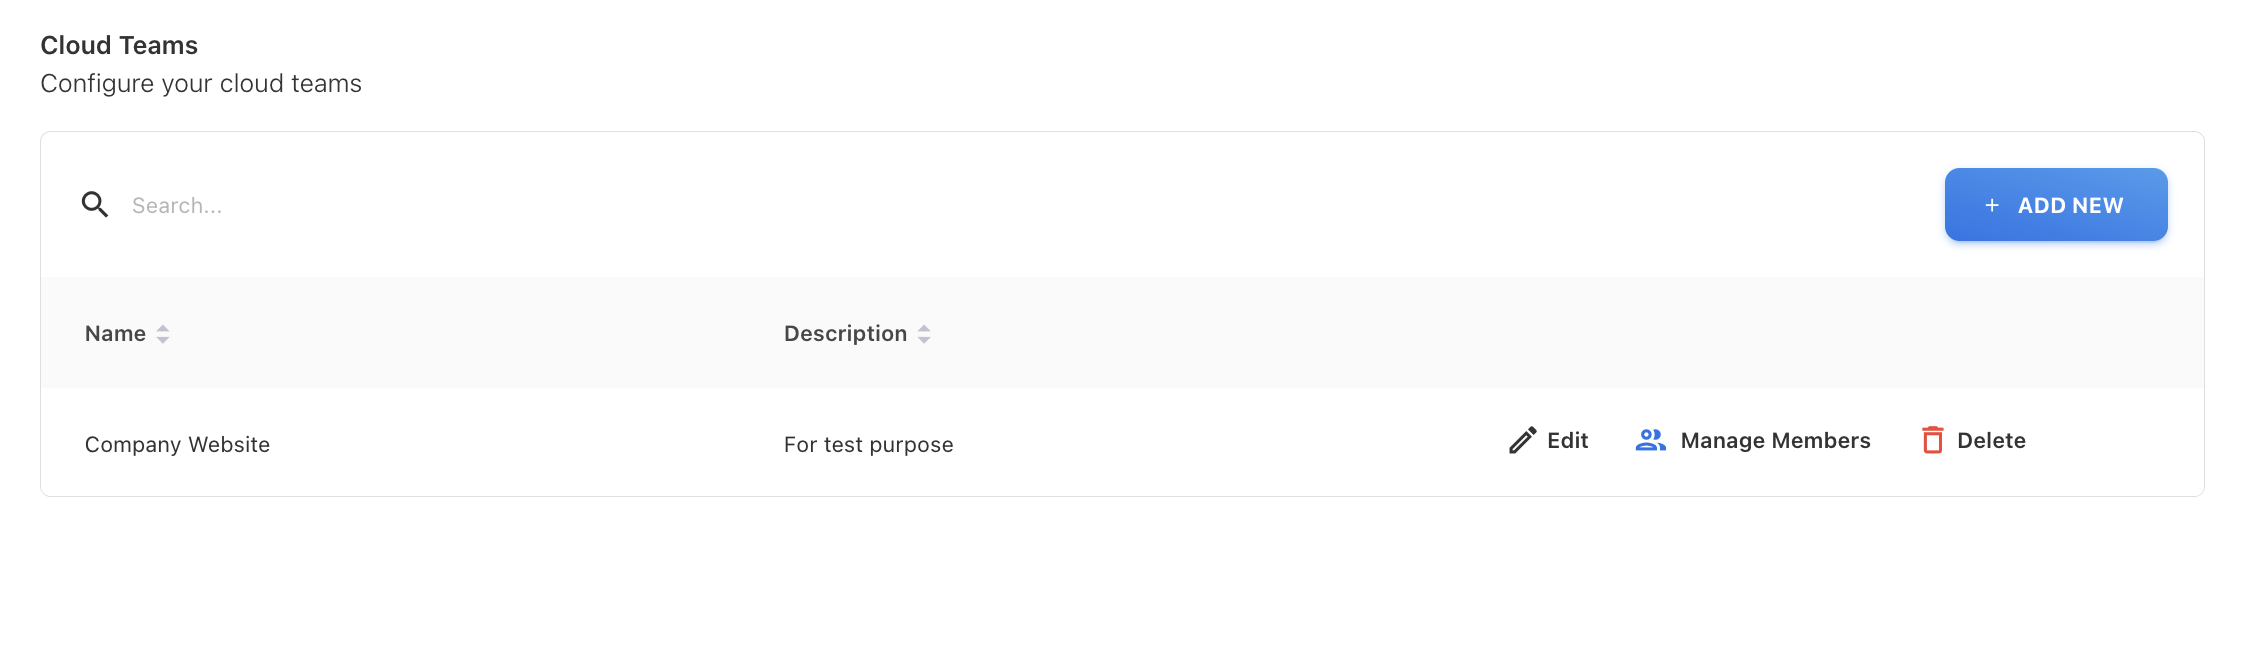
Figure 19
Figure 19 shows an overall view of cloud Teams. Here, you can see the team name, description, and options to edit, delete, and manage members. Once you click the "+ Add New" button, you will get a popup like Figure 20. There, you need to enter the team name and description, then click the Save button. Your new team will be added to the list.
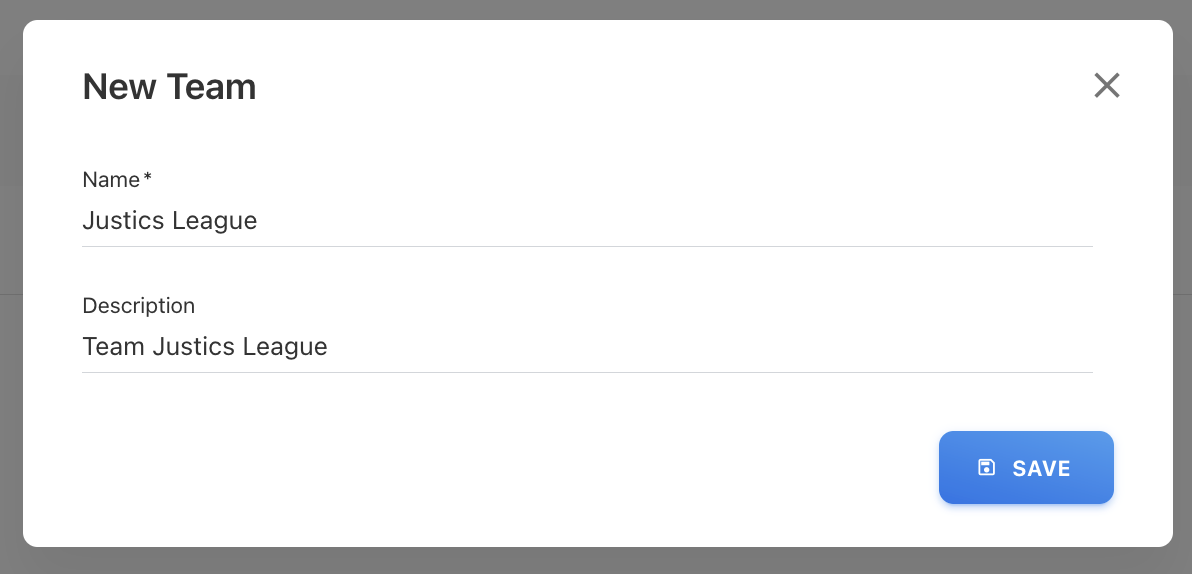
Figure 20
Once you add a new team, you can assign team members by clicking "Manage Members," which is available in each team's row. If the manage member icon is blue, the team has no members. If the manage member icon is green, the team has members. The difference between a team without members and a team with members is shown in Figure 21.
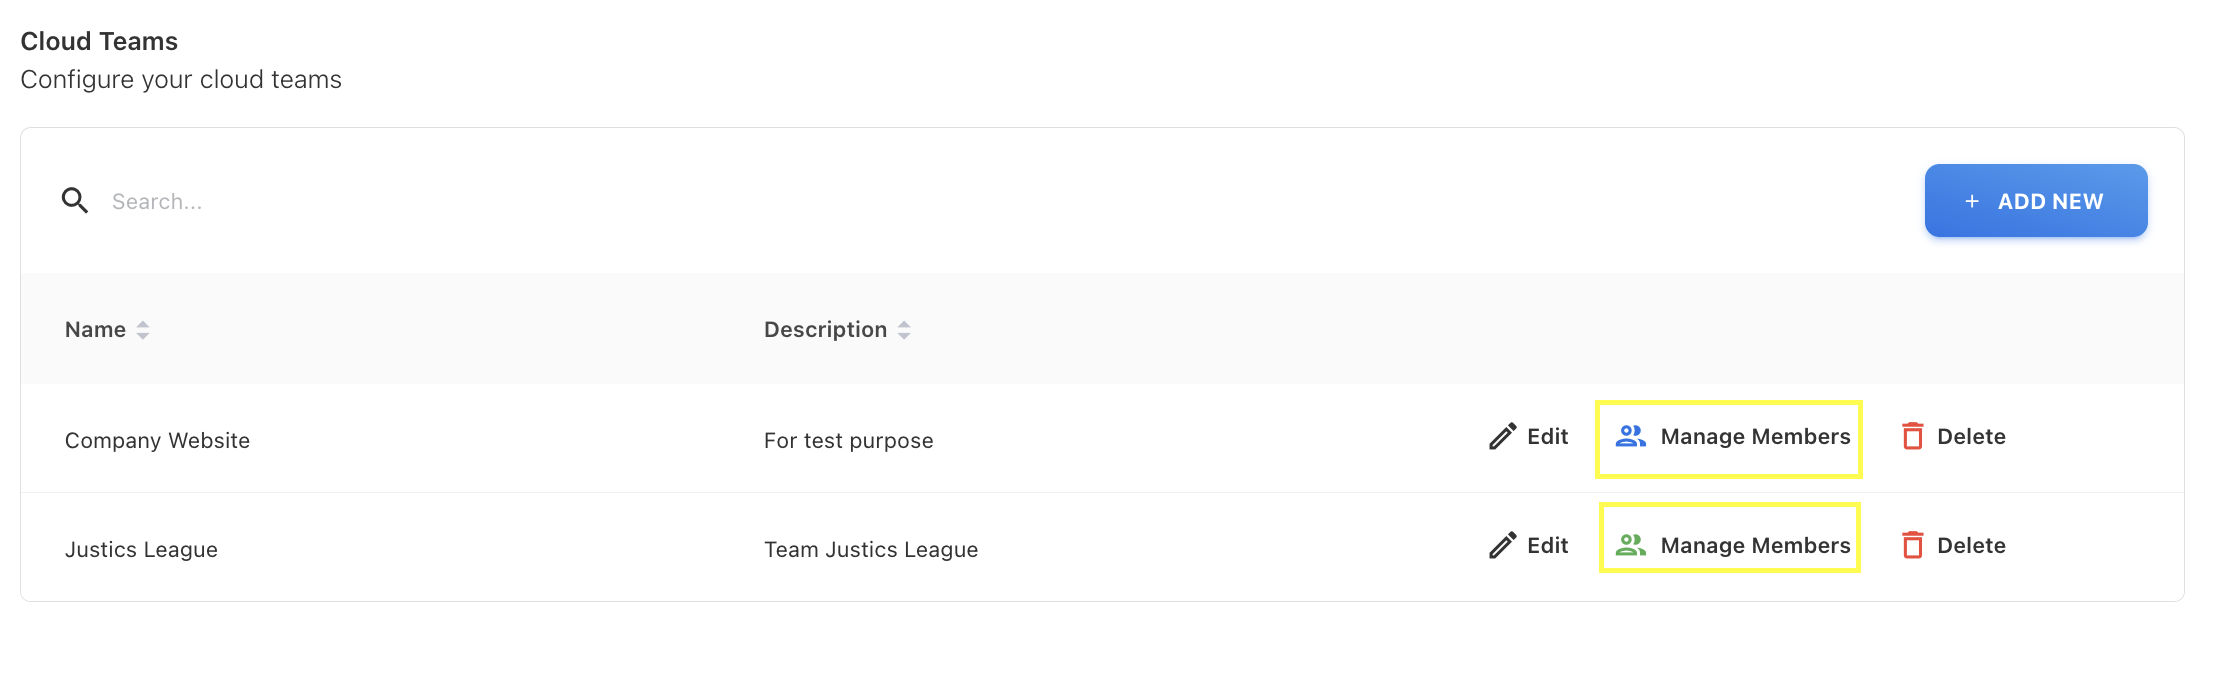
Figure 21
By clicking "Manage Members," as shown in Figure 21, you can add new team members to that team. Once you click "Manage Members," you will get a popup like Figure 22. There, you can see the current team members, and if you want to add more team members to that team, you can do so by clicking the "+ Add New" button, also shown in Figure 22.
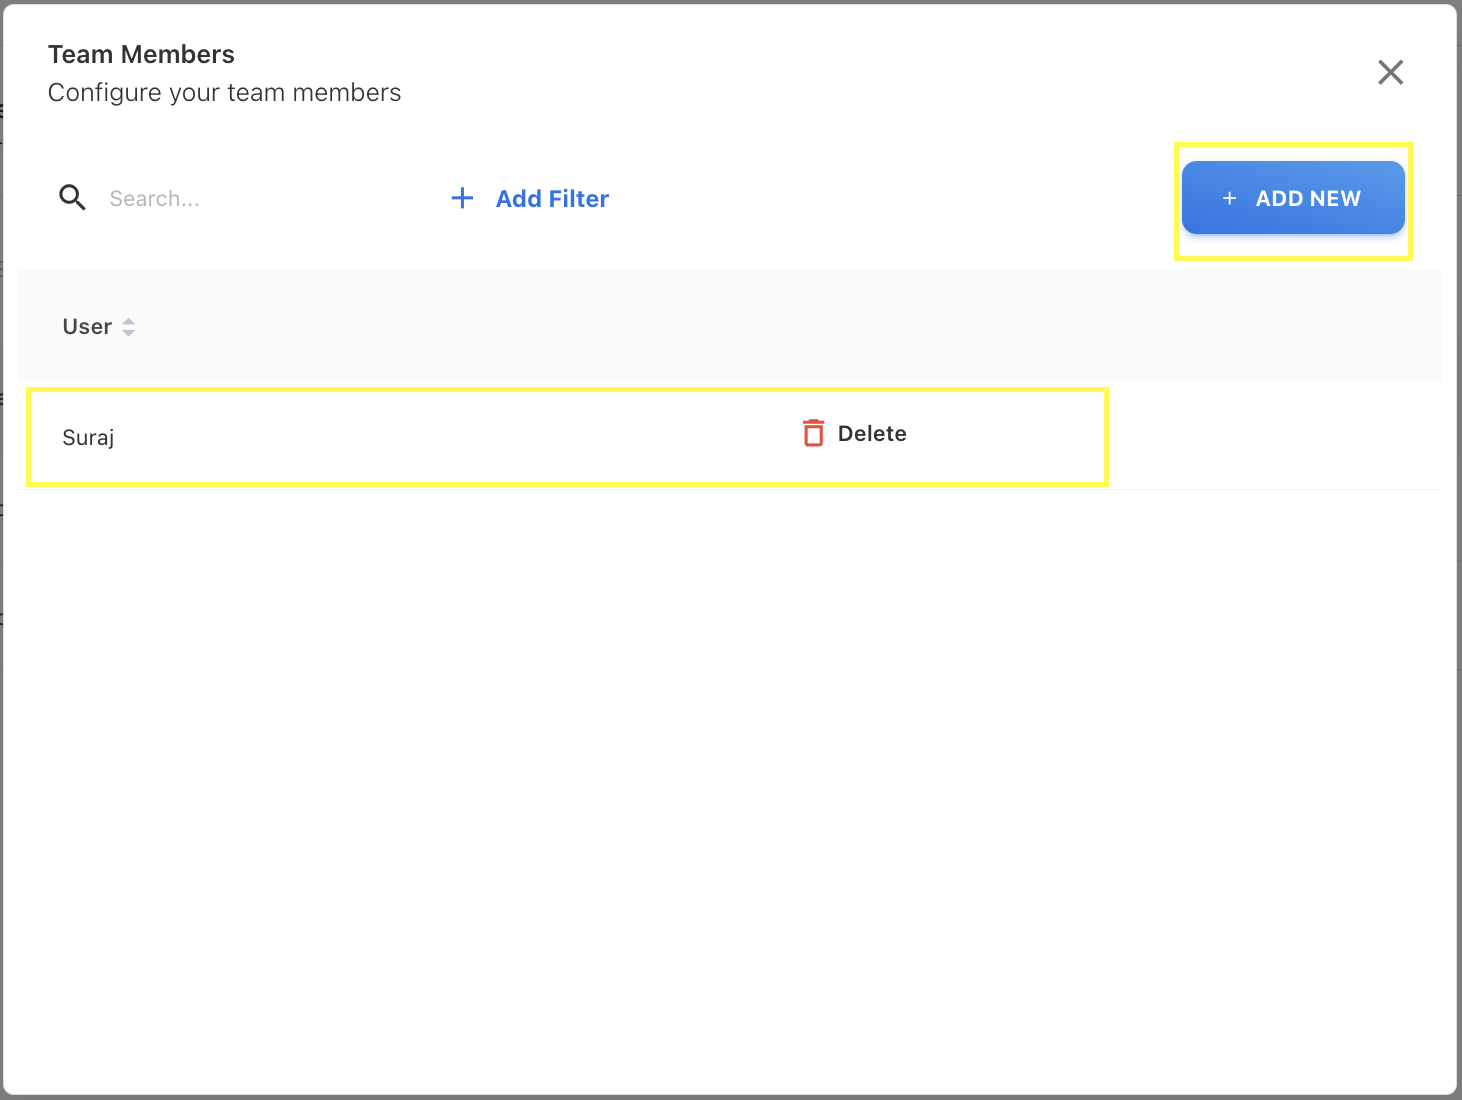
Figure 22
Once you click the "+ Add New" button in Figure 22, you will get a popup like Figure 23 where you can see a list of team members to add. You cannot add the same team member twice.

Figure 23
Upload Rules
Create upload rules to transform data during the upload process. A basic overview of upload rules is shown in Figure 24. Here, you have basic table features like delete, edit, and + Add New. You can add new upload rules by clicking the + Add New button, as shown in Figure 24.
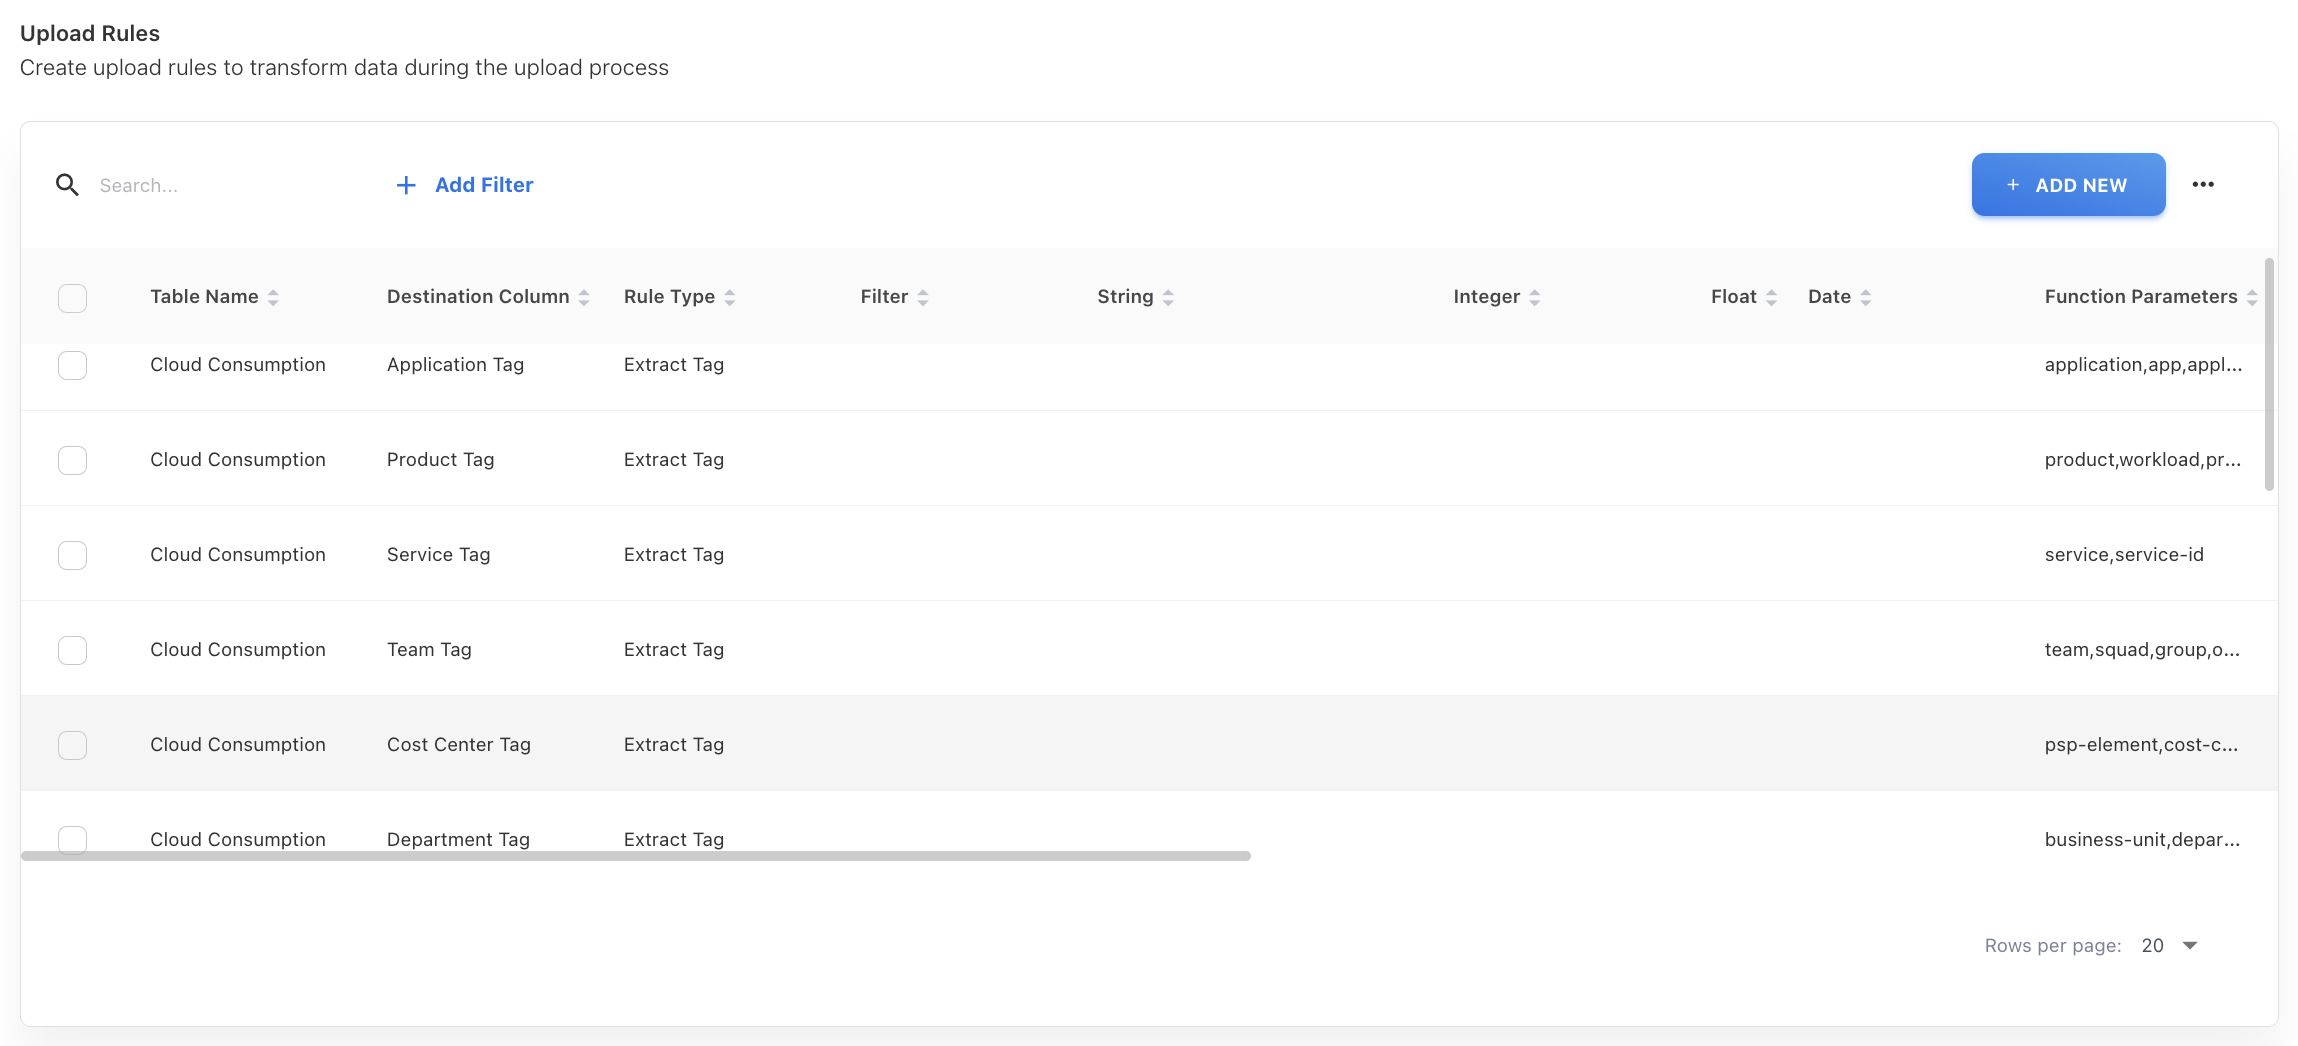
Figure 24
Once you click the Add New button, you will see a popup like Figure 25. There, you can provide options to create upload rules. For more details, you can refer to the upload rules document.
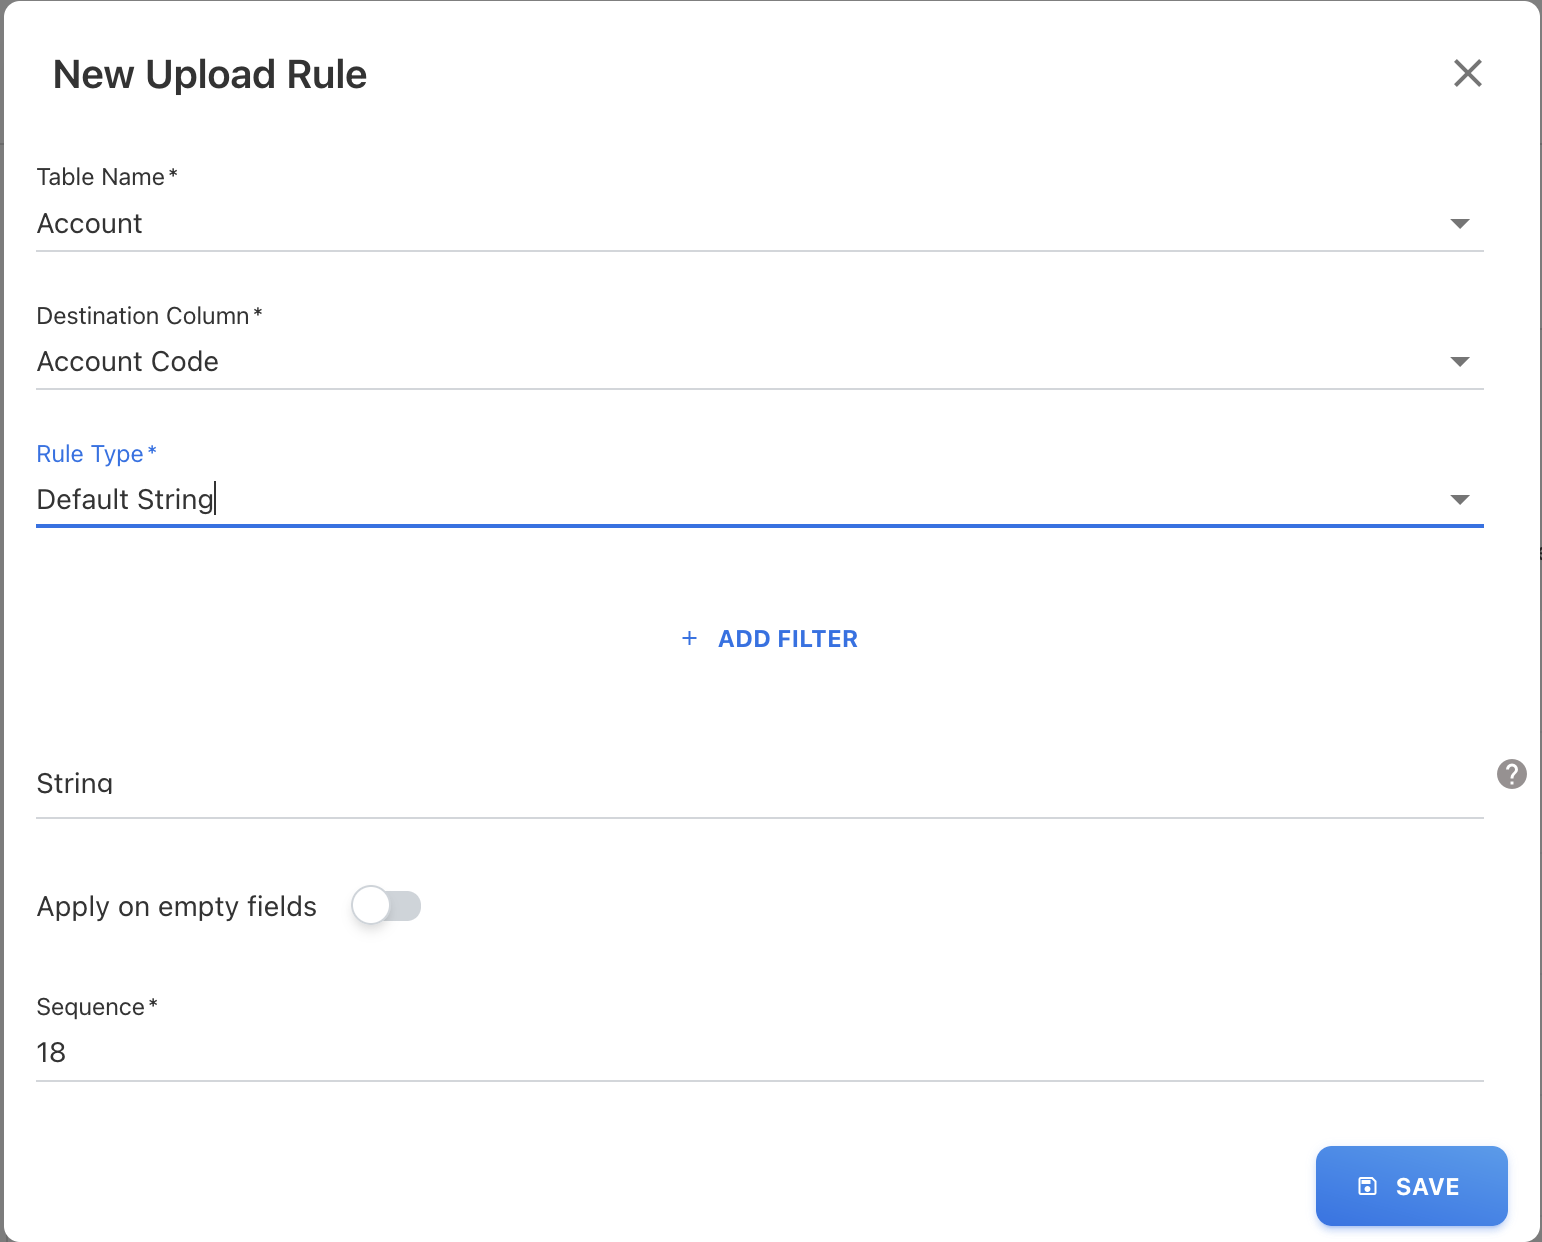
Figure 25
Cloud Spend
Load and publish your cloud resource consumption spend. Once you upload the cloud consumption data, you will see records for that year and month. You can publish the spend by clicking the publish button, as shown in the figure 26. For more details, you can refer to the Cloud Spend document.
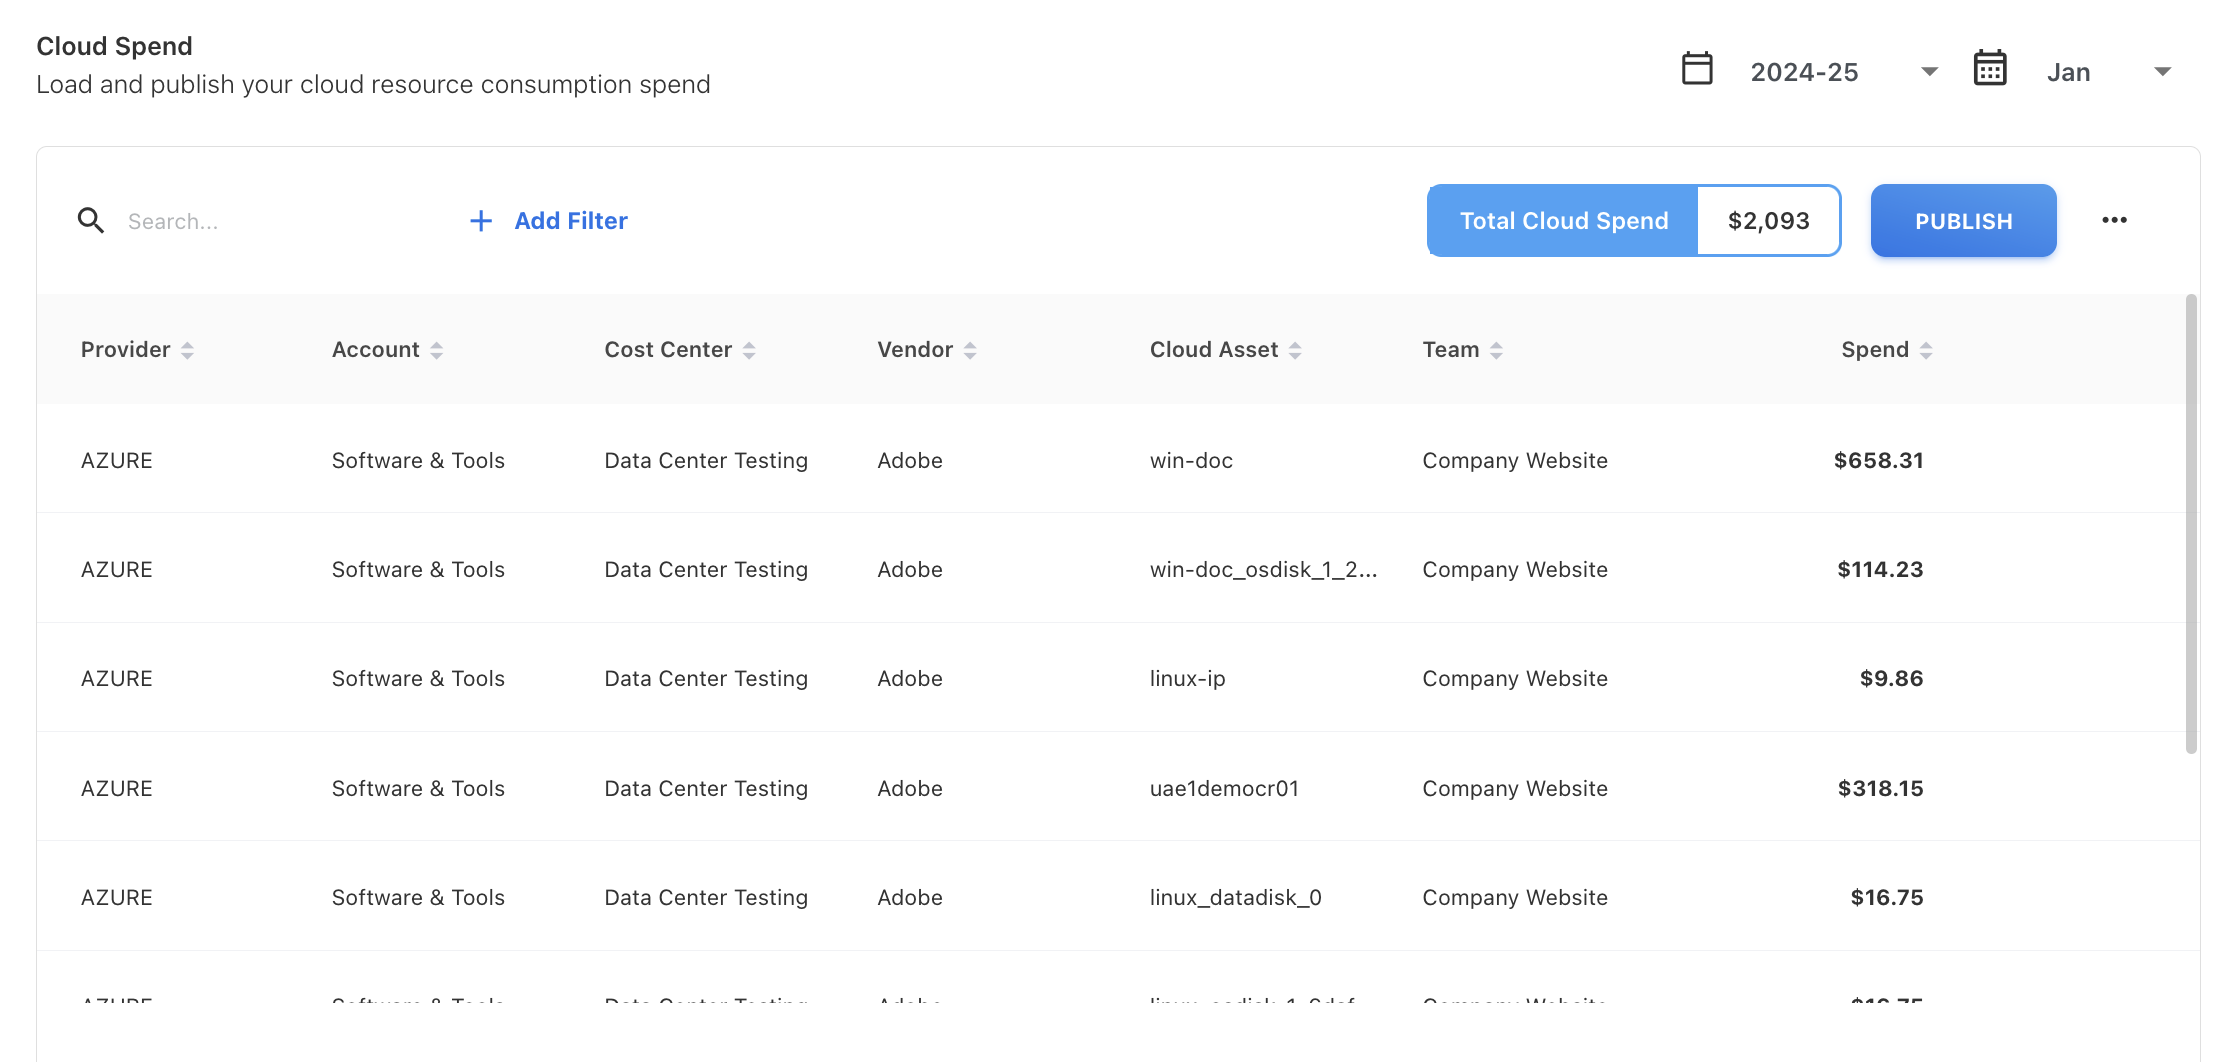
Figure 26
AI
Ask Yarken
Here, you can provide additional text to give the model more context when summarizing the database response. The final result will be based on this context.
Context
"context" typically refers to the set of information or data that the language model uses to generate responses or provide information. This context includes the knowledge and understanding the model has based on its training data and the current conversation history. It helps the model to maintain coherence and relevance in its responses and to understand the flow of a conversation.
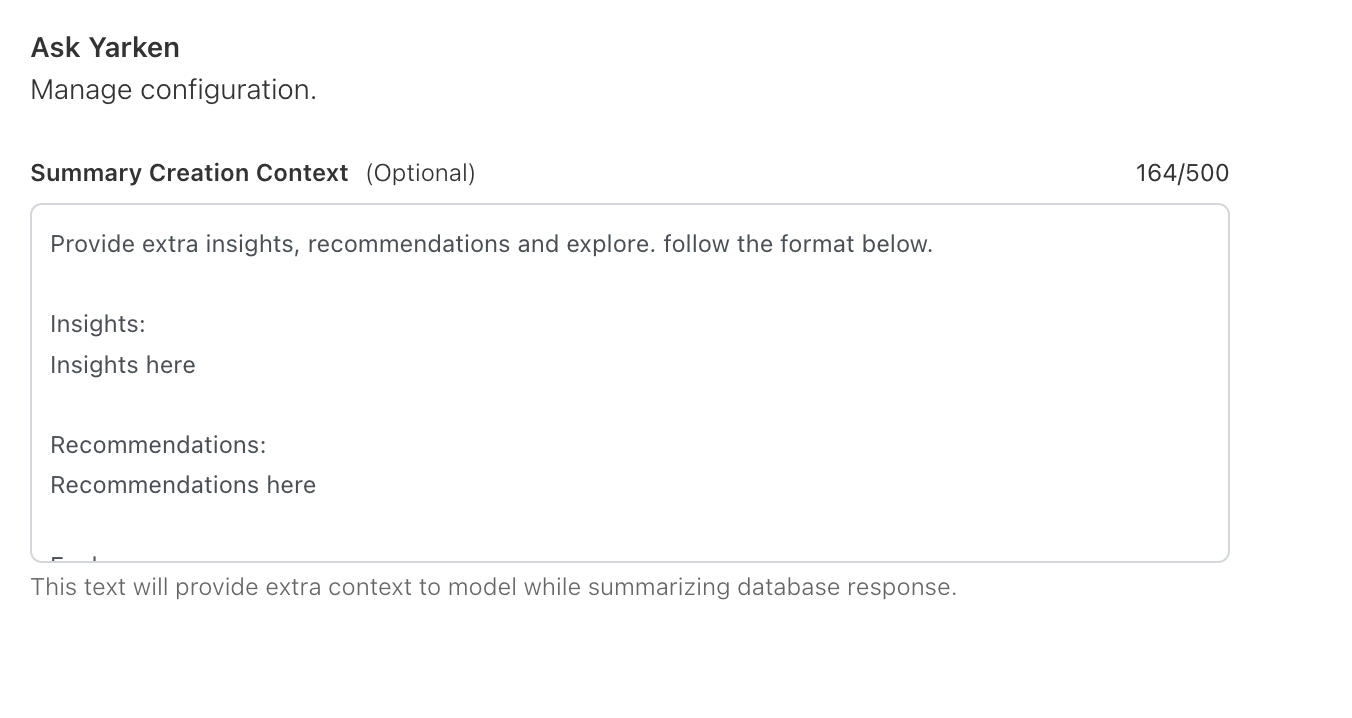
Figure 27
In Figure 27, we have provided some context options such as Extra Insights, Recommendations, and Explore. Once you set the context, you can expect the answer in that format when you ask a question in Ask Yarken.
To access Ask Yarken anywhere in the application, look for the icon in the bottom right corner, as shown in Figure 28.
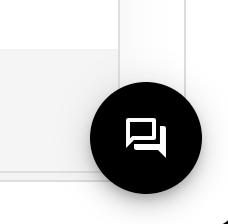
Figure 28
In Figure 29, my question was "What is my spend for Jan 2022-23?" Here, it's providing the answer to that question, and the final summarization is based on the context we have provided in the summary creation context.
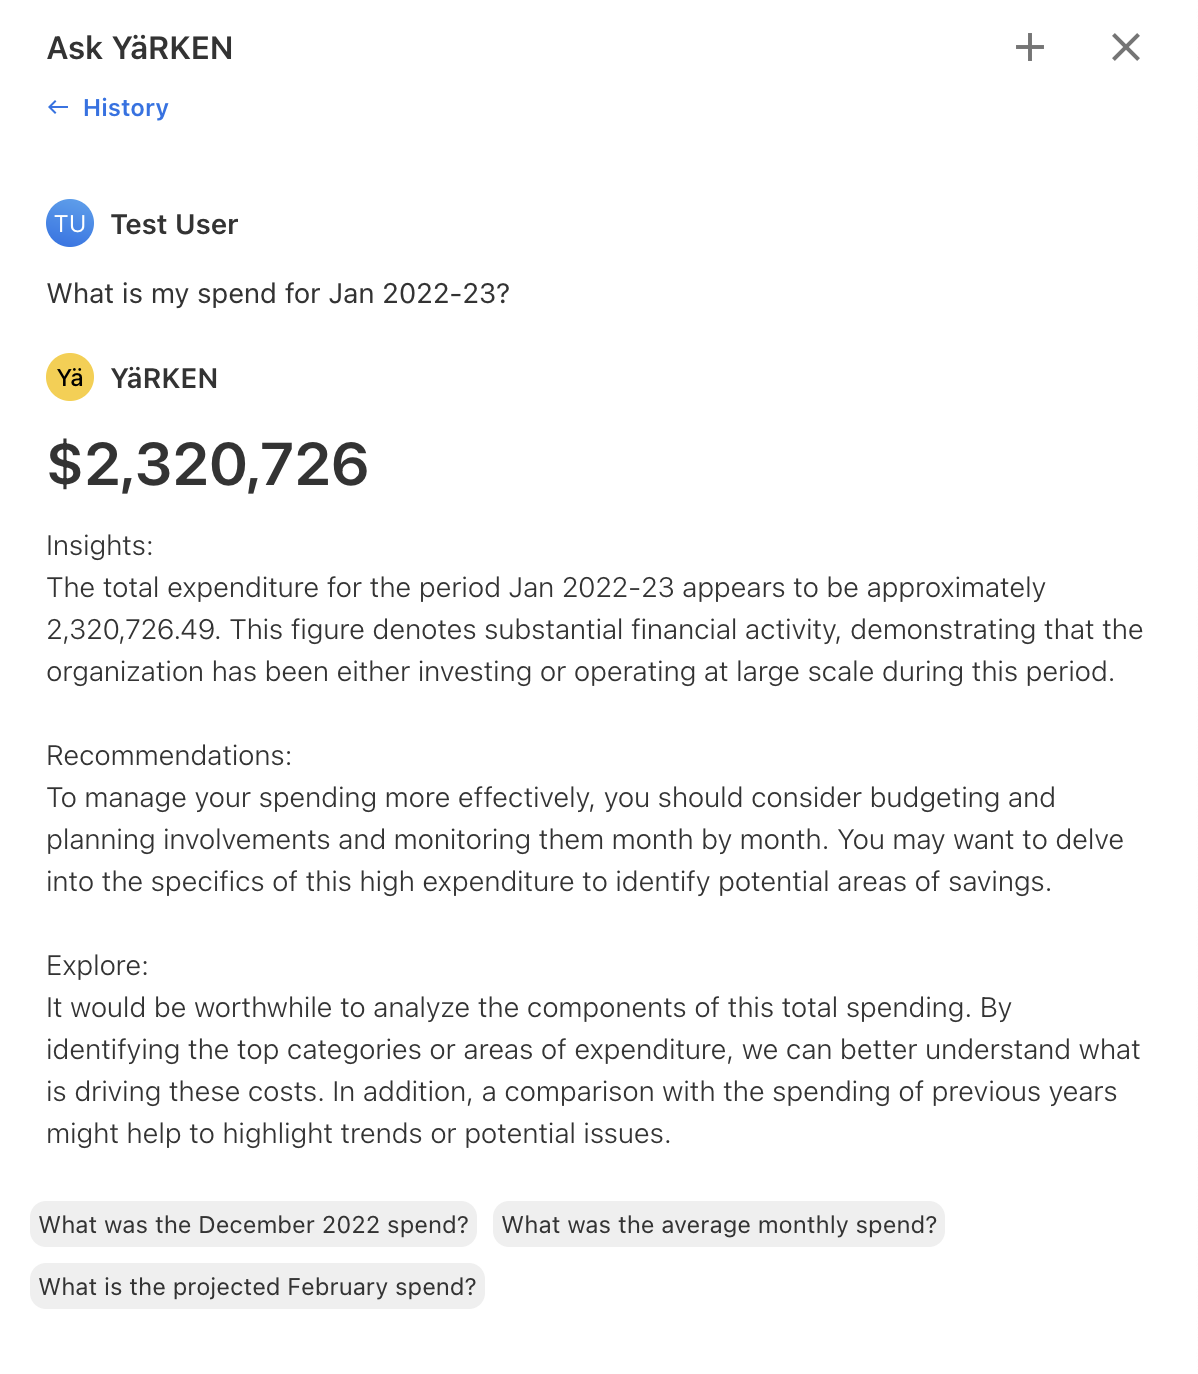
Figure 29
Copilots
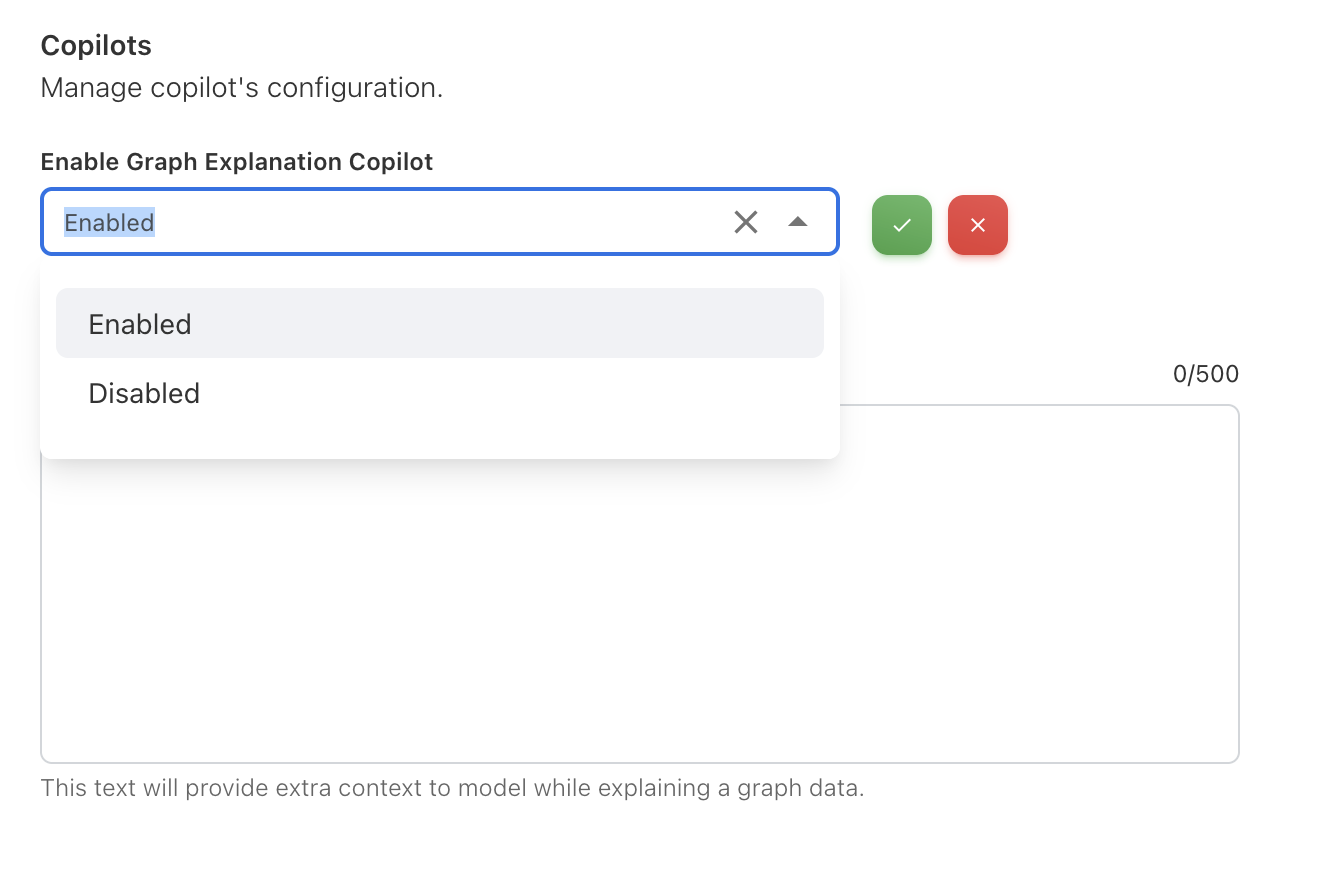
Figure 30
In Figure 30, it shows the basic configuration of Copilots where we have the option to enable graph explanation Copilot. Once enabled, you can see the Ask Yarken icon on all the dashboard charts as shown in Figure 31.
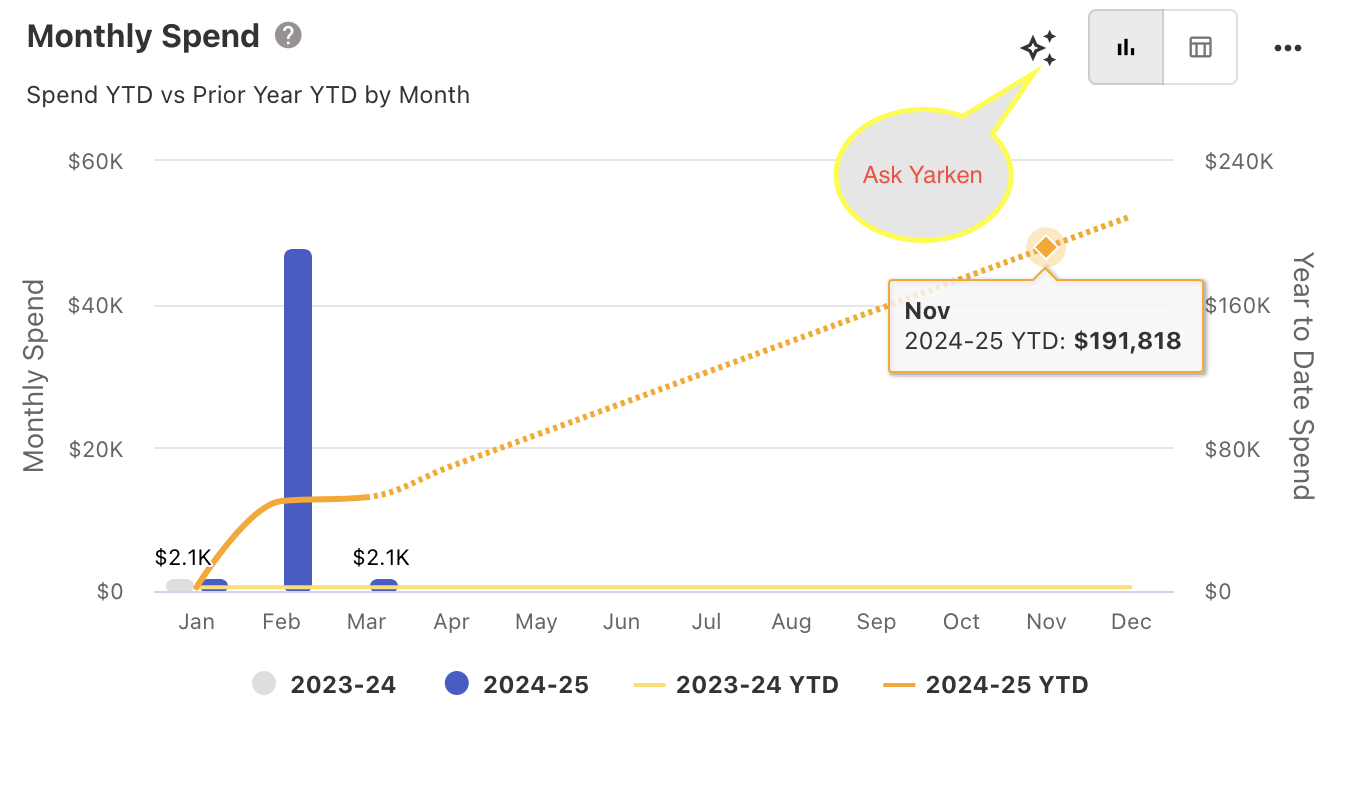
Figure 31
Once you click Ask Yarken, you will get details about the charts or tables. The final summarization is based on the context that you provide in the Copilot context as like Ask Yarken context.
Setup
Licensing
Licensing is a feature-based access method that allows you to grant or restrict access to specific features or functionalities within an application based on the user’s license or subscription.
The access levels are managed using the licensing file. You can use the .lic file to upgrade or downgrade the license. When you upload a licensing file, the relevant features are automatically activated and integrated into your user interface in the application.
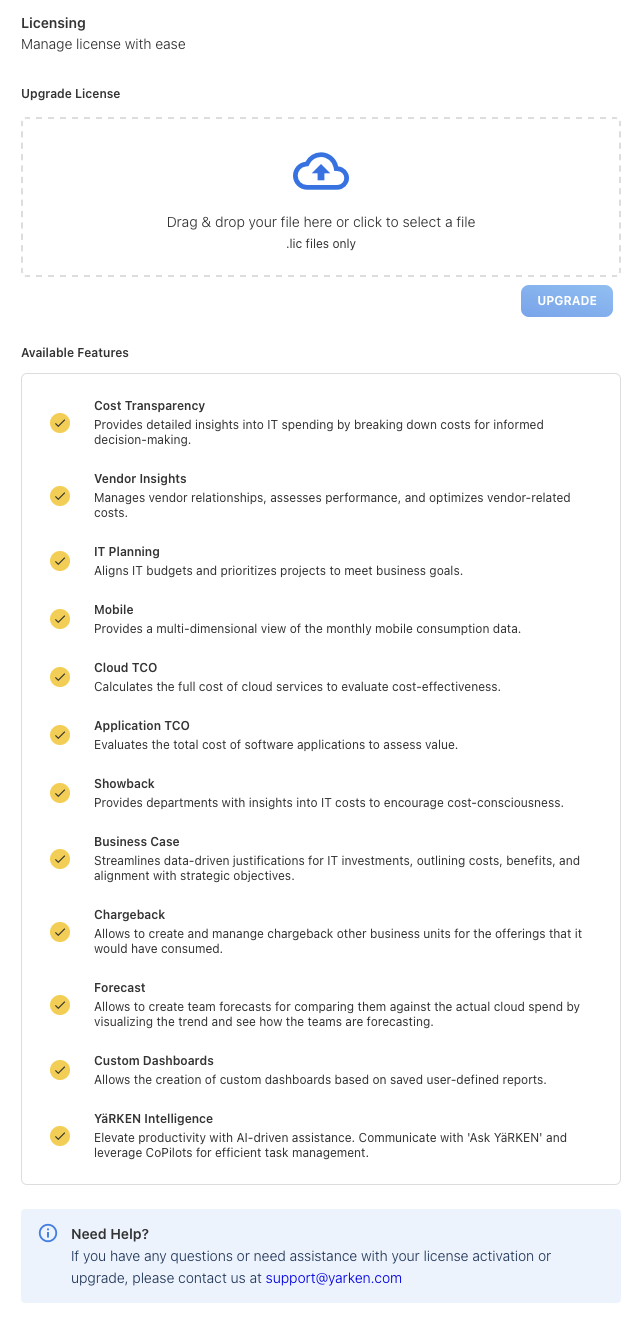
Figure 32
In figure 32 shows an overview of licensing. Upon entering the application for the first time, you will not have access to any features. You will need to upload a license to gain access to all features. Once you upload the license file, you can see which features you have enabled, indicated by the yellow ticks in the above figure.
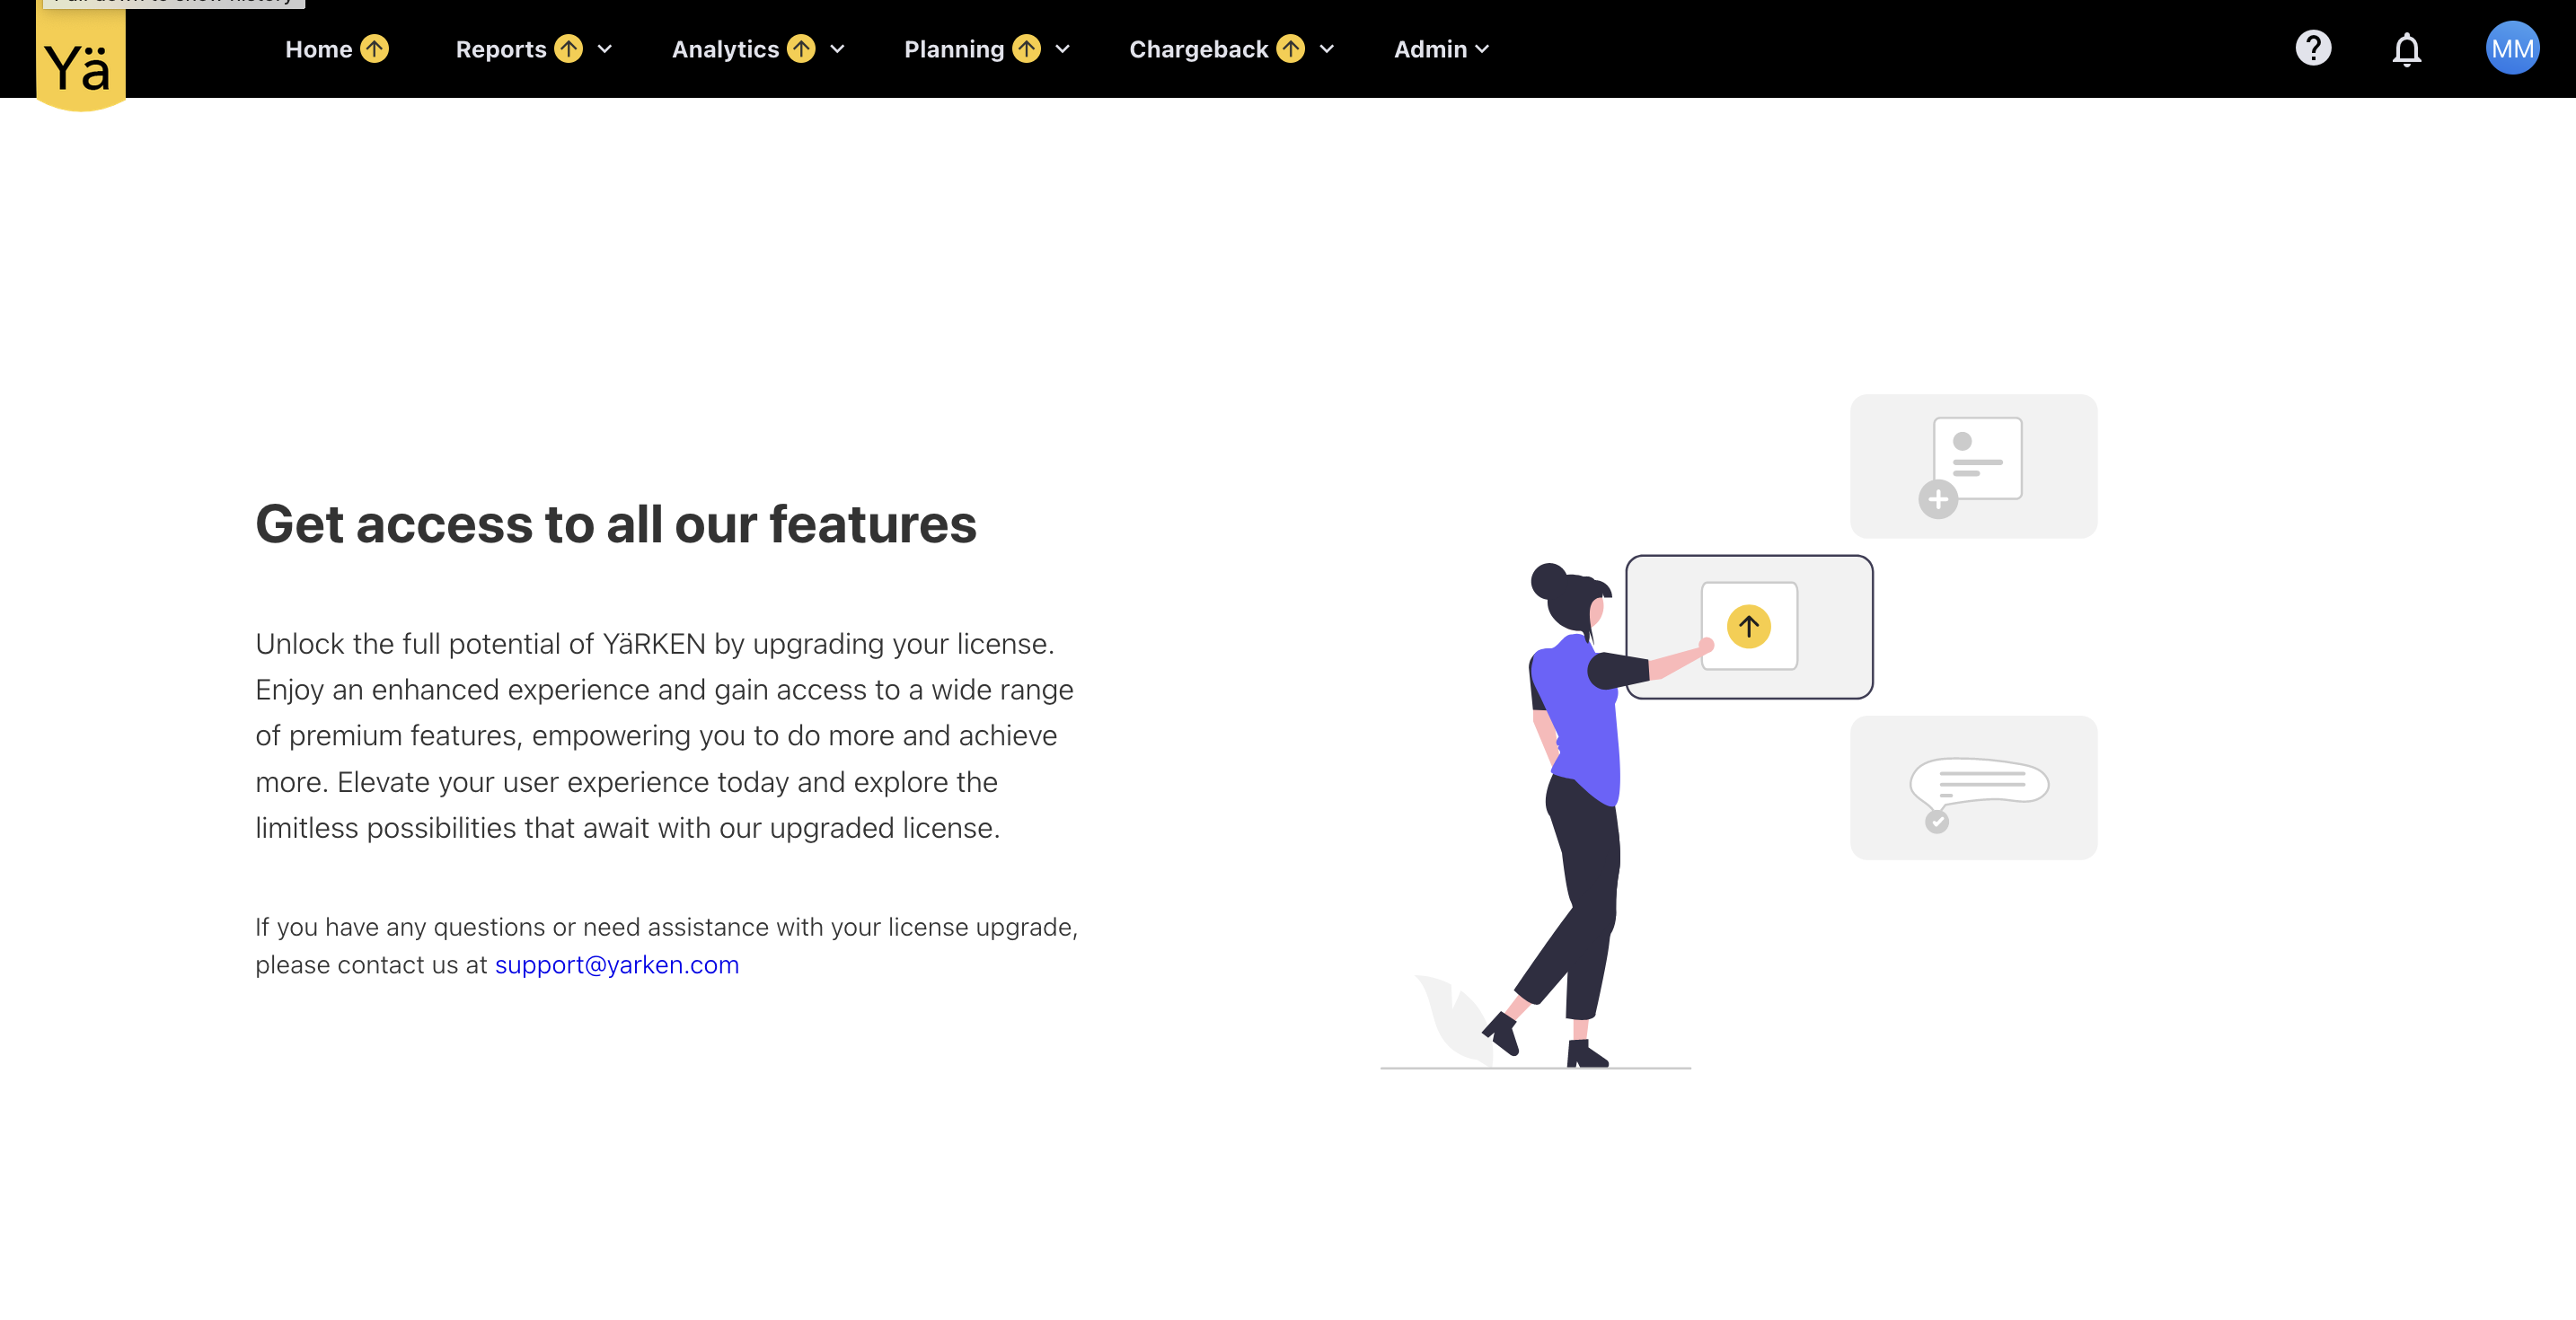
Figure 33
In Figure 33, it shows that you don't have access. You need to go to Settings, then to the License section, and upload the license file. The features will be enabled based on the license file.
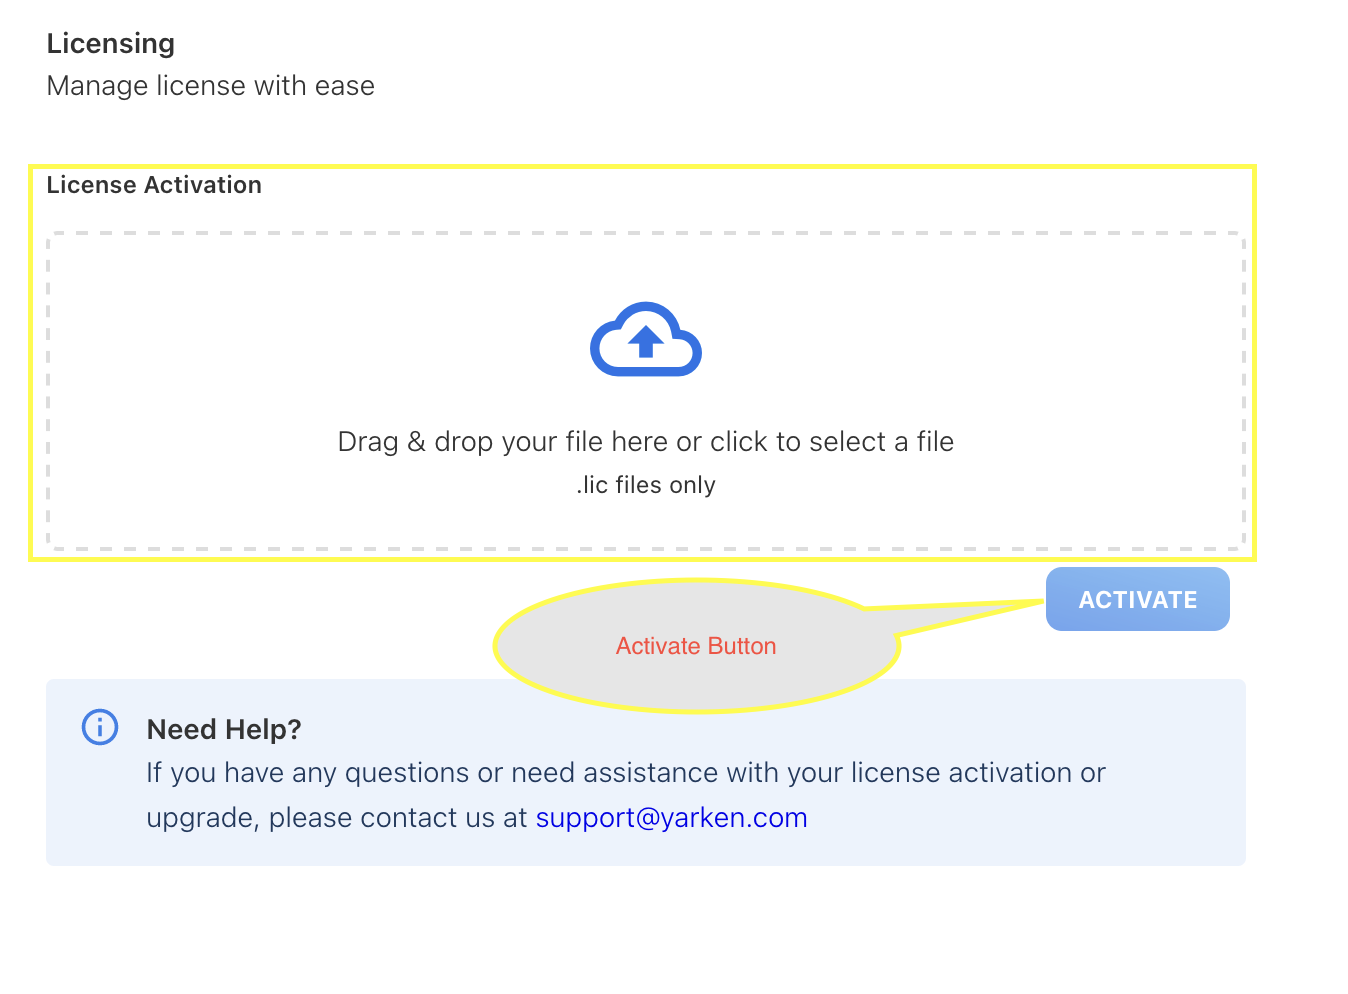
Figure 34
In Figure 34, you can see the place to upload the license file and the Activate button. Once you upload the file and click the Activate button, you can enable the features.